The end of the year is nigh … I am not sure how we got here so quickly! The last month or so has not left me any time for a blog so I wanted to catch up with all the end of year products on offer without making this blog too long.
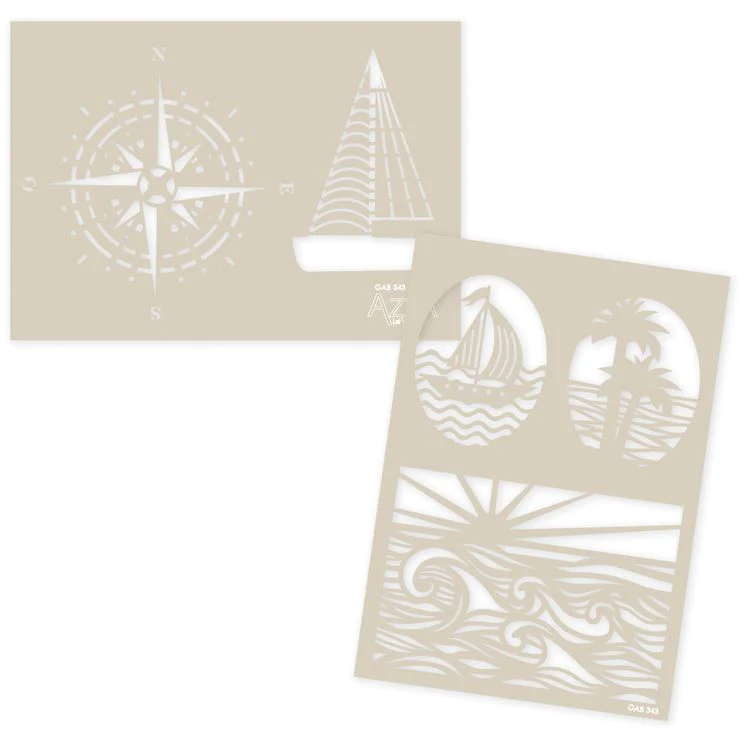
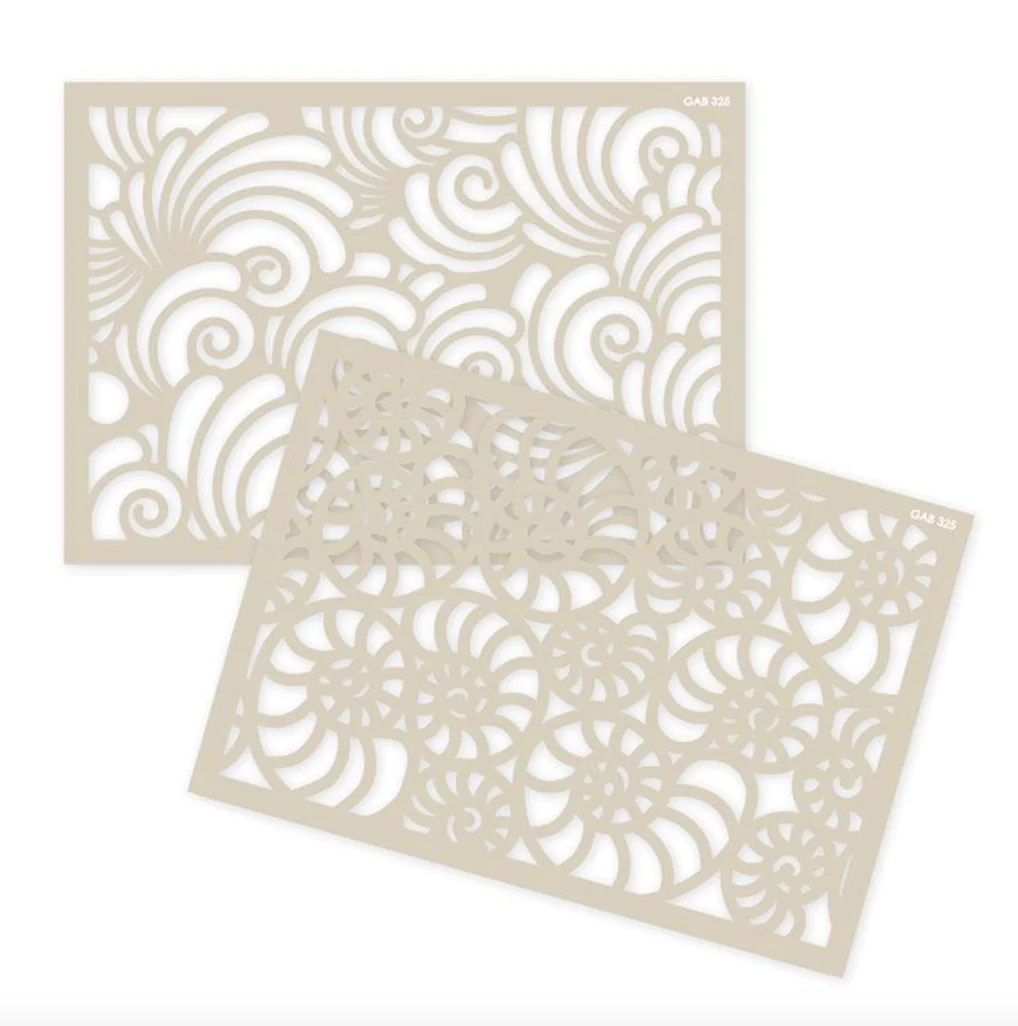
Since AZZA Springfield was released in October we have had the lovely 30 x 30 AZZA Himalaya stencil set released and a smaller 12 x 12 stencil: Greece. The smaller Greece stencil would make for a wonderful ‘Stocking filler’ and you could always include the smaller upright album so a project is ready to be made!
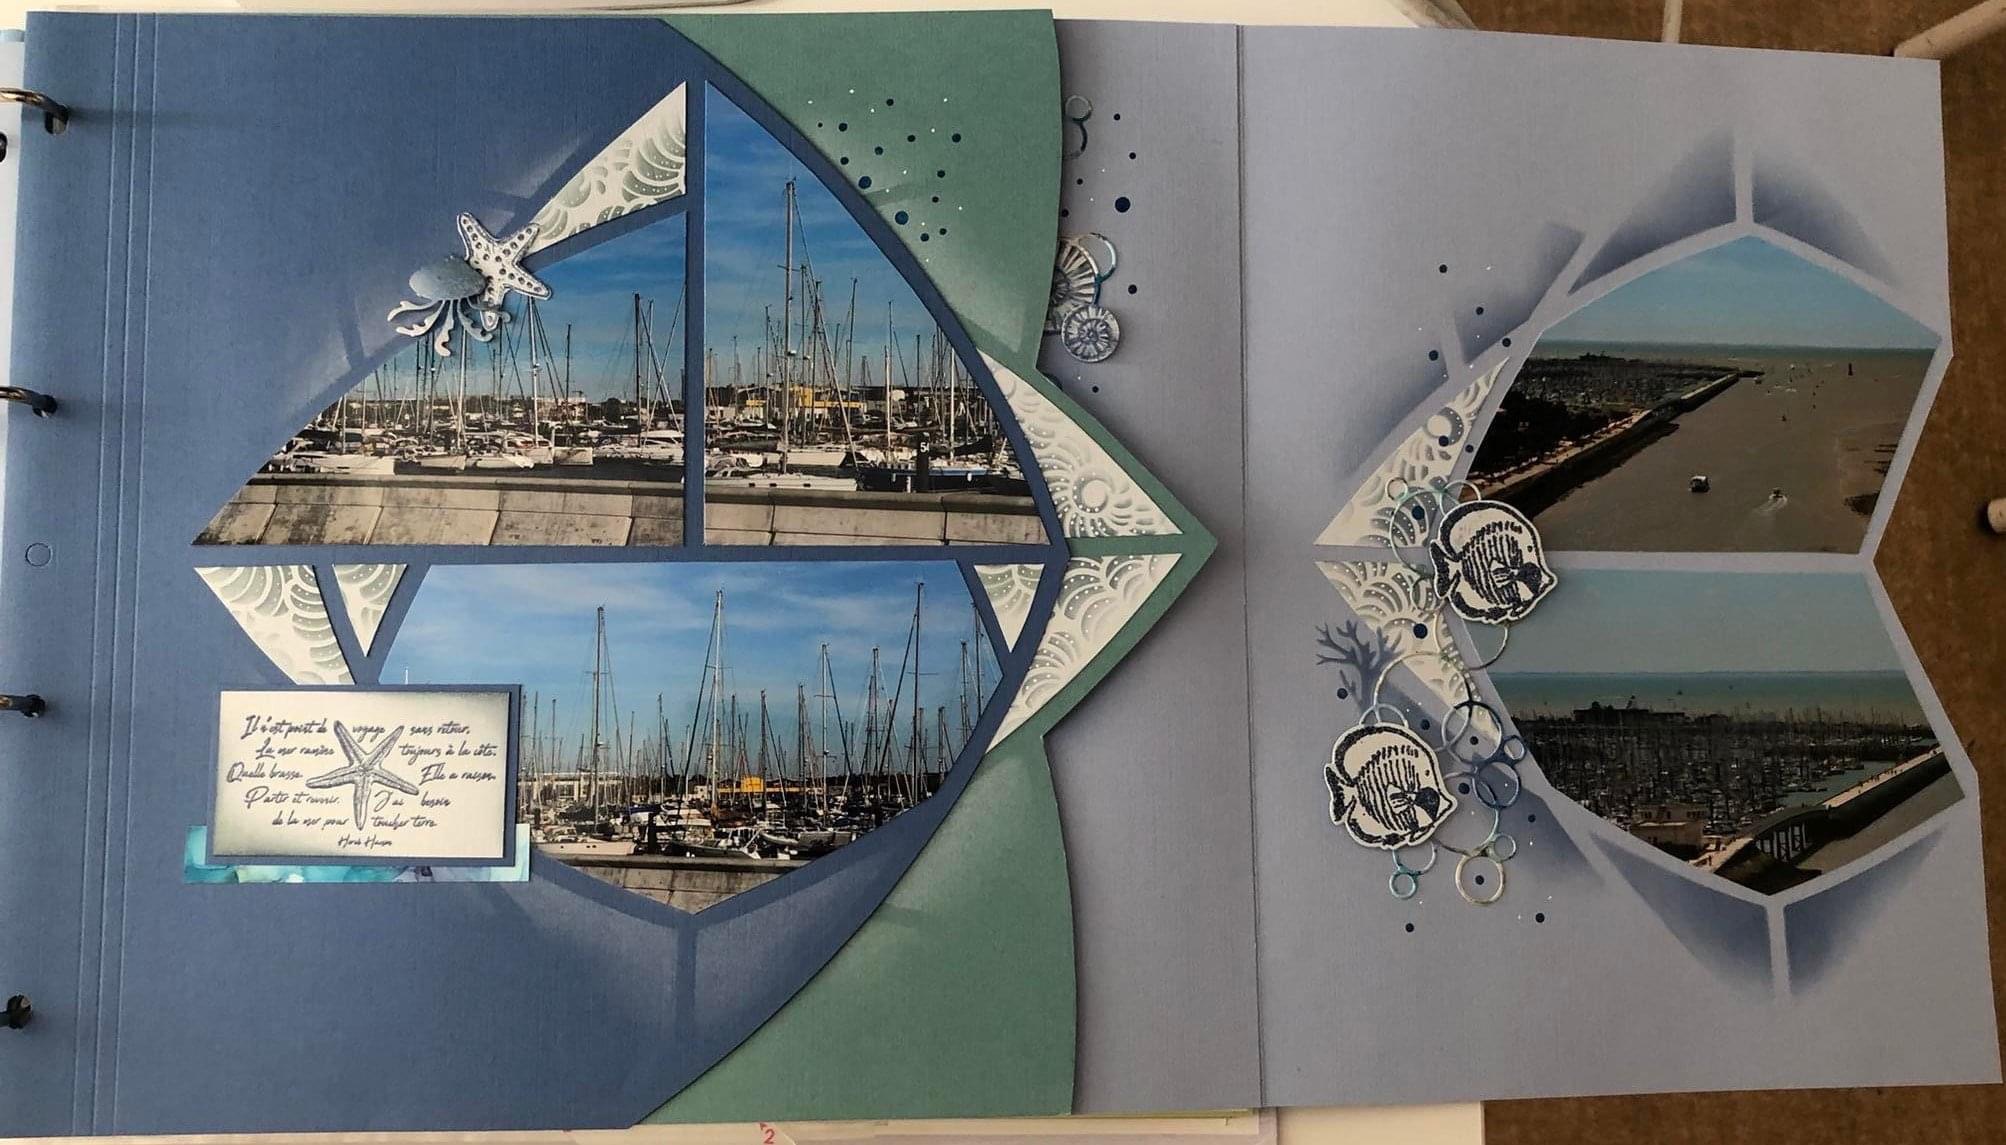
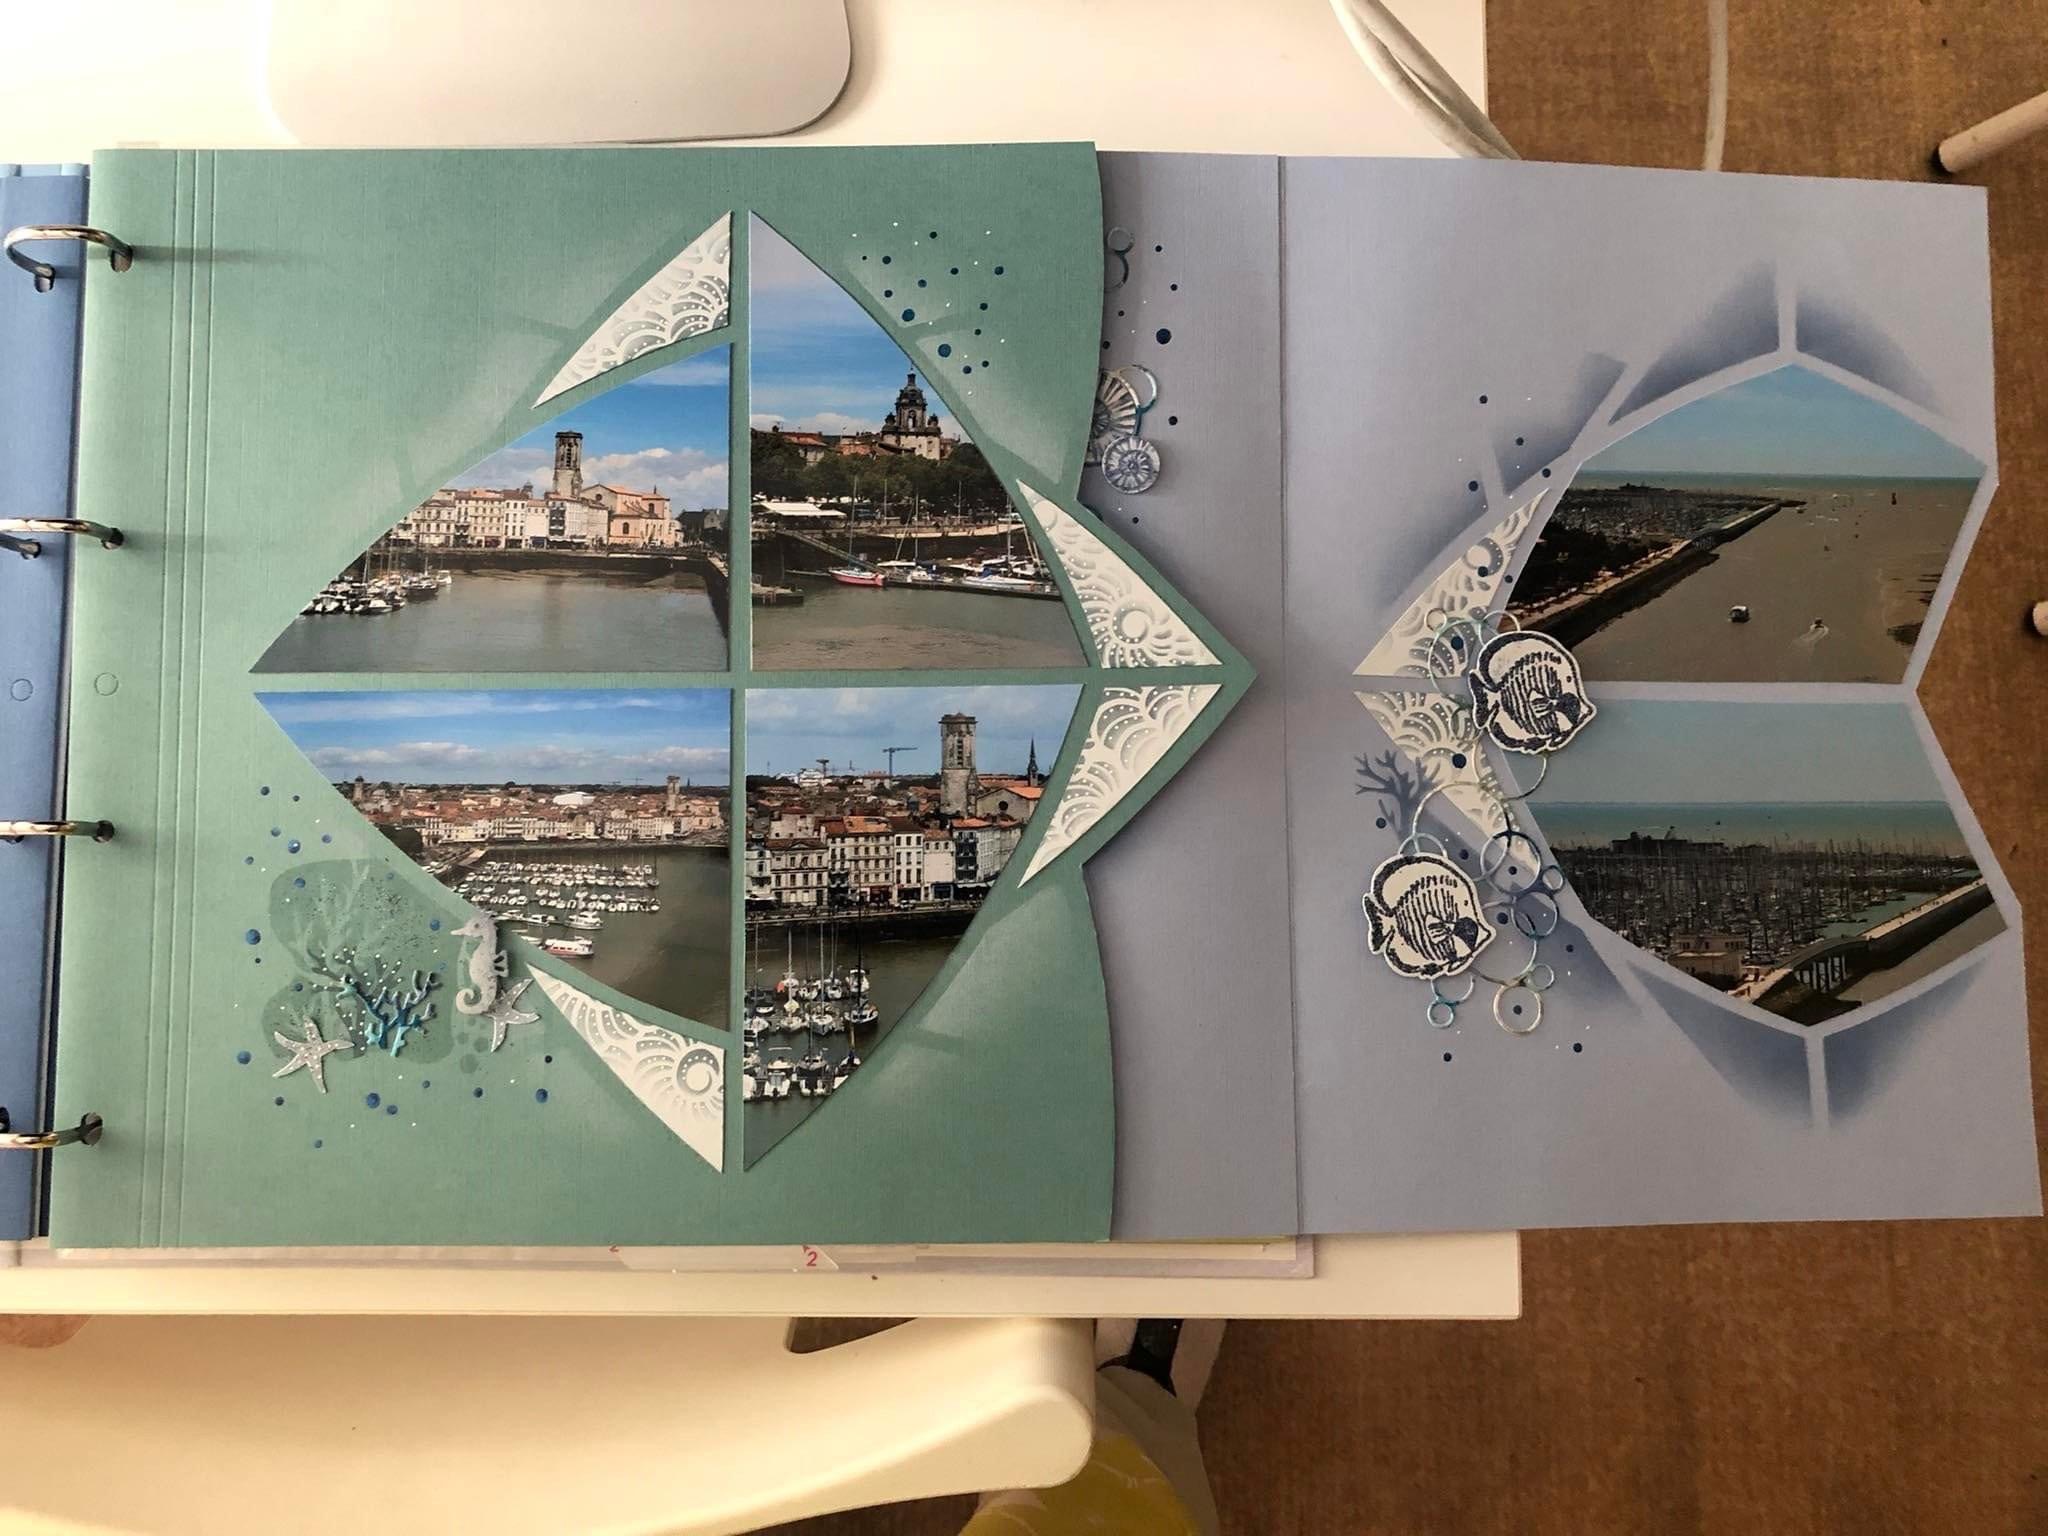
The AZZA Greece stencil works well on the different sized AZZA pages. If you like to give mini albums as gifts, this smaller stencil is perfect as it fits the AZZA 20 x 20 pages, 25 x 25 pages and the AZZA A4 pages. Below is a multi-page I created for an A4 album.
I used two 20 x 20 pages for the first two pages and the last page was an AZZA A4 page which was the size of my album. As you can see I placed photos on the back of the smaller pages to include extra photos into the layout.
For the back page I flipped the Greece stencil 180 degrees as seen below.
The second set of pages I had fun with were on the AZZA 25 x 25 pages as seen below. The stencil can be used in so many ways on top of a larger page.
The multi page set below was created by Sue Talbot in NSW using a 30 x 30 page.
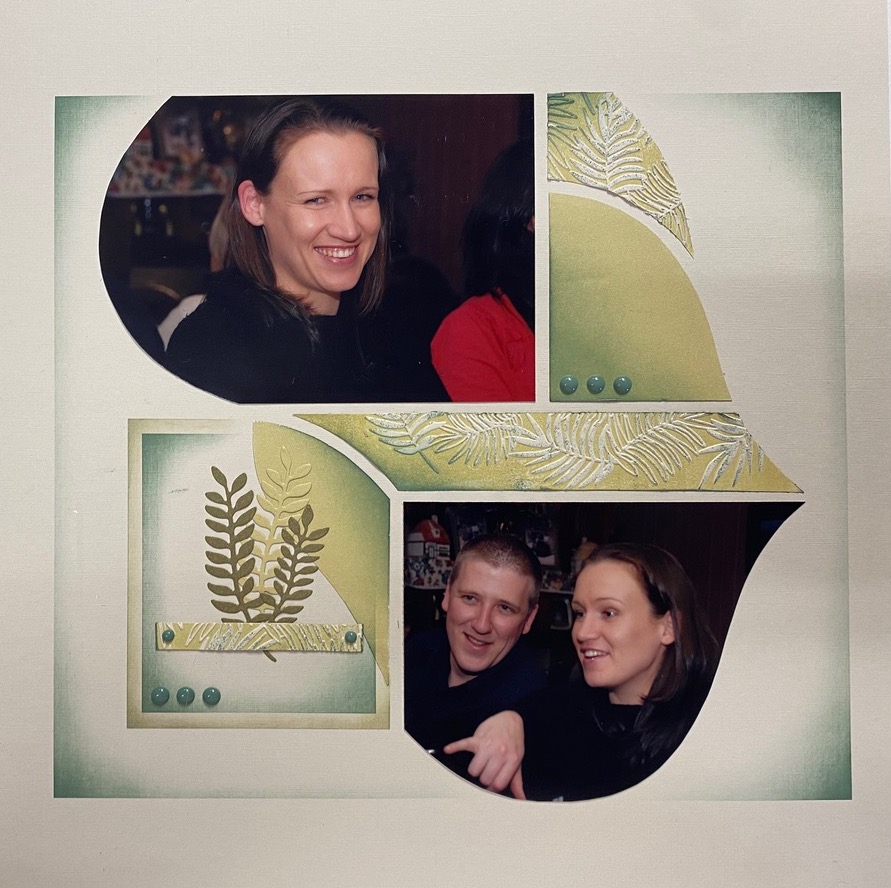
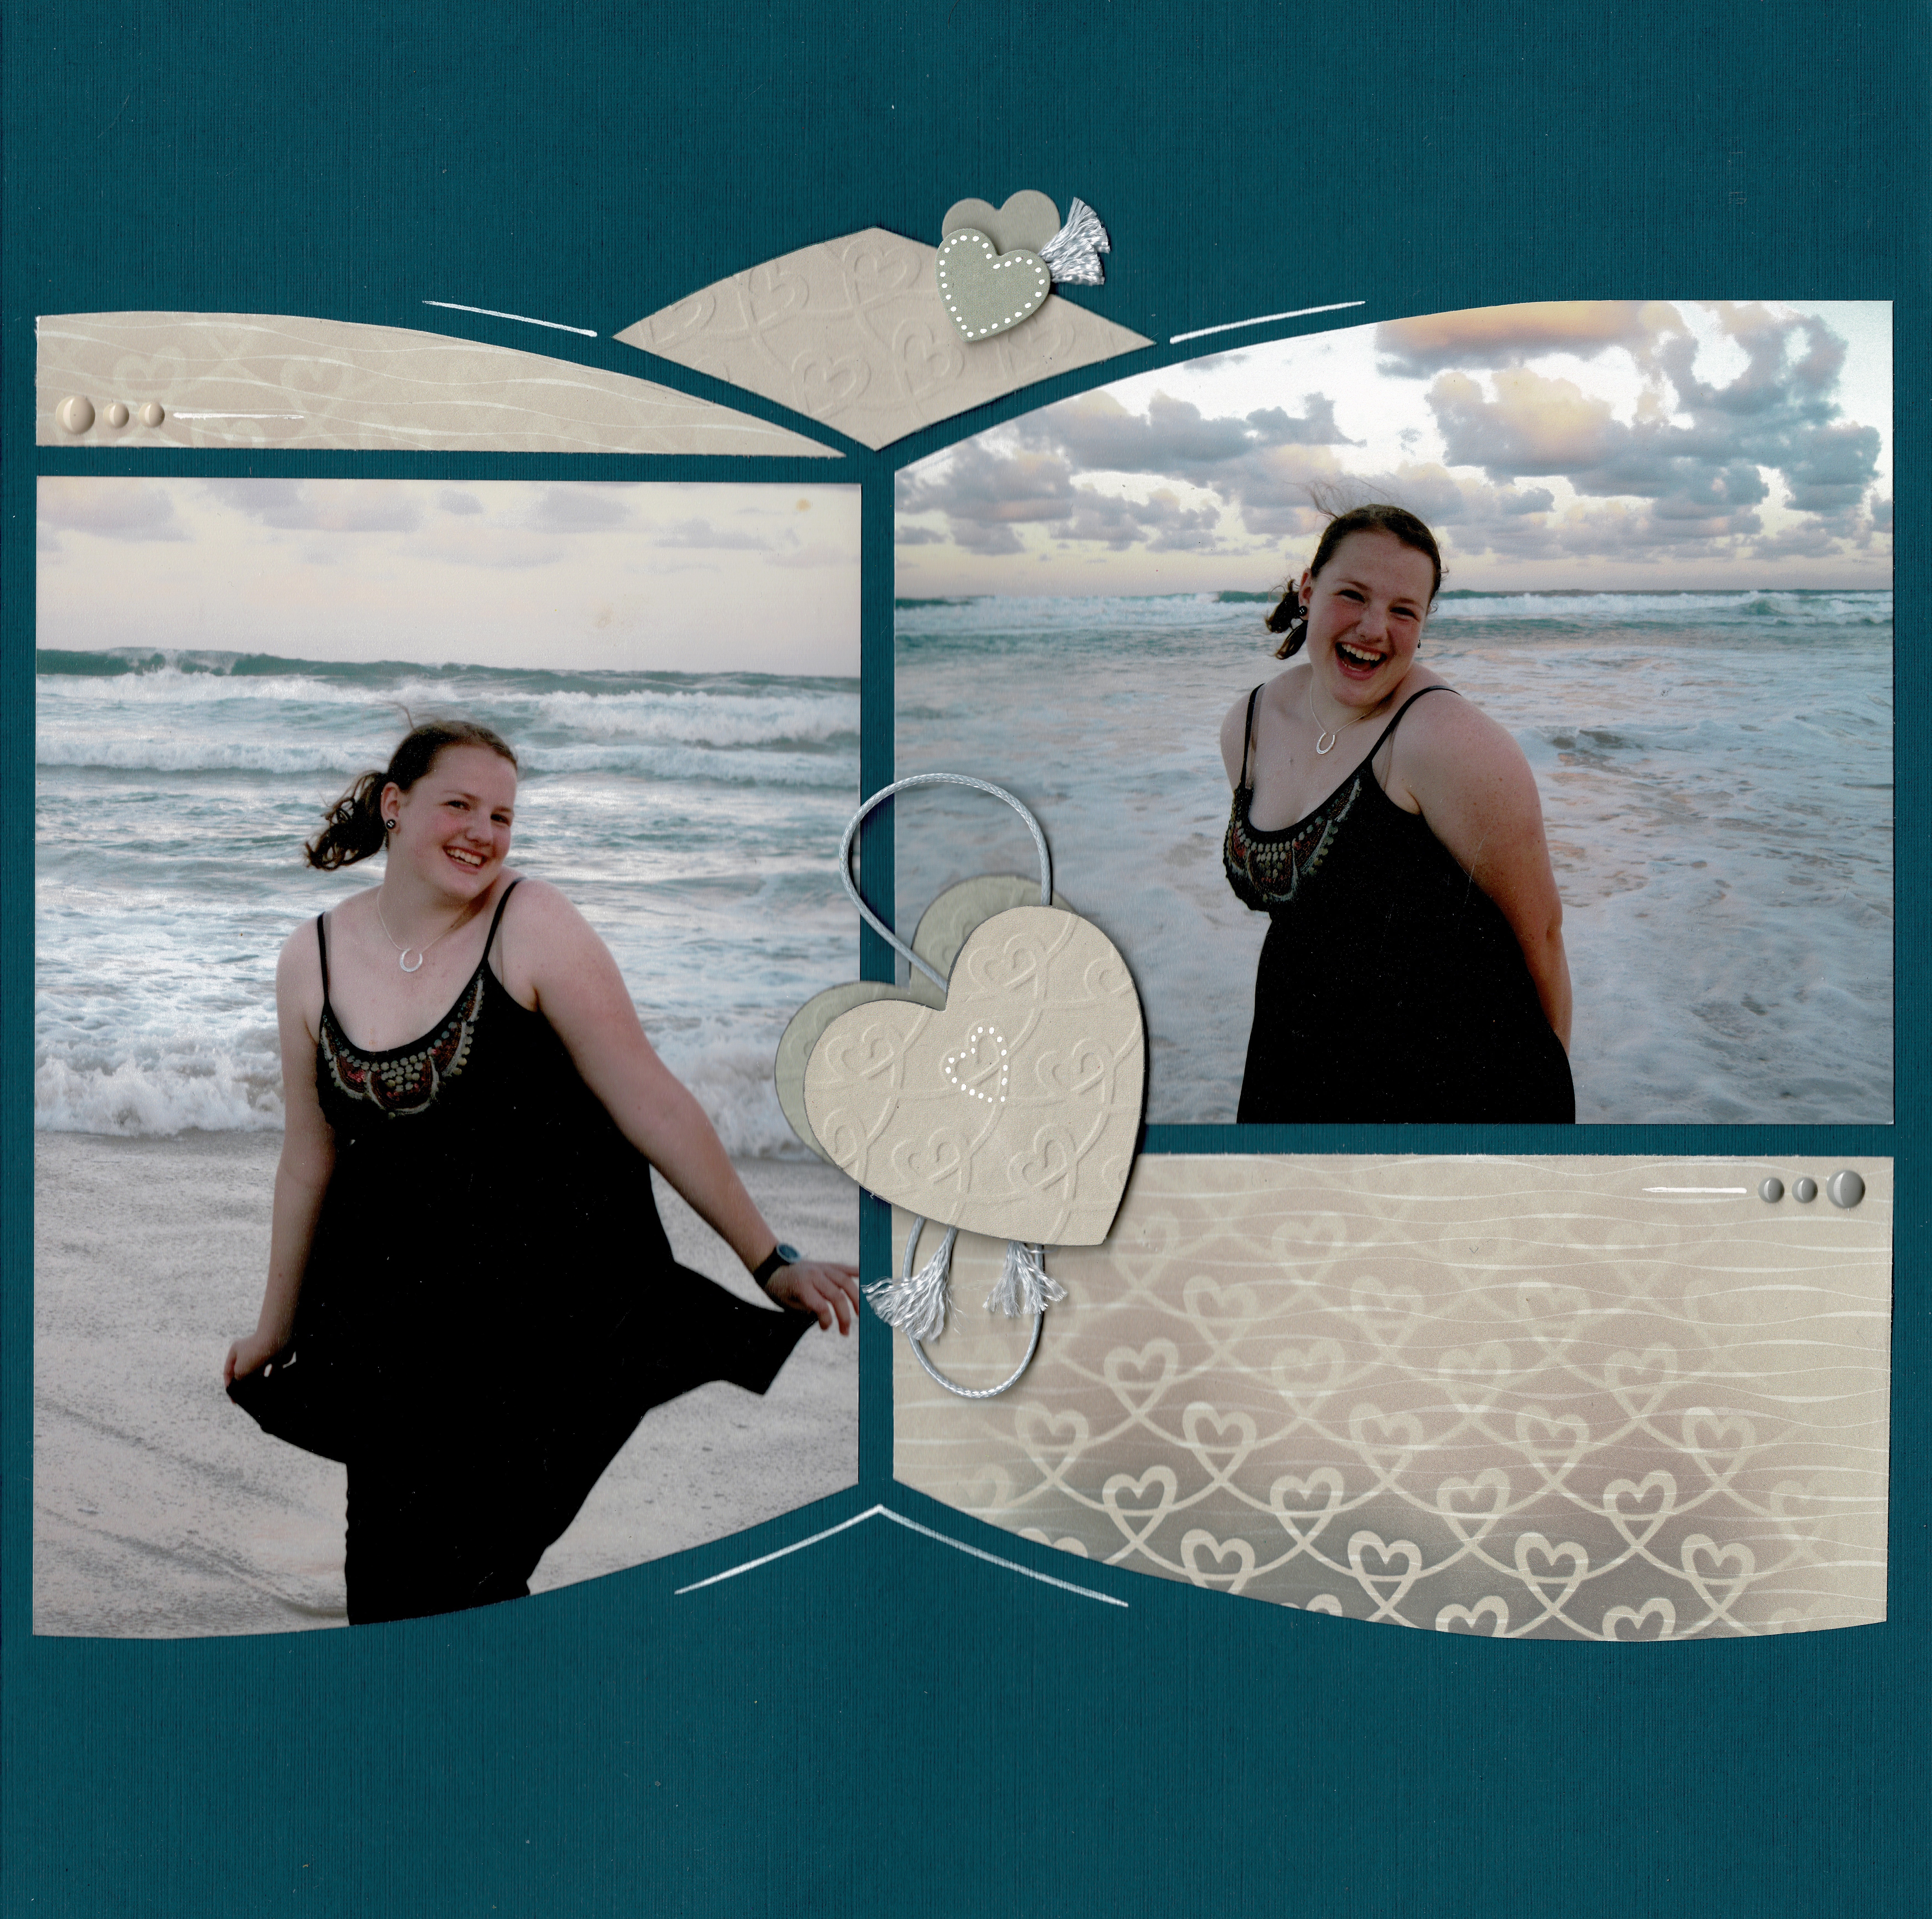
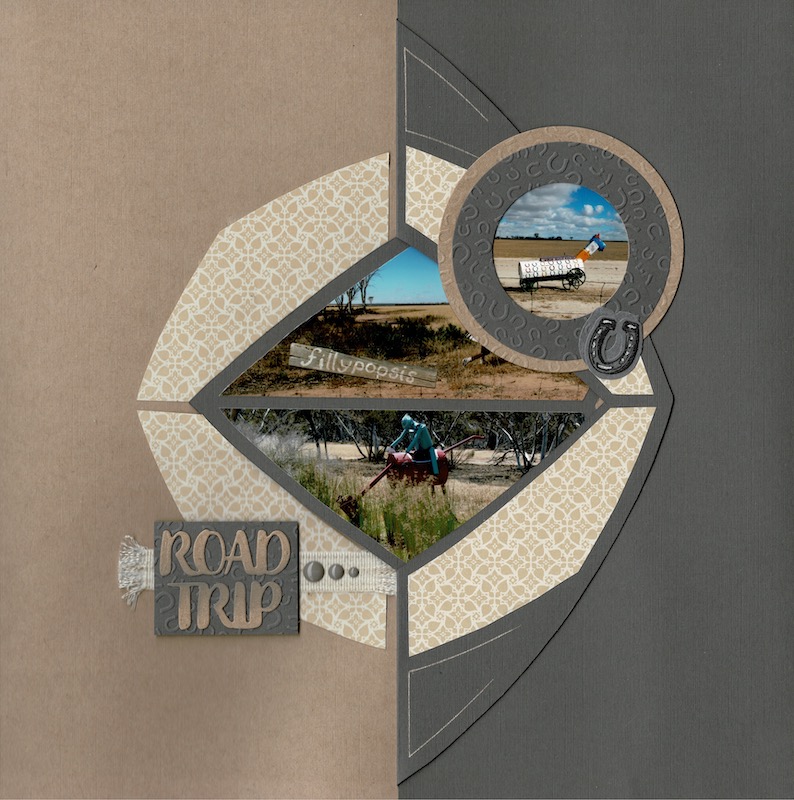
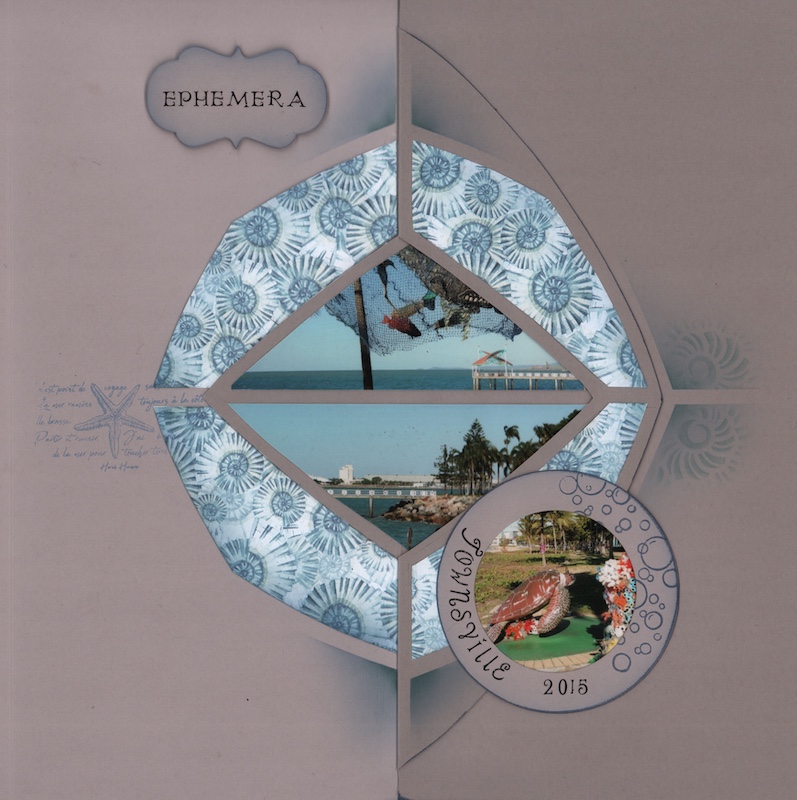
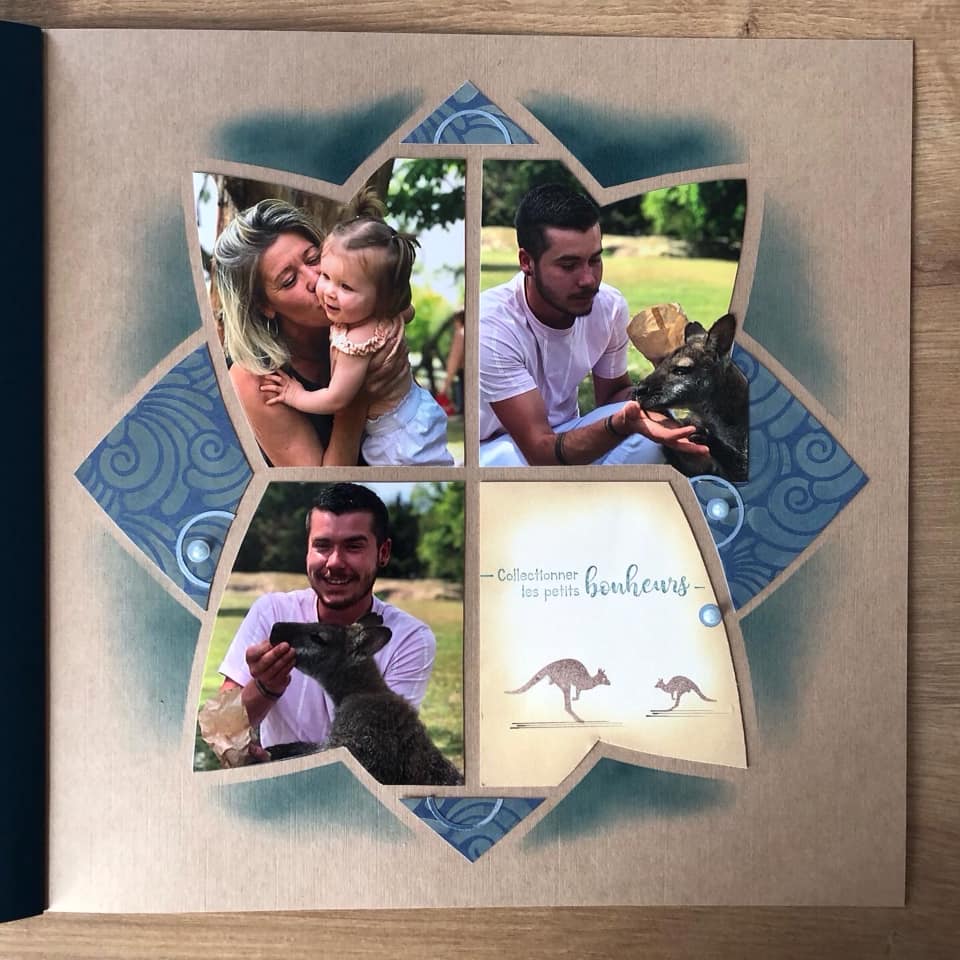
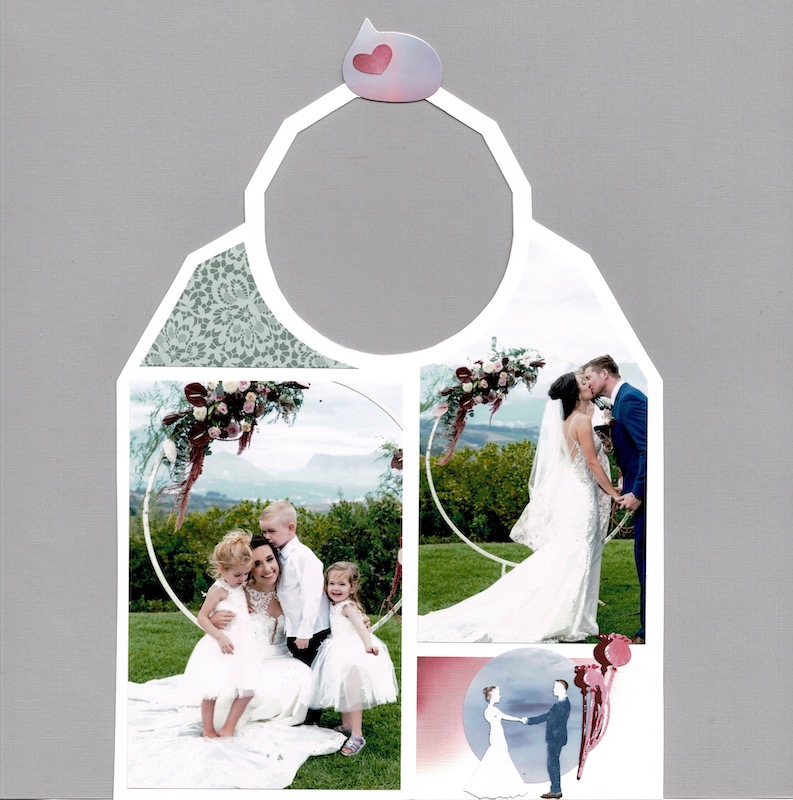
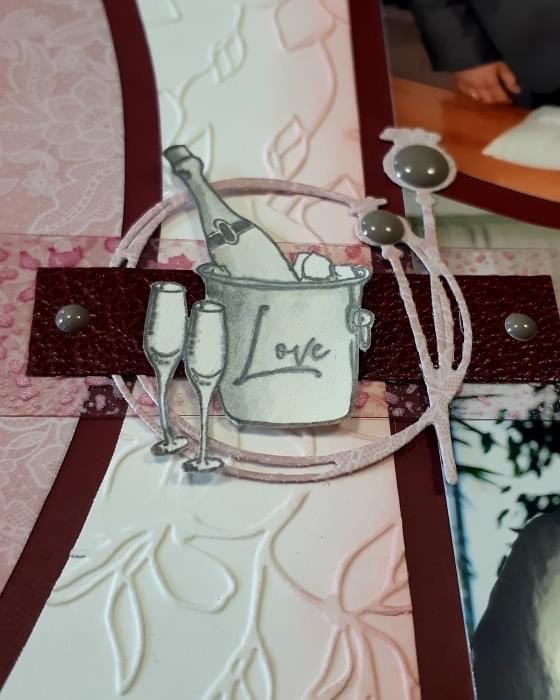
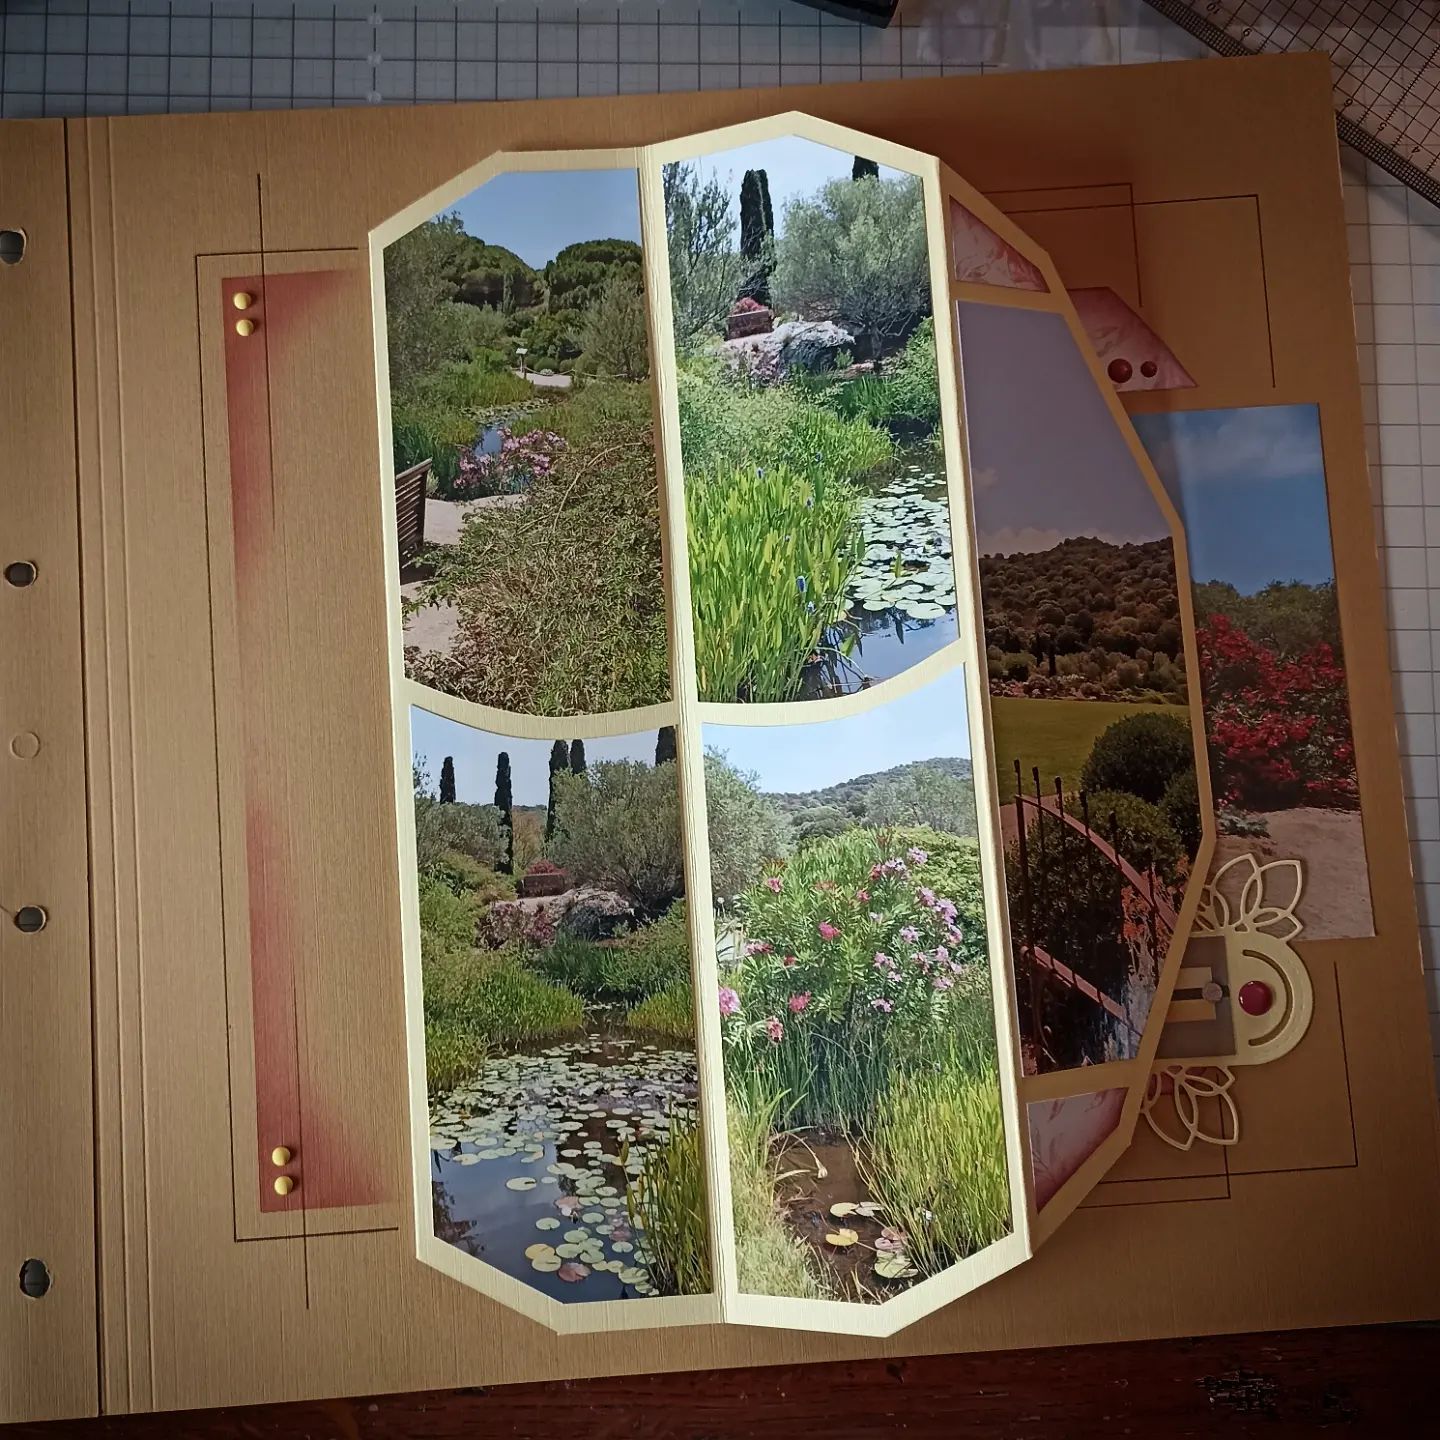
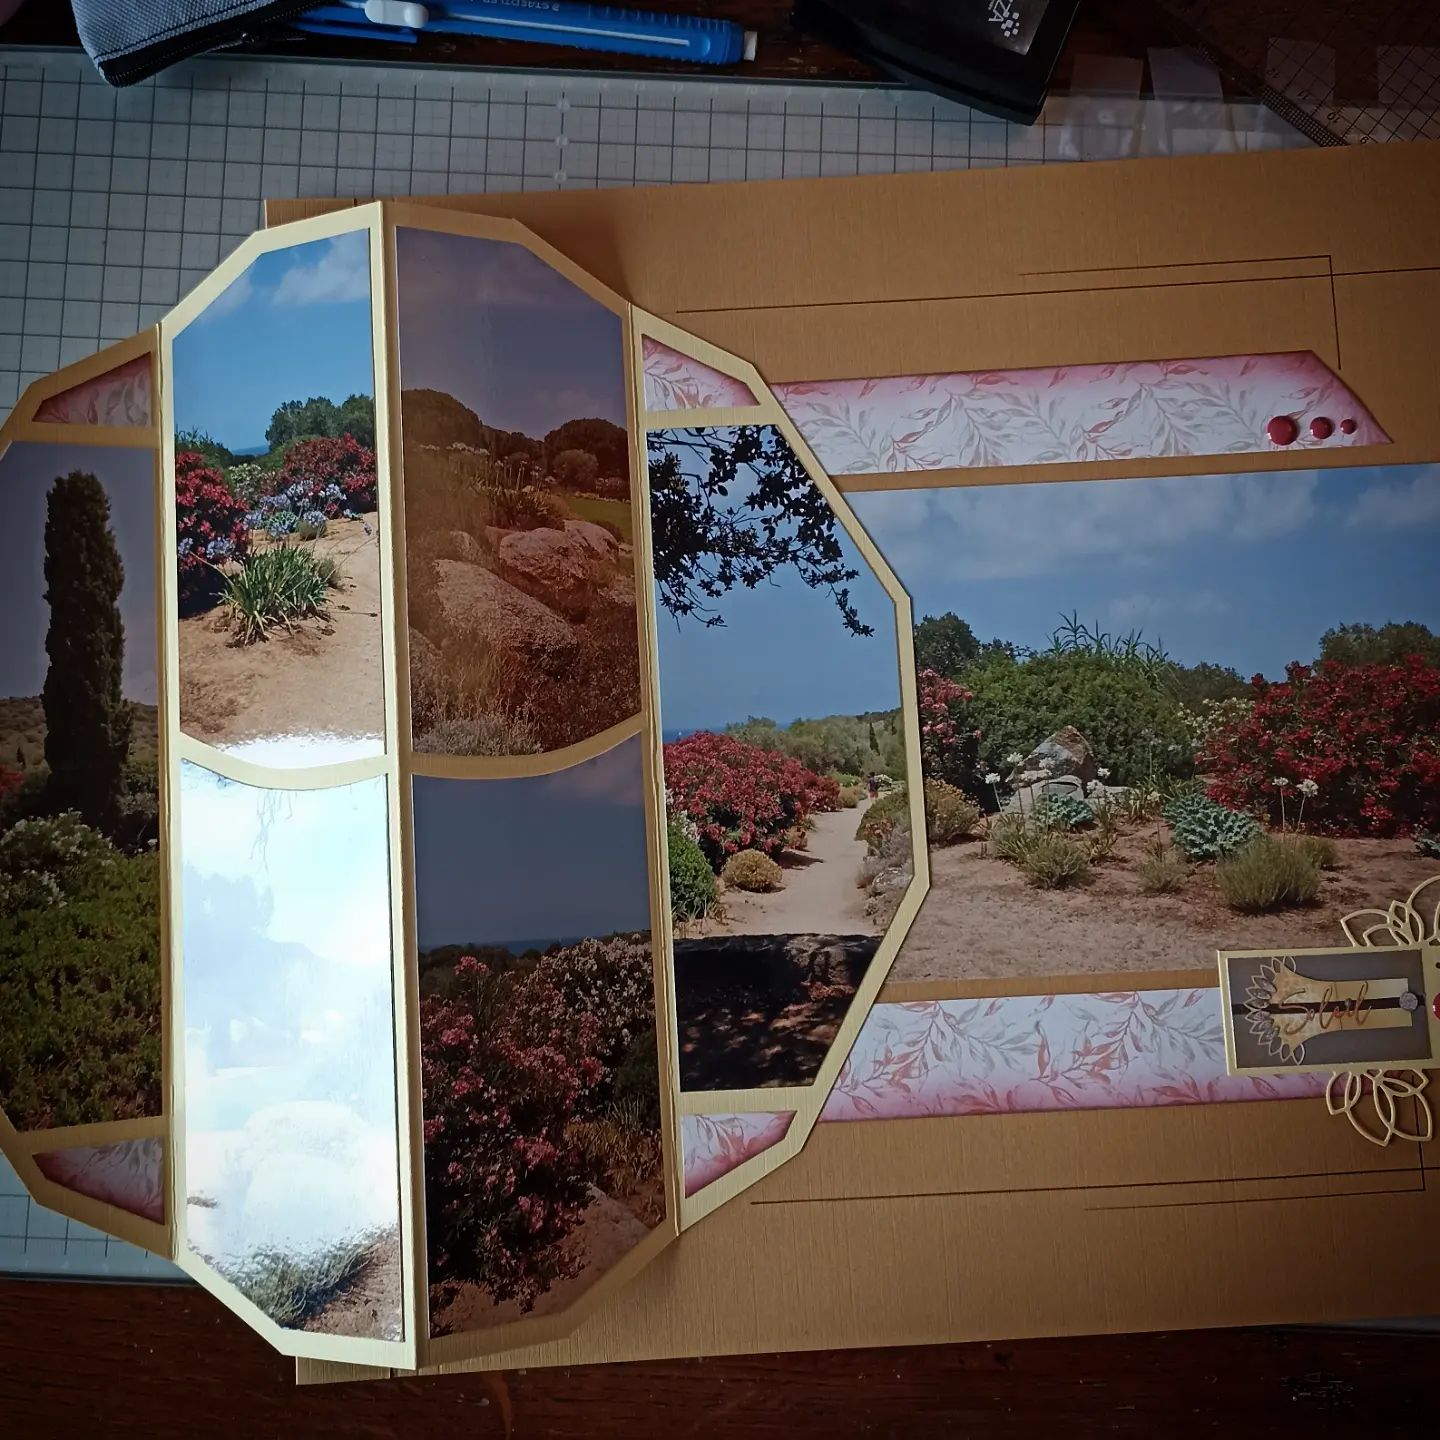
The smaller 20 x 20 pages are great to add extra photos to your layout but also lovely as a ‘Title page’ that can be flipped open to offer more journalling or extra photos. The smaller pages can be adhered to the back of the large page or, if adhered to the front of the large page, can be camouflaged with Washi tape, Glitter tape or papers. Below is my layout using an AZZA 30 x 30 page with the smaller 20 x 20 page. You can either use an AZZA Flipette attached to a stamped image to keep the smaller page closed, or raise your stamped image with 3D mousse and tuck the smaller page under the edge of the raised image when closed.
Anita Day used Washi tape to cover the strip that adhered the smaller page to the larger page. As you can see she chose to adhere her smaller page to the top of the 30 x 30 page.
The last AZZA 30 x 30 stencil for the year was Himalaya and the decoration theme ‘Top of the Mountain’.
Anita Day, once again, ran a Masterclass with the new stencil and here are some of the beautiful layouts sent in by our Consultants. The first layout below is Anita’s sample page.
EPSON MFP image
Layouts above by Irene Warfe, Denise Harris, Jennie Banks, Sue Talbot and Hilary Hamilton. When a new stencil is released in Australia do keep a look out for the Masterclass with Anita.
Sue Talbot shows how a layout can be rotated to fit the photos you are working with.
There have been some beautiful Himalaya layouts out of Europe, these are two of my favourite.
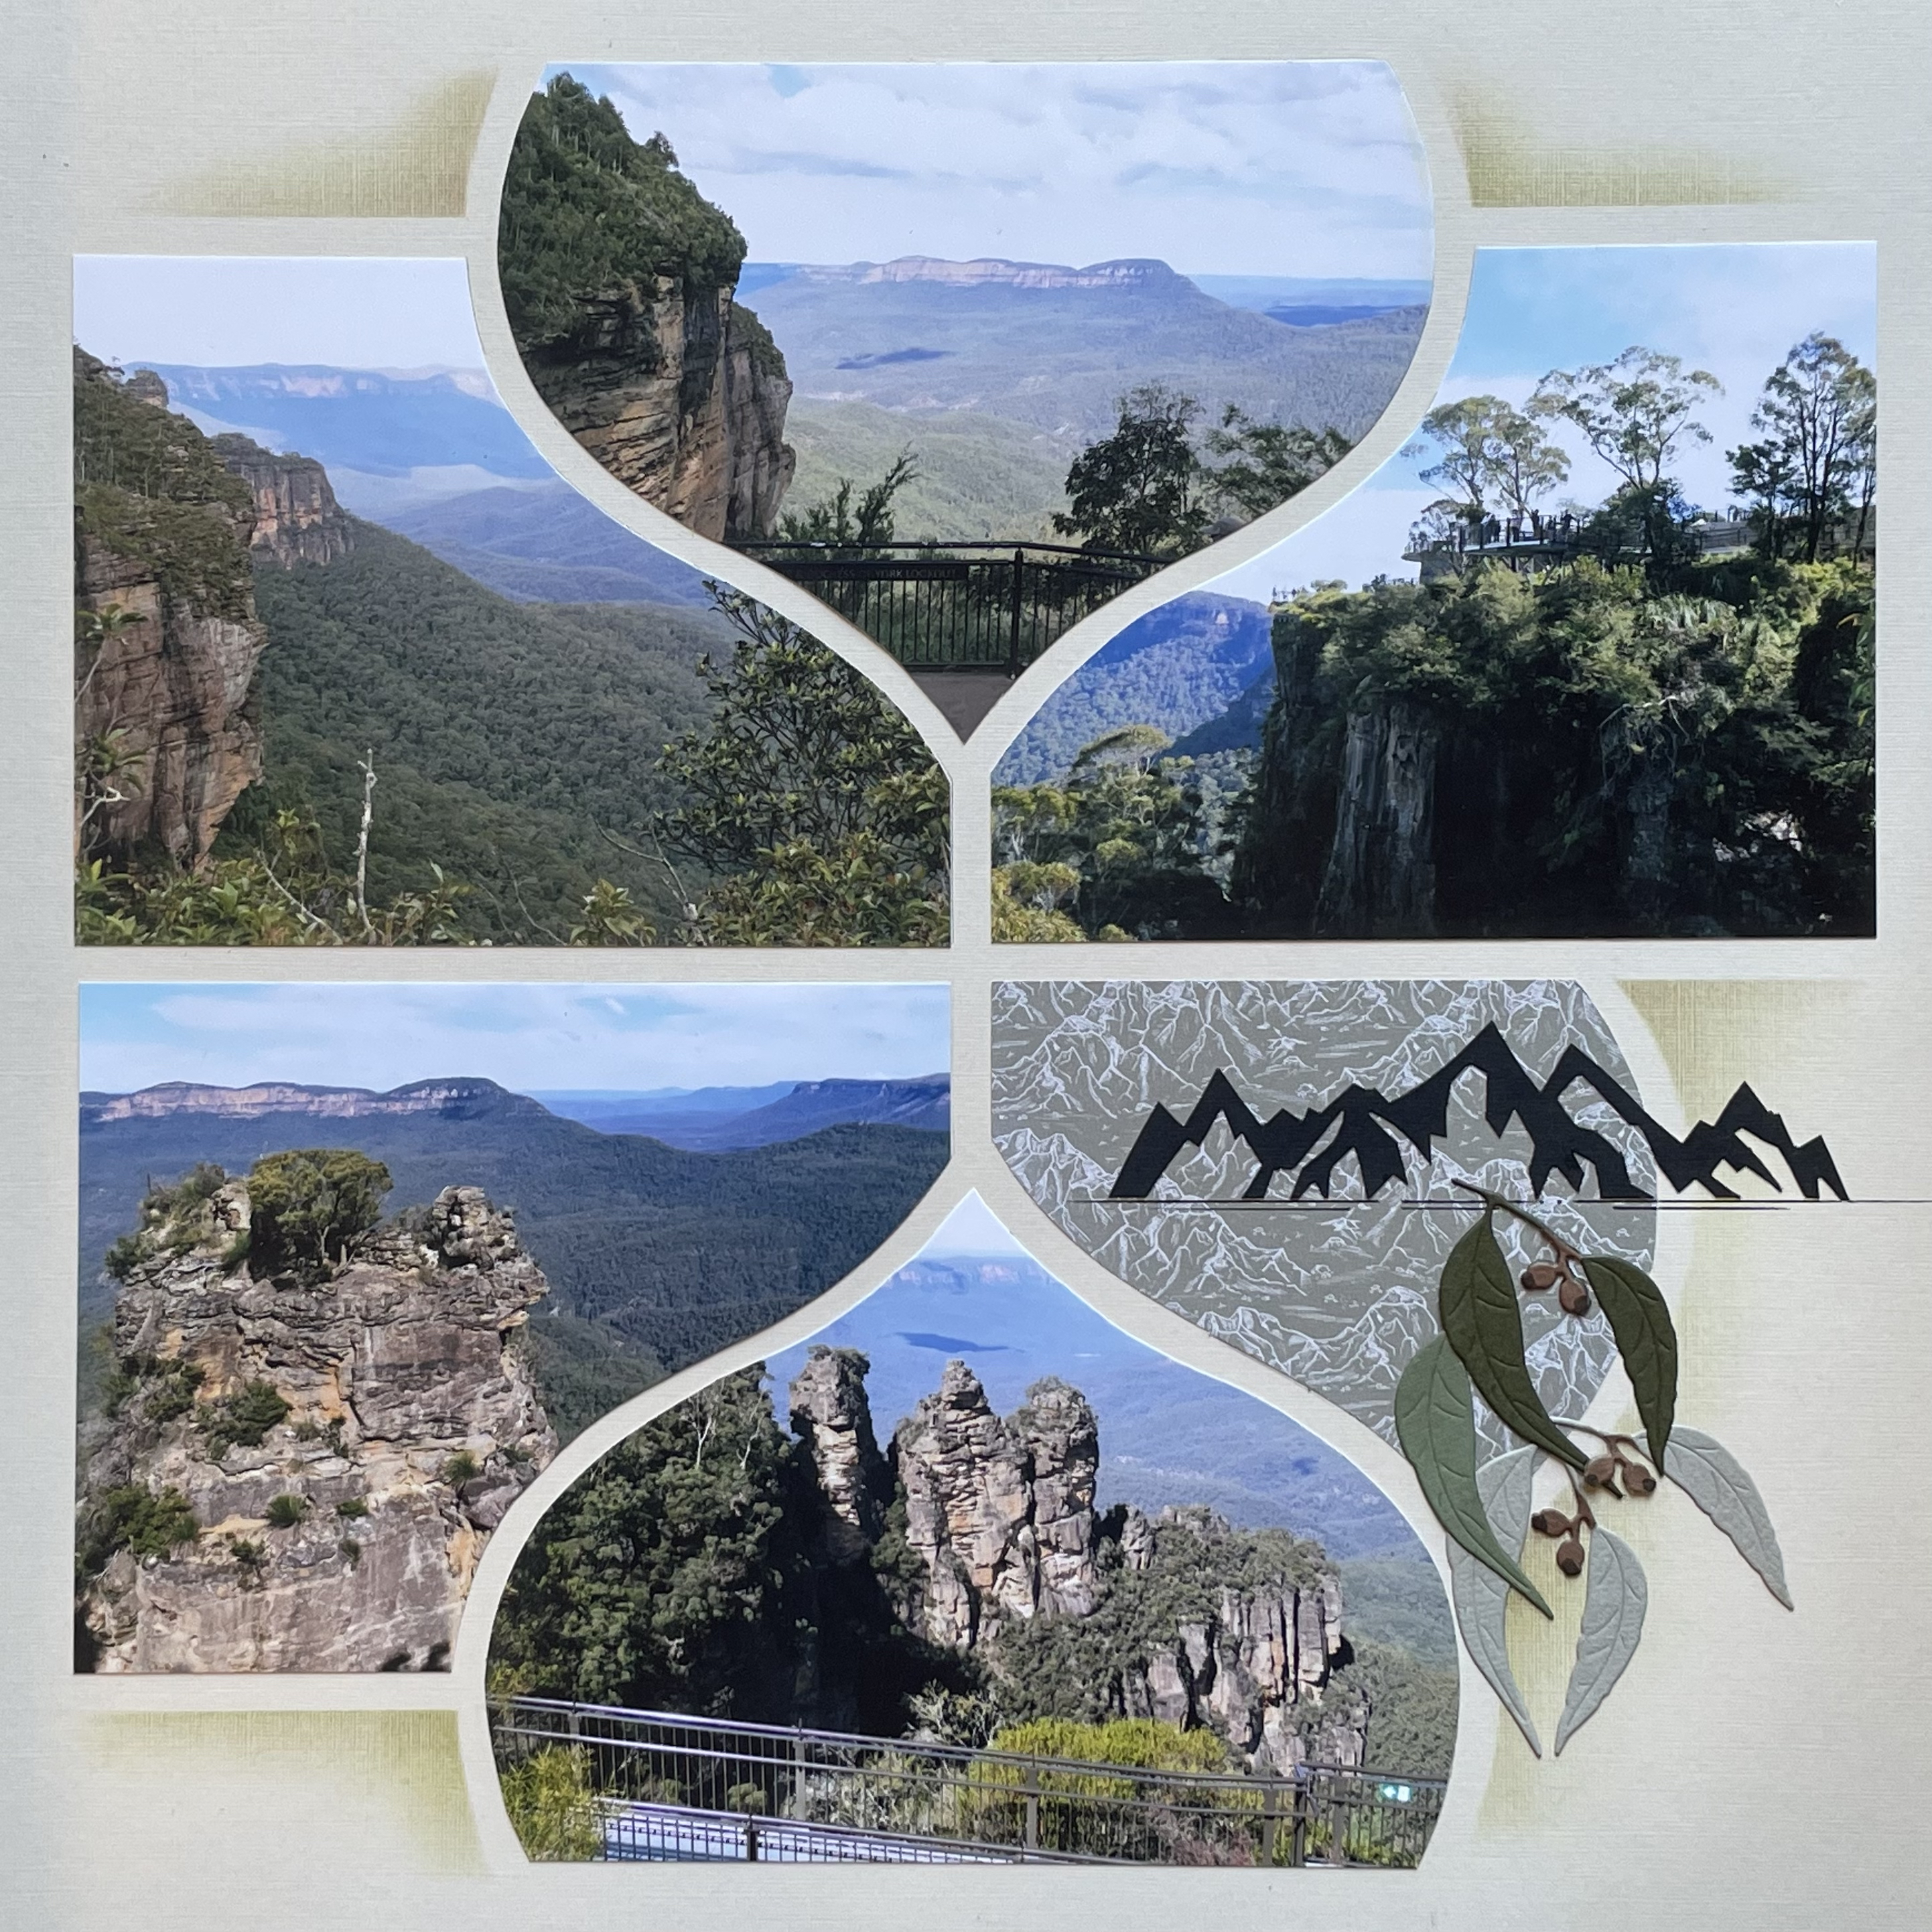
Sue Talbot shows our very own Blue Mountains work perfectly with the ‘Top of the Mountain’ products too.
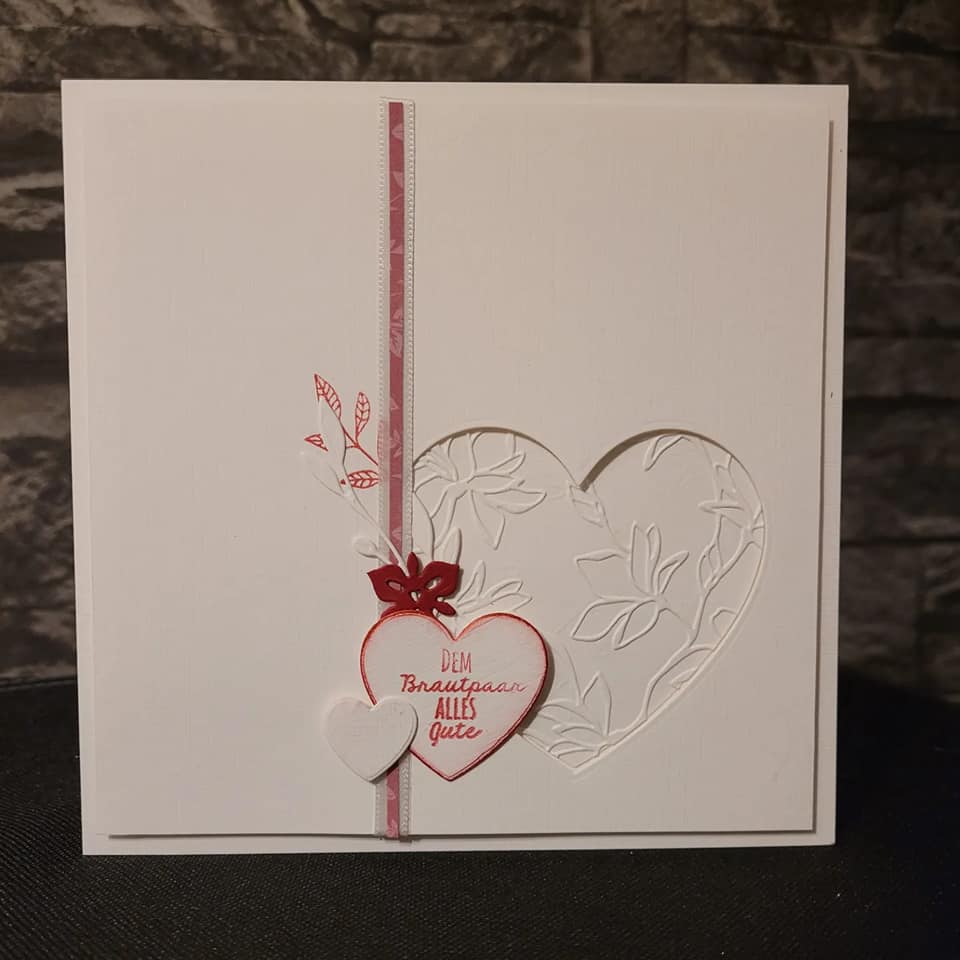
This beautiful card was created by Julie Kecskes in Europe with the ‘Top of the Mountain’ products. The shadows of the mountains were created with the Decoration stencil shown below.
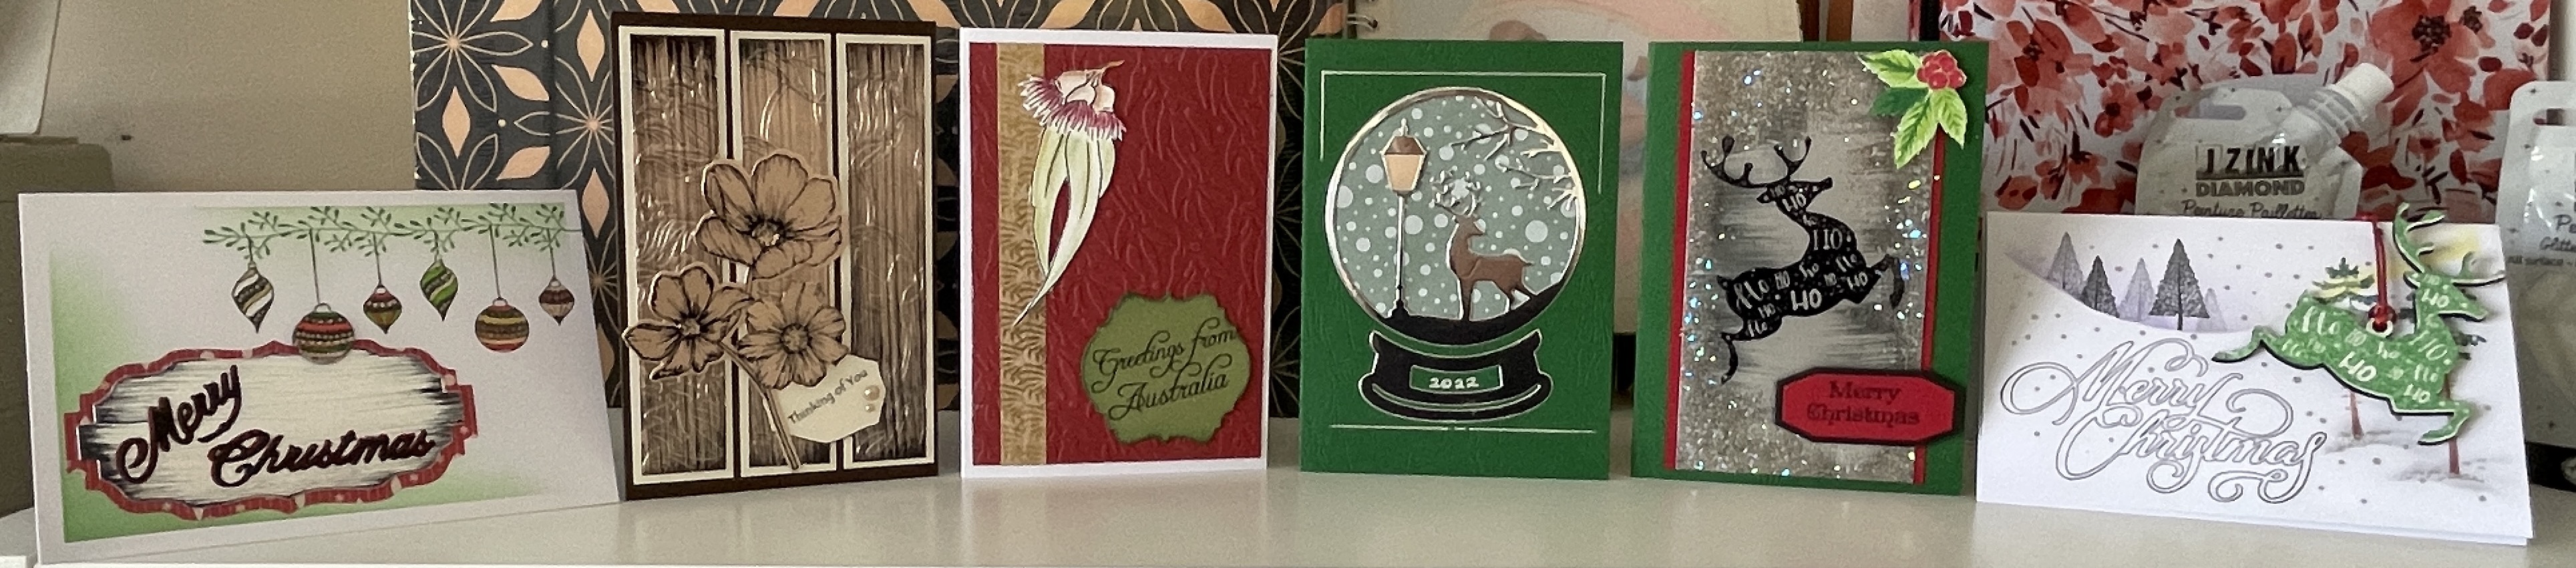
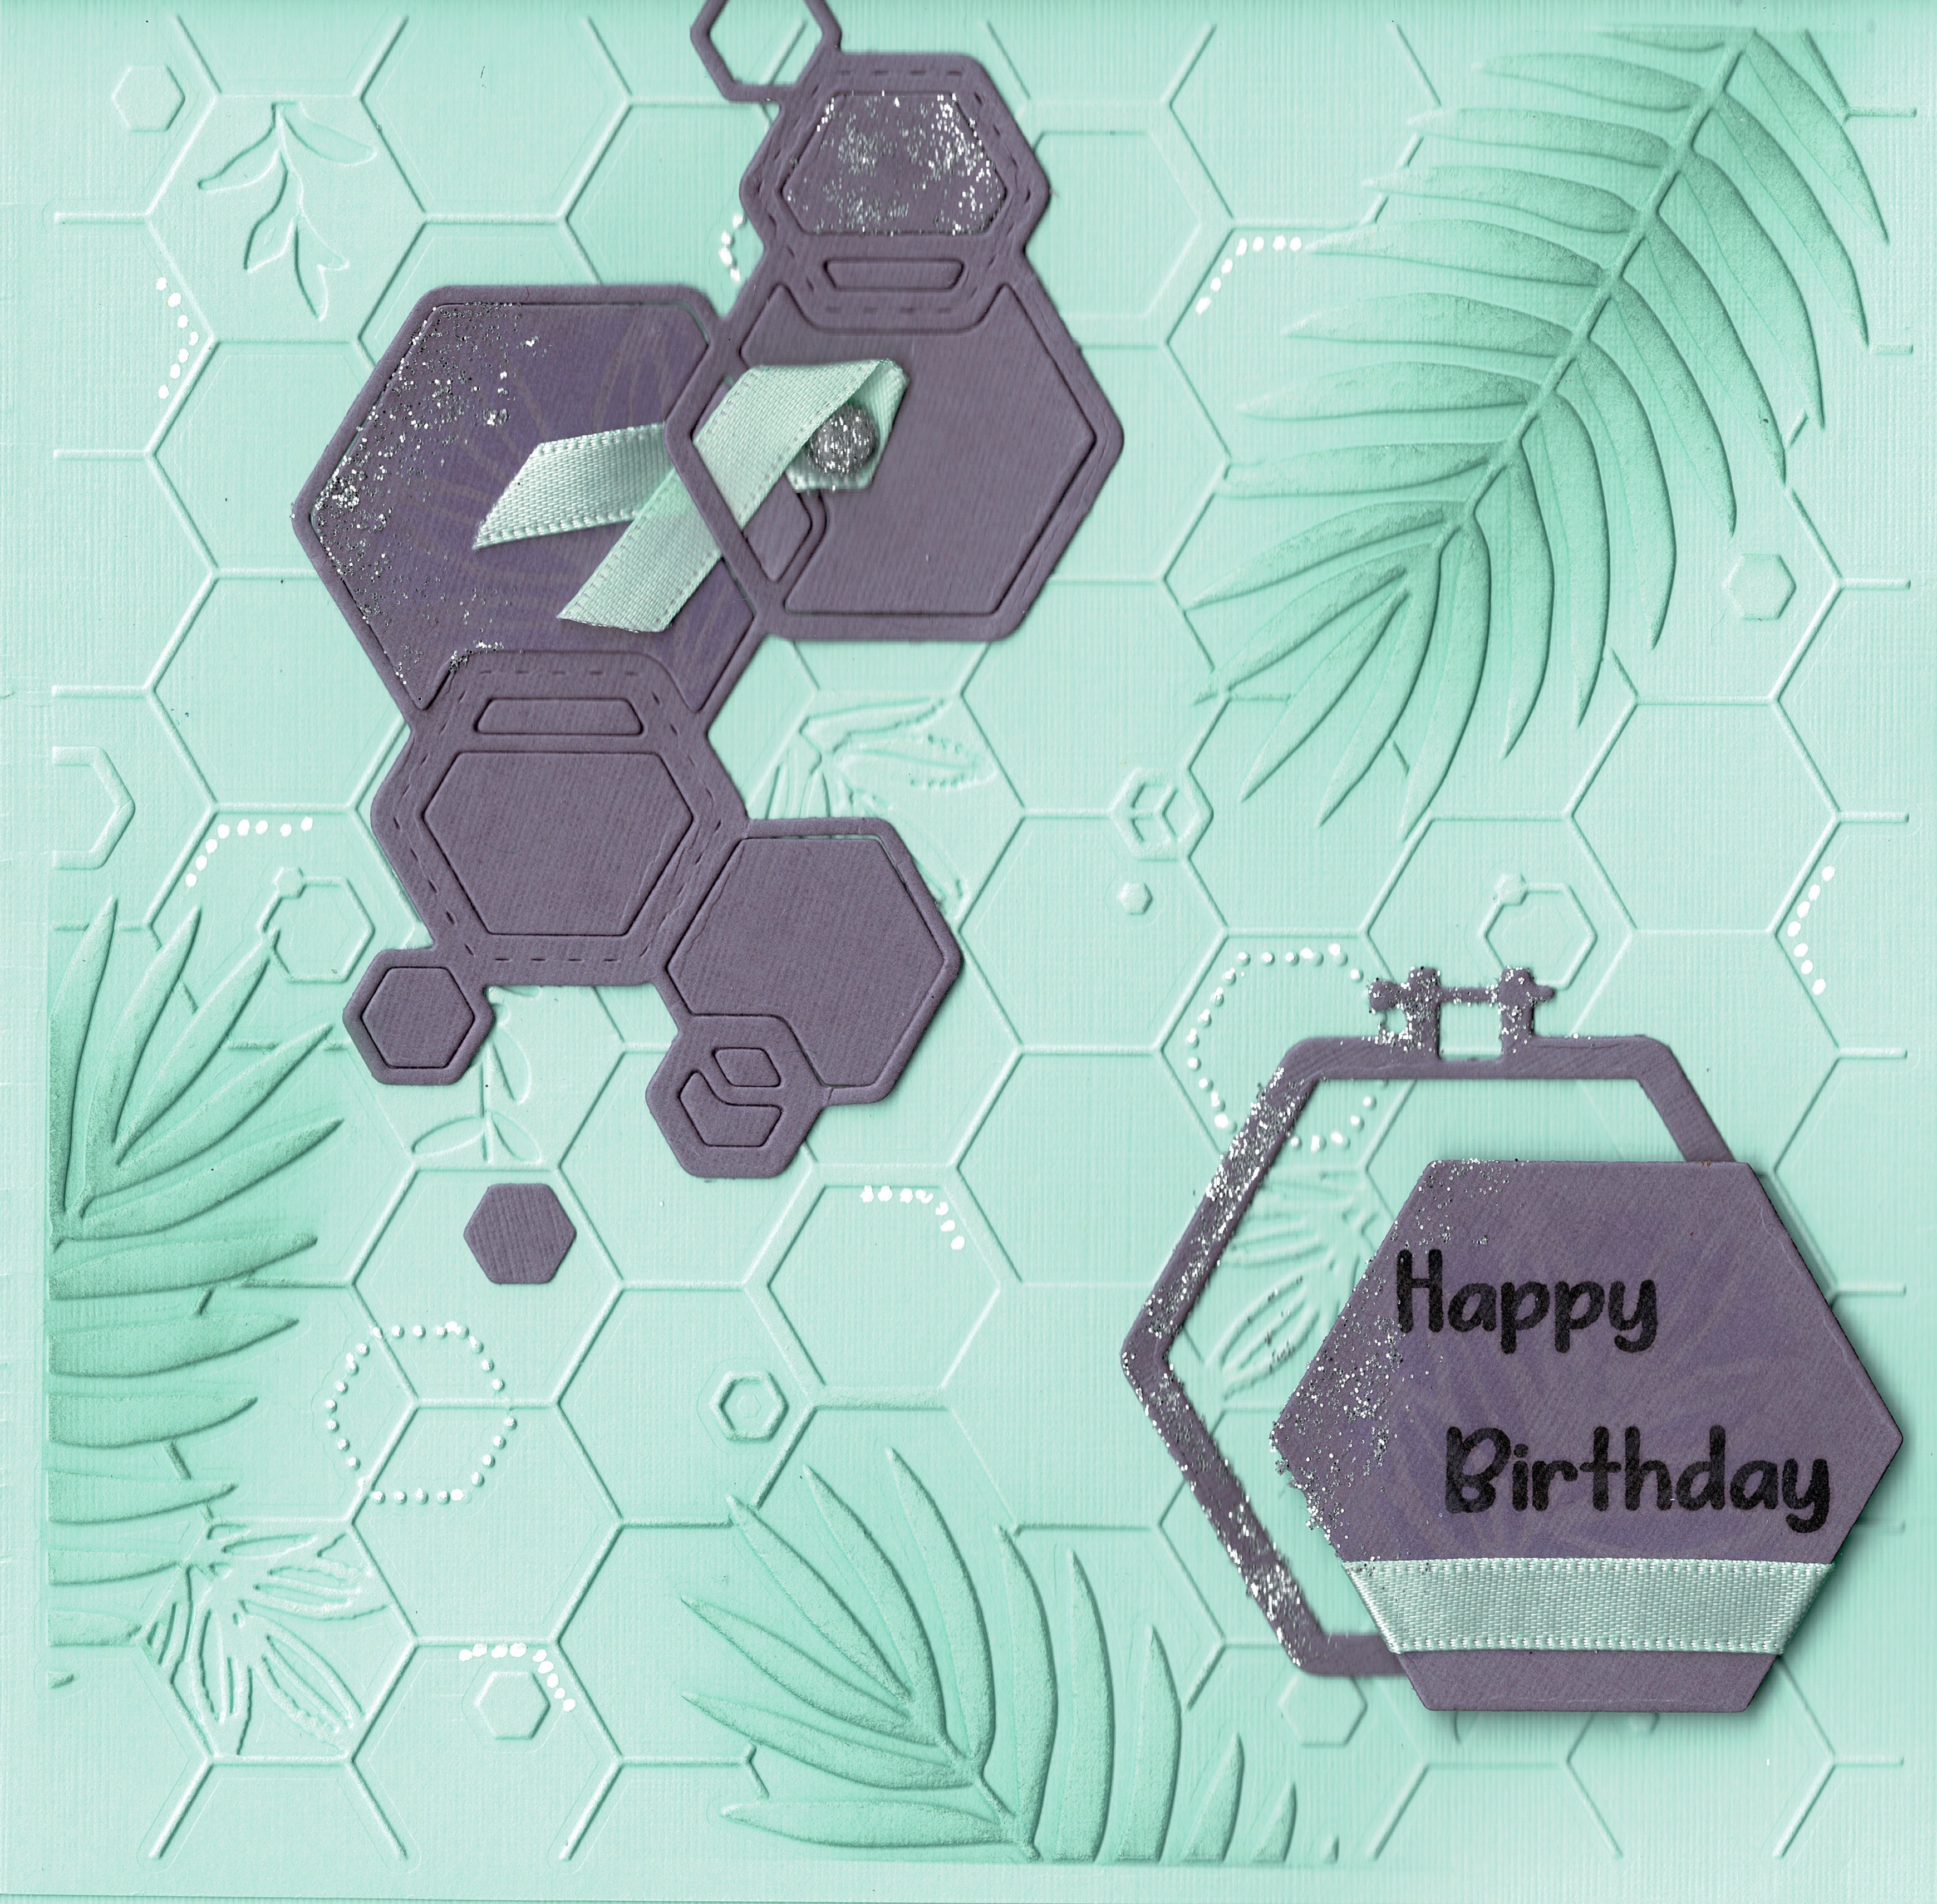
The dies give texture to the scrapping page or card. In the card below by Brigitte Langenfeld, the dies have been incorporated into a card created with the lovely Christmas Snowball die.
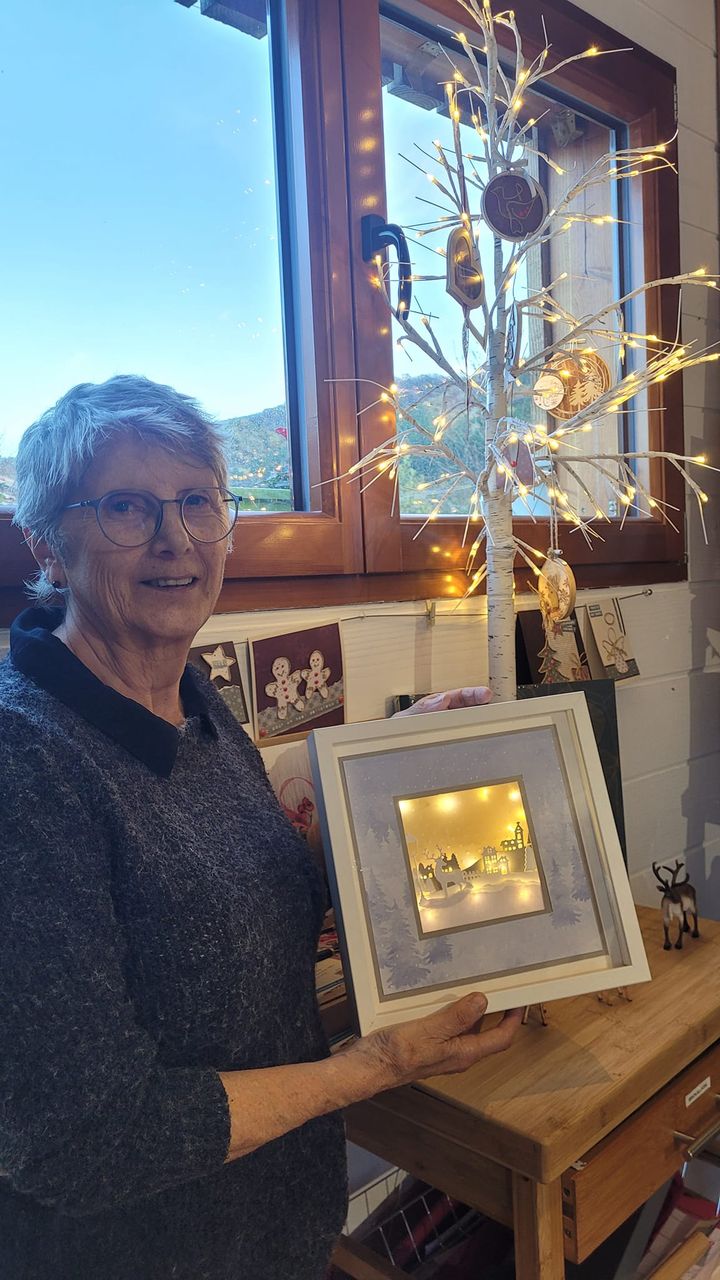
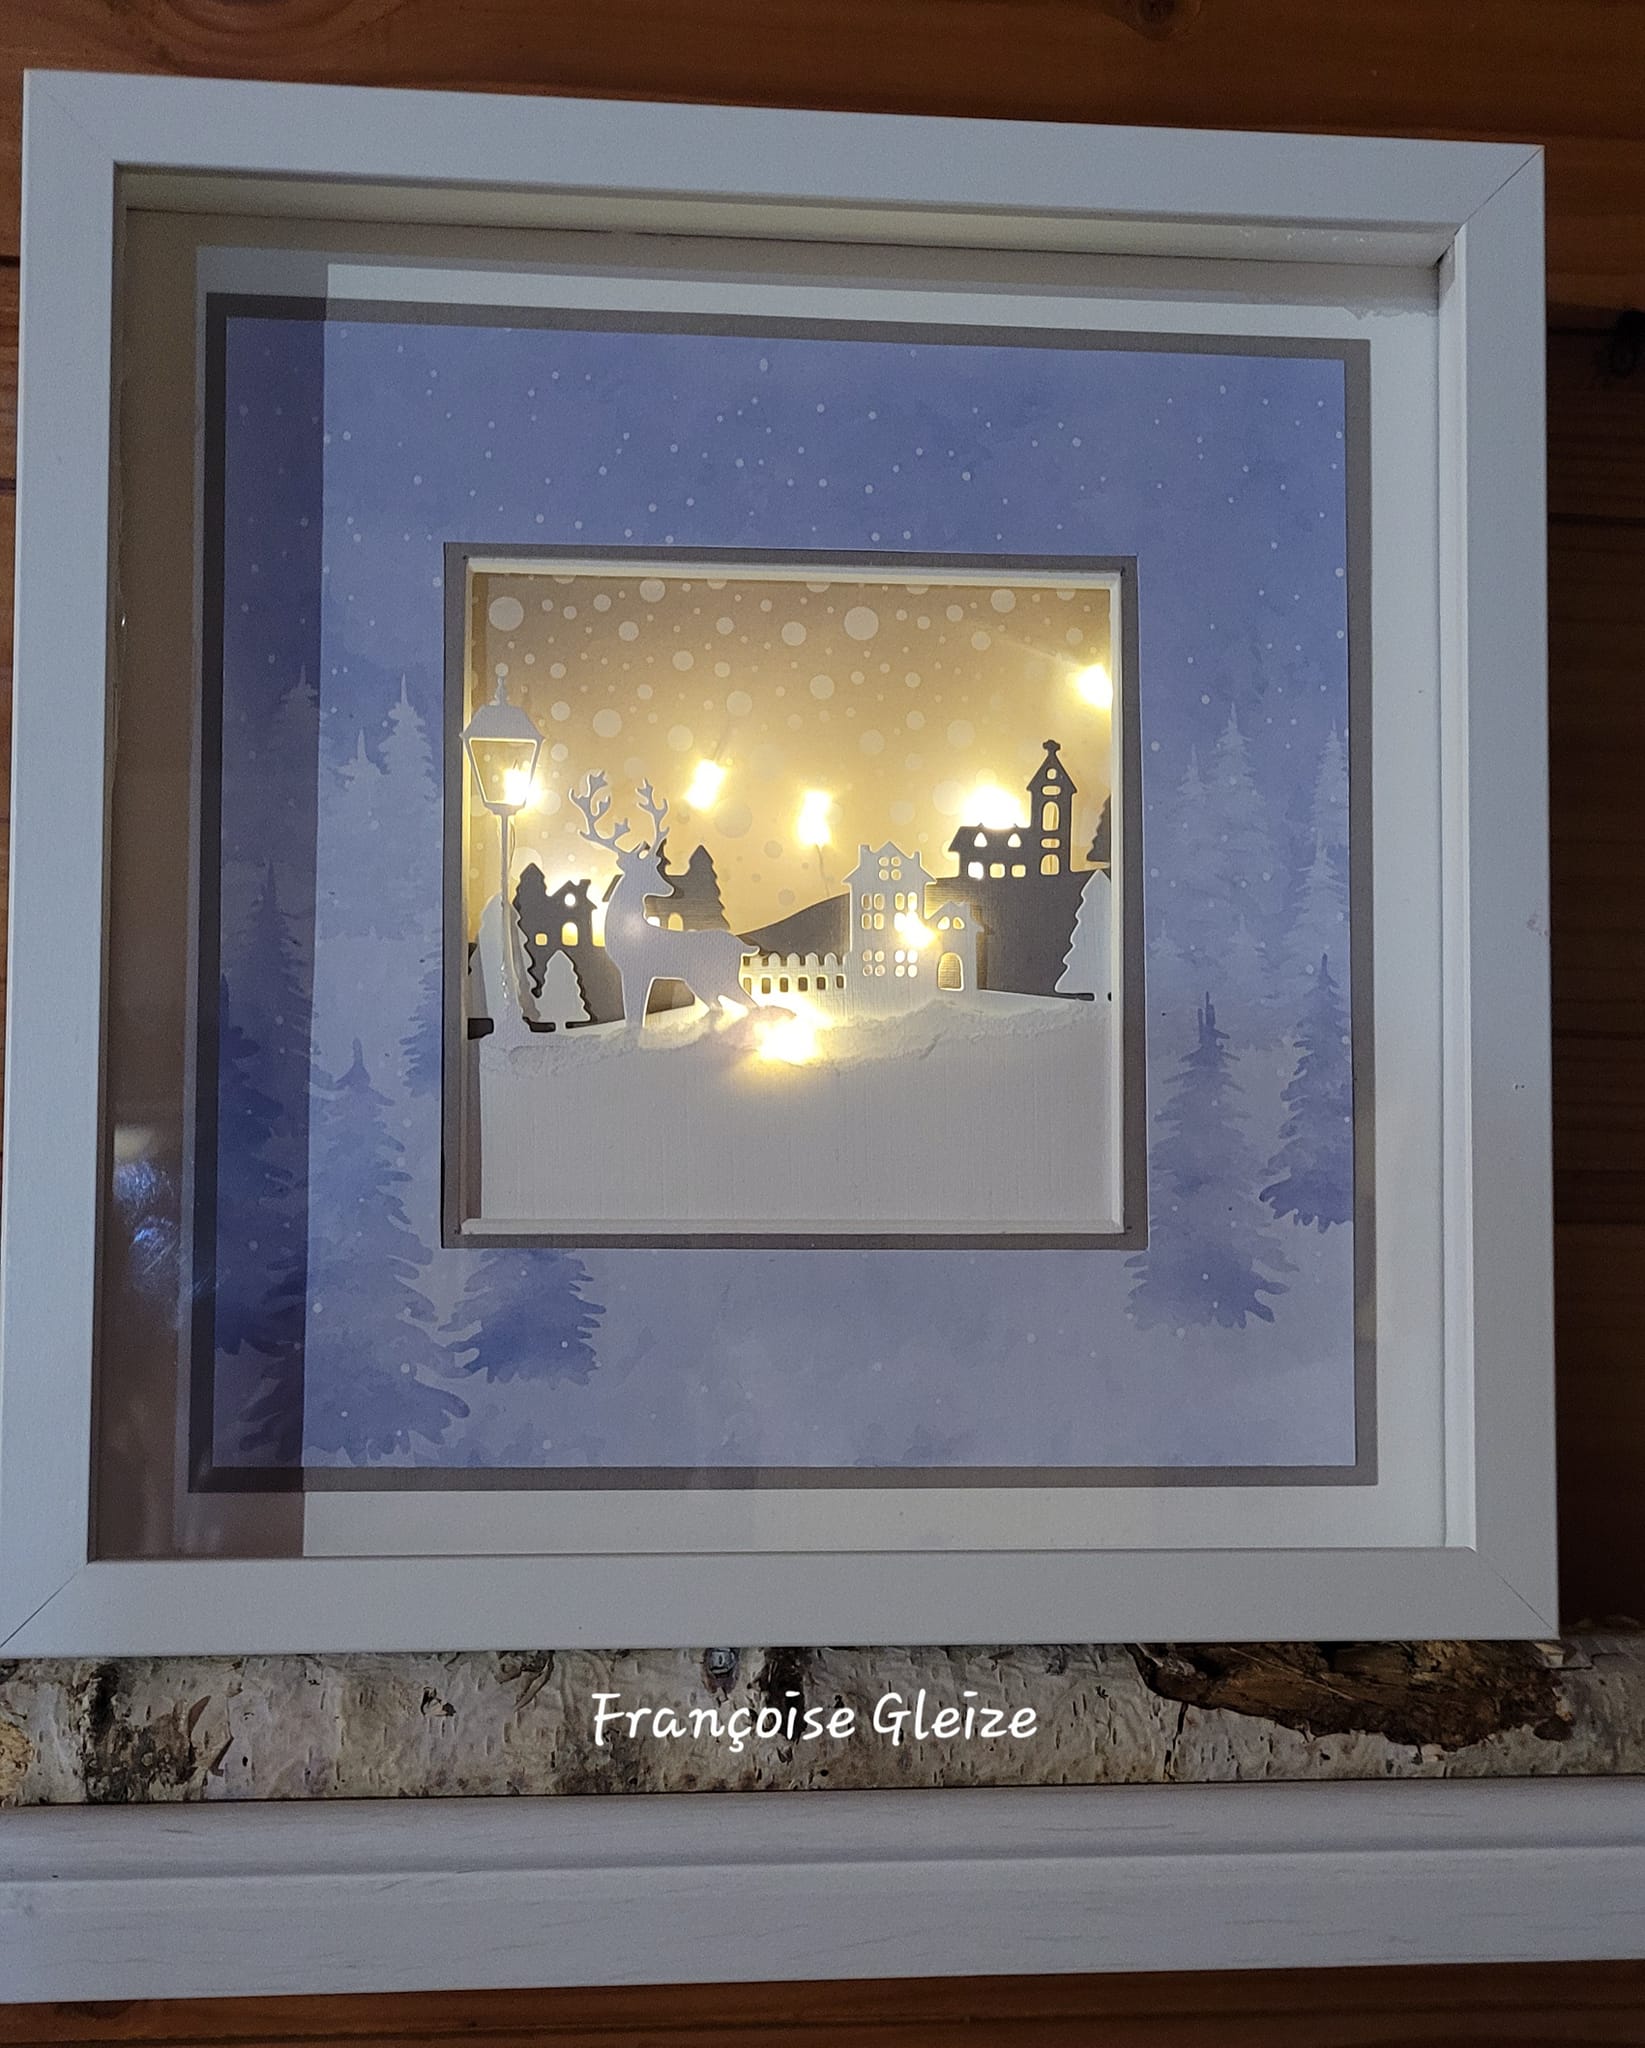
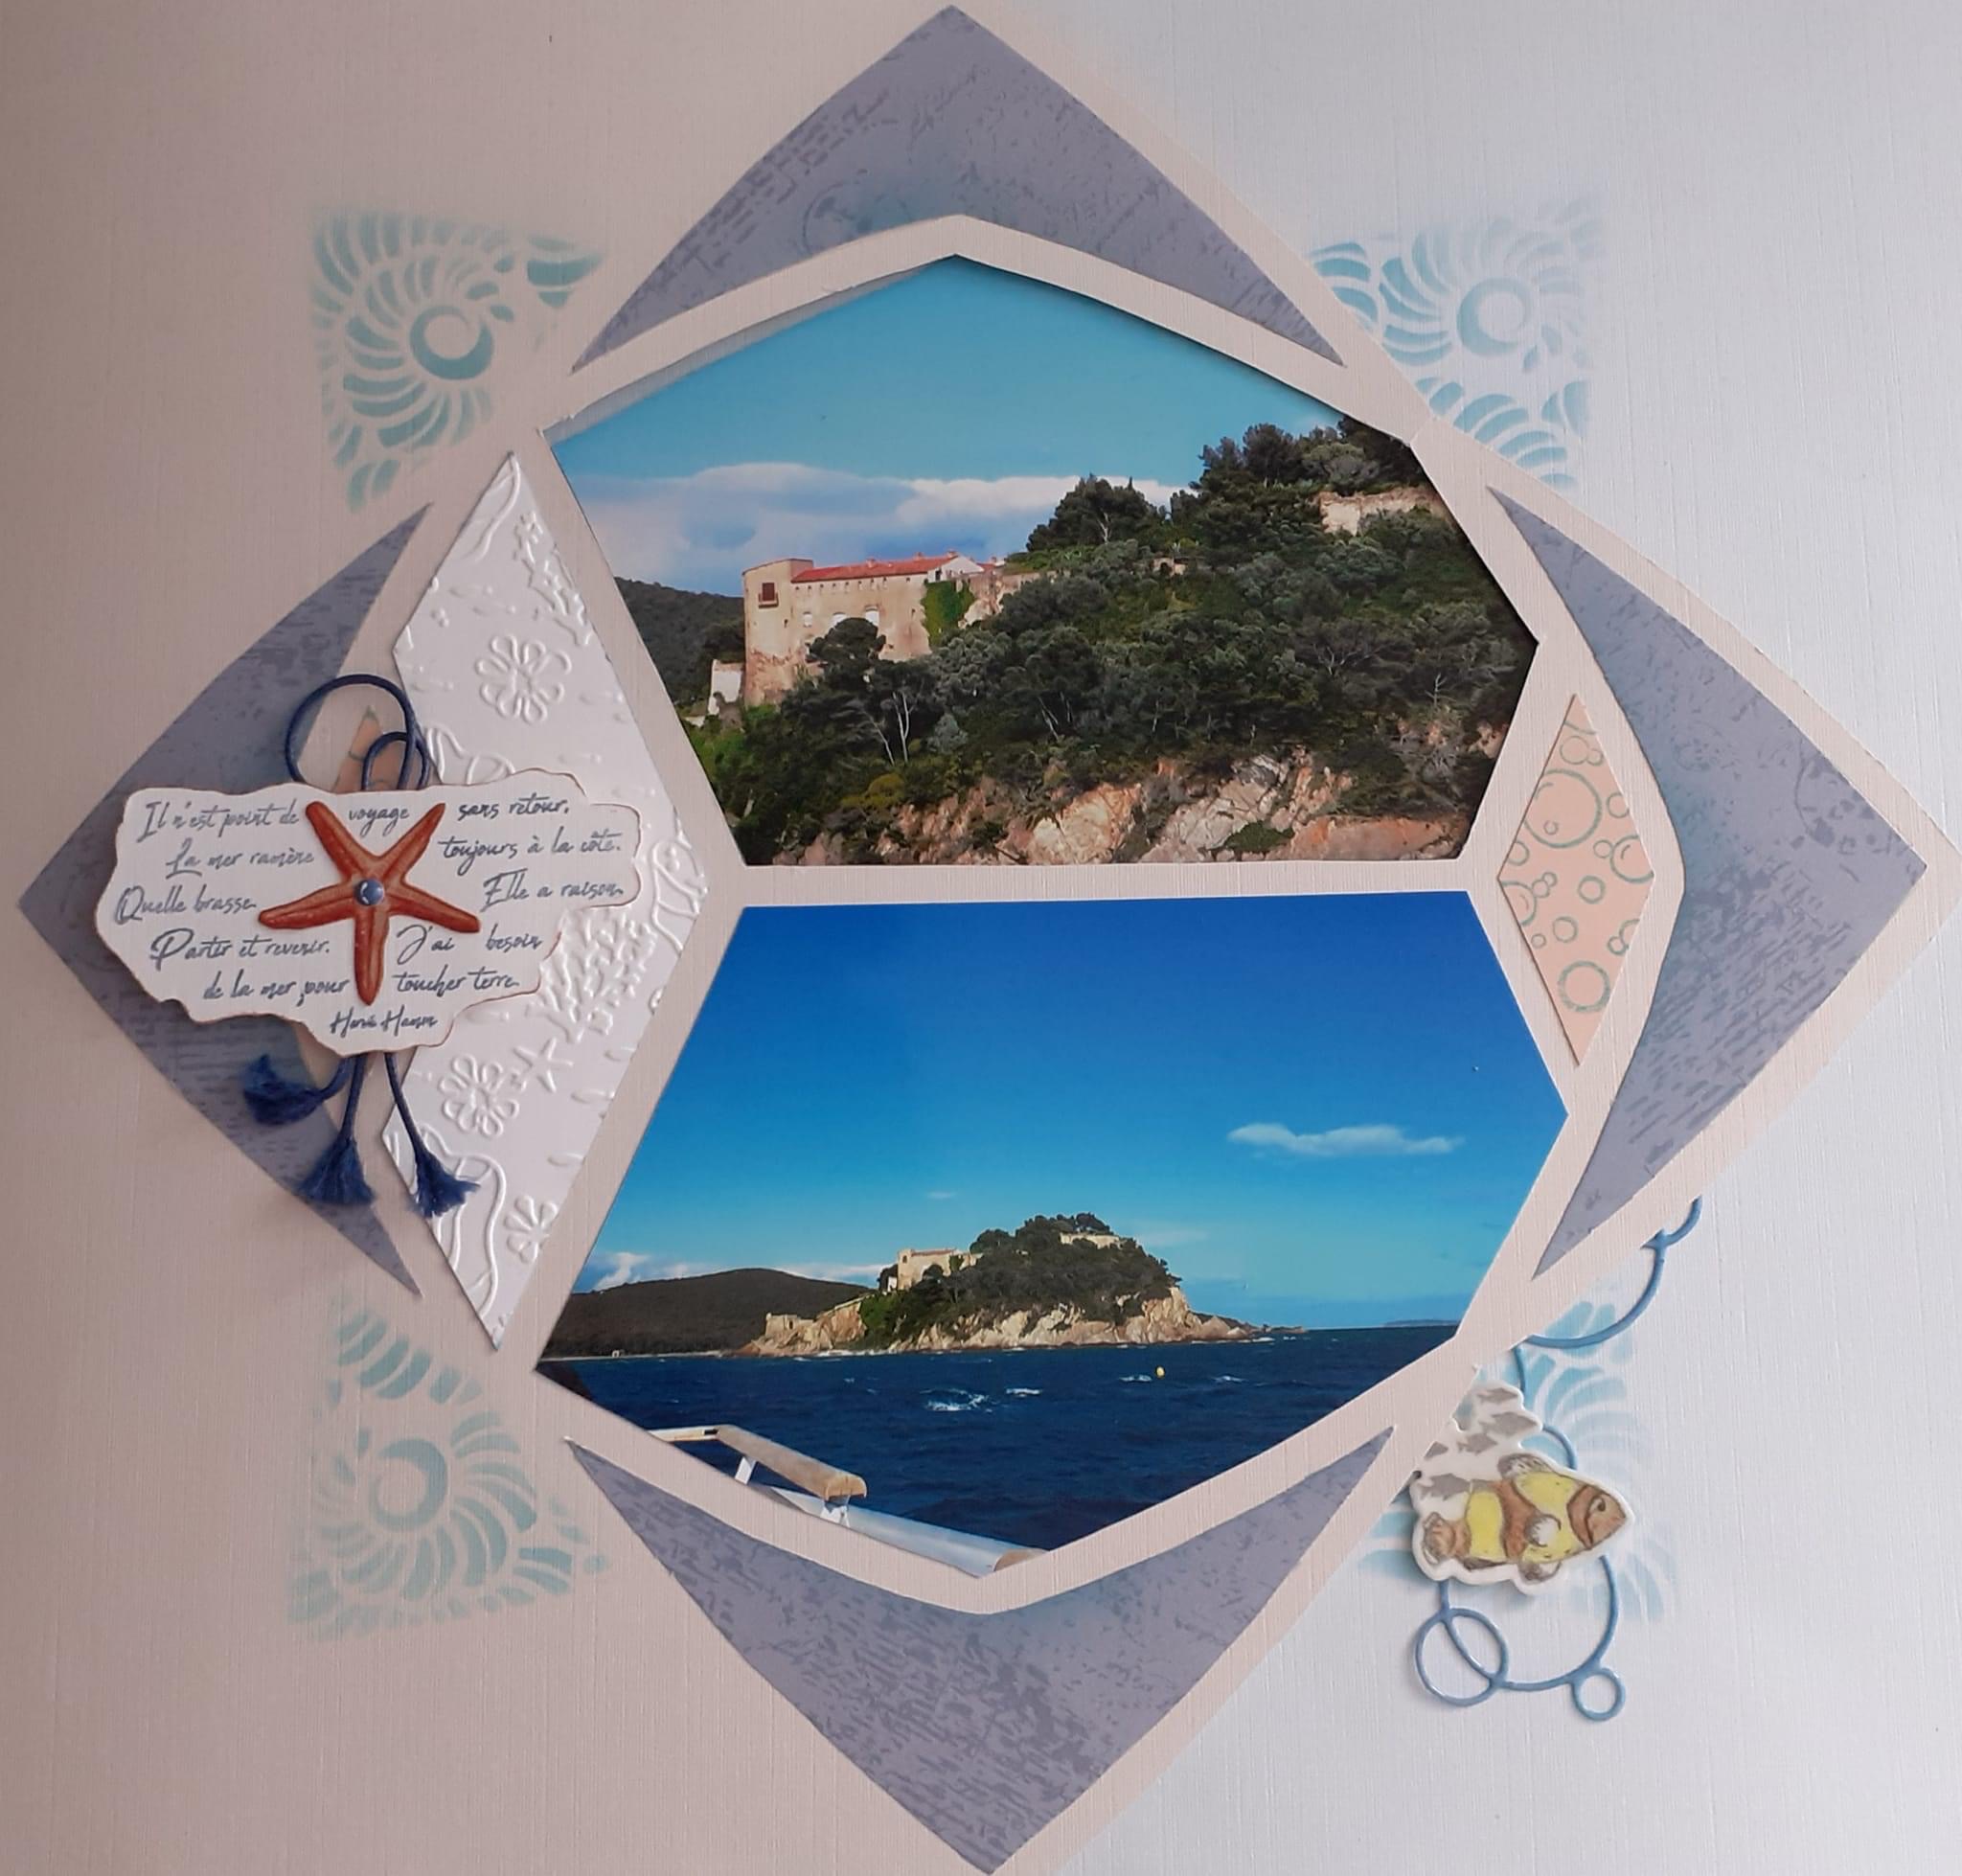
Another lovely ‘Off the page’ project is shown below: Thank you to Sophie and Francoise for sharing their beautiful 3D frames with us.
The AZZA Online shop will close this Friday, 16th December. Orders can still be placed online but they will only be despatched on Monday, 9th January when the shop will re-open in the New Year. Backorders that are awaiting a shipment from Belgium will be shipped as soon as the product arrives in Australia.
Have fun with the Christmas products. Don’t forget to look at all the AZZA Christmas products not only the new, a lovely collection can be created.
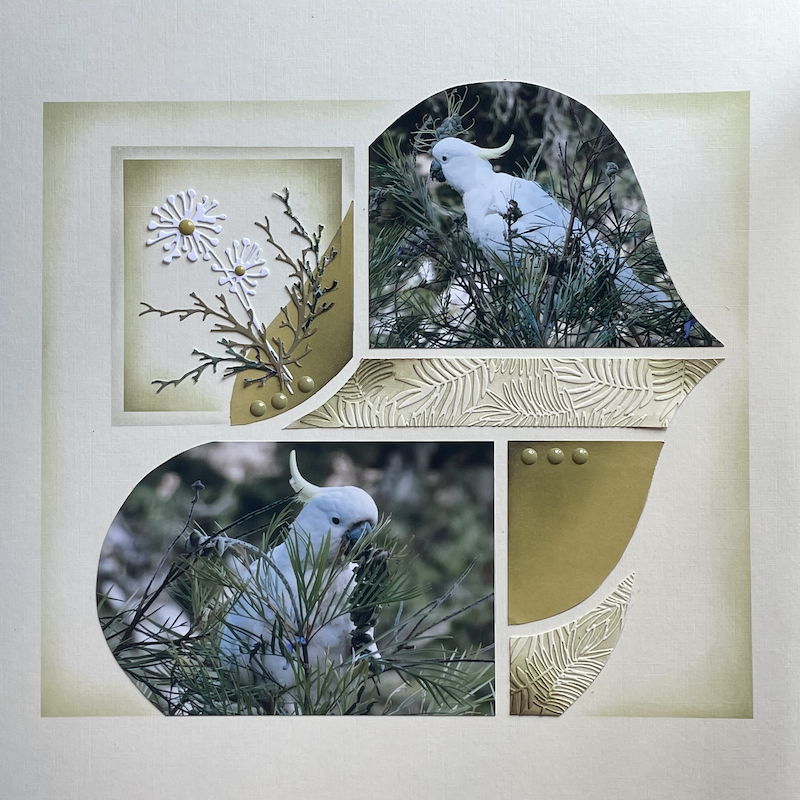
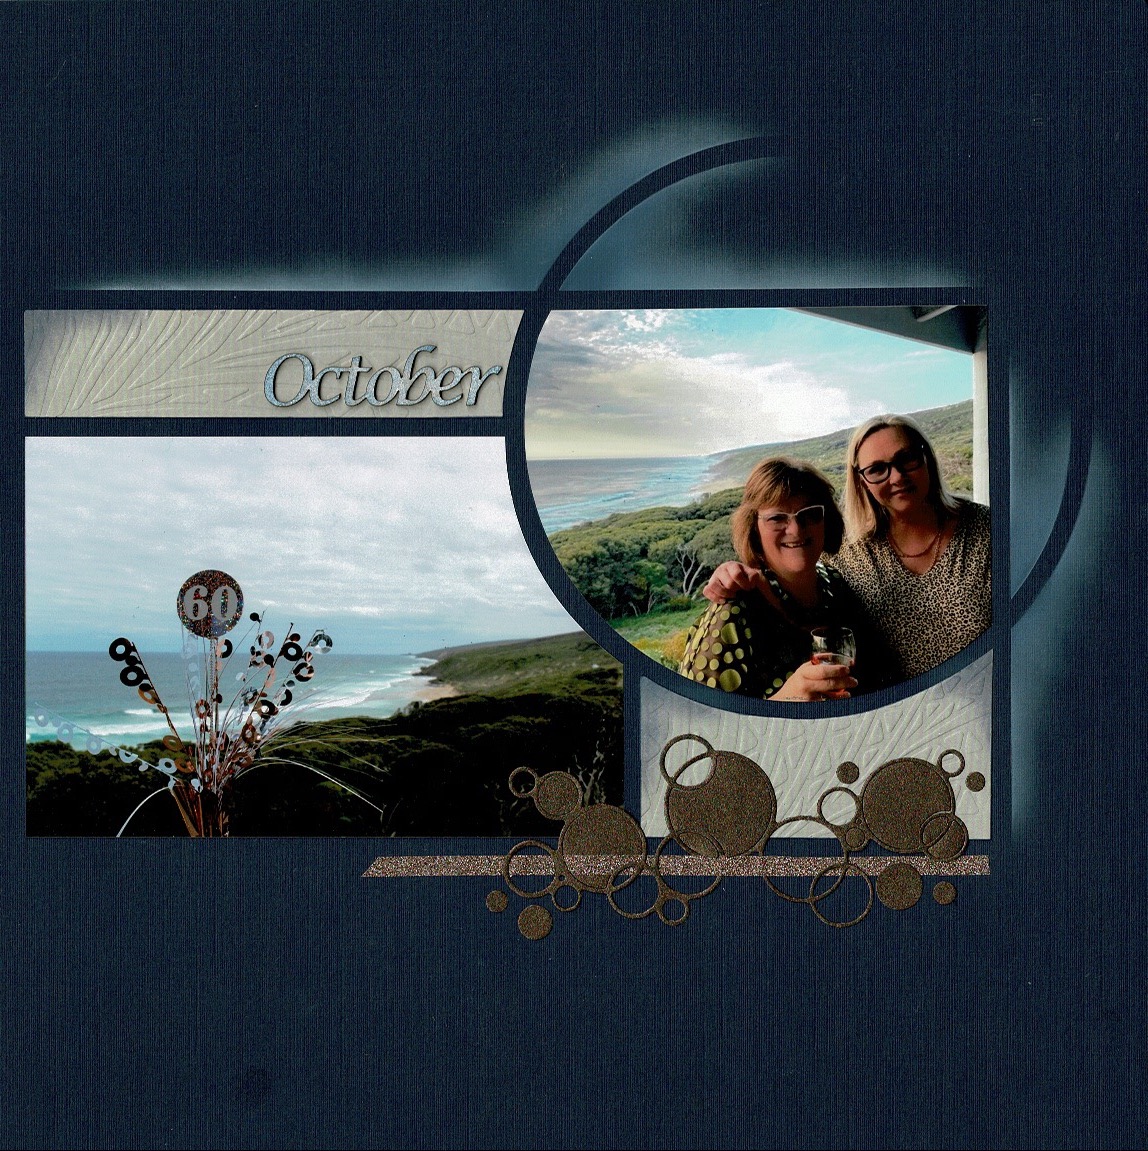
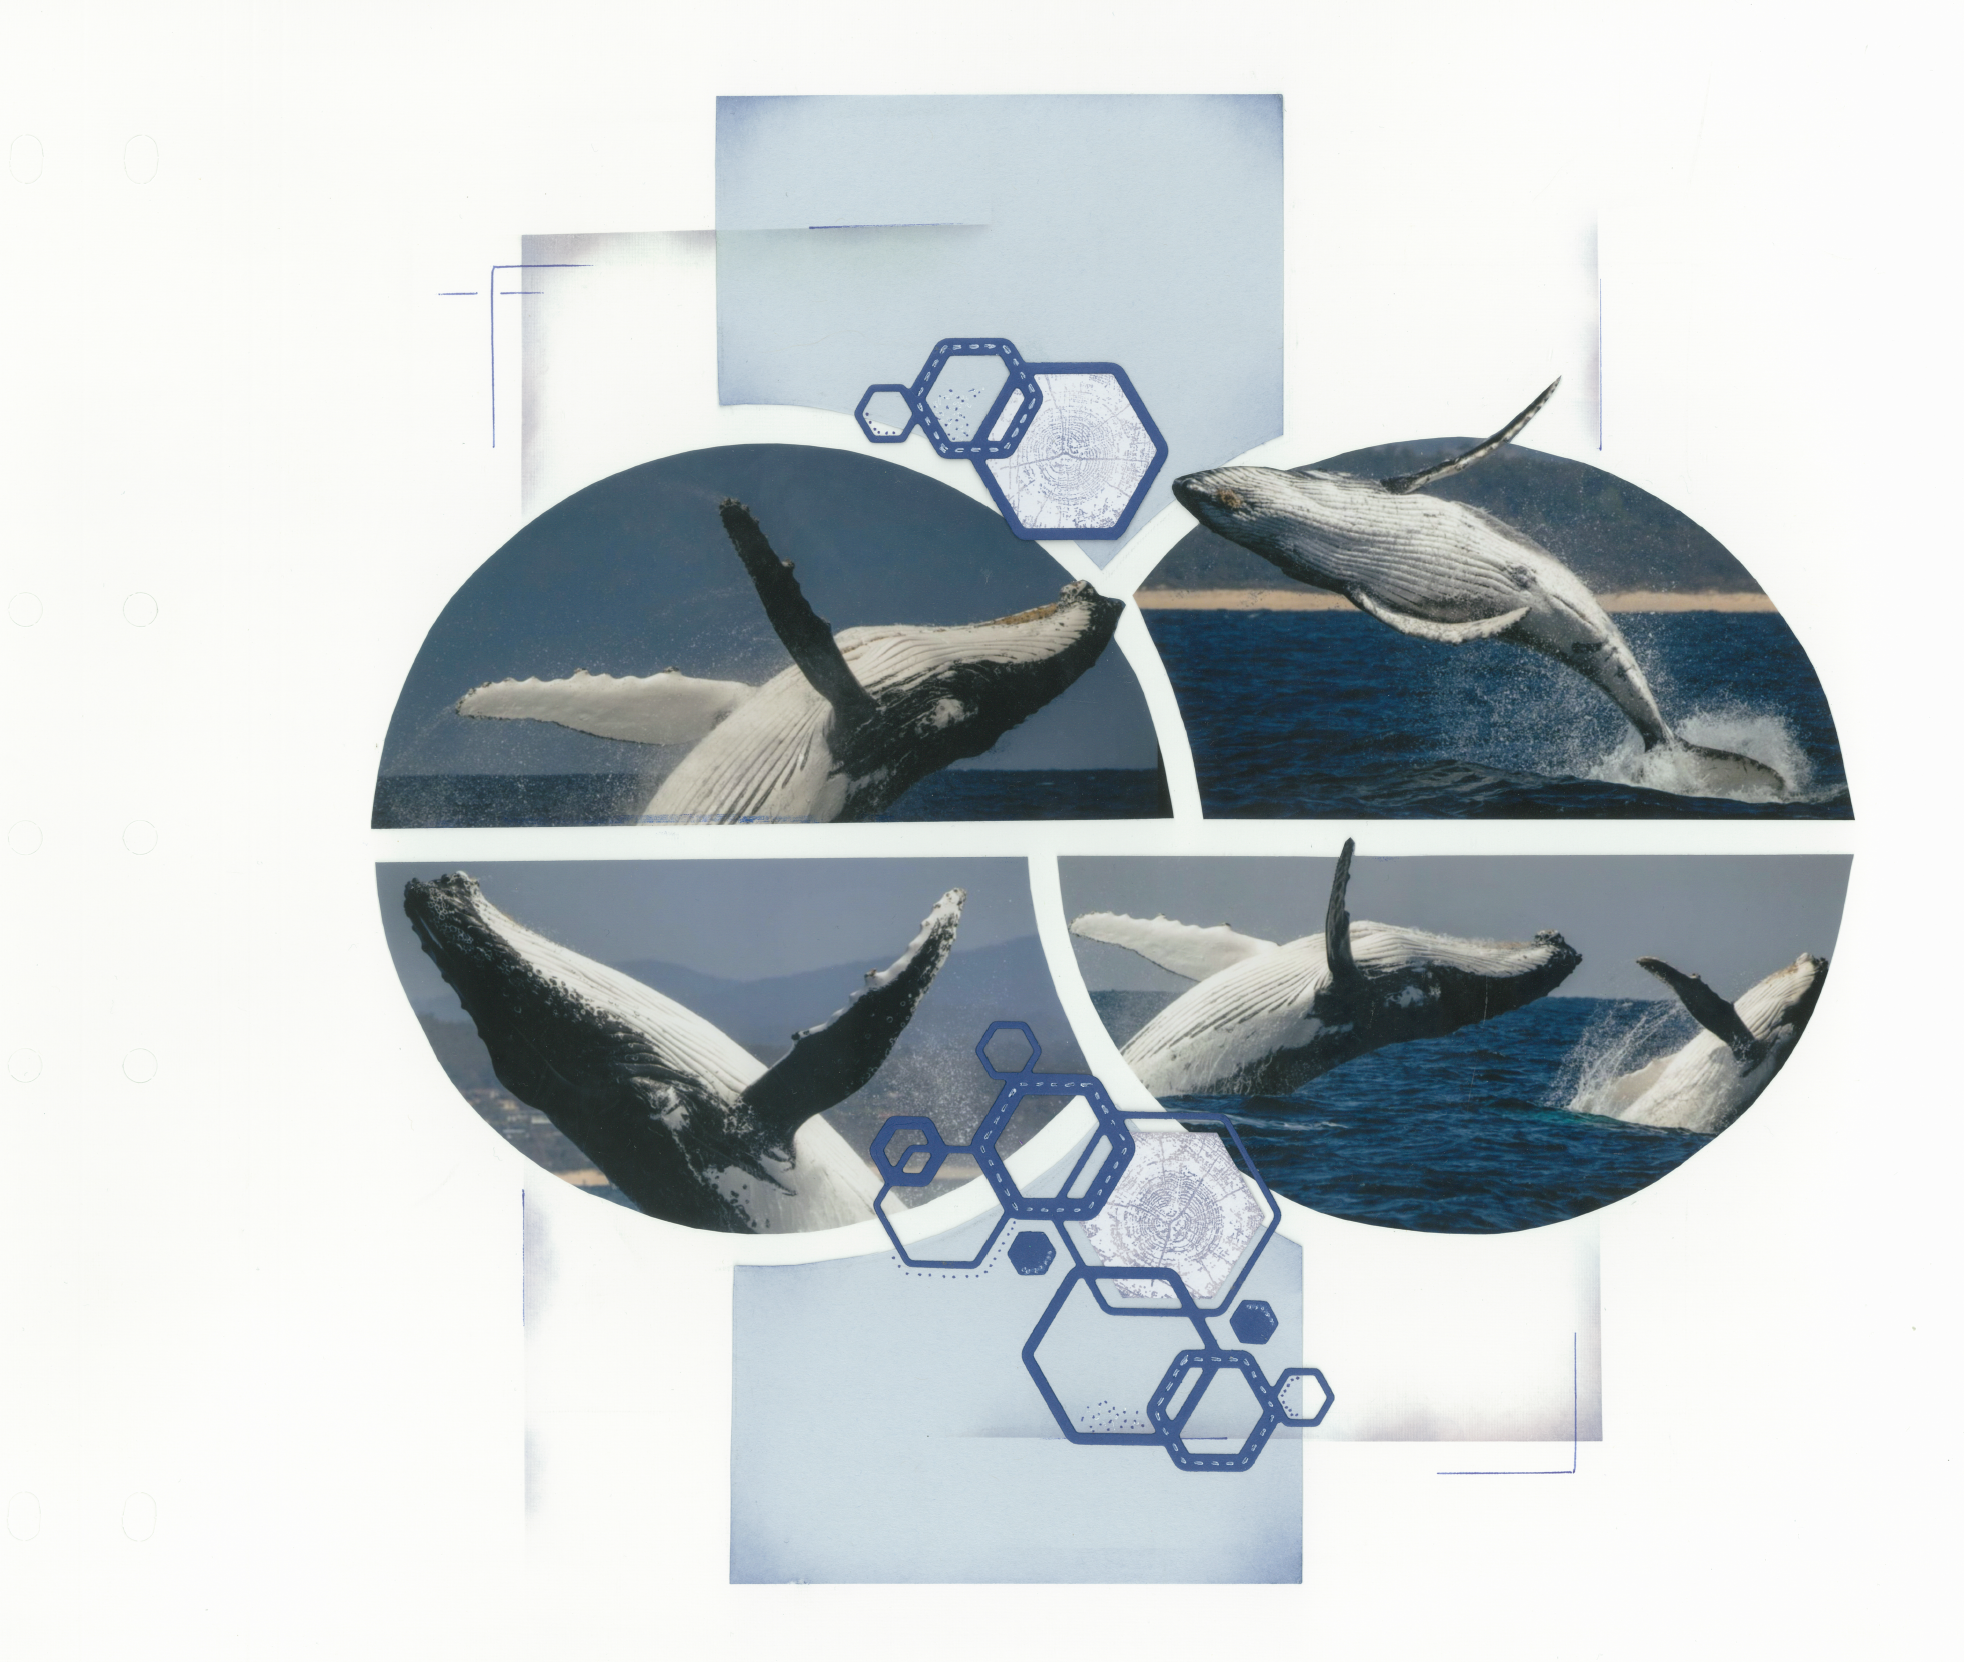
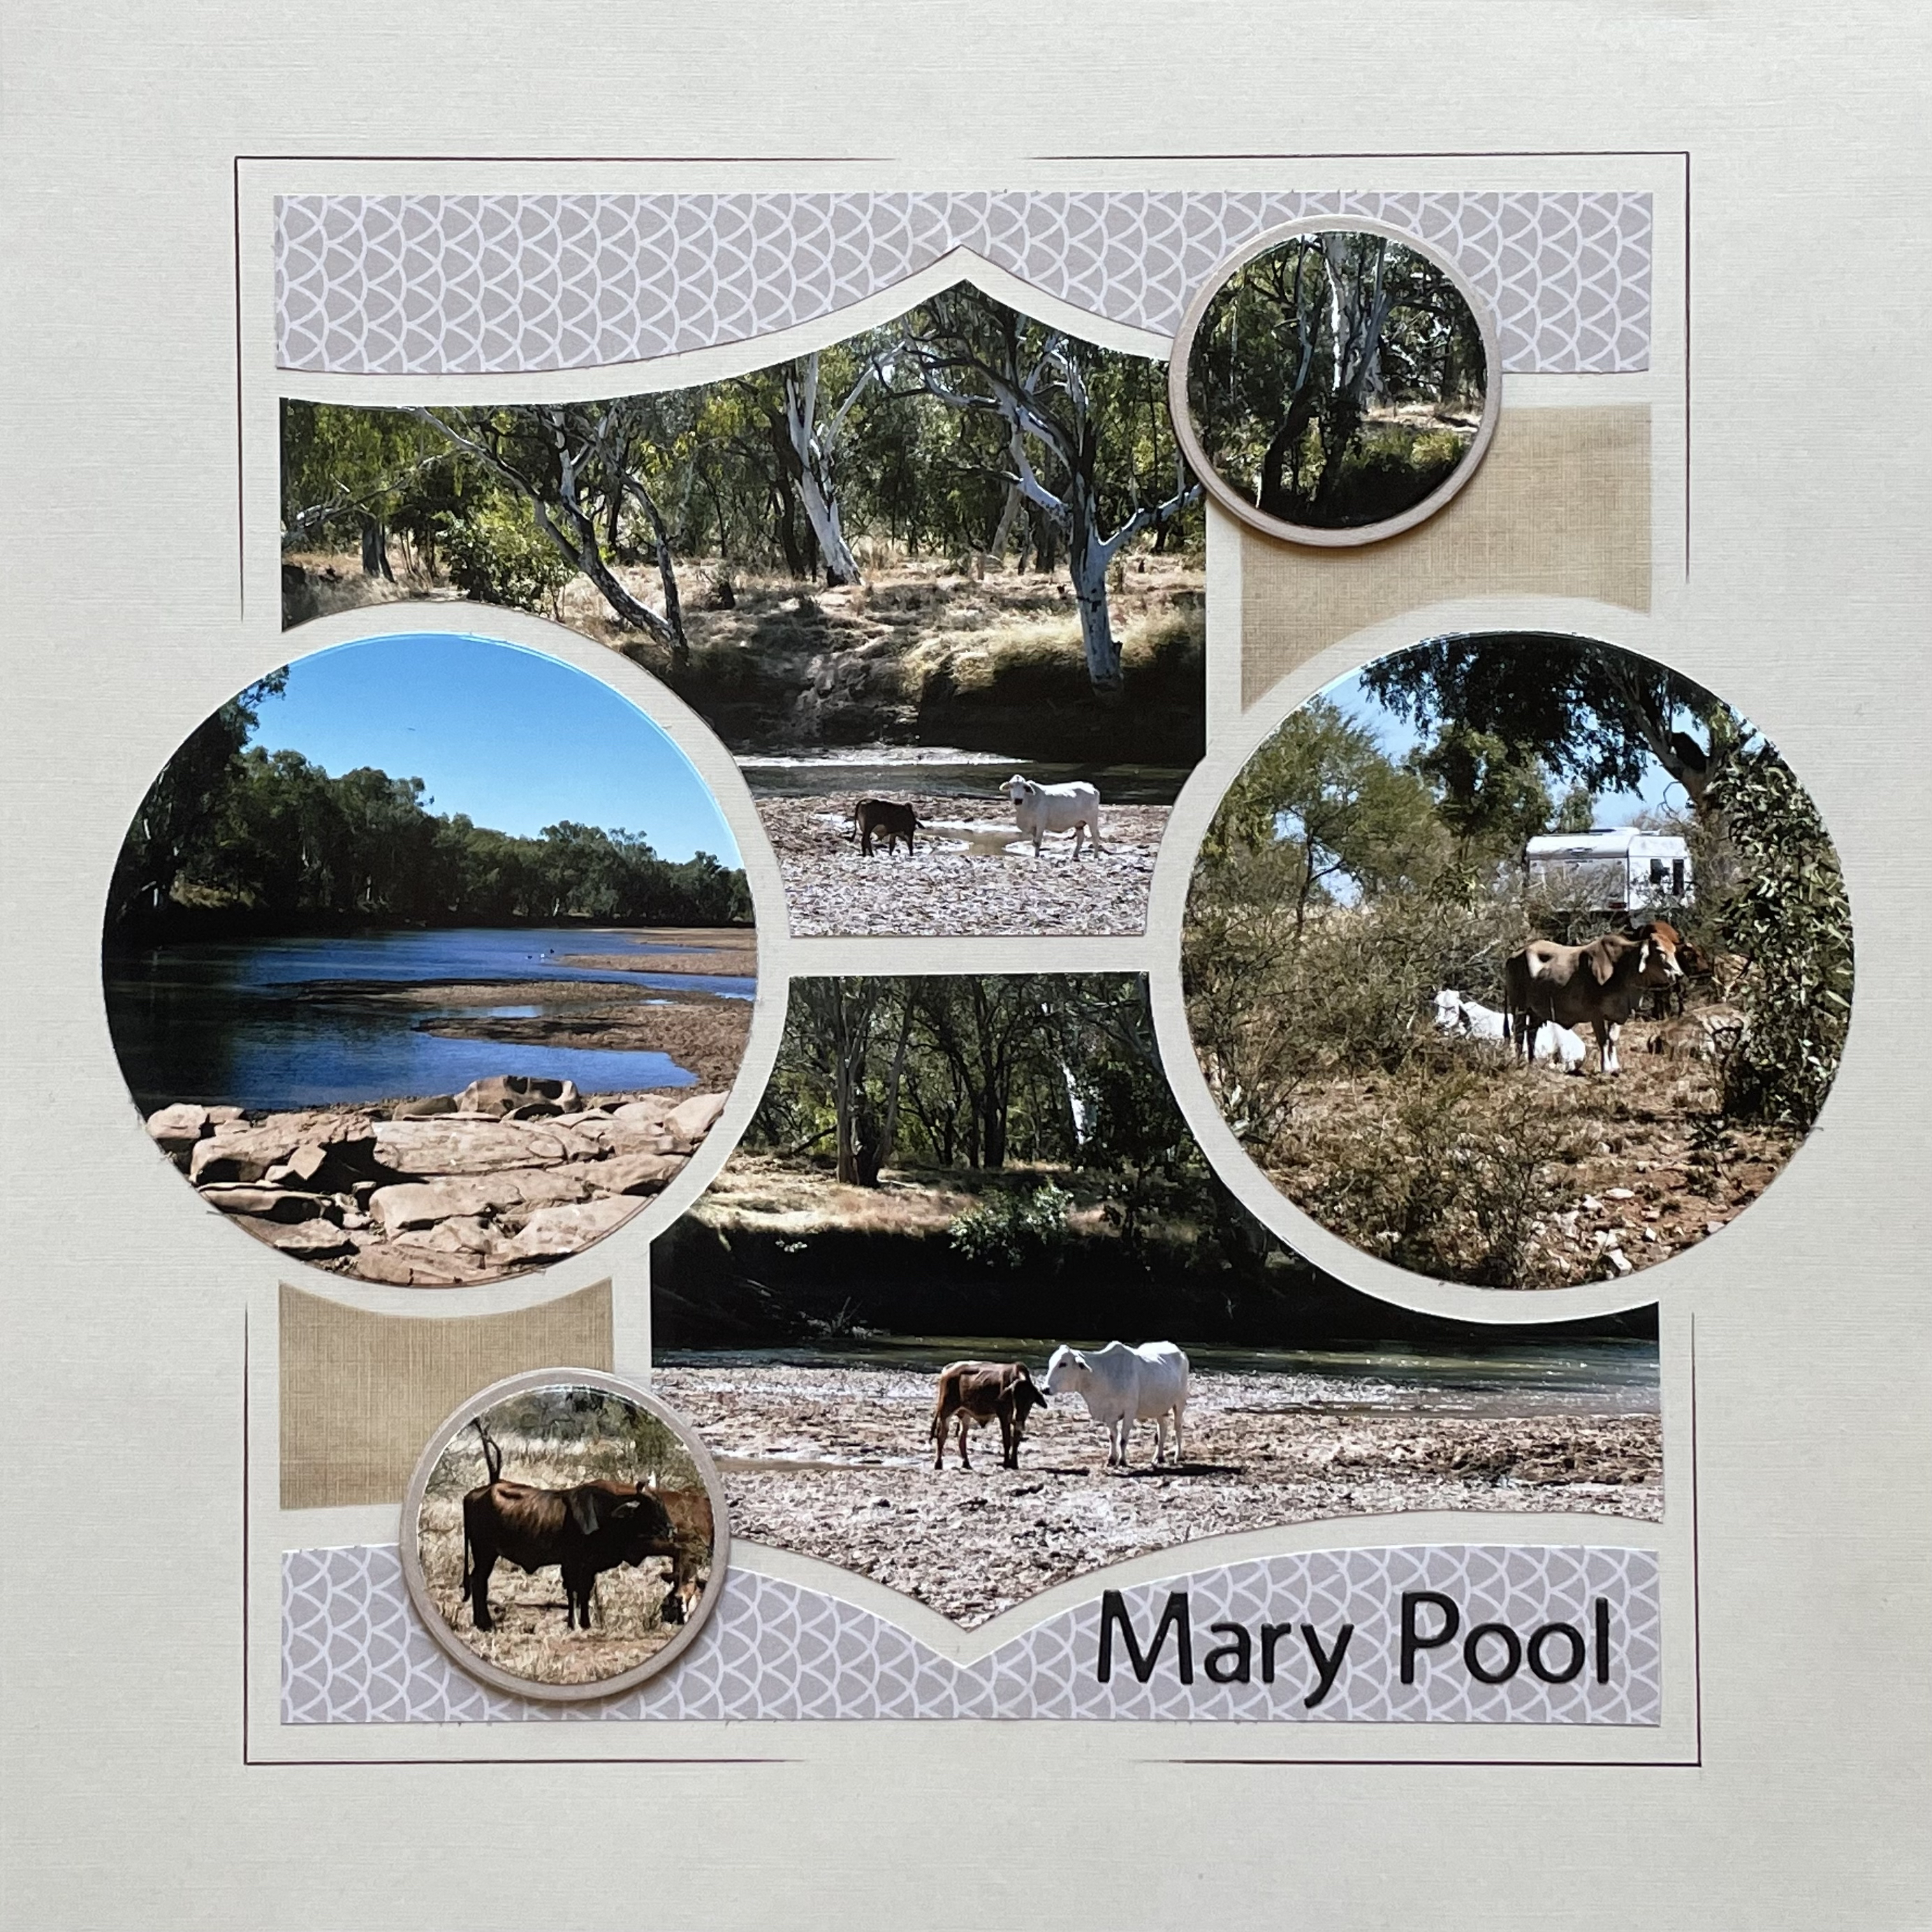
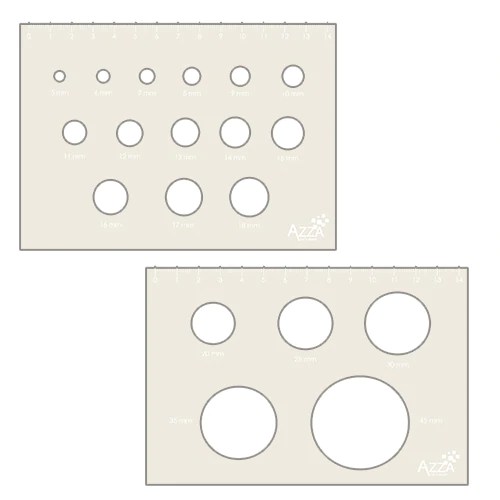
I am loving the new Springfield stencil and Nature’s Footprint decoration products. I love anything with circles, so I think this one will become one of my favourite. Having also received the circle cutter which suddenly makes cutting the larger circles so easy and they look beautiful on the page. On the page above I have used the AZZA chipboard silhouette ‘Months of the year’ – they are so easy to pop on the page to complete the decoration. We have three new Christmas sets ready to be released next month, in time for your Christmas pages. These chipboard words have been specially made for us in a size that suits the scrapping page and words that suit scrapbooking. Those signed up to Mail-Out will receive a set in December with ideas on how to use them on the page.
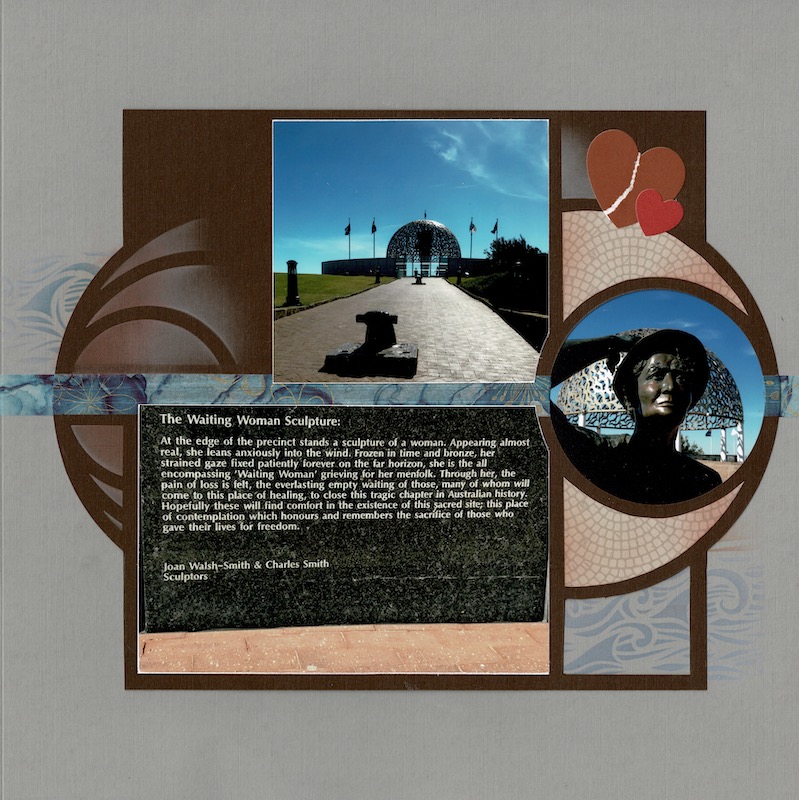
The next page I created was following a sample in the Focus book. If you lack inspiration the Decor or Focus books are fabulous and full of ideas. With the Springfield release the Focus book is only available via Special Order. If you are interested please contact your consultant or send an e-mail to enquiries@azzaworld.com.au.
I cut a page in a contrasting colour into the square shape of the stencil as seen below. I then creased this page through the centre, which in fact is the centre strip of the stencil. Note the centre crease is 5mm wide, so in fact you need to crease a line both top and bottom of the strip of stencil that runs through the middle of the stencil horizontally. I then cut a circle out of the page on the right-hand side following the stencil. The circle cutter makes this easy. Washi tape or Glitter tape is placed on the top to hide the creases, double sided tape is placed on the back between the creased to adhere it to the back page.
I then overlapped the two photos onto the Washi tape for the front page. I then worked on the back page ensuring the circular photo on the right would show through when I placed the chocolate cut-out page on top of it.
On the back page I ran a strip of Washi tape through the middle which would line up with the Washi tape on the chocolate page once it is adhered to the back page. I then placed the photo allowing for a 5mm gap above the fold of the front page.
I then worked on the lower half of the page, again allowing a 5mm gap between the fold and the photo. I completed the decoration, worked on the photos on the back of the chocolate page and then adhered the chocolate page to the back page with the double-sided tape strip in the middle. I lined up the Washi tape on both pages. It is an easy interactive page and adds a few more photos to the layout. I did also cut a small window in the chocolate page to show the decoration behind when both open and closed. The decorations were created with the All Aboard decoration stencil and the AZZA Concentric heart die set.
Now for some beautiful samples pages from the Australian consultants:
Layout by Sue Talbot in NSW. Sue has used the Classic essential paper and the new Nature’s Footprint dies with a little AZZA cord.
Deb Byrne in Tasmania created the page below with an enlargement of her adorable new puppy Murphy. Deb has used the ‘Paws’ paper which is still available in the AZZA online shop.
Below is a page created by Jill Attrill. Jill has used the lovely Nature’s Footprint patterned paper but toned it in with her page with inks.
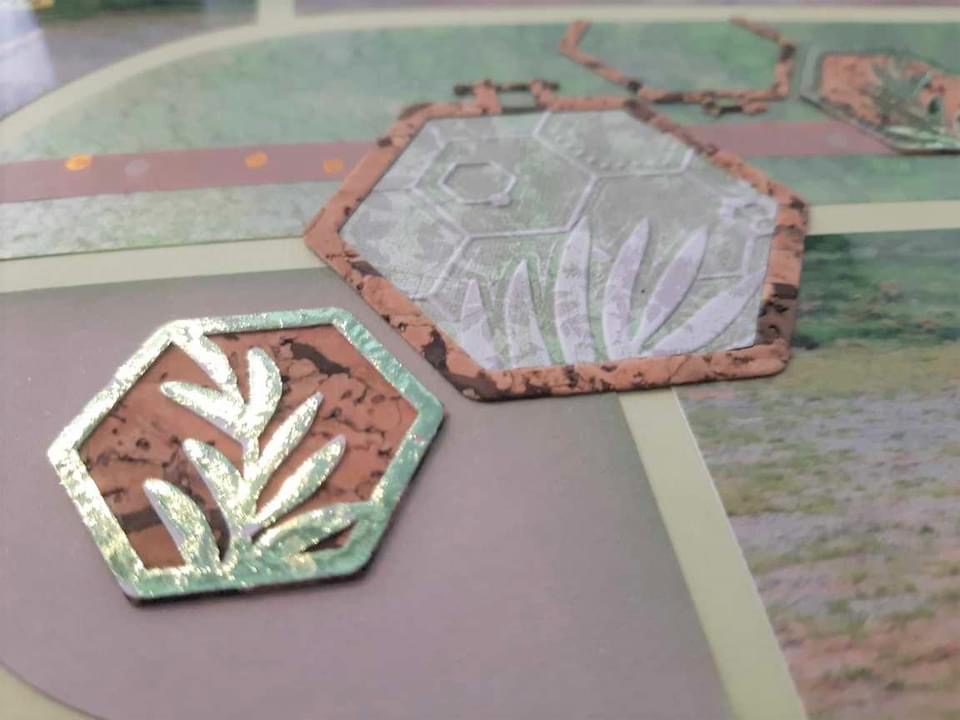
Pauline Cartwright in ACT created the page below. Pauline has used the large stamp set to stamp the lovely wood images to use with her cutting dies of the same shape.
As you can see, the layouts created are quite different on the page but all just as beautiful. The great thing with the Nature’s Footprint decoration products is that they can be used with almost any theme on the page.
The grey shades of the new Steel colour are perfect for Heritage pages. I have used the Nature’s Footprint patterned paper on this page together with the texture stencil on the plain double-sided Steel paper. Using the double-sided paper and the patterned paper is perfect as you know the tones will be the same. I used both the Steel ink and Dolphin for my inking on the page.
Last weekend AZZA Australia was hard at work during a training weekend. Consultants joined together online to learn new techniques and ideas to share with their clients. Hopefully next year we will once again be able to gather together at a venue and not online.
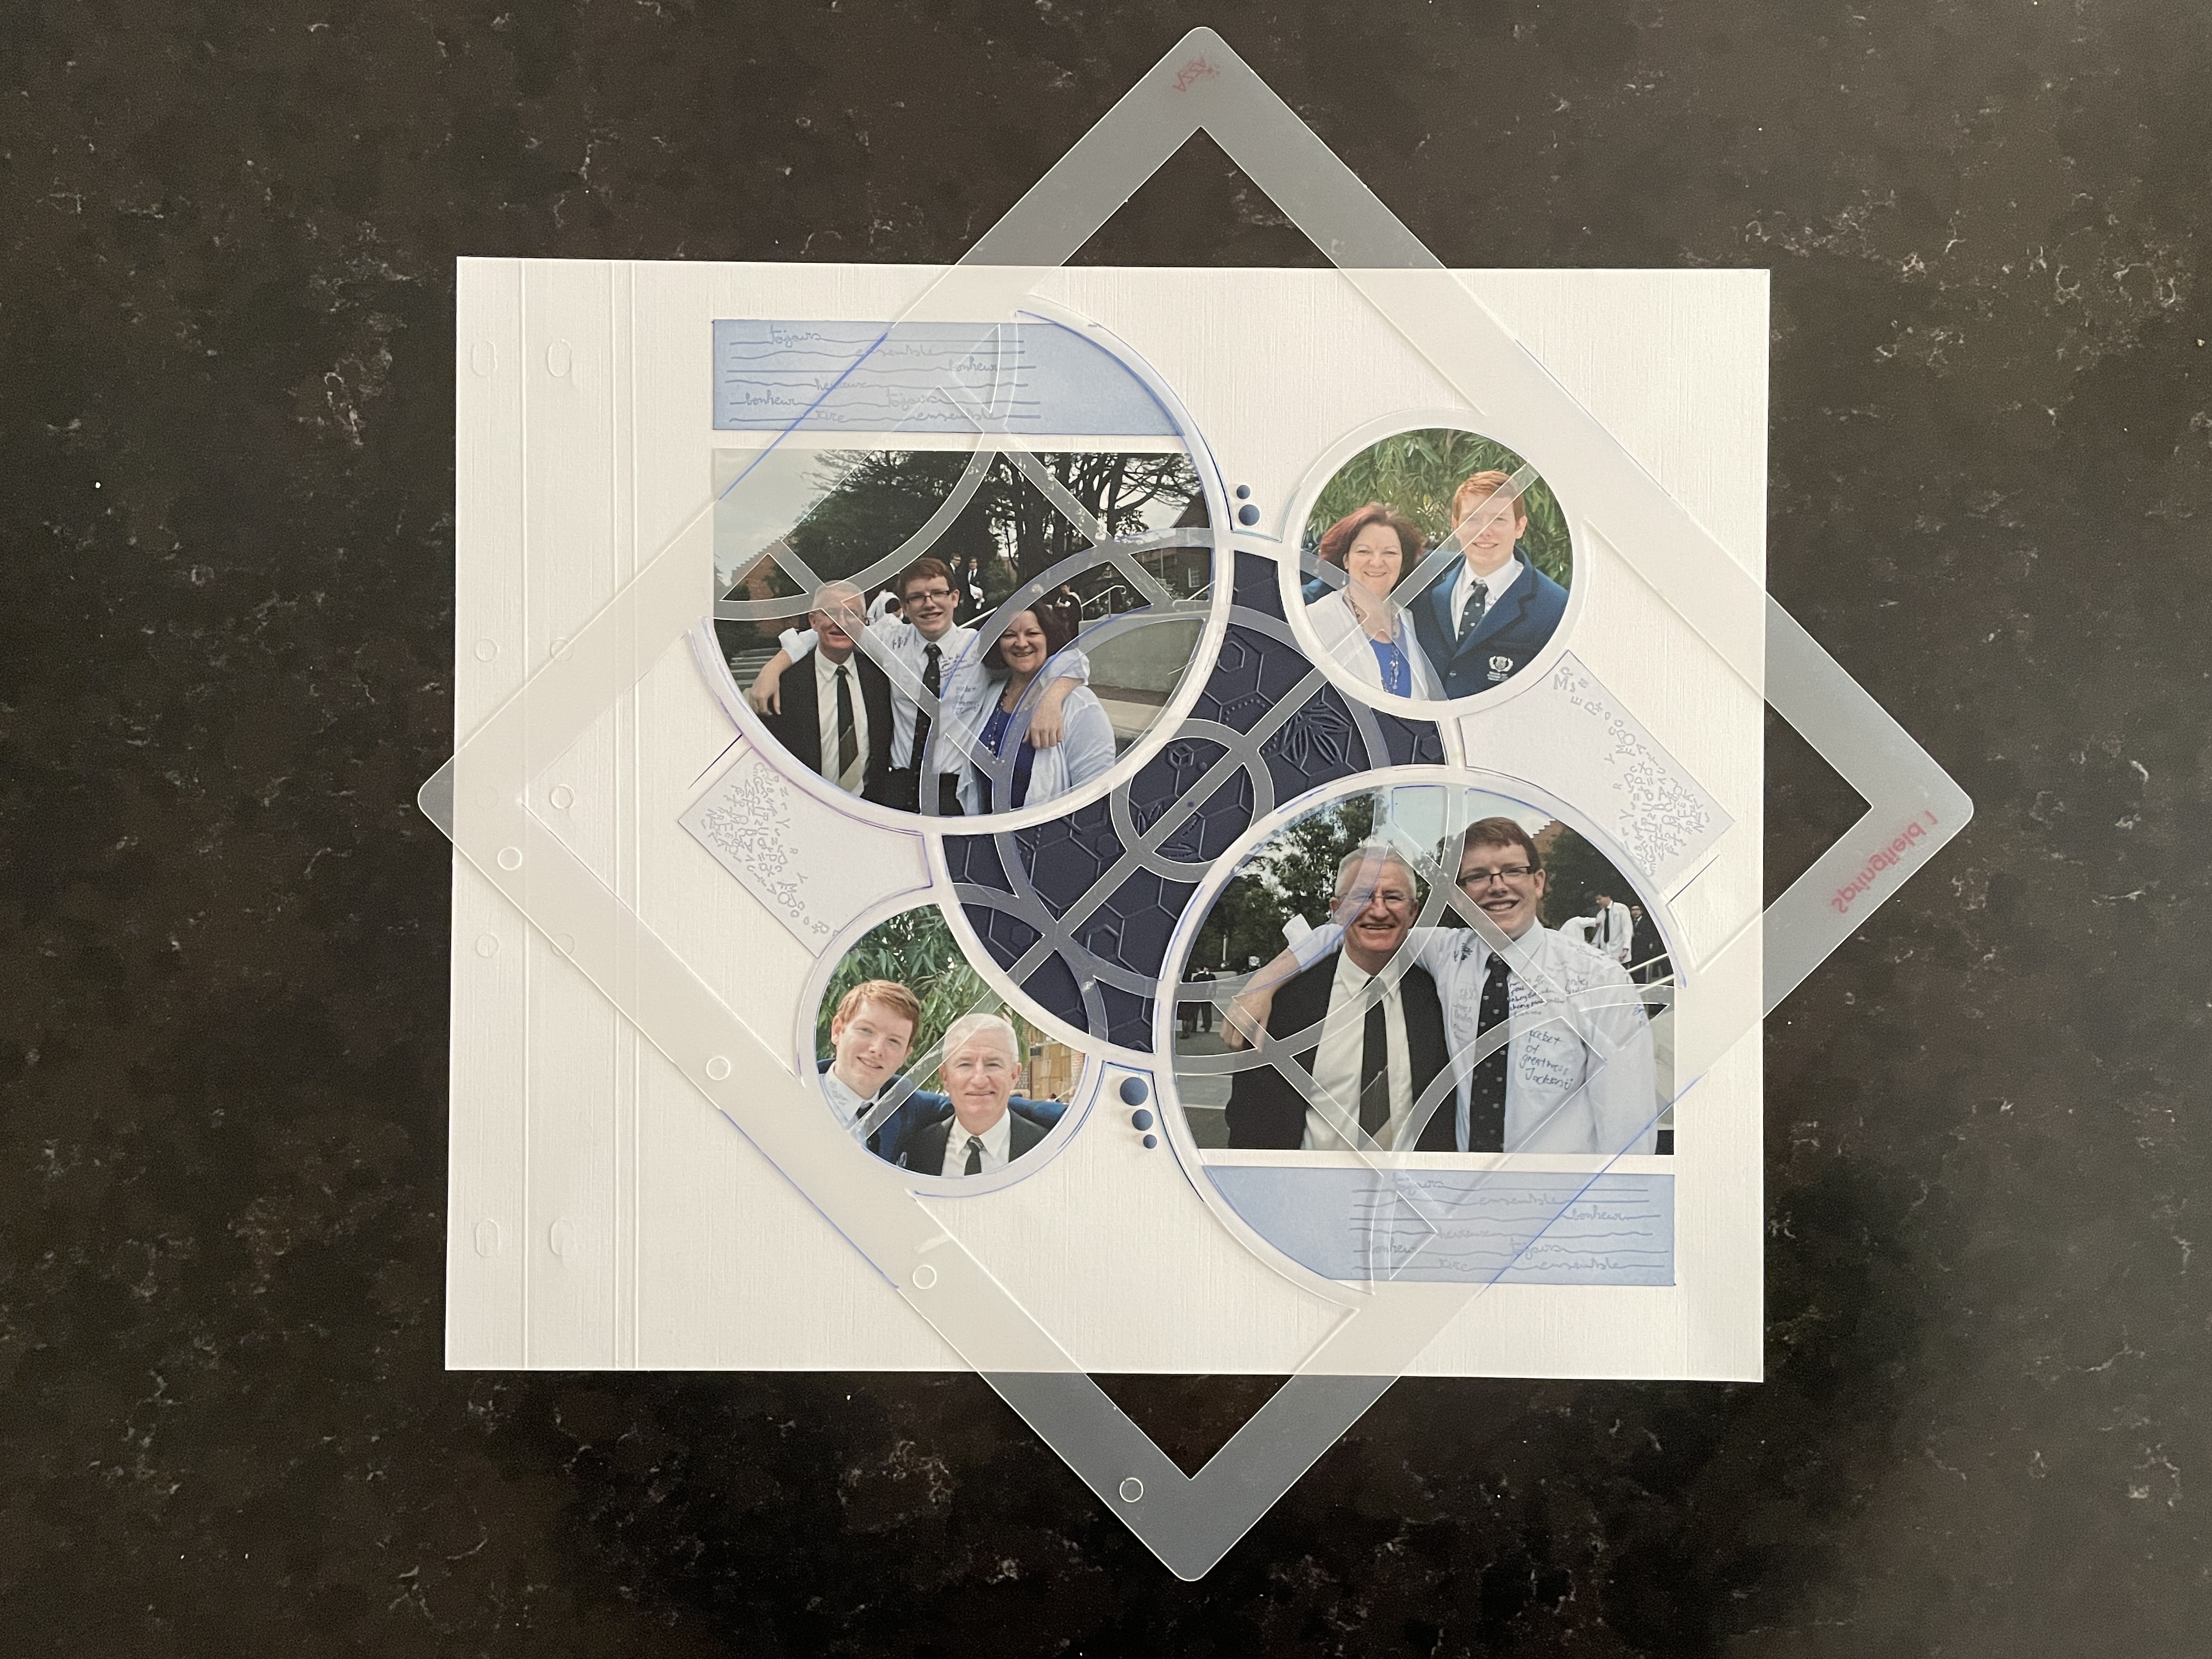
Consultants worked on pages using the stencil at an angle on the page. This takes a little bit of extra work, but as long as you have a Reference mat and keep everything straight on the page, the result is worth it.
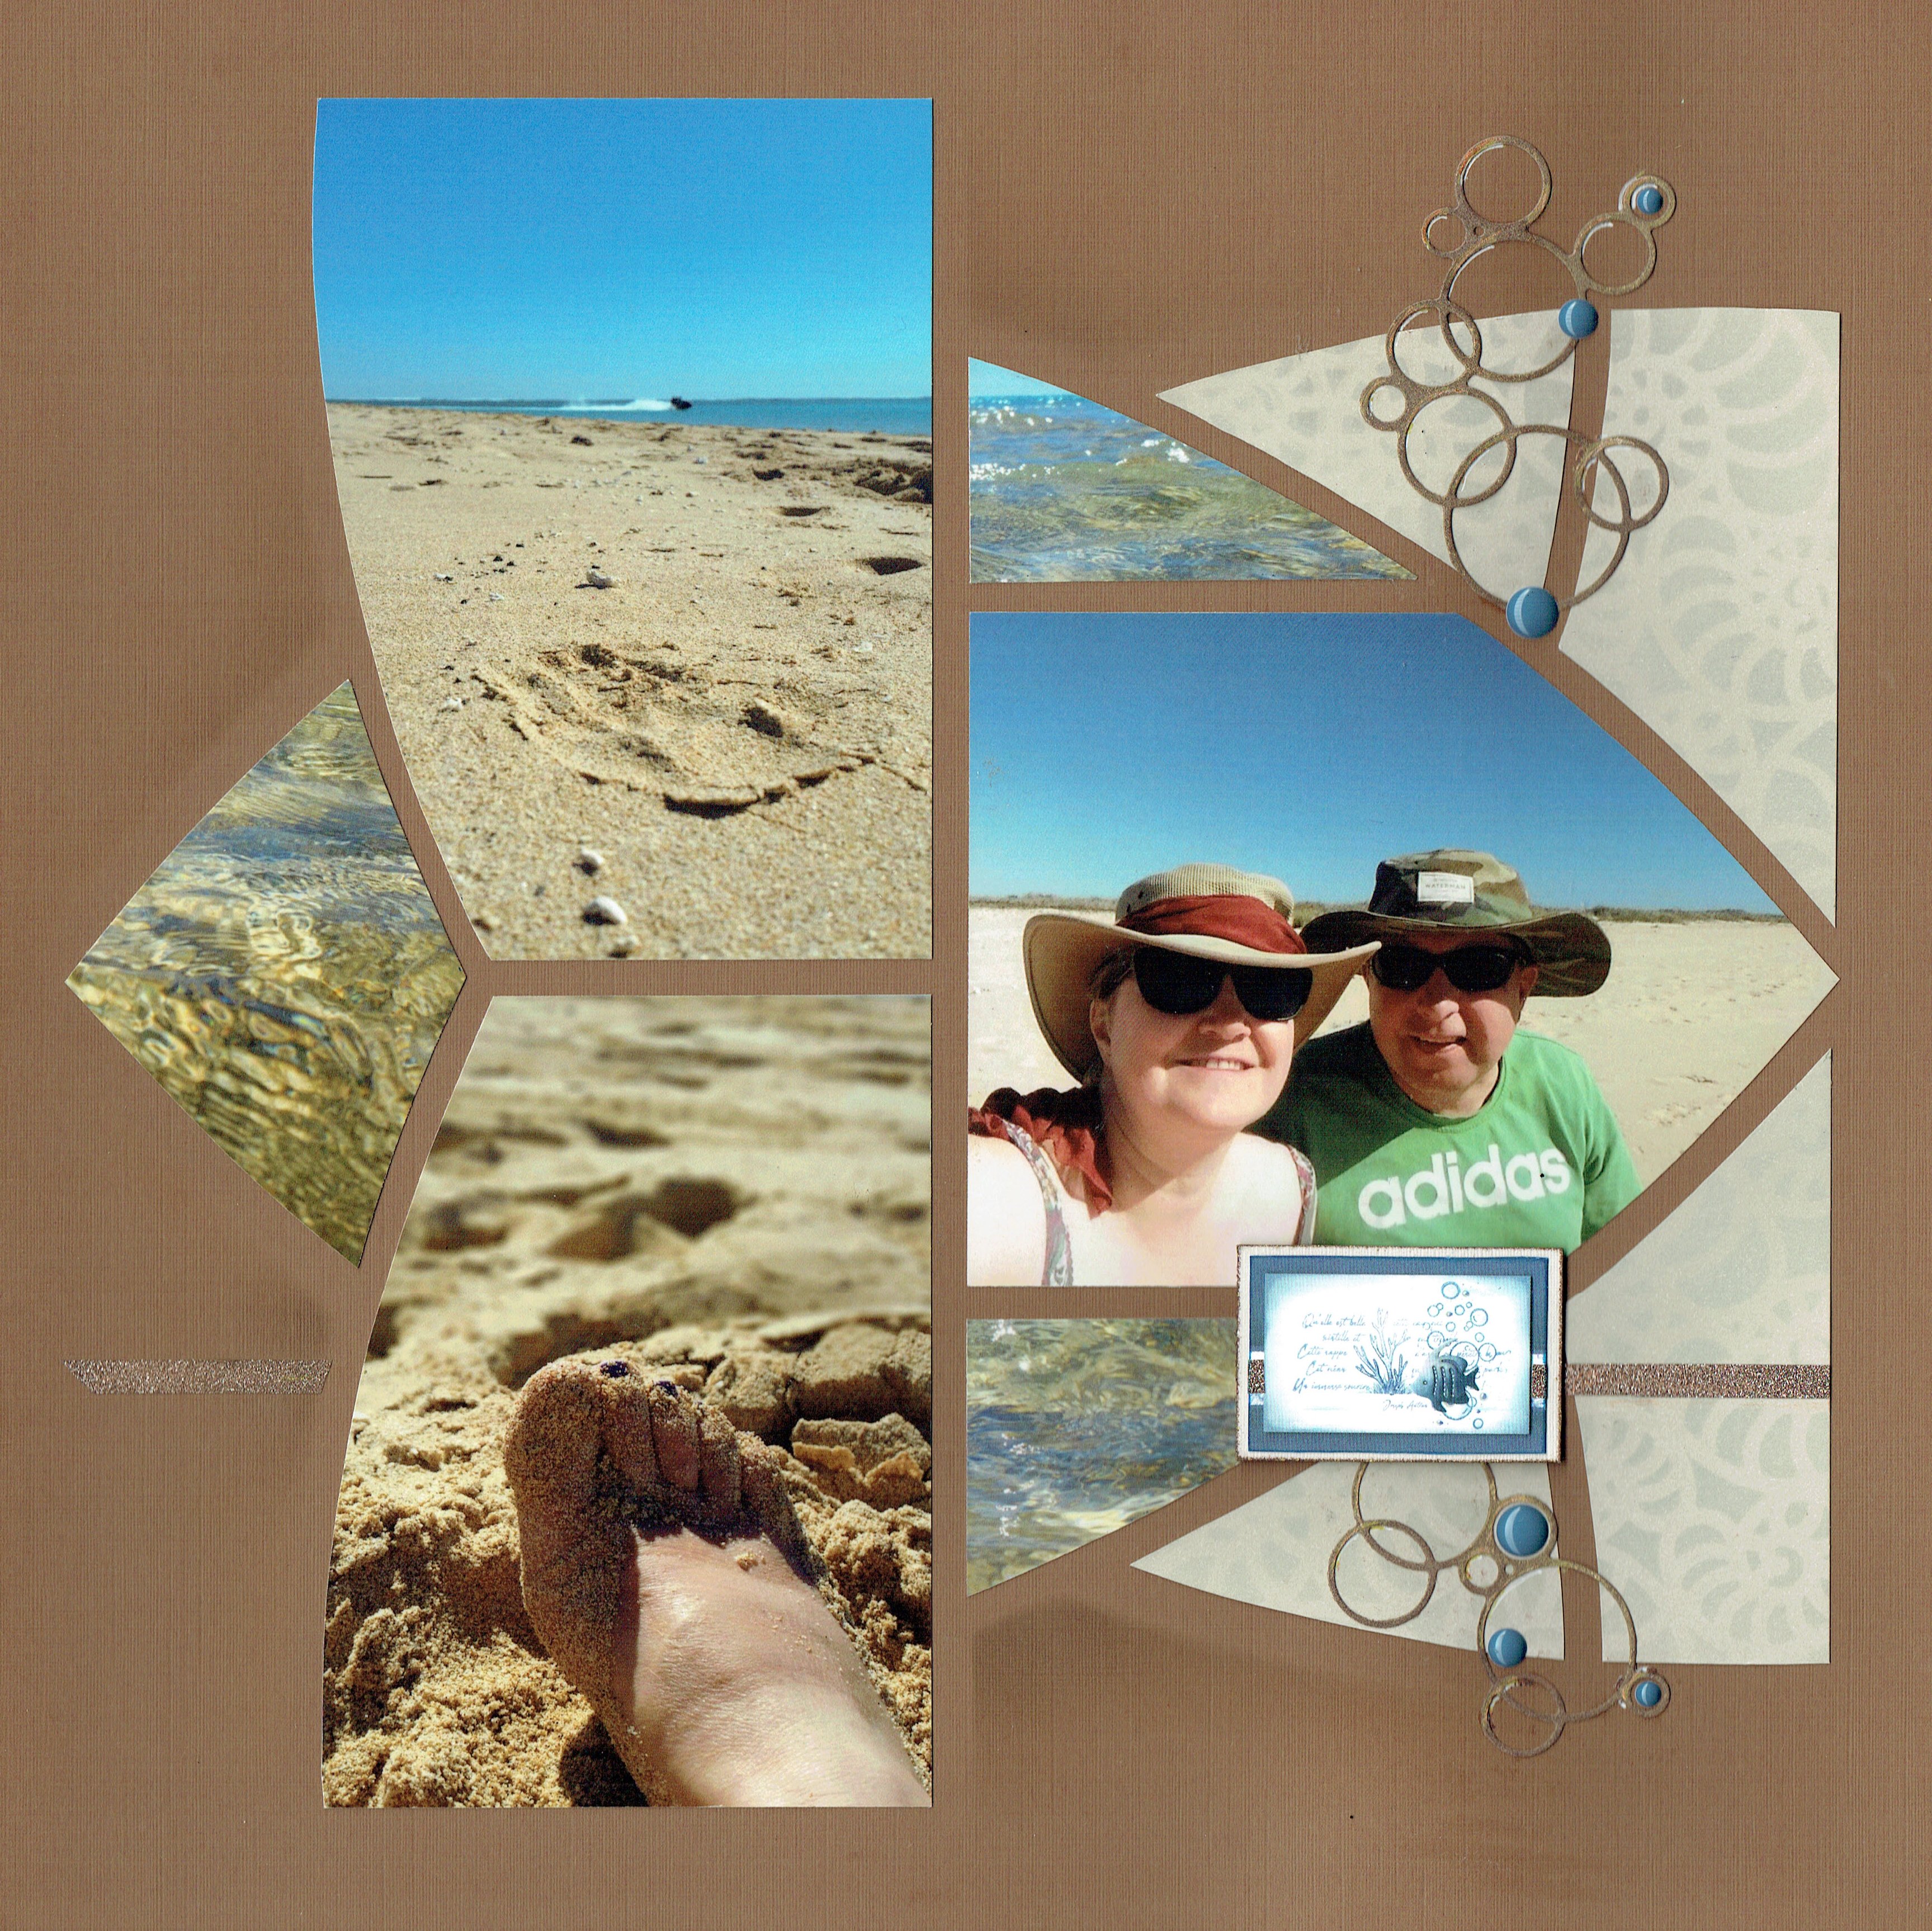
Below is the page I created using the Springfield stencil at an angle on the page:
I completed the page with the Nature’s Footprint embossing folder and a lovely ‘Just one word’ stamp that is in the online shop. This little stamp set can be used on so many pages, I use it often.
Just when you think you have enough embossing folders you will realise you NEED this one. It is so beautiful on the page or a card.
Herewith a few more ideas for a page using the stencil at an angle, this layout is Decor book shown previously.
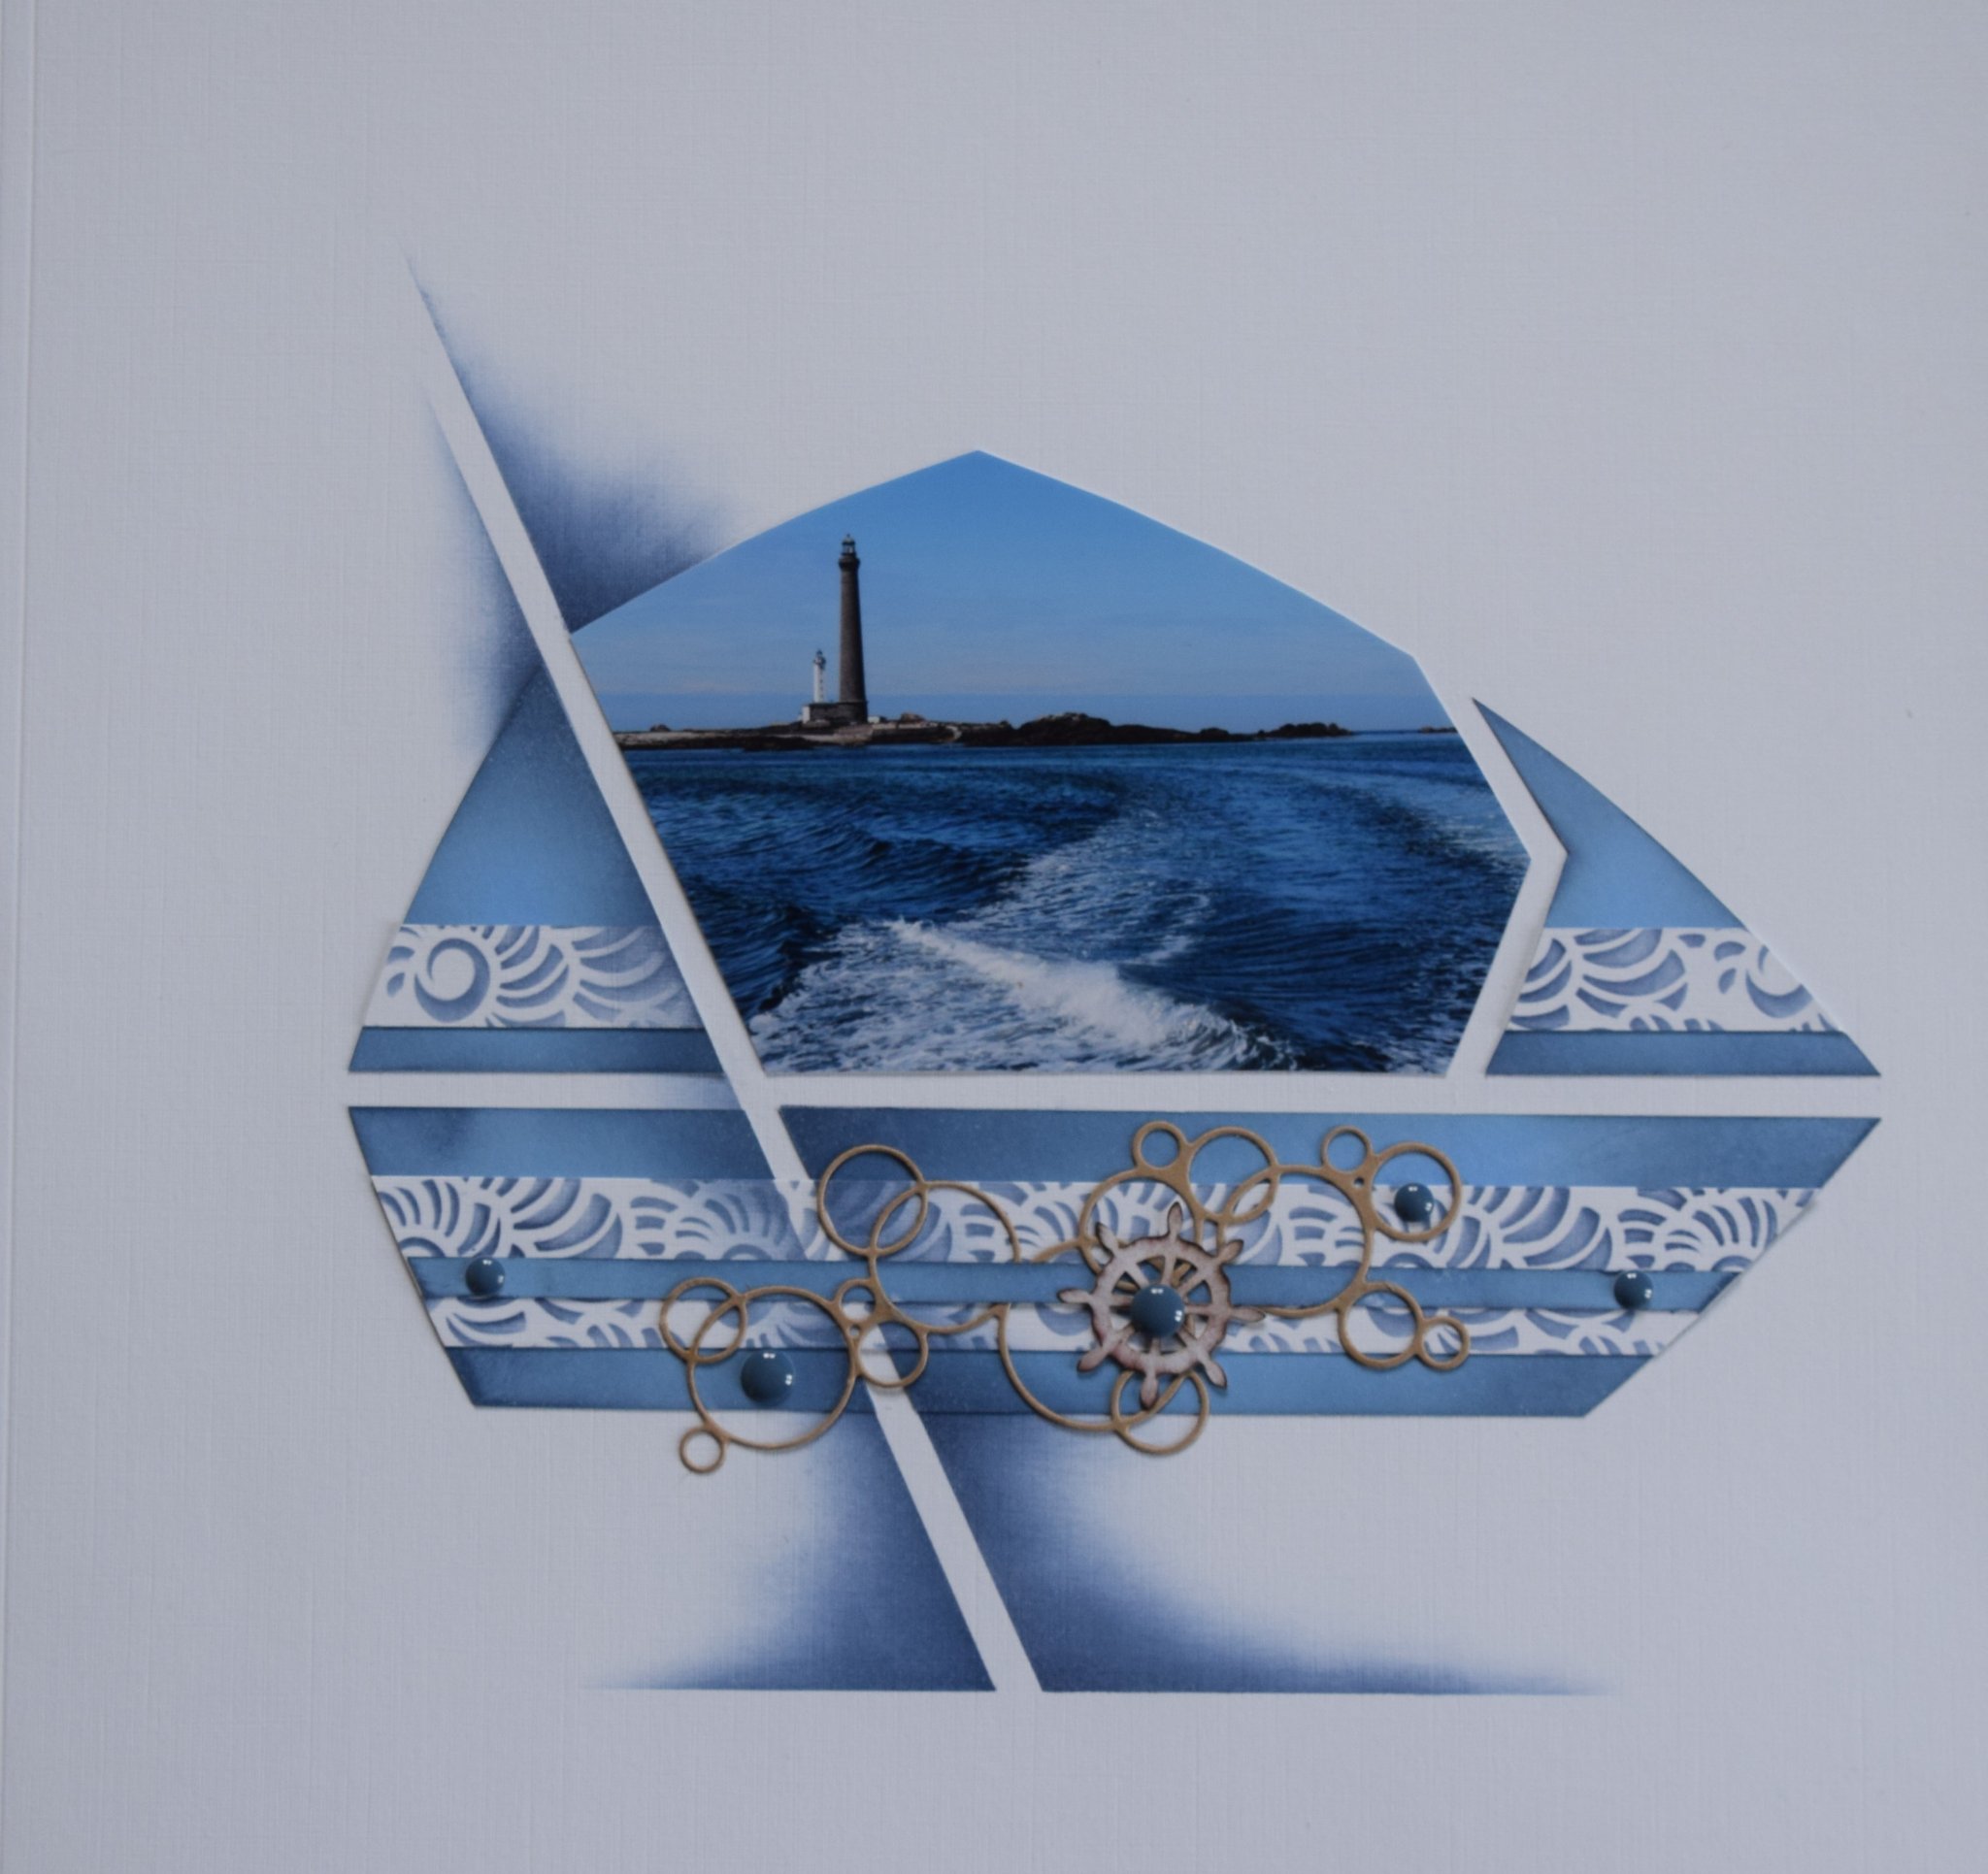
The layout below is by Sue Talbot, Sue has used the Daydream embossing folder, All Aboard patterned papers and the lovely ‘bubble’ die.
The lovely page above with a single photo was created by Marie-Andree Jacquemin in Europe.
A beautiful layout by Christine Houbrechts inspired Anita Day to present a lesson on One page – Three decorations. Christine has used the ‘Just one Word’ stamp set highlighted previously.
Anita presented the same page but with three different ideas for decorating.
Herewith her samples: On the first page Anita has inked paper to match the photos and then stamped the two small pieces of paper to complete the circles. If you purchased the Materials & Texture large stamp set, this stamp matches this release perfectly. She has used plain vellum behind one of the shapes which have been cut with the new die sets and trimmed the end of her title strip to match the shapes on the page.
In this layout, Anita has used the Nature’s Footprint embossing folder to complete the circles and the texture stencil either side of the photos. She has completed her decorations with the cutting dies. This set of cutting dies is out of stock at the moment, they have been so popular they have already sold out. Hopefully, it won’t be too long before we can order them in again.
Natalie Lestrat in Europe shows how lovely the decoration products are on a page created with the AZZA Botanicals Scrap kit and the Brisbane stencil.
That should be enough inspiration to get you through the weekend.
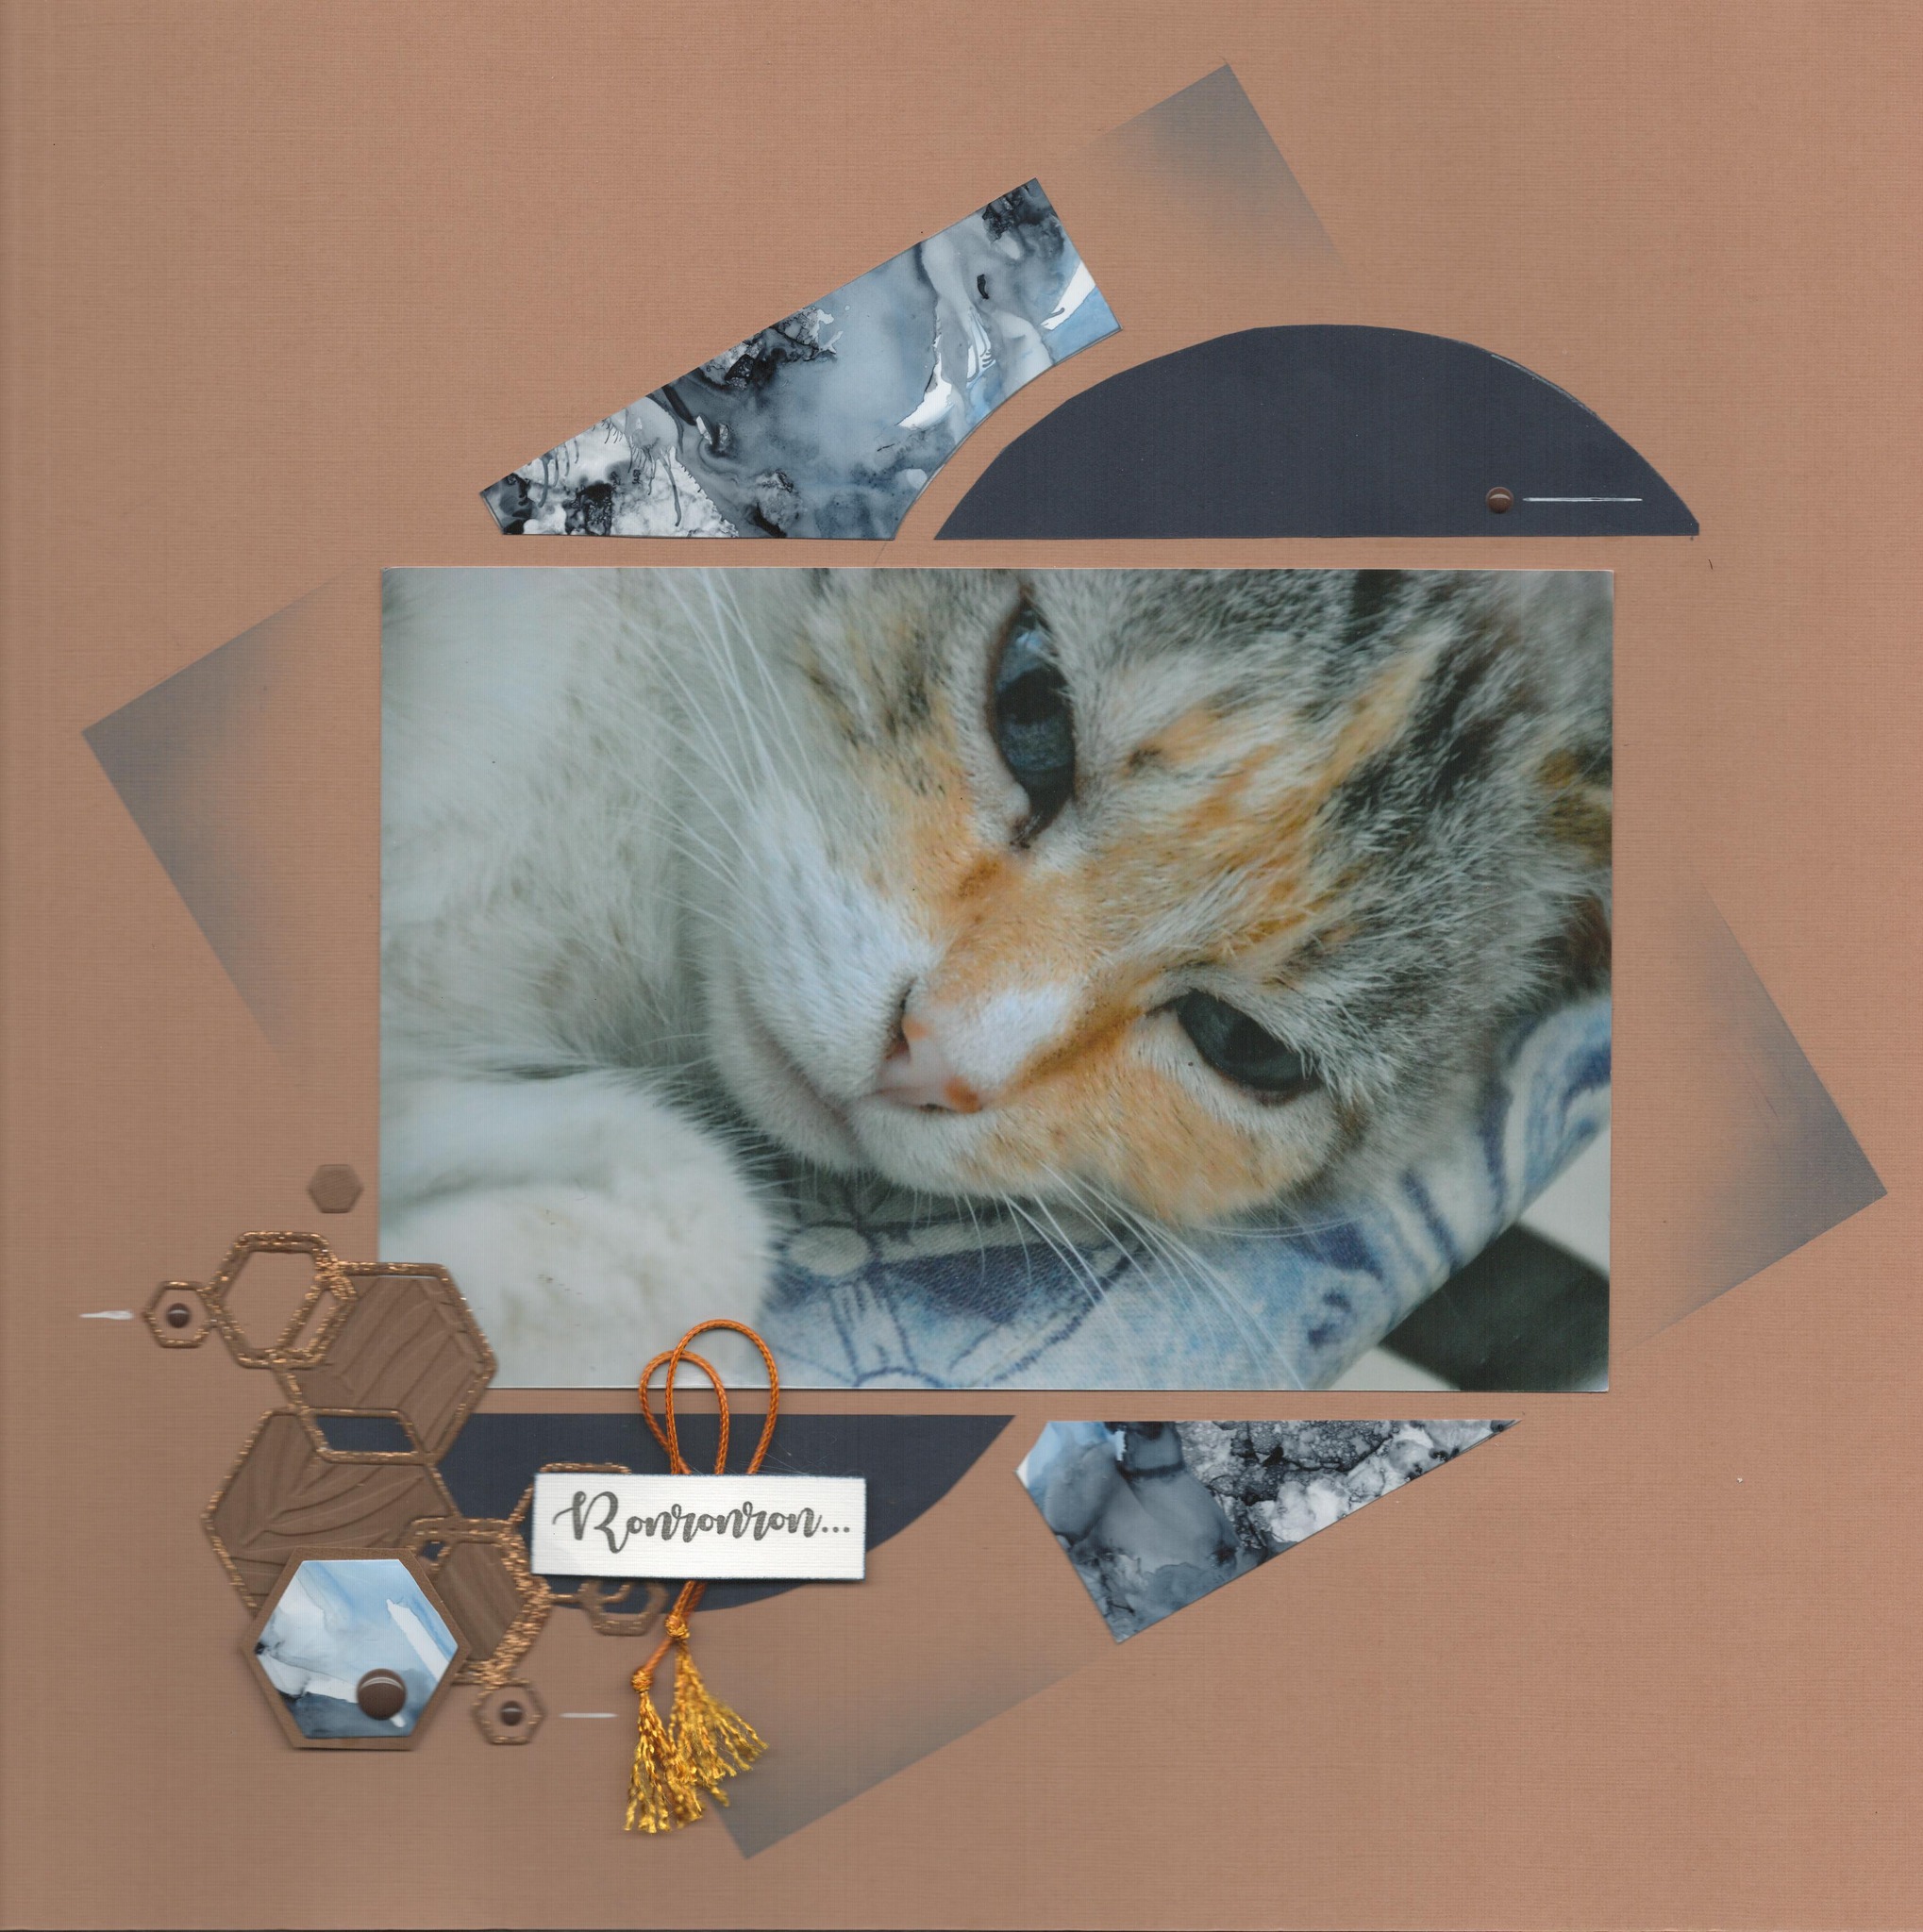
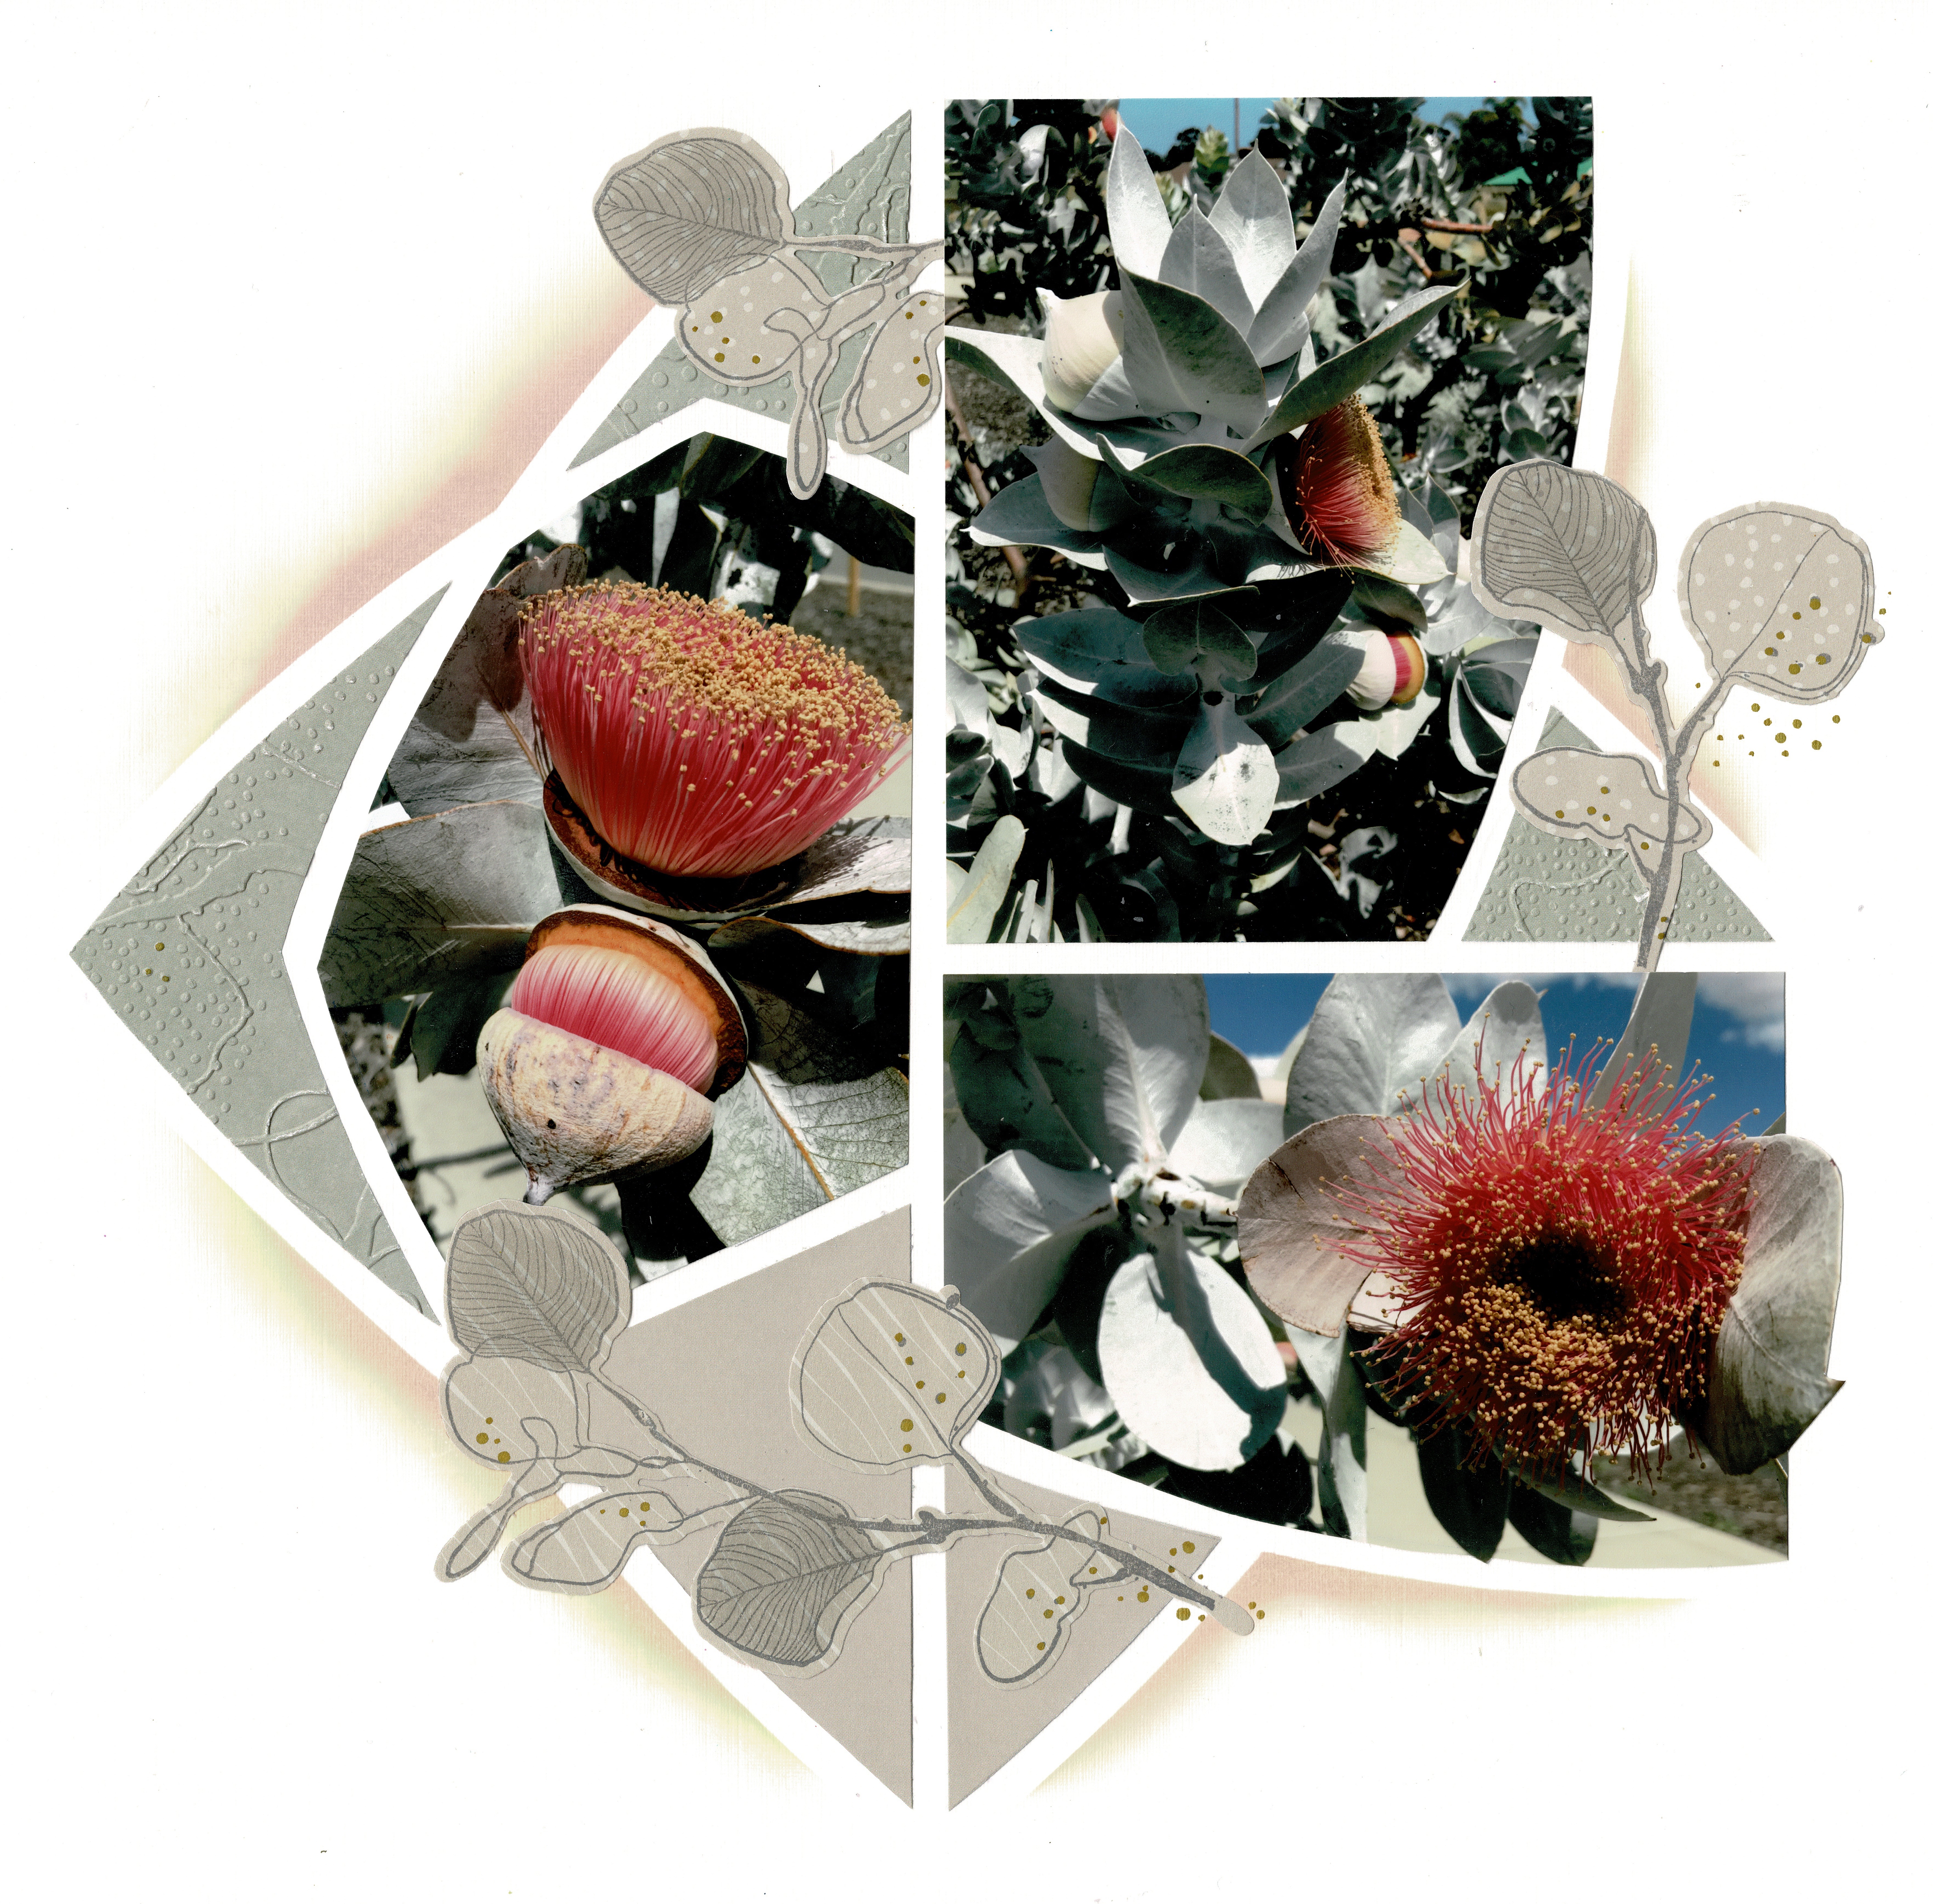
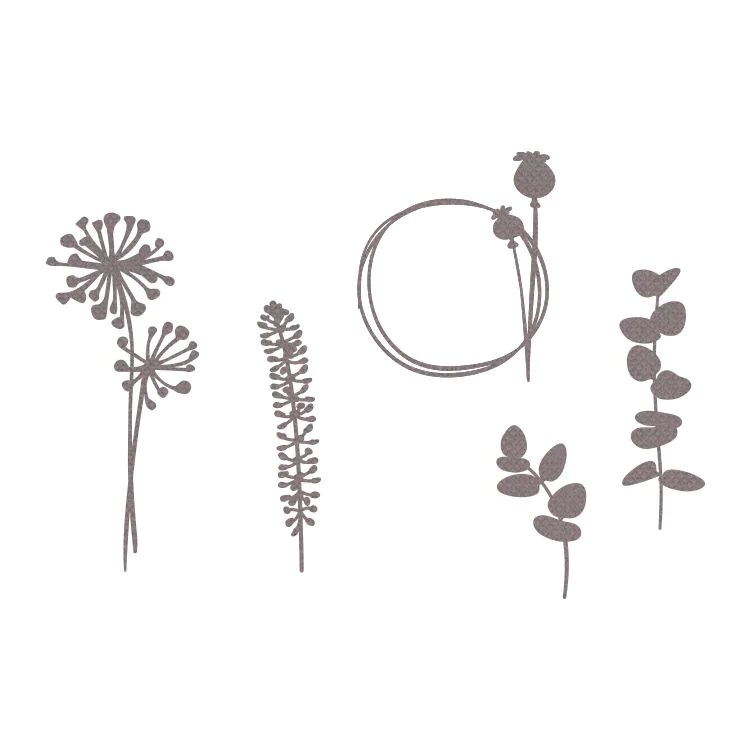
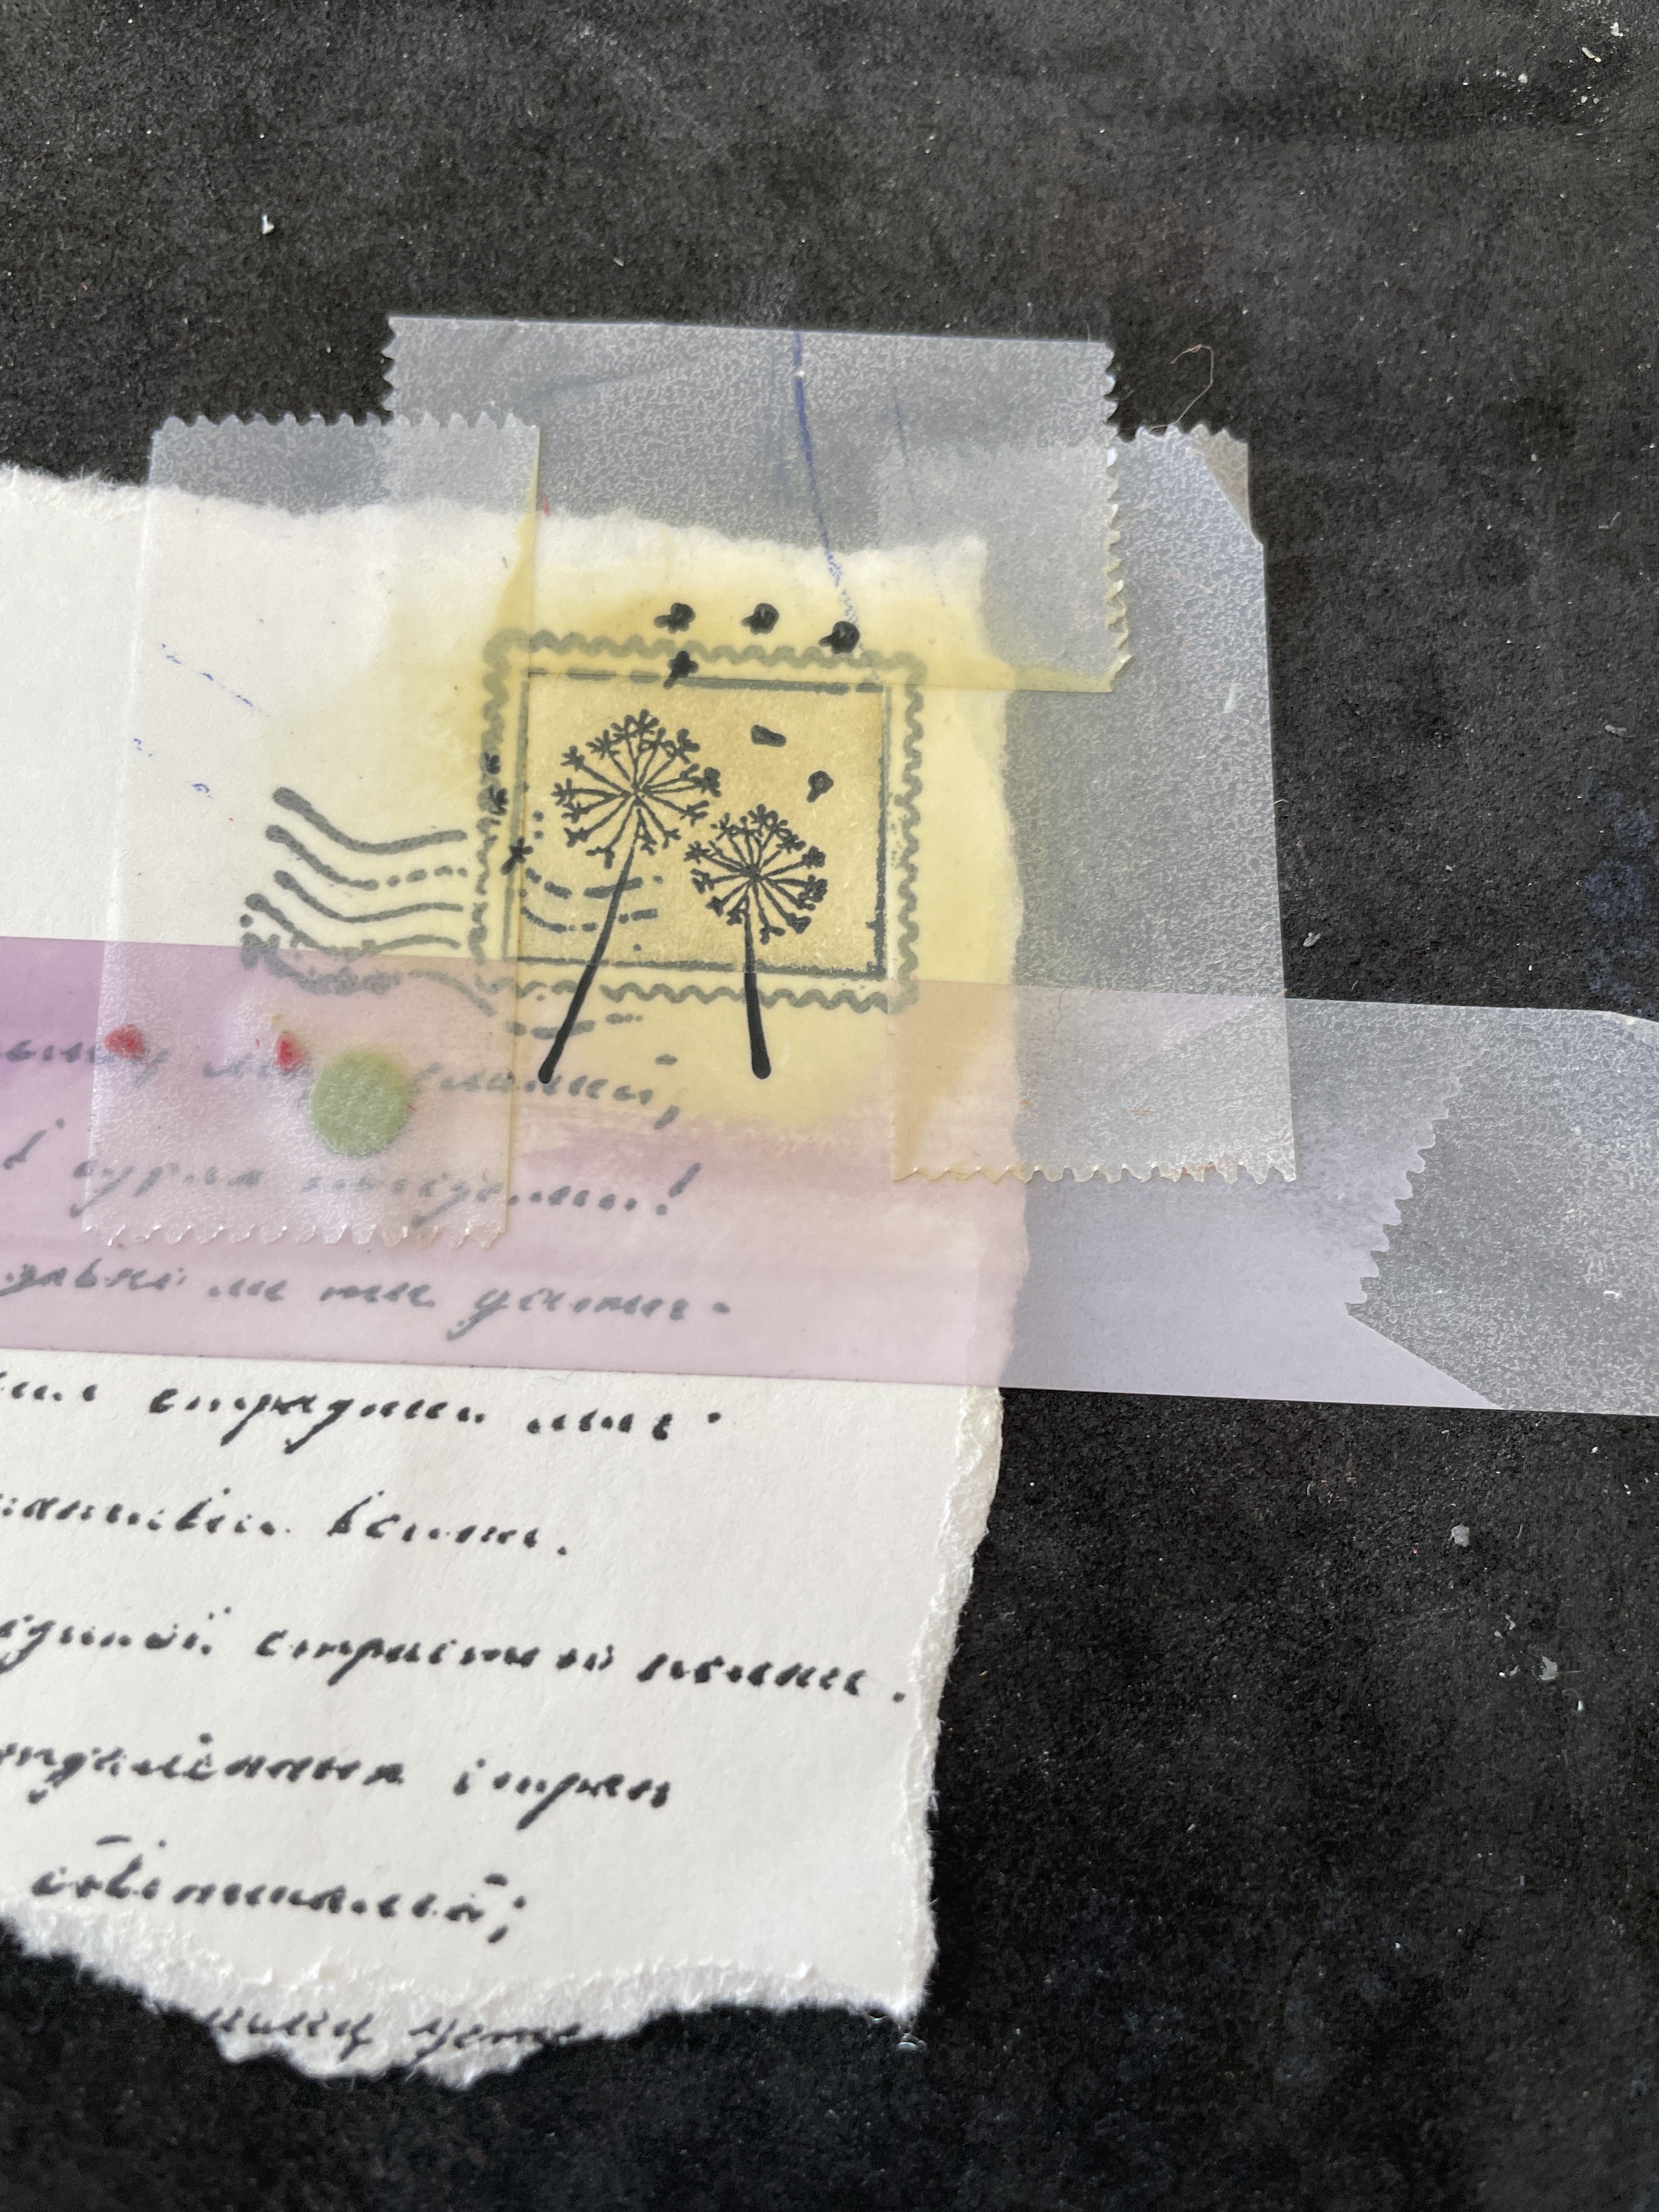
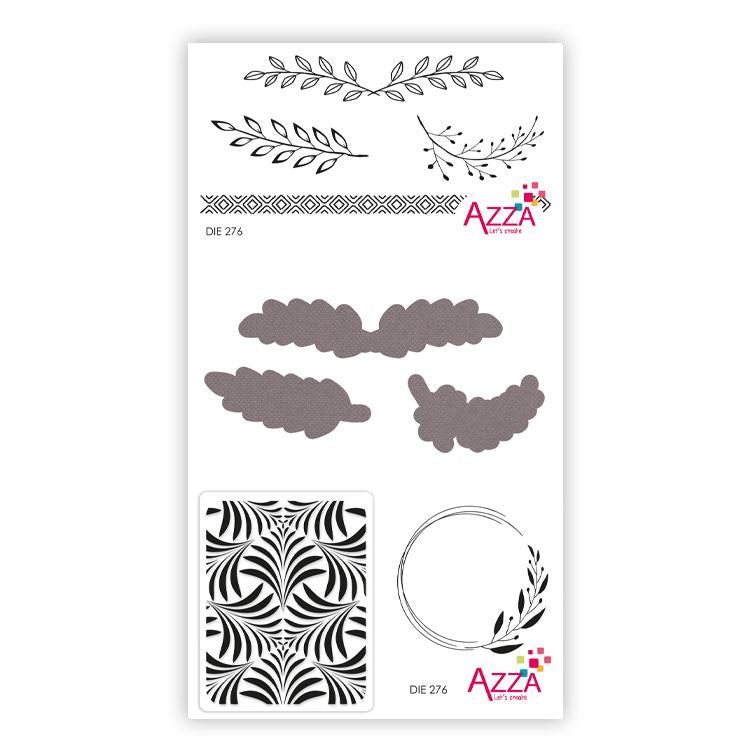
September sees the release of the Pretty Shoots stamp and die set. These are beautiful on both cards and the scrapping page.
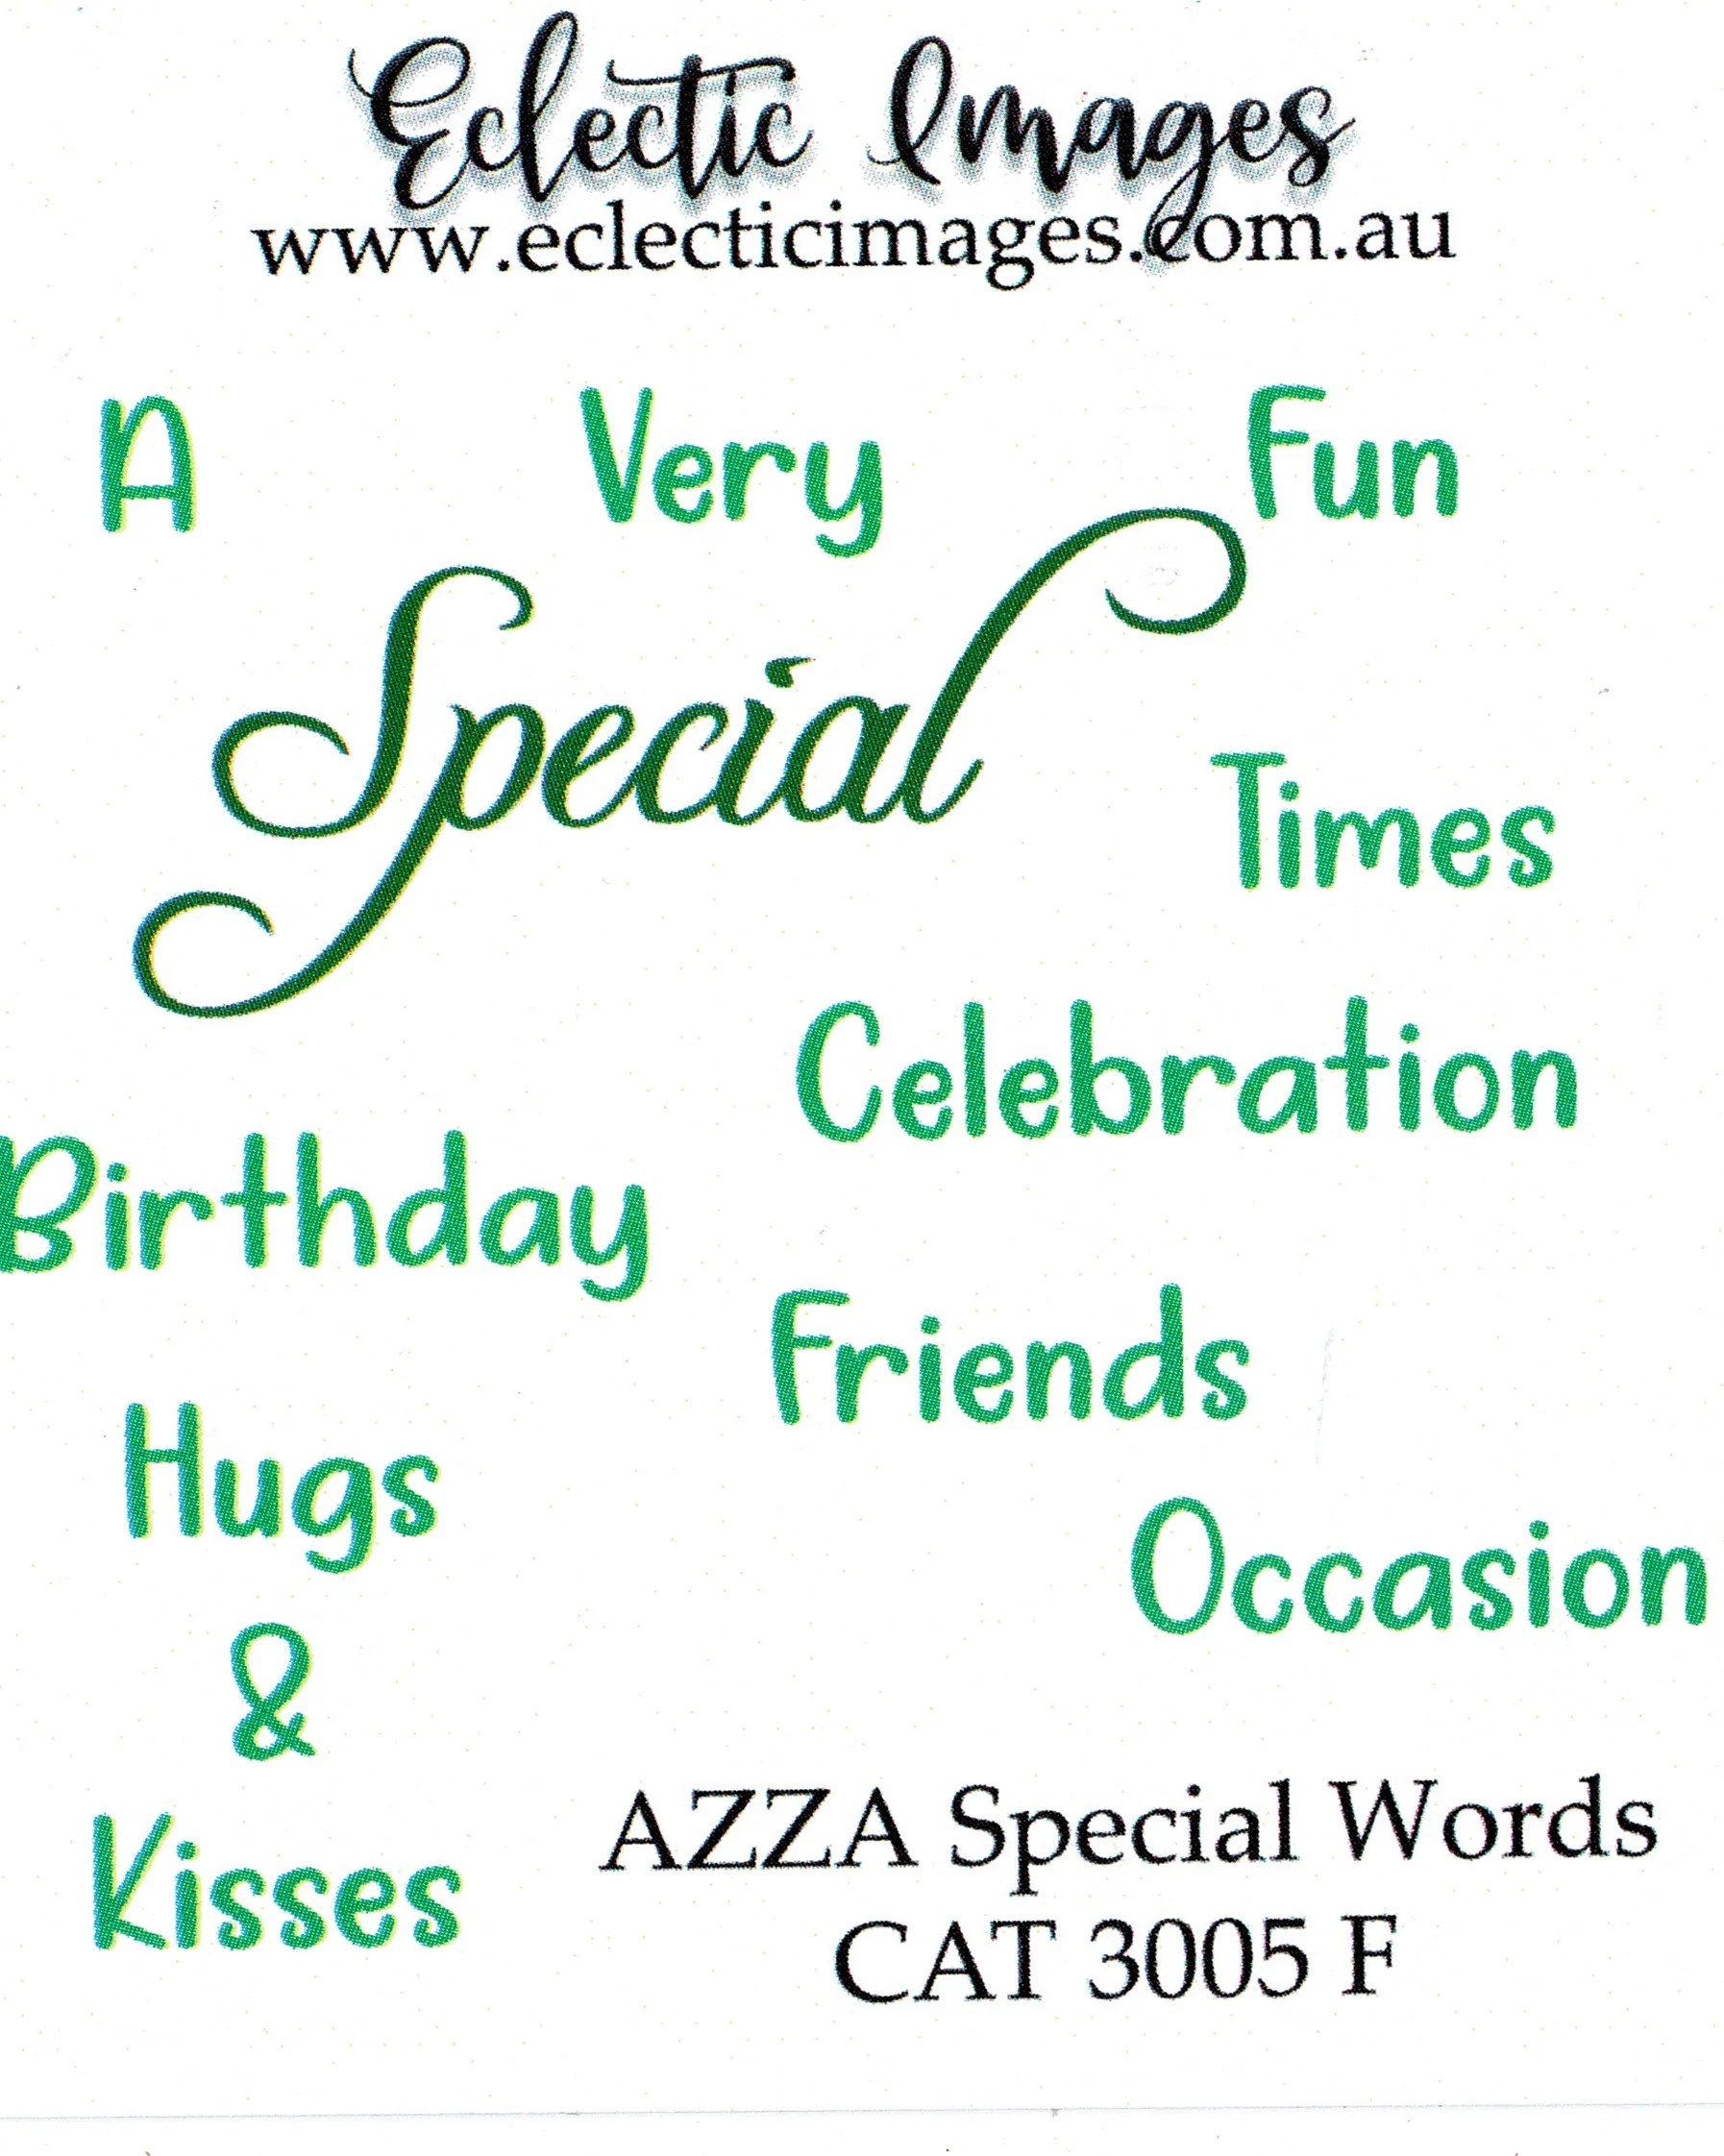
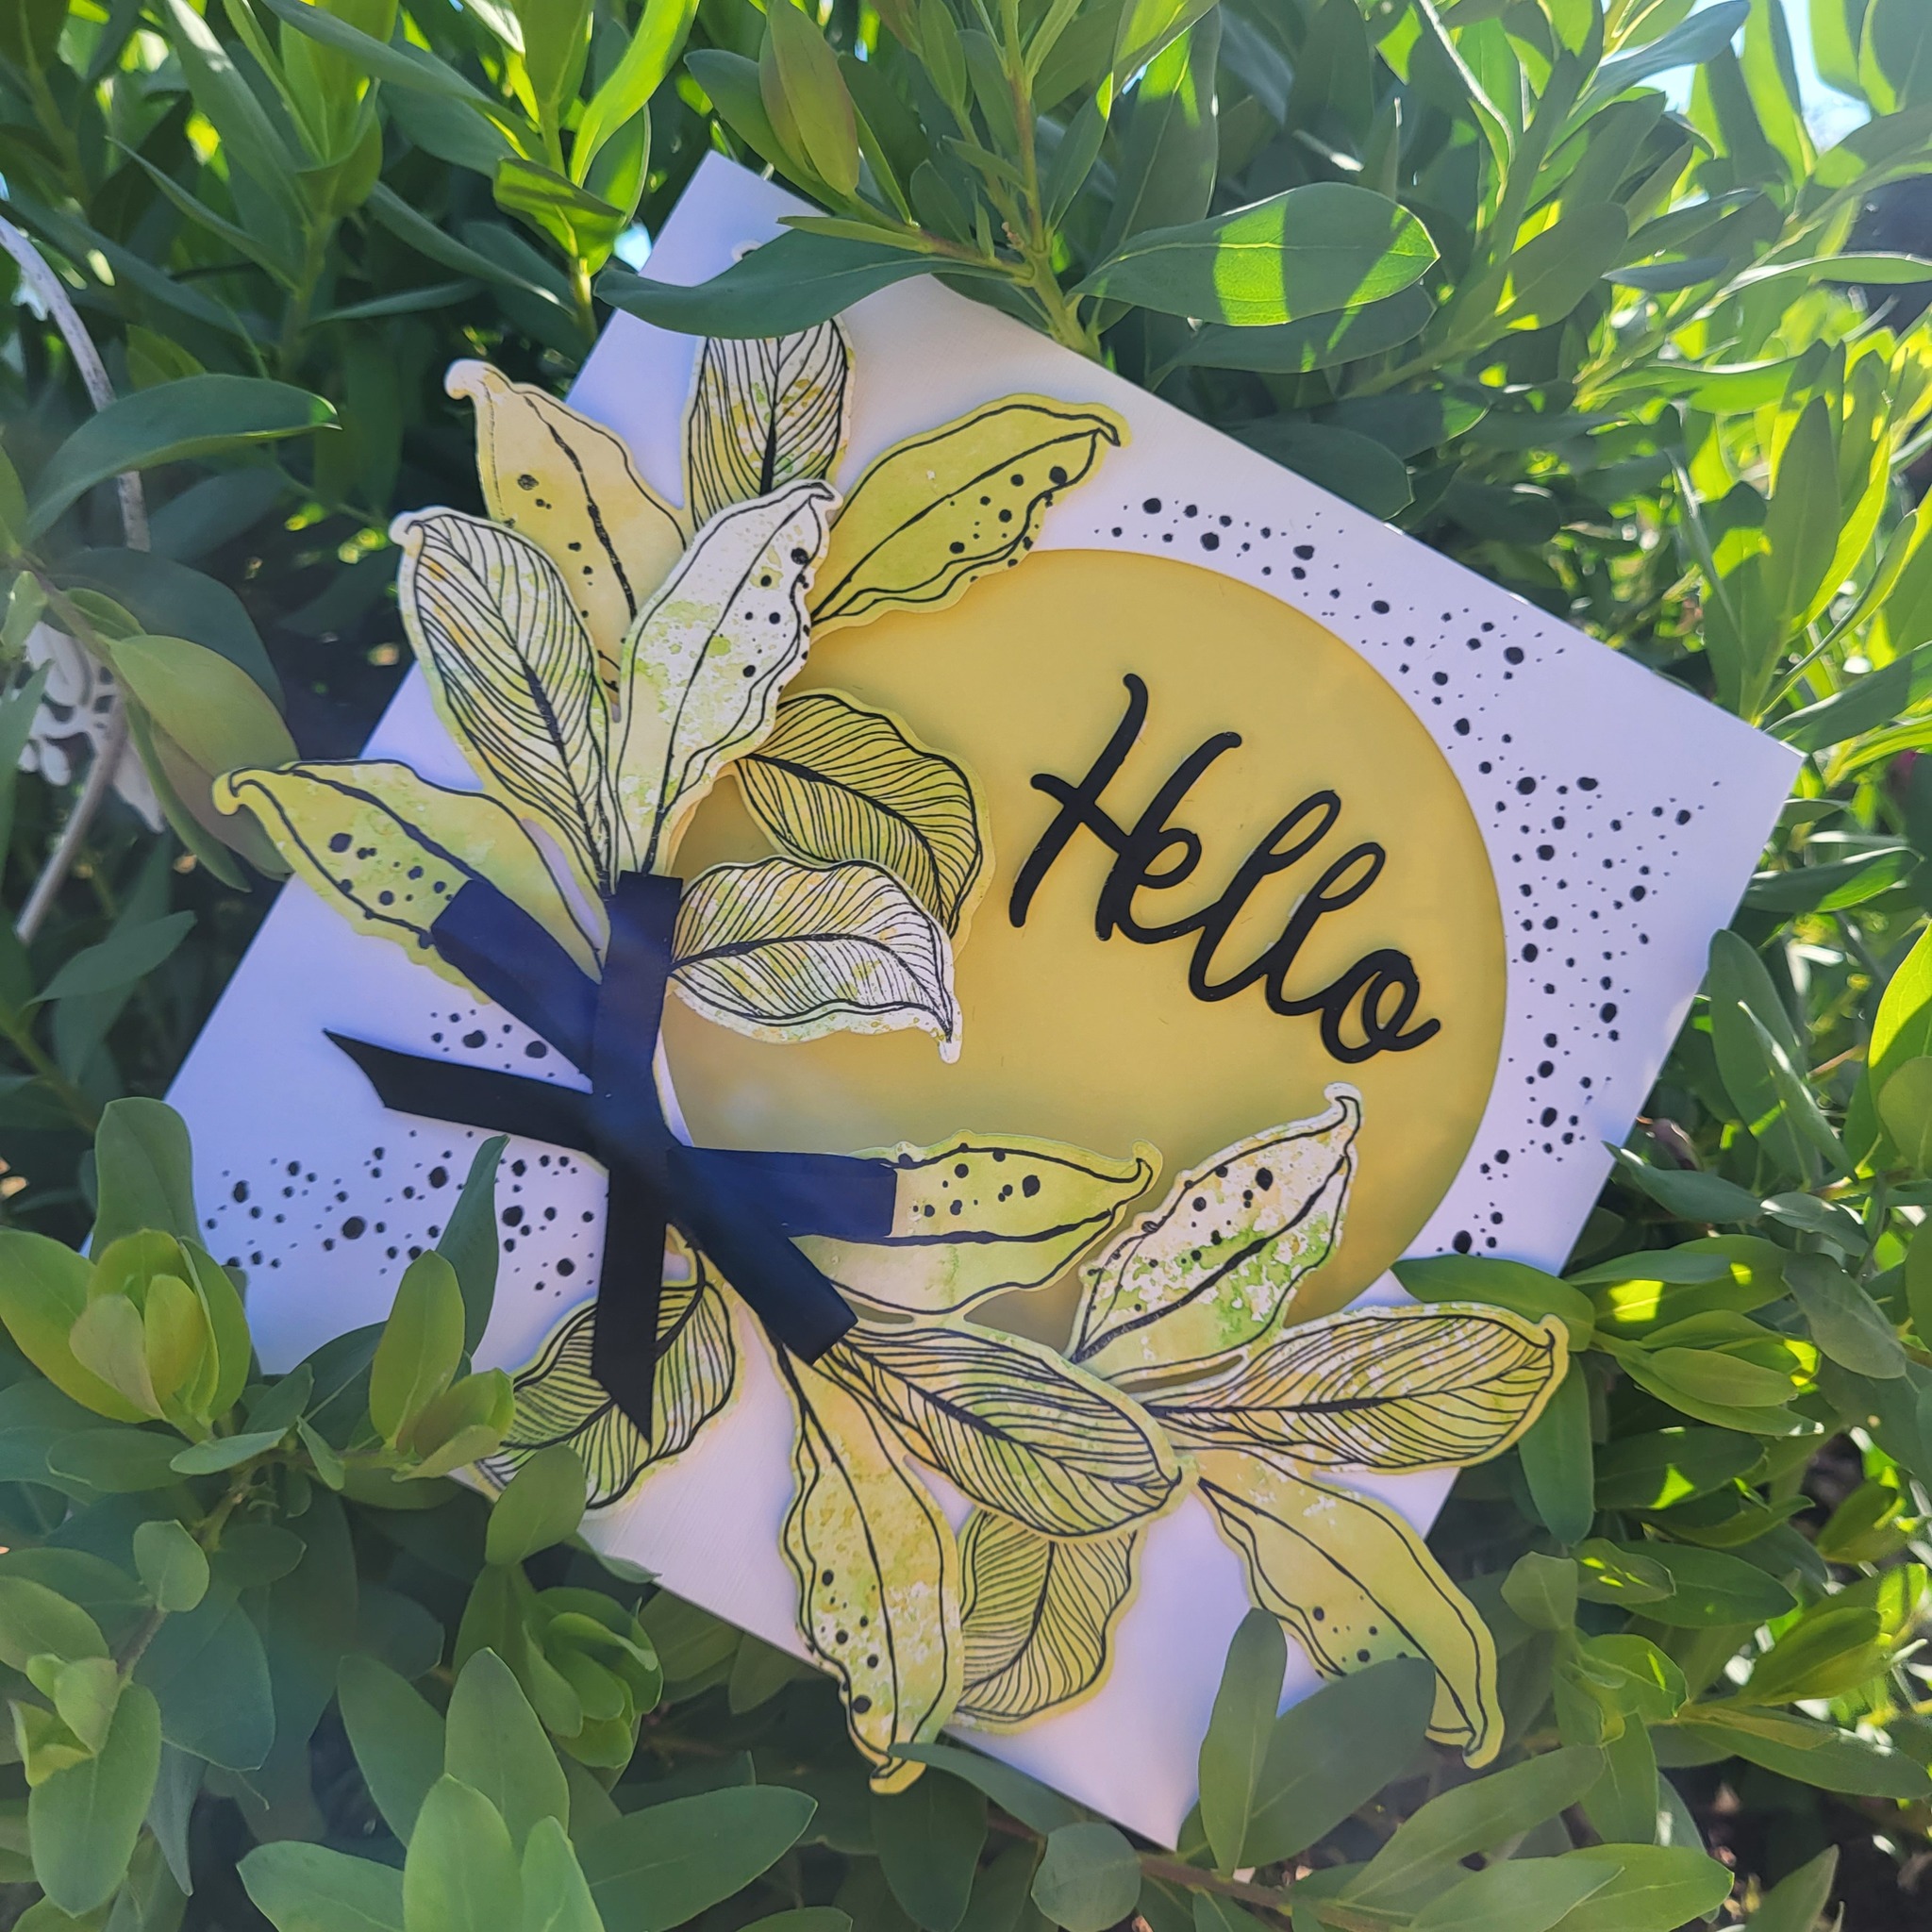
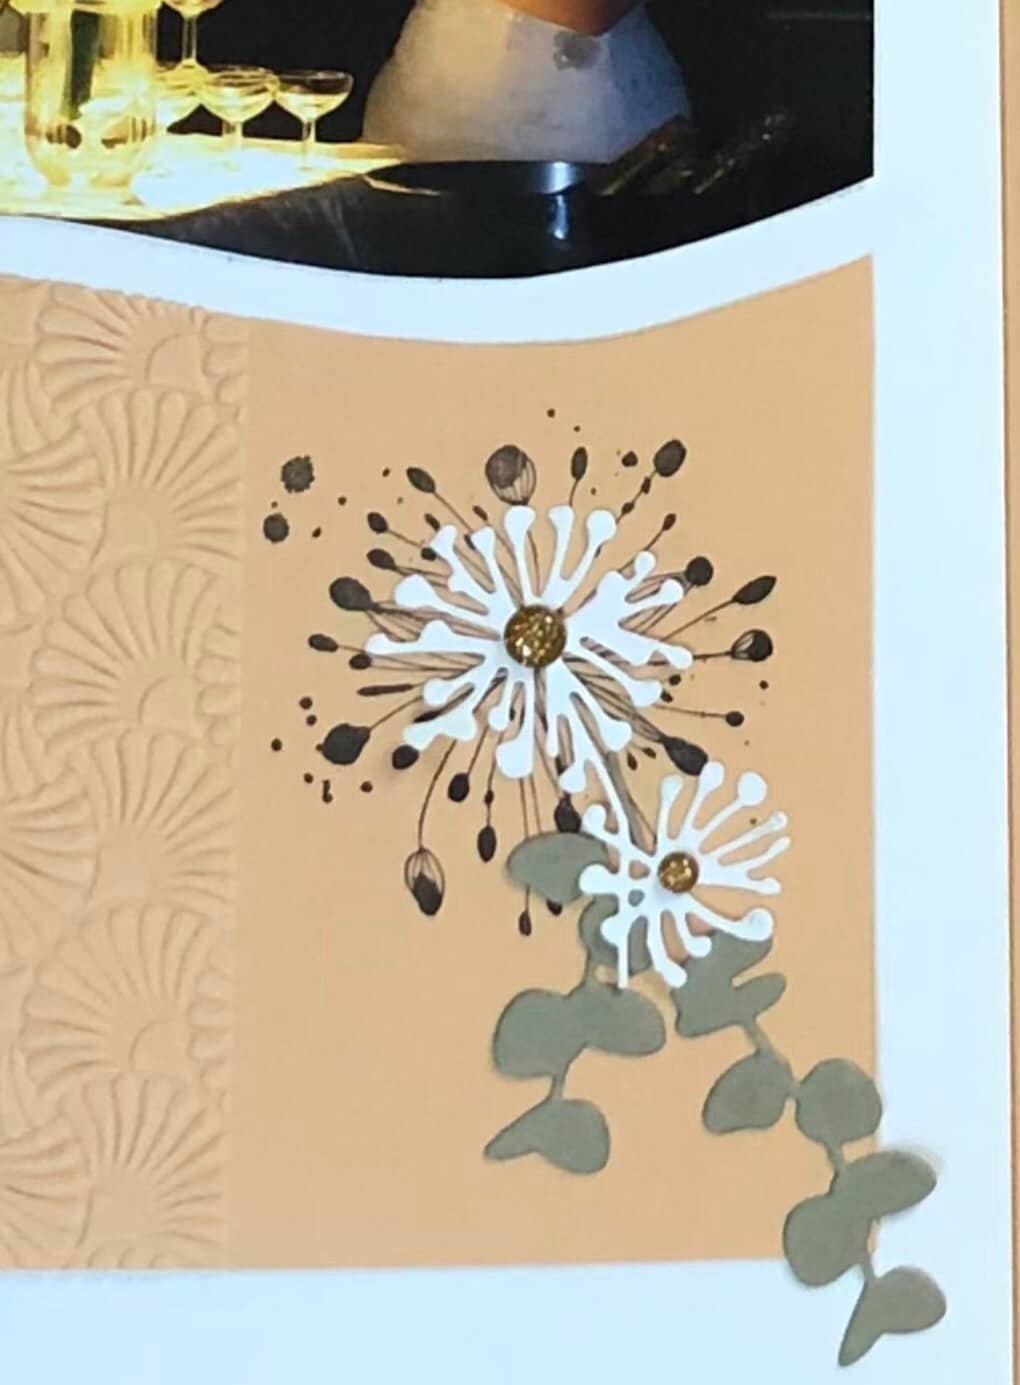
On the card below I placed 3D mousse behind the two leaves that I had coloured with Chalk pencils to raise them off the card. I completed the card with the AZZA Words stamp set: Special Words. These sets are designed to mix and match for numerous options on the scrapping page or cards. I completed the card with the lovely grey cord and the silver Writer/Dot pen.
The card above shows the lovely patterned paper Nature’s Footprints that will be released next month. The colour tone on this page is all about Nutmeg and Steel, the two new colours in the AZZA range. I used the double-sided paper to print my image on, and cut it out with the corresponding die. I then stamped one image on the patterned paper, added the cut-out image to the card and completed it with the new Beige coloured cord, Nutmeg Resin dots and Satin ribbon. The word set I used on this page is Romantic Words 1 seen below.
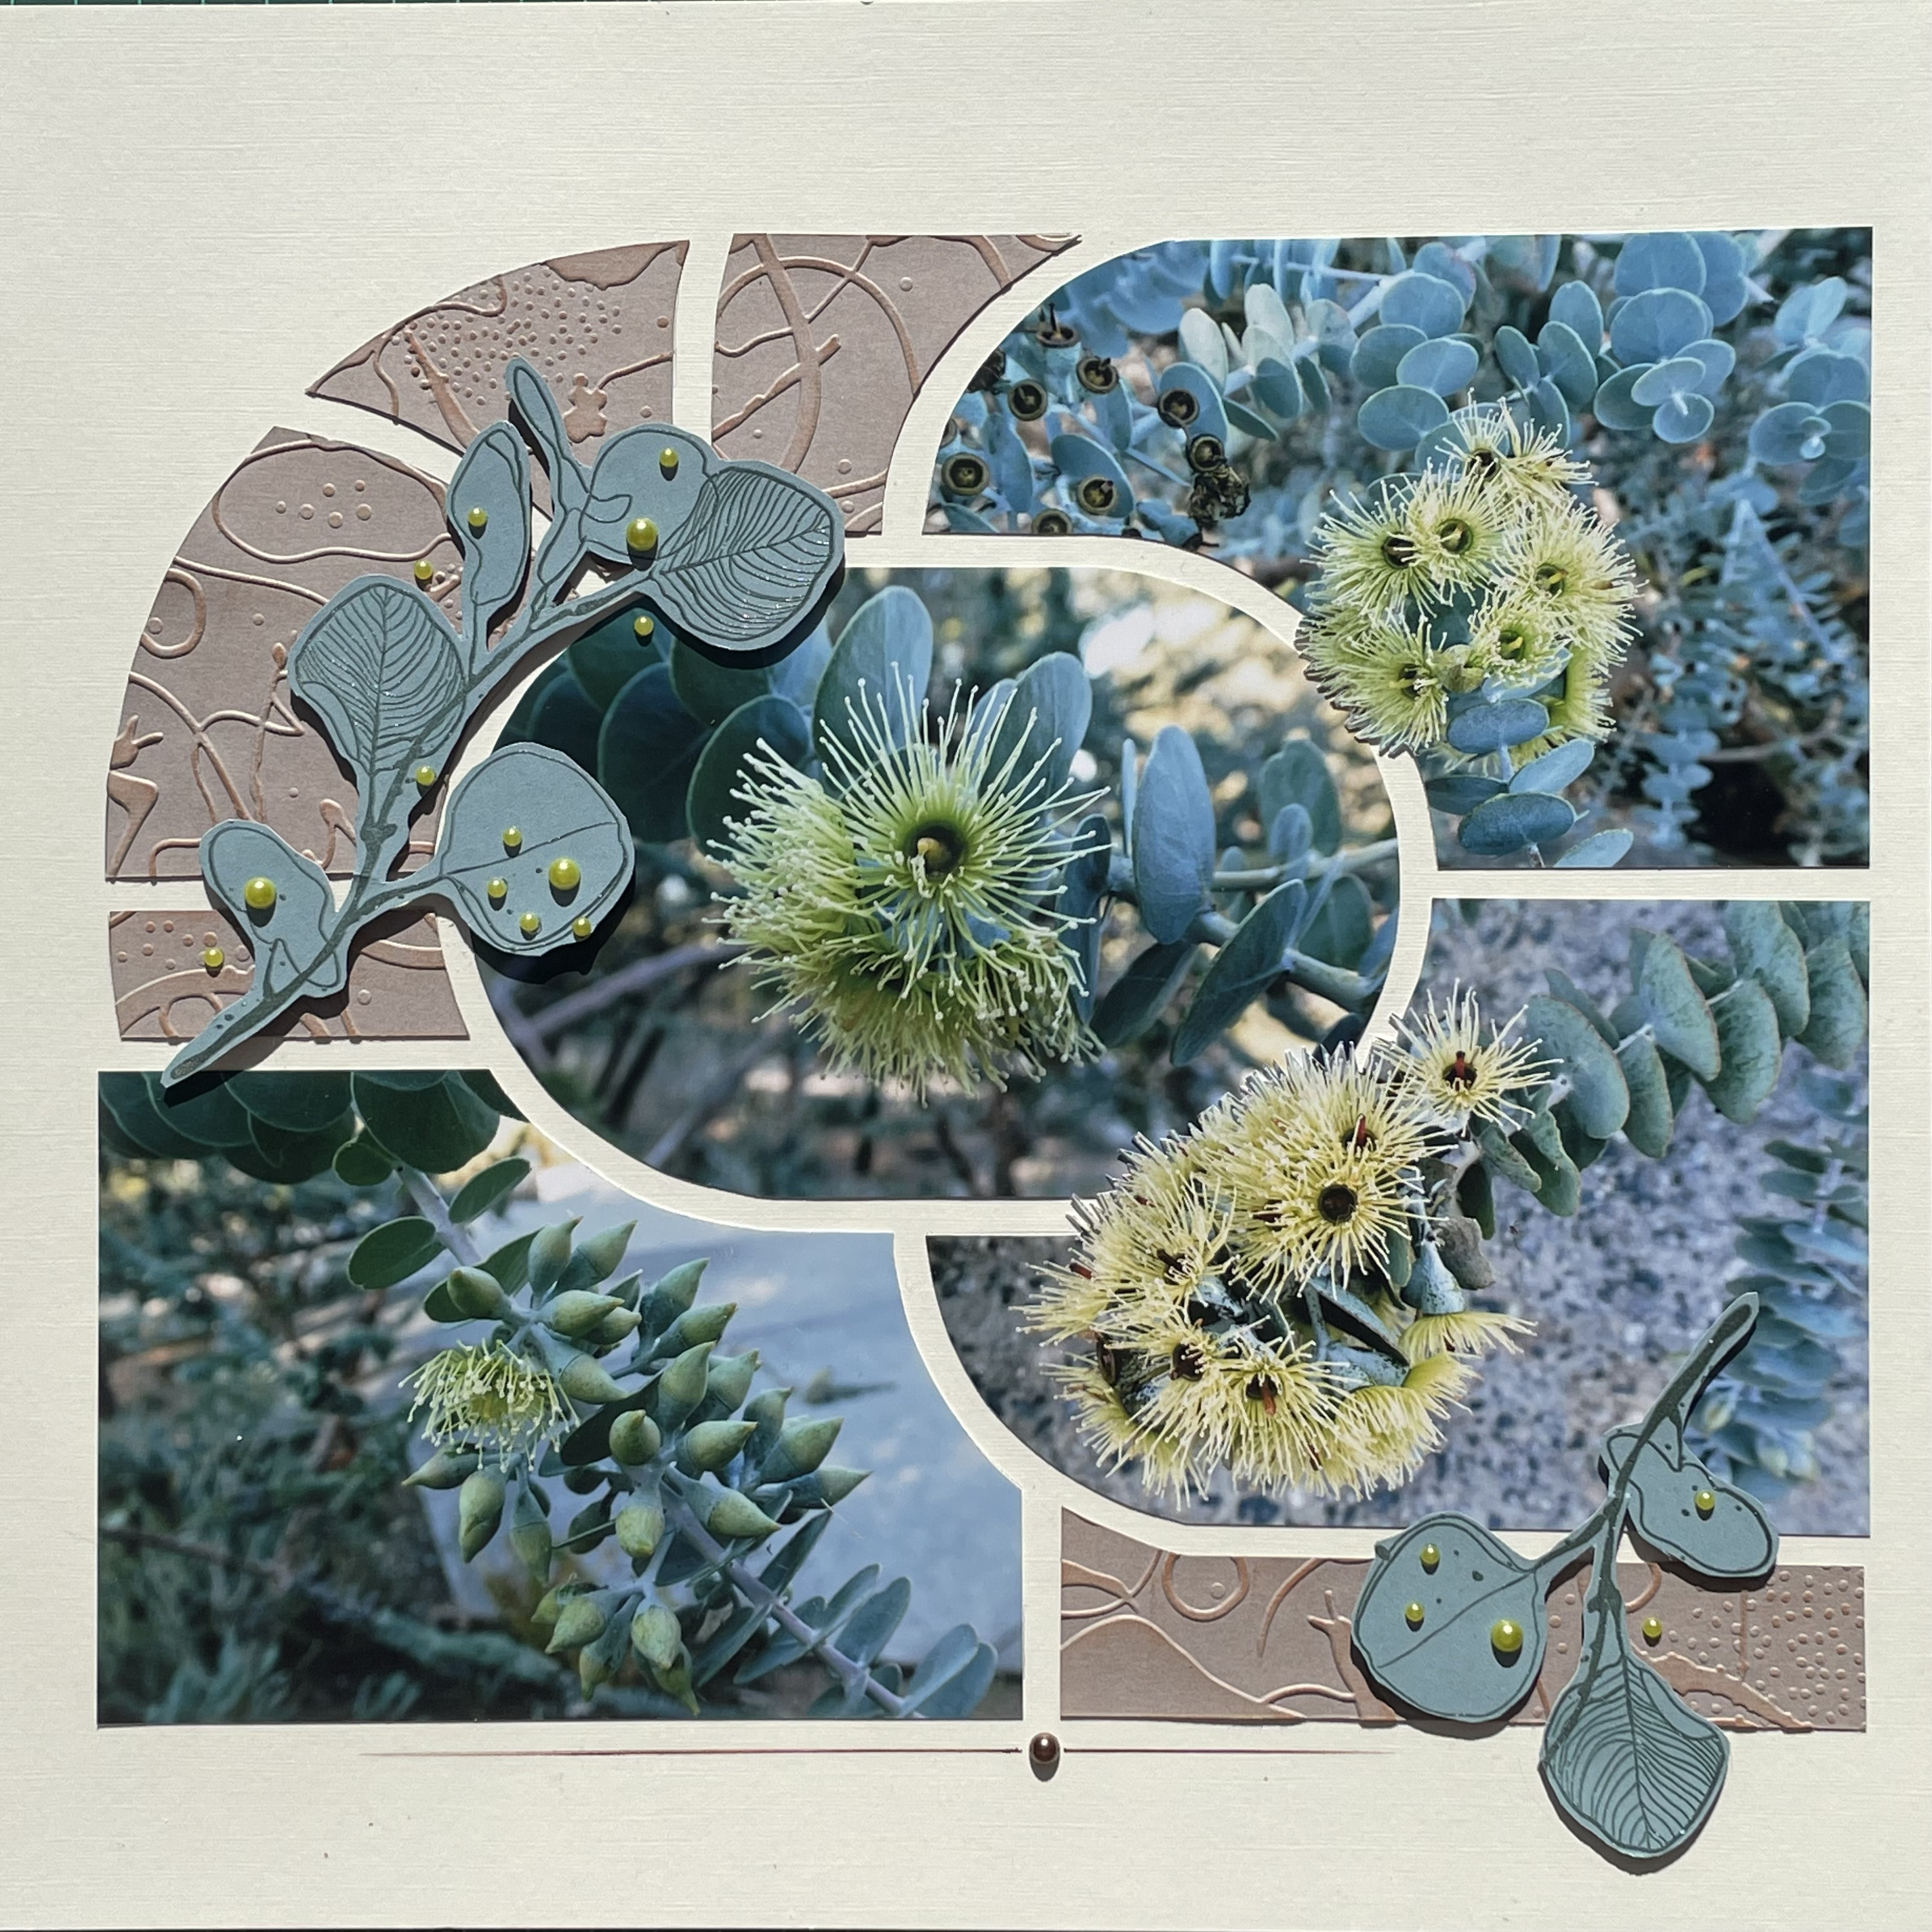
In the layout below I have used the AZZA Brisbane stencil and the new colours Nutmeg and Steel for decoration. I have used the Daydream embossing folder for texture on the plain printed paper and both inks for the edges. The grey looks green in the scan, but it is the new Steel ink. I completed my page with a few extra dots created with the Writer/Dot pen.
Layout created by Lyn Holmes – Western Australia.
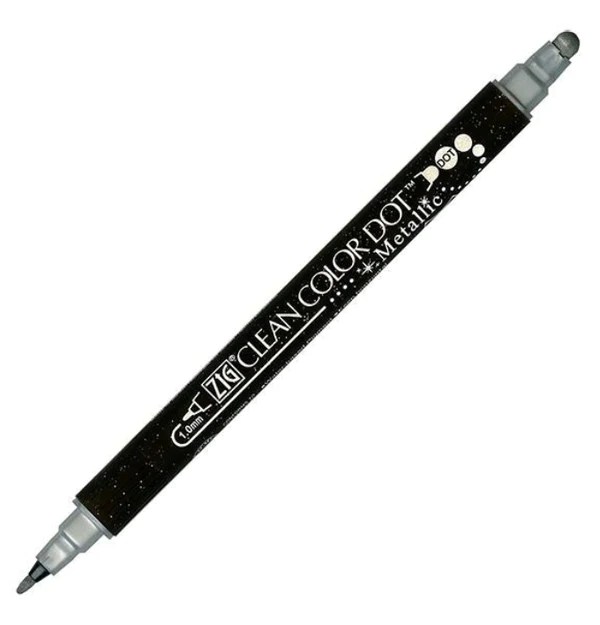
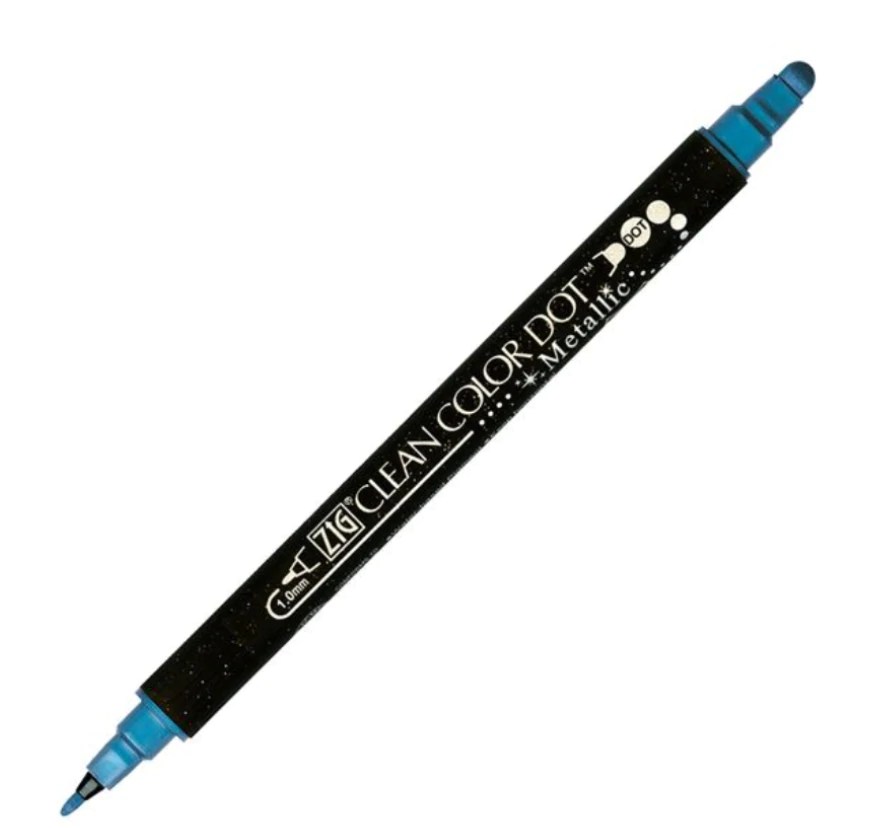
The image below shows you the Writing Marker and Dot pens. They are perfect with the Pretty shoots images as the images already have quite a few different sized dots on them. With the Writing Marker and Dot pen you can change the colour of the dots on the leaves and add a few more keeping the flow of the design on to the page or background paper. Check out the different metallic colours in the online shop.
Sue has created both pages, above and below. She has used the AZZA Brisbane stencil, Daydream embossing folder and the Nutmeg/Steel Classic essential papers on the page above. Below Sue has used the AZZA Montmartre stencil, Daydream embossing folder and completed the decorations with AZZA pearls. The stamped image is quite large, note how you can use smaller parts of the stamped image on the page.
Created by Sue Talbot – New South Wales
Below is a very simple layout on the page using the new product which I thought I would share with you. The background decoration can be created with either Chalk pencils or an Aqua brush and inks.
Created by Honouring Loizeau – Europe.
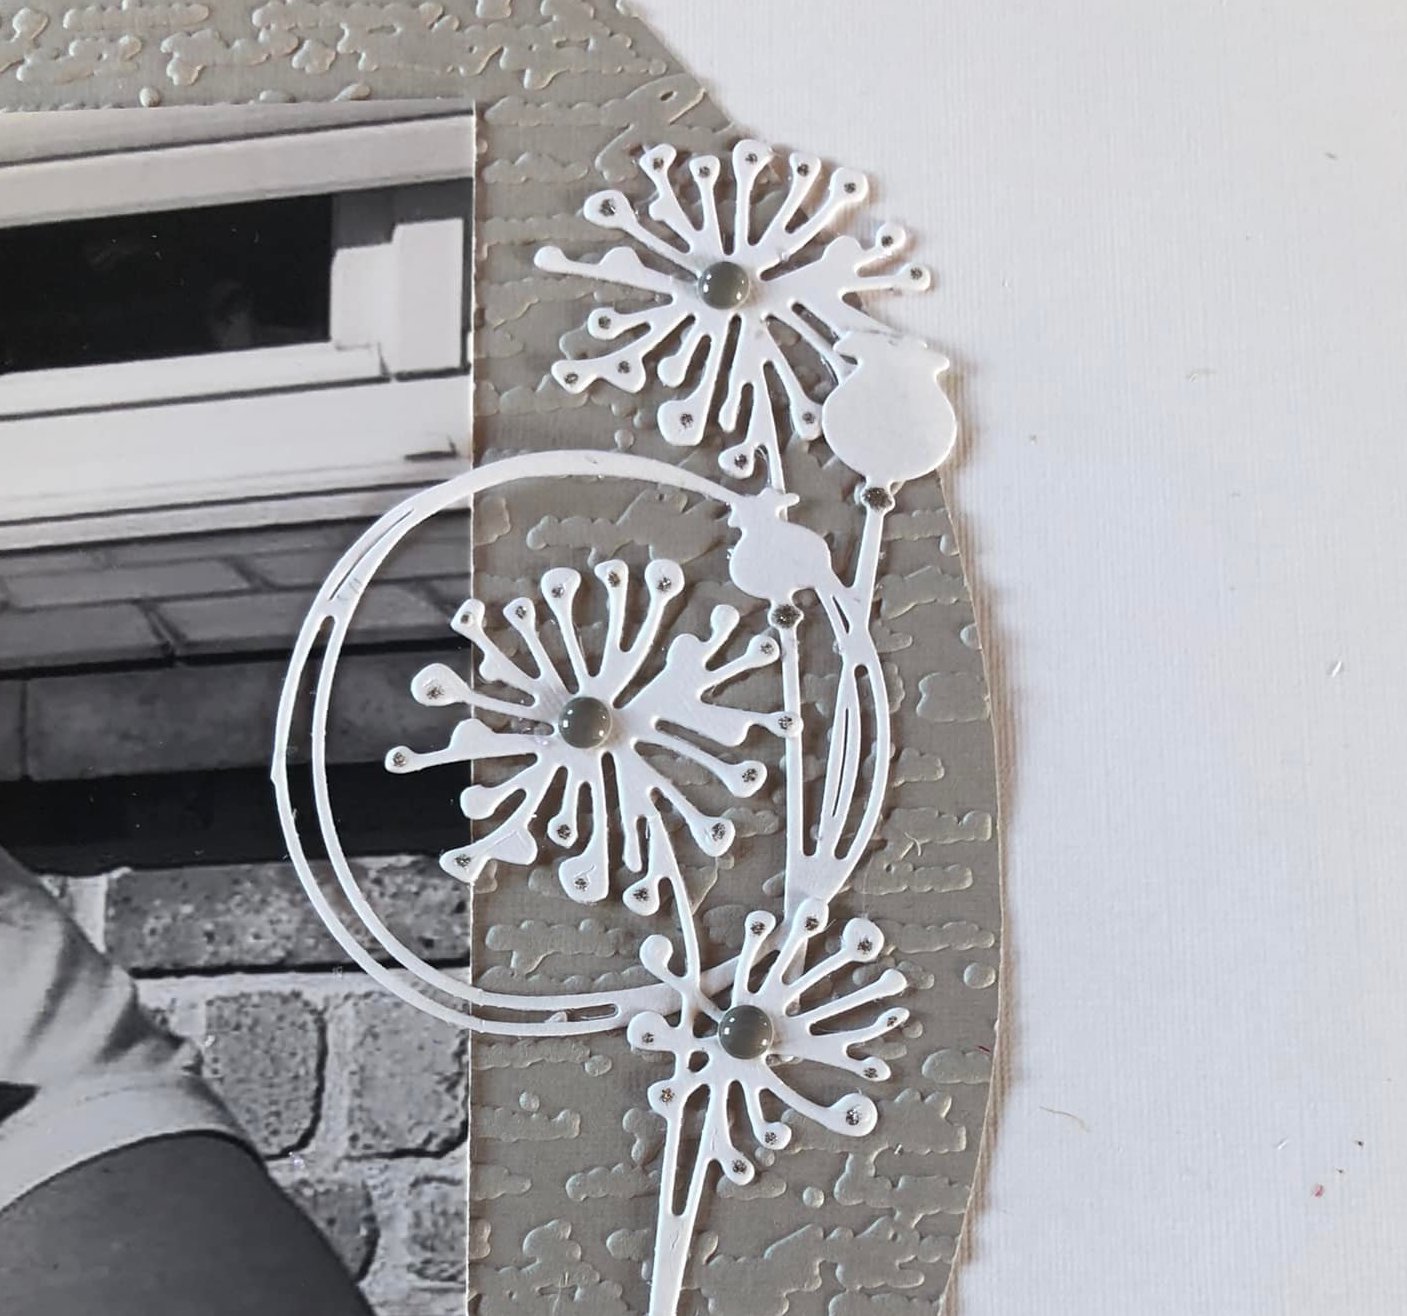
Lastly, a fun card by Julie Kecskes. Julie has used the AZZA dies to cut out a circle in the front of the card. She has used the stamped images to frame most of the card and the Writer/Dot pens to complete the design. Lastly, a little AZZA Satin ribbon tied in a bow. This would surely improved anyone’s day.
Click on the image below and scroll through the September catalogue.
In the image below Hilary shows how easy it is to colour the Pretty Shoots image with Alcohol pens and the Aqua brush and inks.
Decoration by Hilary Hamilton – Victoria
With the release of the new colours we have created a Sample pack. This enables customers to receive a selection of product in the new colours, without having to purchase complete packs. A document with ideas on how to use the product is included.
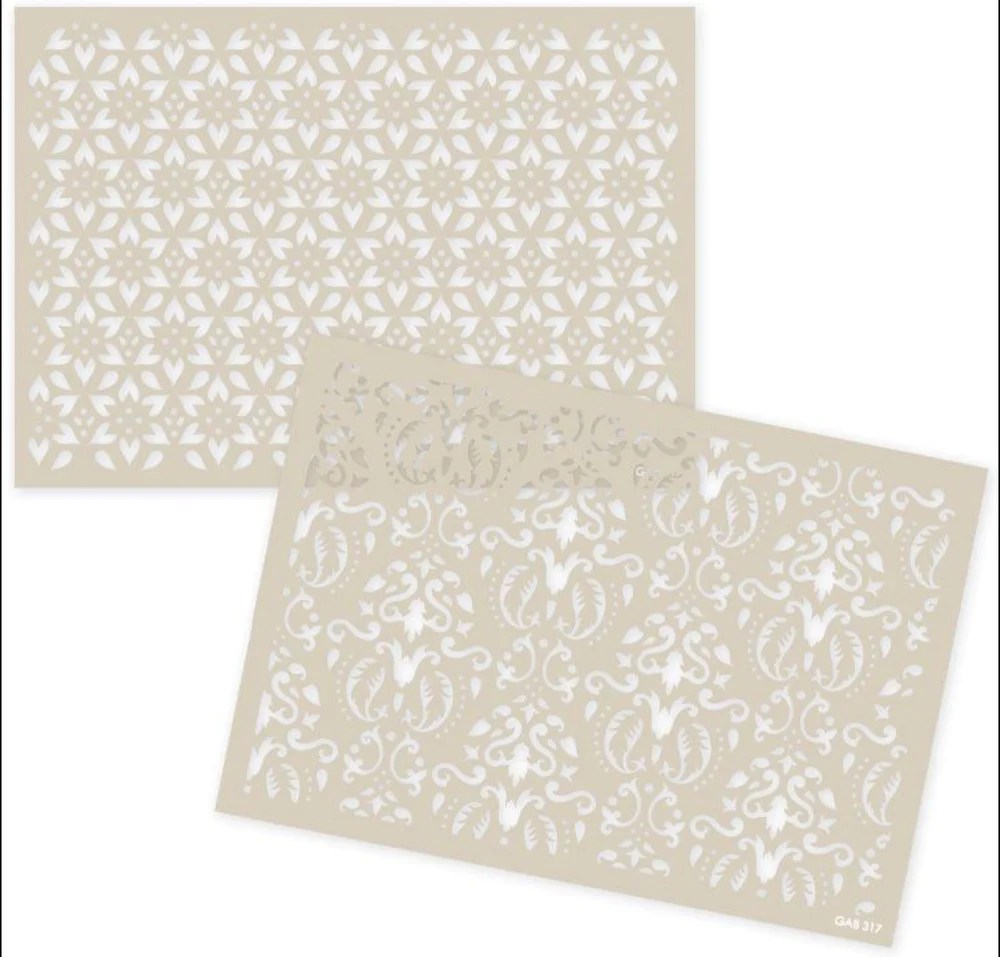
The second theme to be released in Australia this month was all about friendship and love. A set of Concentric Heart dies and a lovely Texture stencil duo was released. On the page below I have used both. I have shown how the Texture stencil can be used in three different ways. I have used it with the AZZA iZink paints, AZZA inks and to emboss paper. I completed the page with Resin dots and 6mm Satin ribbon in the new colours. I used a 5 x 7 photo for this layout.
Created by Lyn Holmes – Western Australia
If you do not know how to use the Texture stencils to emboss paper, please contact your Consultant.
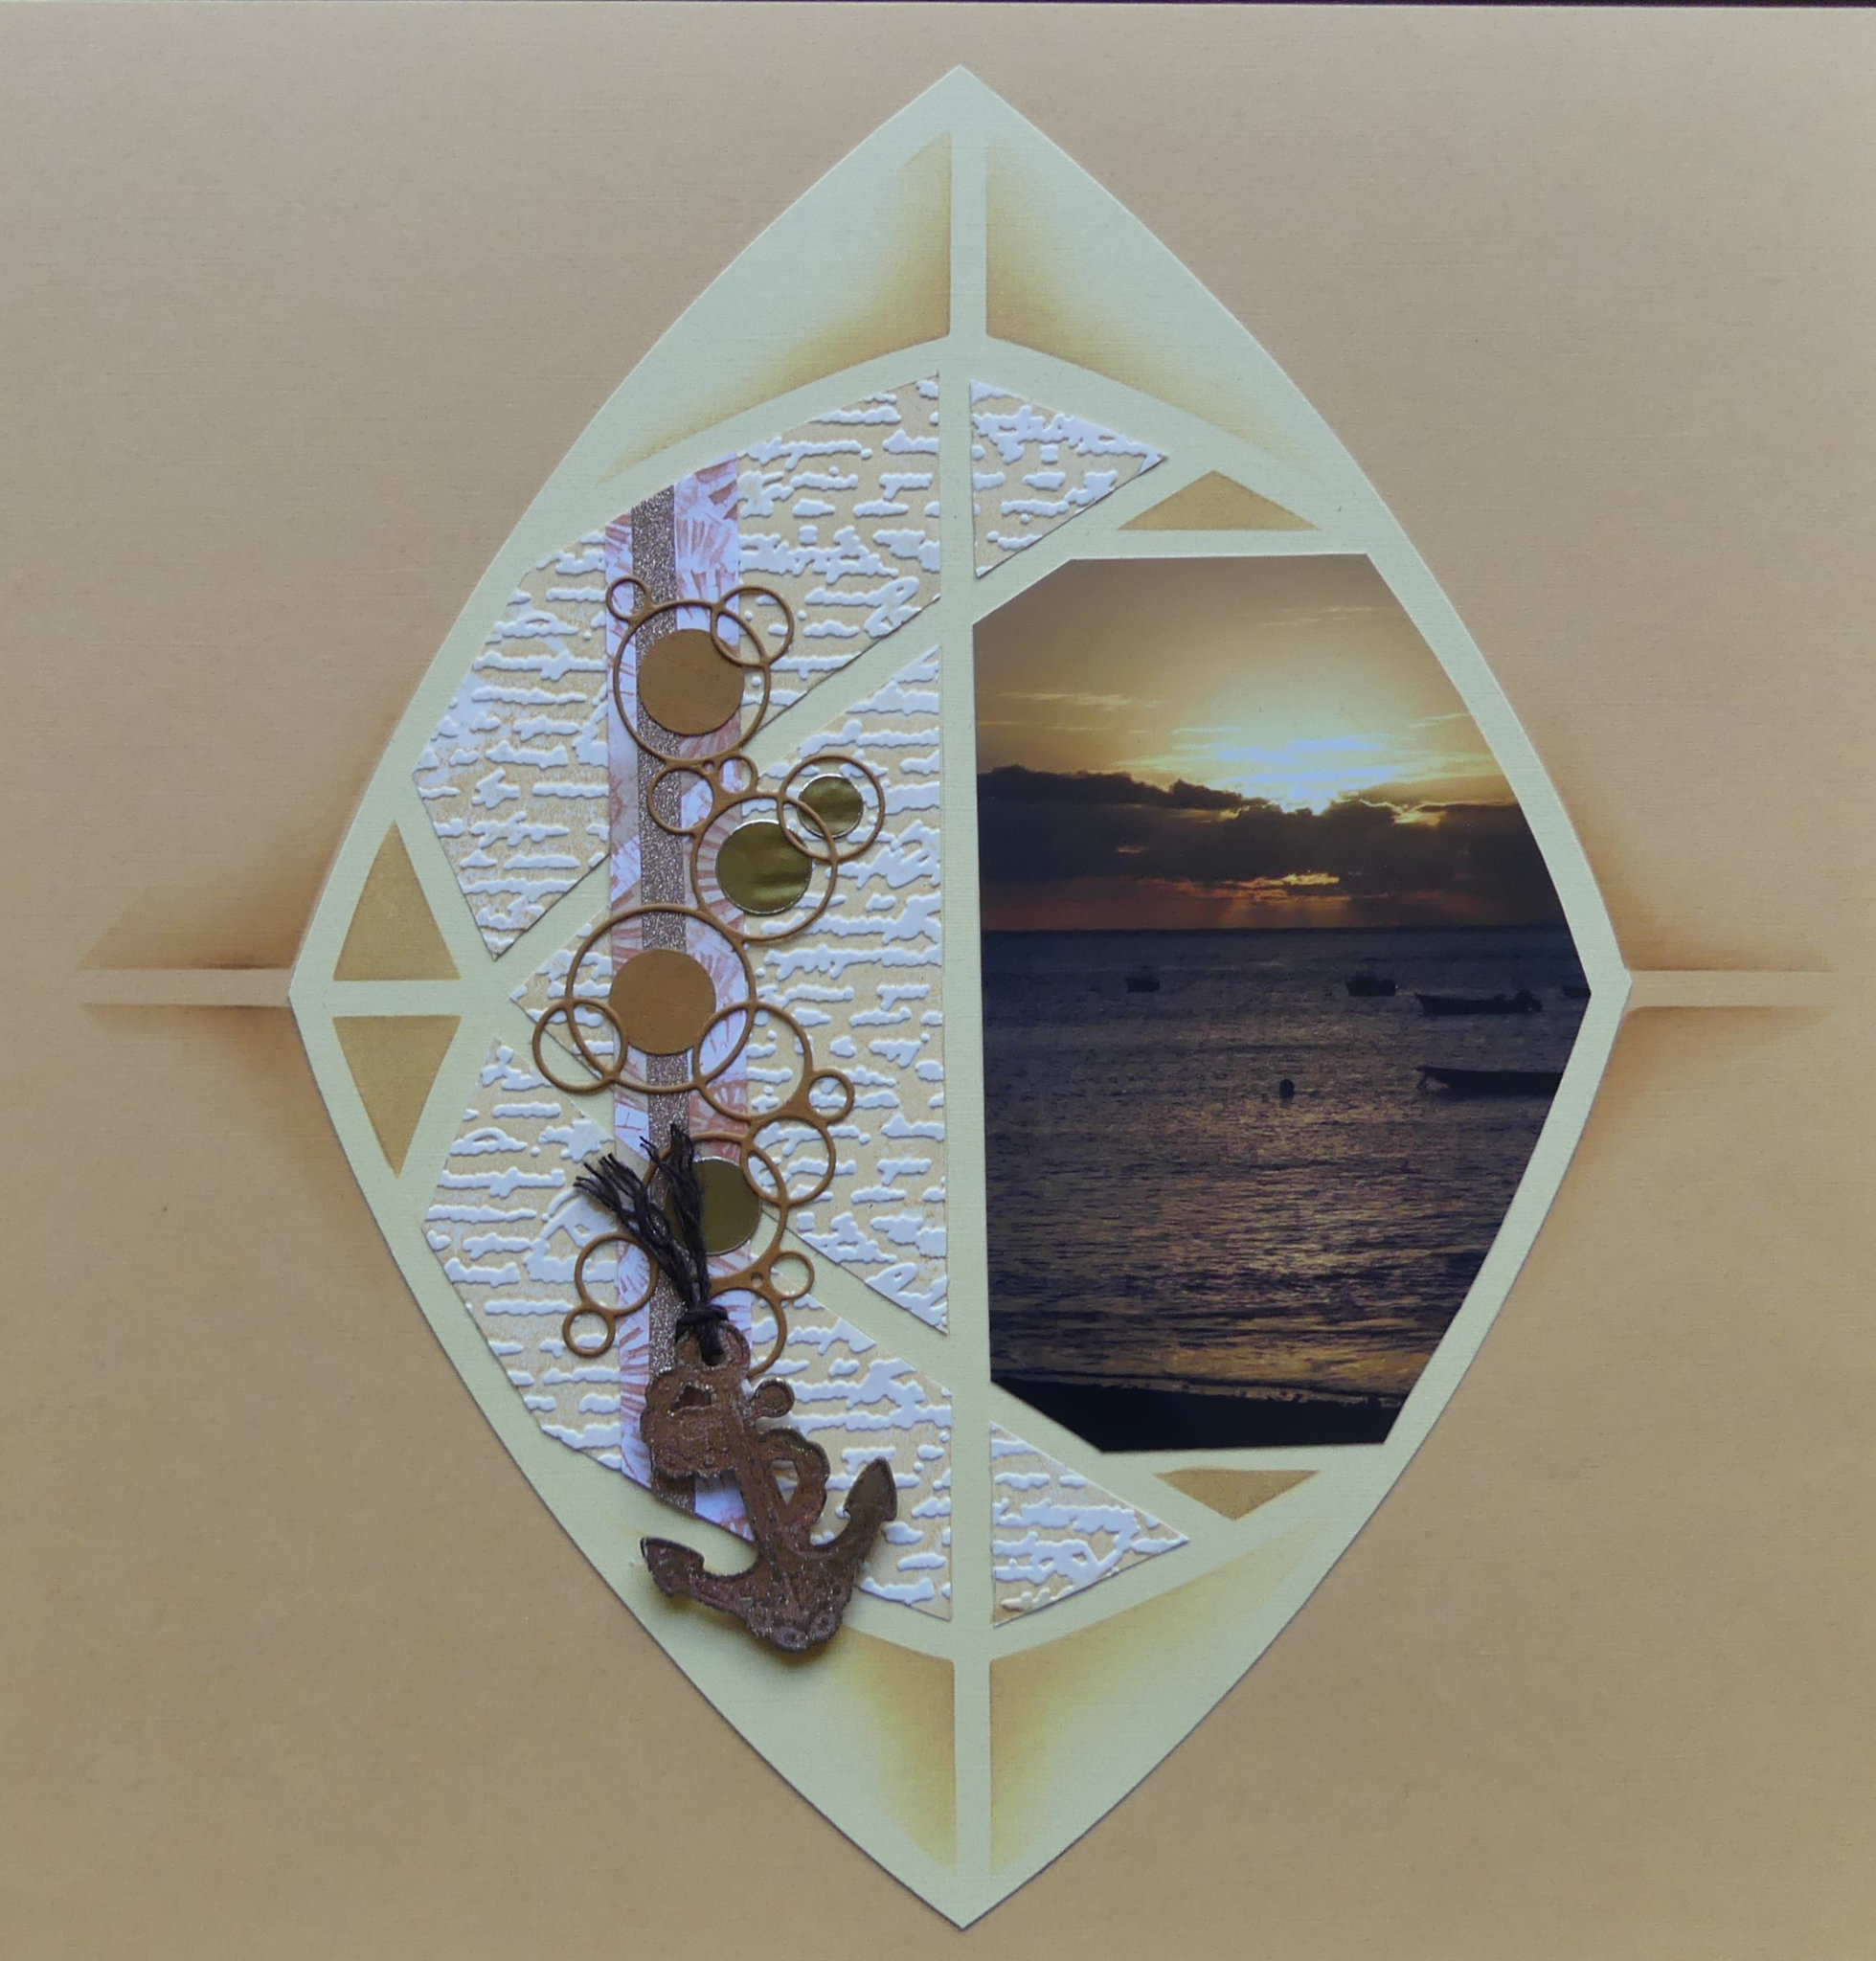
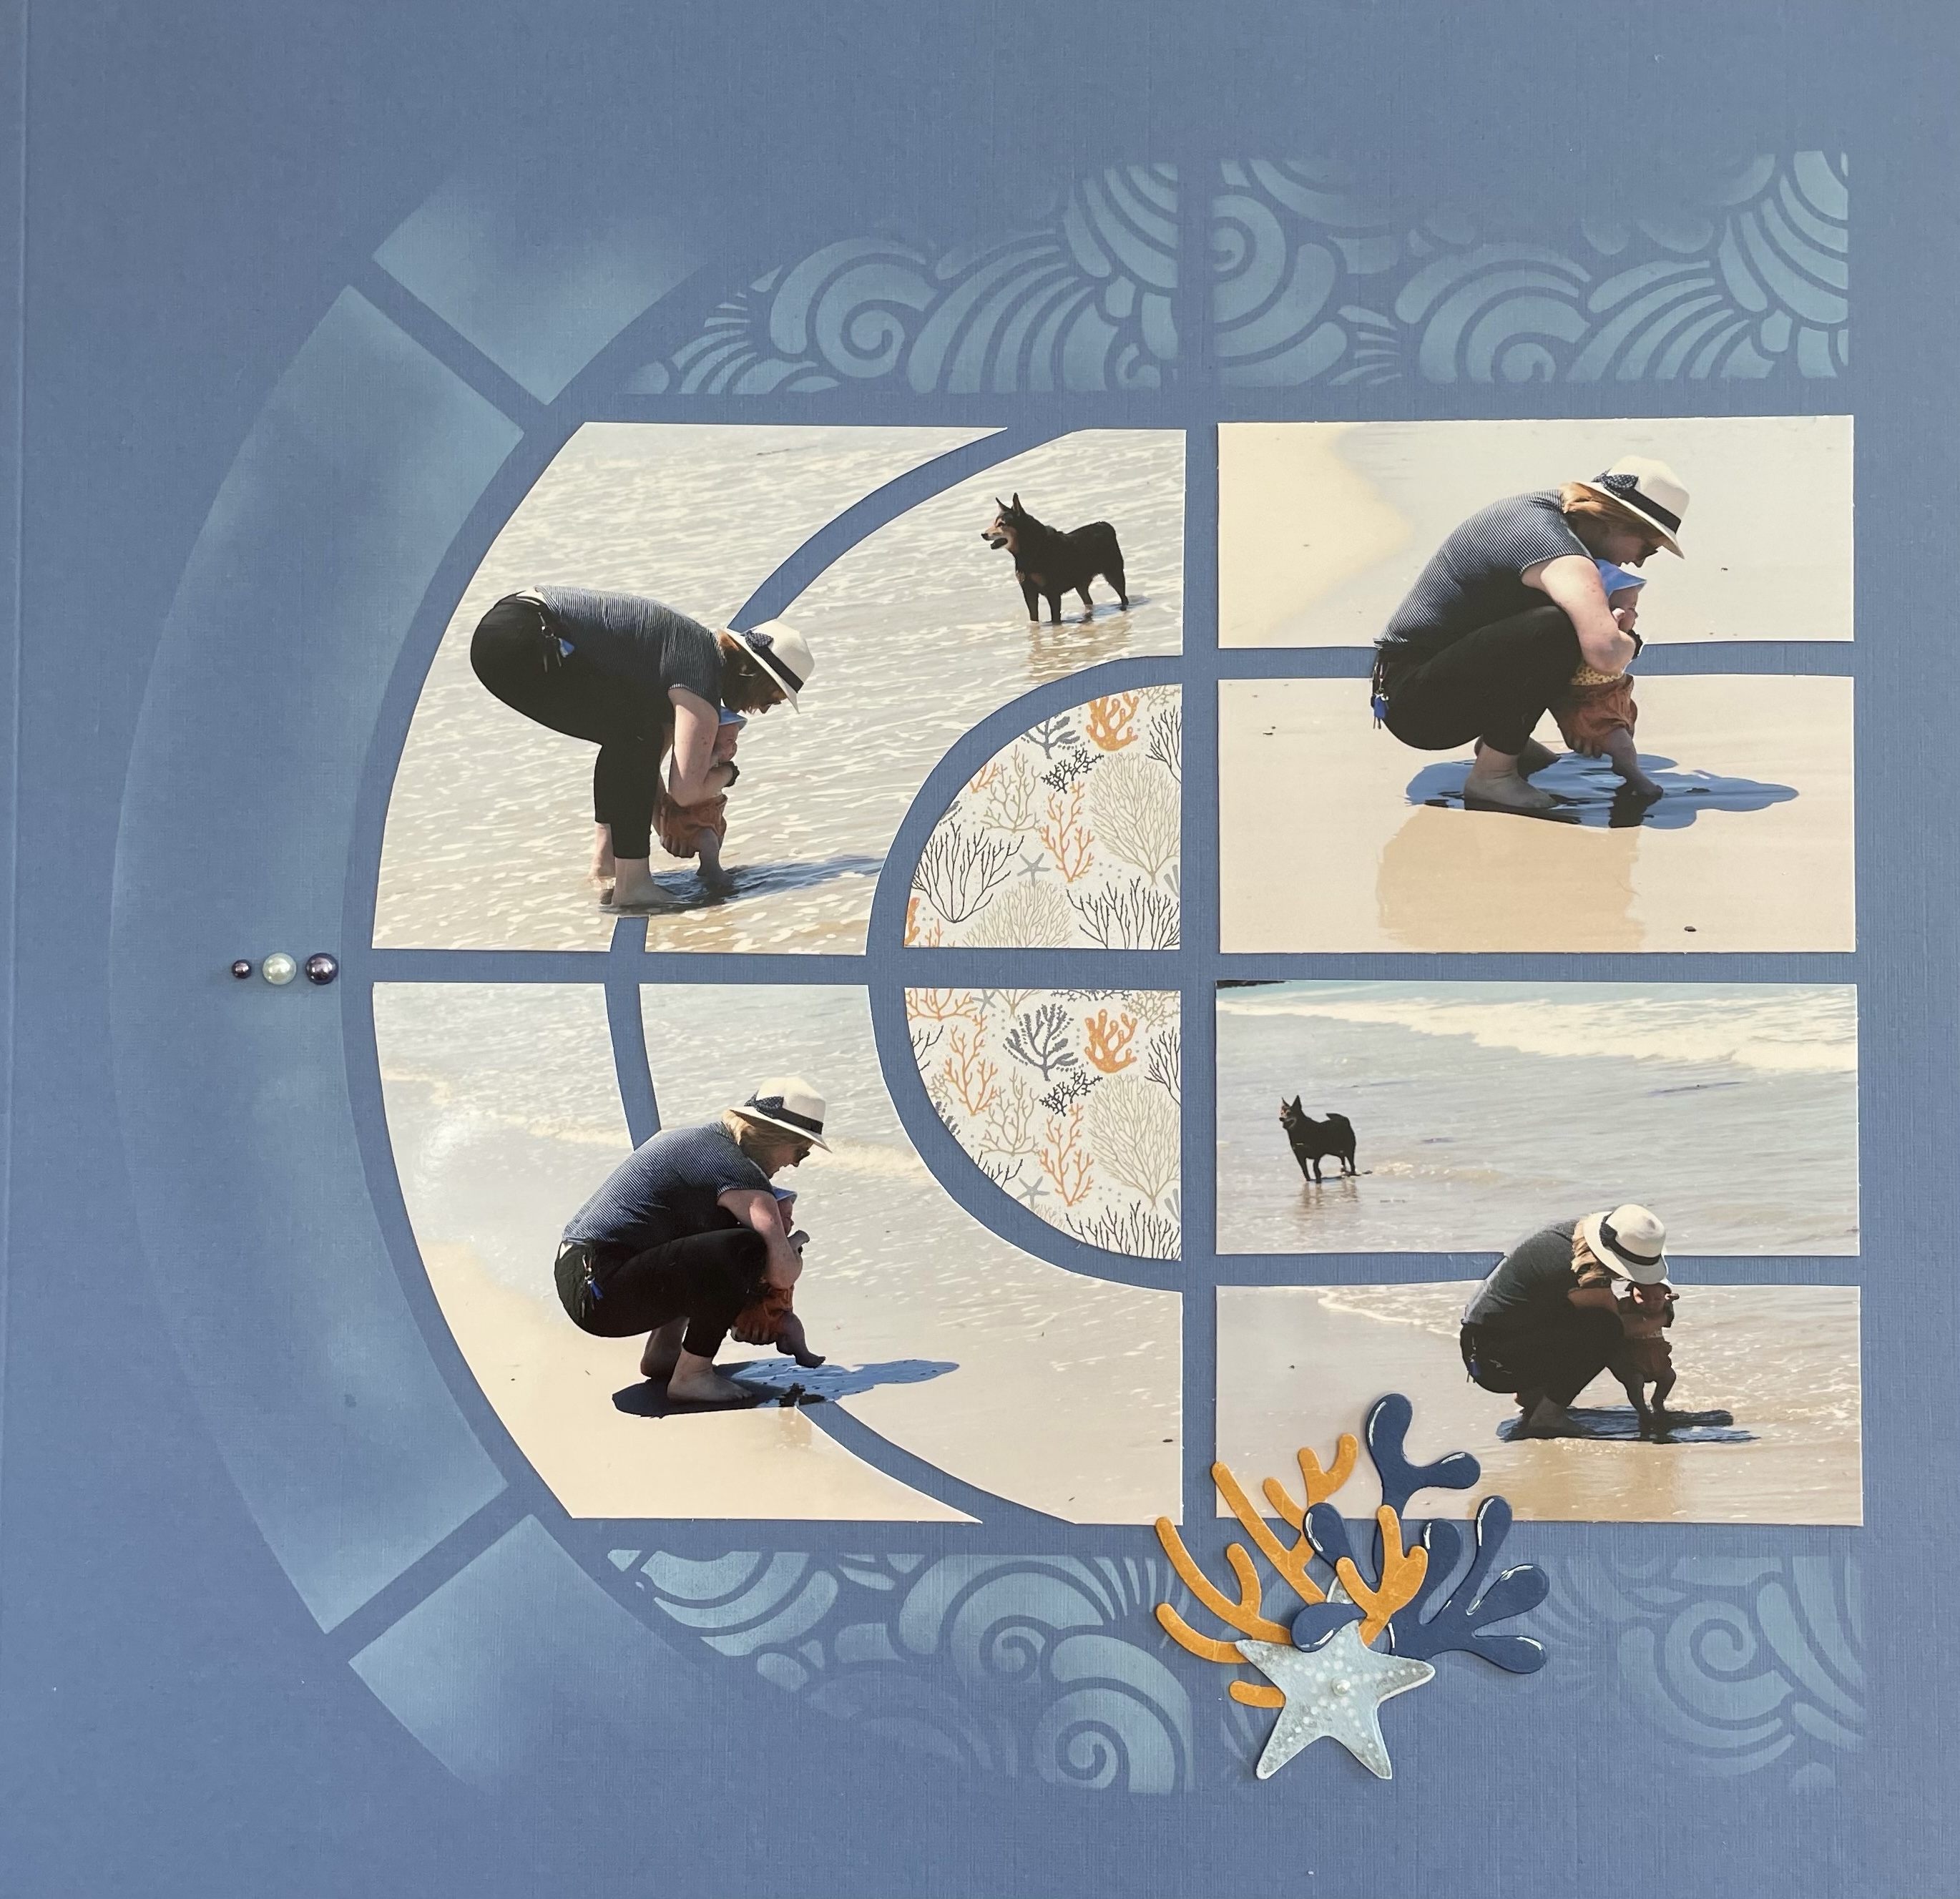
The second page I created was with the AZZA Brisbane stencil. I find the Petrol coloured pages work so well with most water themed photos. Once again I used the new colours as decoration products. The nutmeg colour blended beautifully with the pinks of the sunset. On this page I added a little grey AZZA cord. If you do have a large piece of paper on the page, a little texture decoration over the top breaks it up.
Sabine has created a beautiful card using the Concentric Heart dies. She has added a few AZZA die cut images and a strip of 6mm satin ribbon and smaller strip of AZZA paper.
Sabine – Creative ID – Europe
Now to a few layouts with some of the older AZZA stencils to give you some inspiration to dig them out and create a layout with them.
Sue Talbot created the layout below with the AZZA Galapagos stencil. She added a few extra photos in circles, mounted on a circle of plain paper. The AZZA Circle dies are perfect for this.
Using the AZZA Around the World stencil:
Using the AZZA Noisette stencil:
AZZA – Europe
Using the AZZA Sherwood set of stencils and the To the Beach embossing stencil.
Jocelyne Heyne – AZZA Europe.
Using the AZZA Verlaine Stencil:
Created by Jocelyne Heyne – Europe.
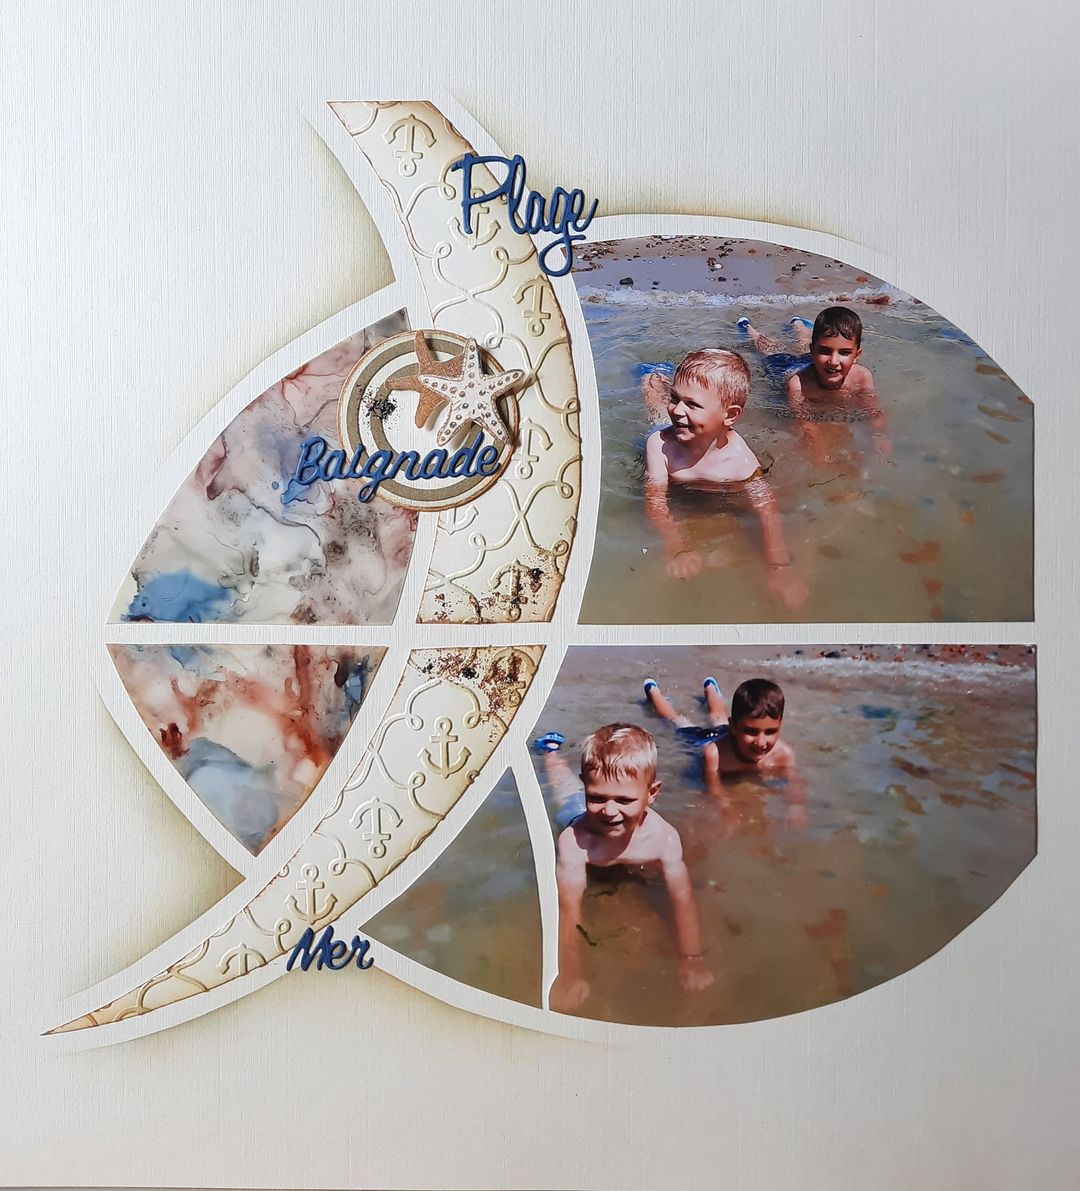
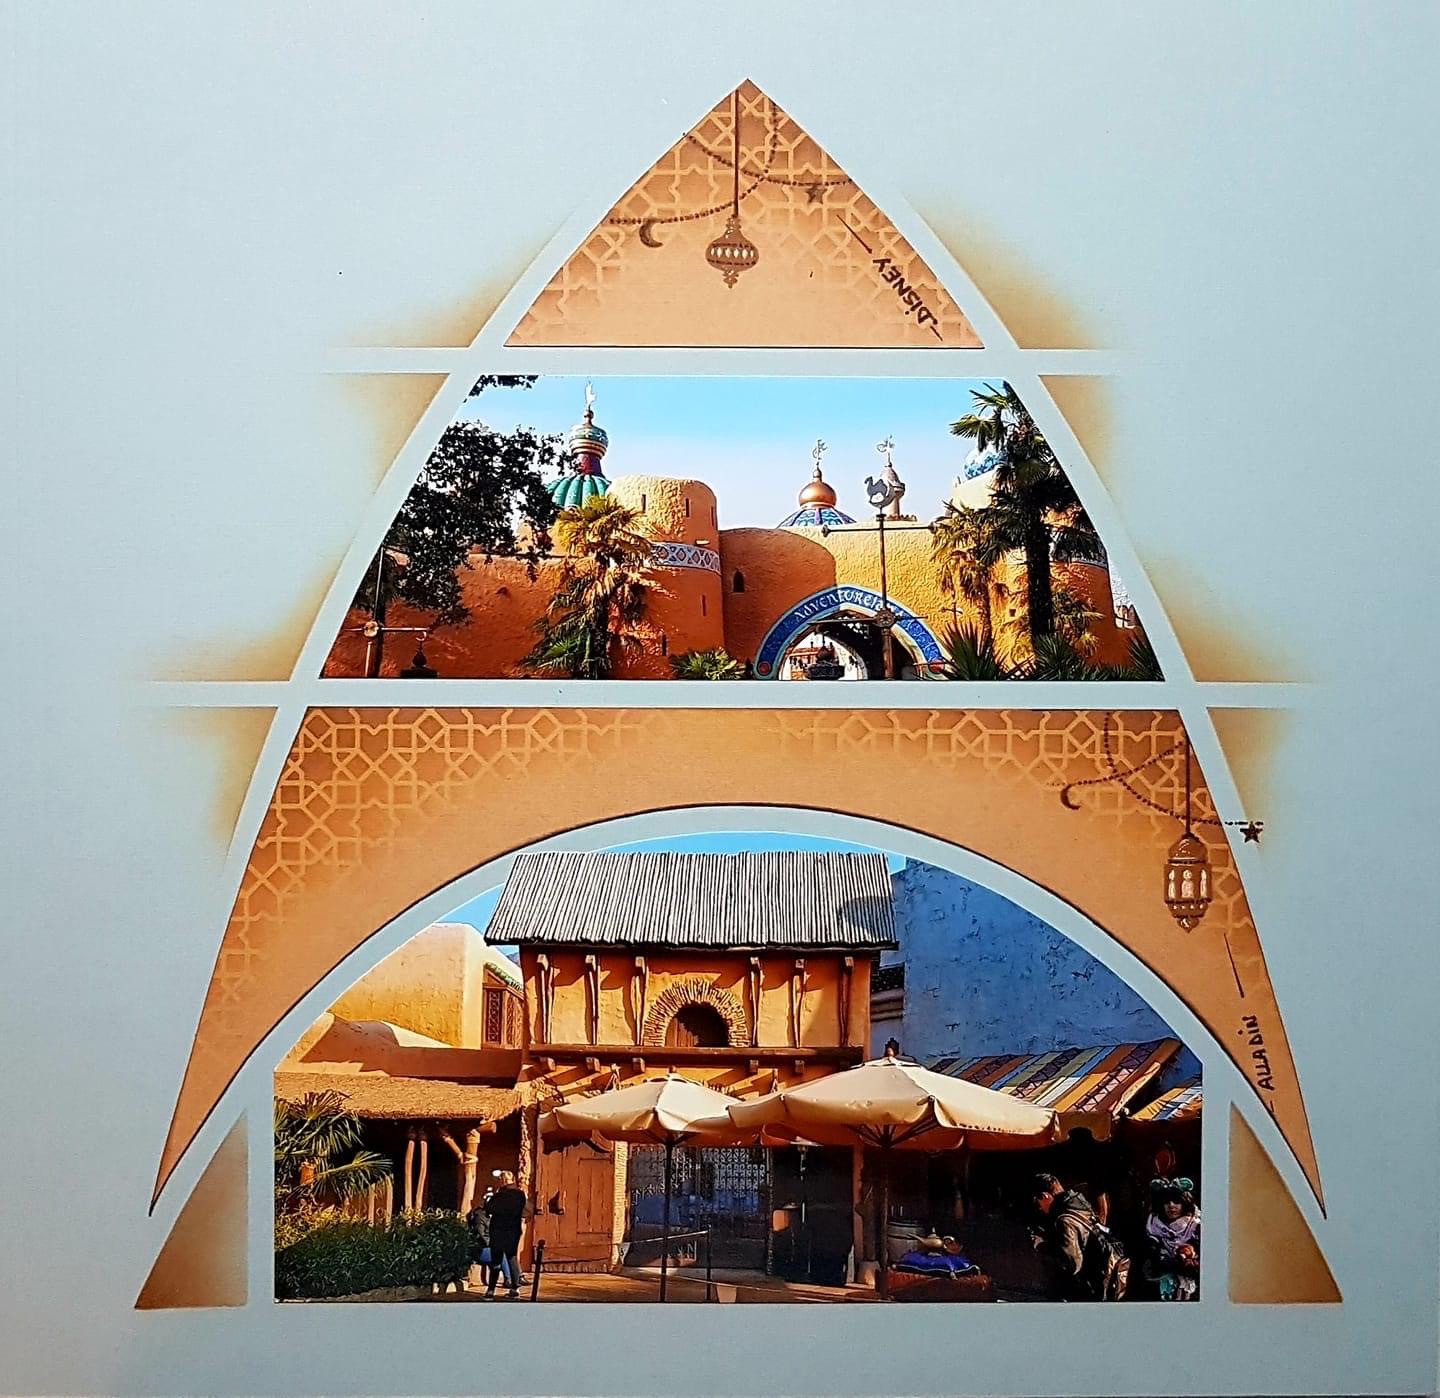
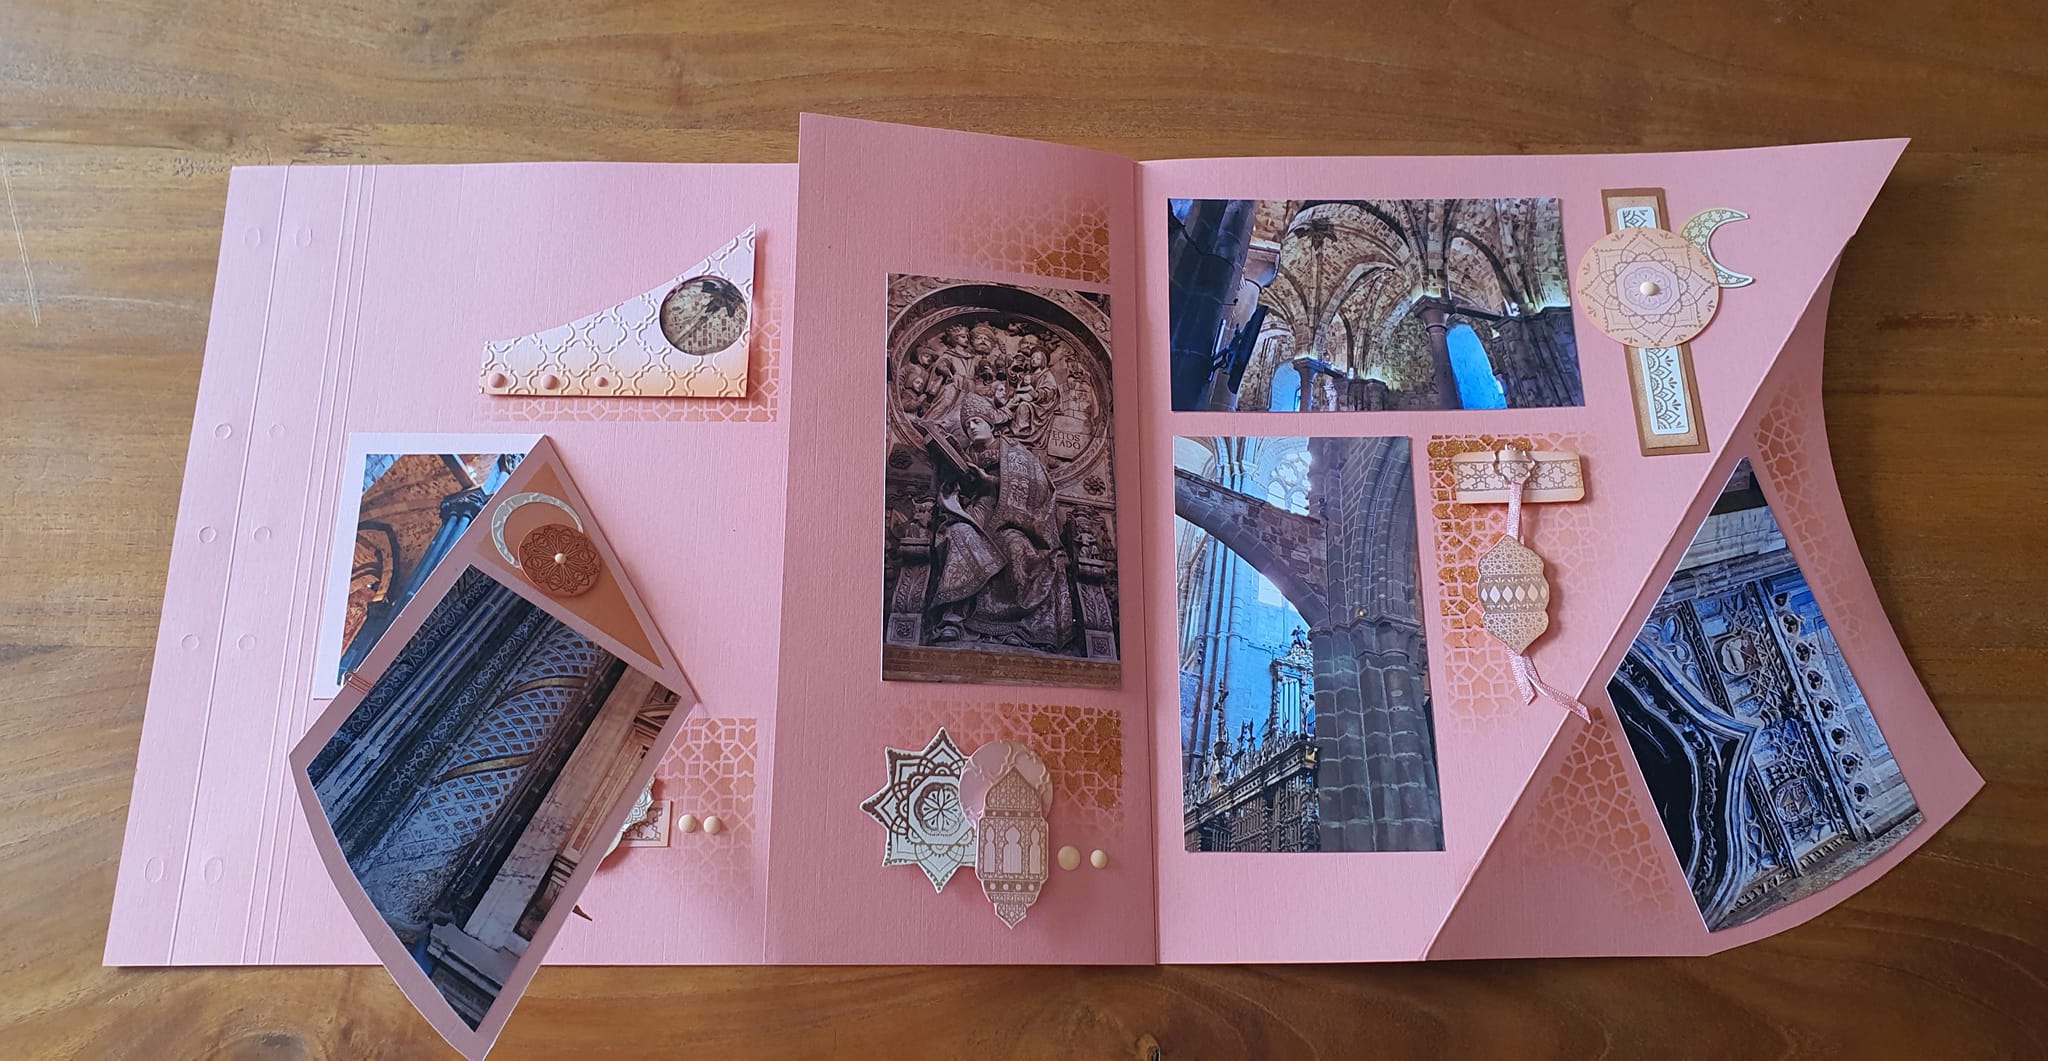
Using the AZZA Casablanca stencil and Arabian Nights decoration products:
AZZA – Europe
Using the AZZA Cancun stencil:
AZZA – Eruope
Using the AZZA Melbourne stencil and Material and Texture decoration products:
AZZA – Europe
Using the AZZA Brisbane stencil following a layout in the recent Scrap and Moi magazine:
AZZA – Europe
And a few single photo layouts which I thought were lovely:
AZZA Eclipse stencil
The AZZA Circle tool stencil is wonderful for decorating using full circles.
Scrap & Moi No 64 is now available. This edition has samples with Barcelona, Cannes, Loire, Brisbane, Montmartre, Discovery stencils. This beautiful layout is based on Dominique Spirlet’s sample on page 42 using Brisbane stencil and the beautiful Flower Field cutting die.
Cards are also included, Valerie has recreated one of the samples below.
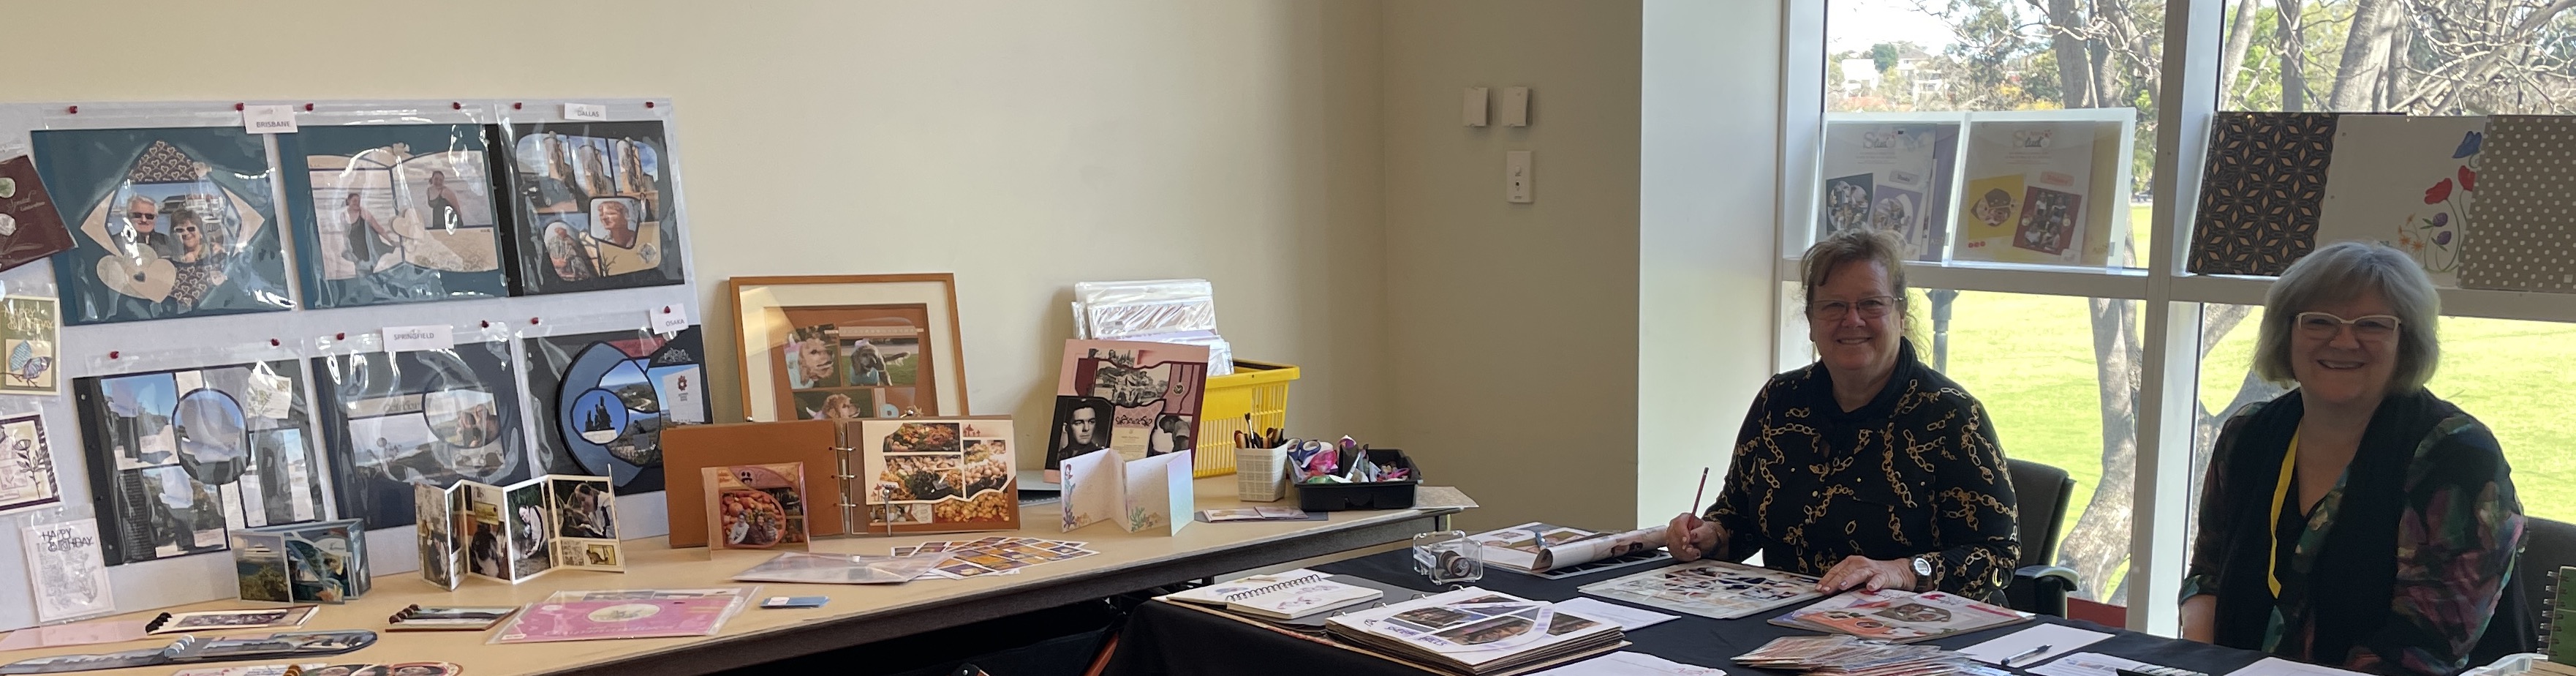
A big thank you to all the ladies that stopped in to visit with Jeni and I at the Craft show in South Perth. As soon as I have a venue for classes south of the river I will be in contact.
Page by Hilary Hamilton – Victoria. New York stencil.
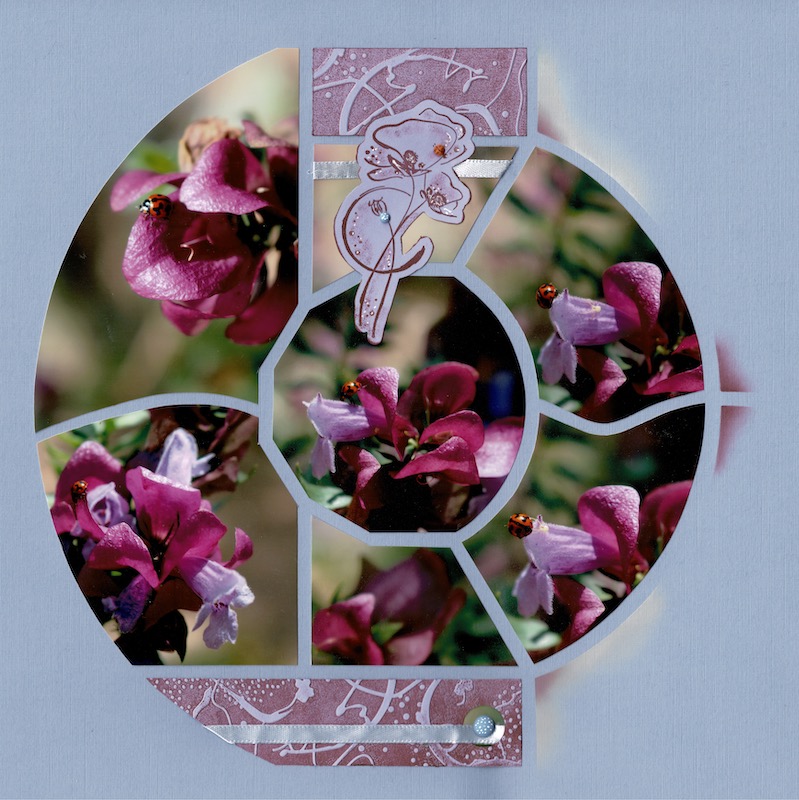
With Spring almost here I thought I would share some pages of beautiful flowers, giving us a taste of what is around the corner. The wild flowers are beginning to flower in Western Australia, I can’t wait to get out and take a few more photos to scrap through the year.
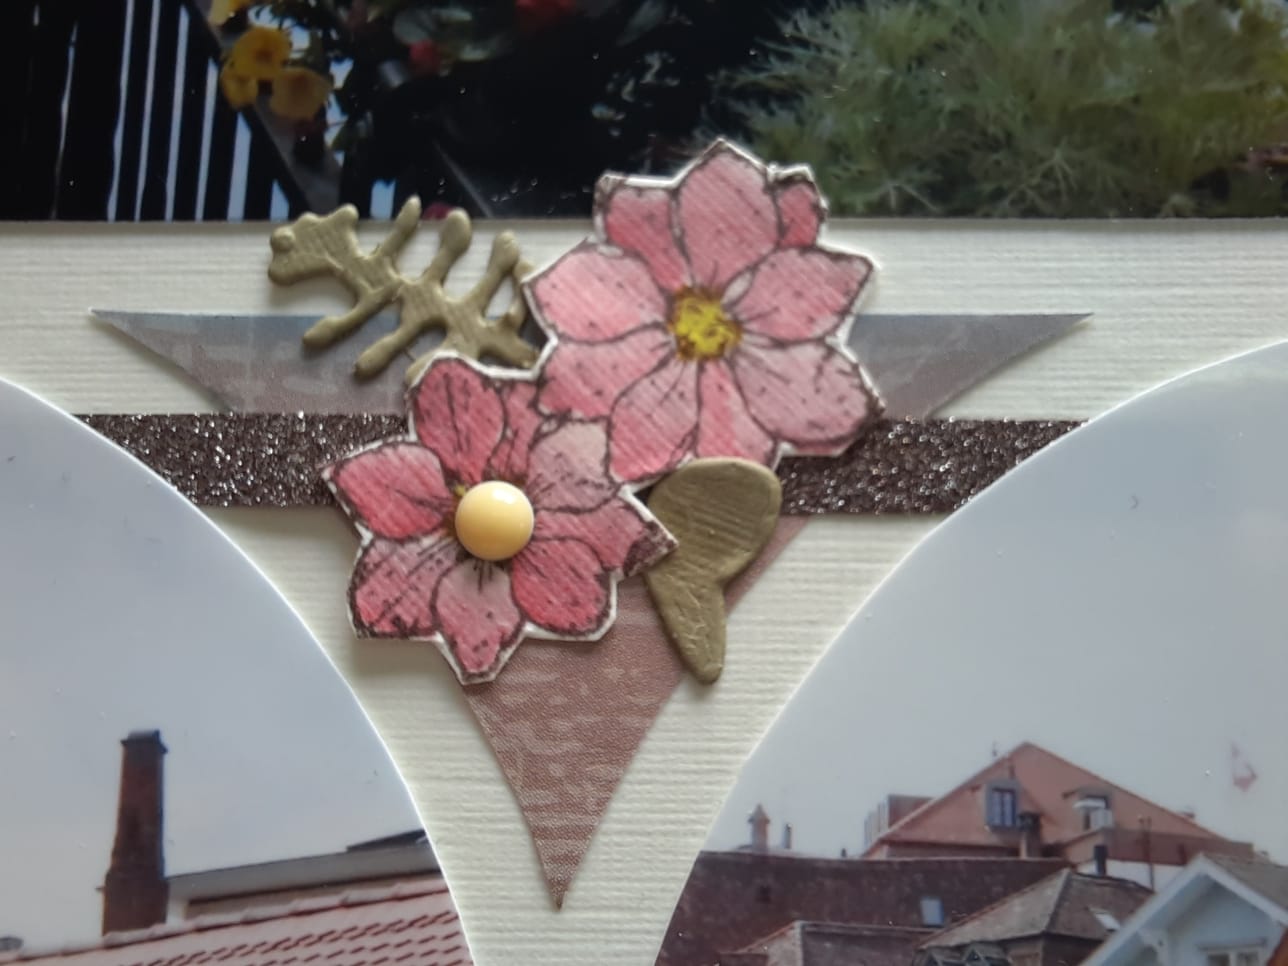
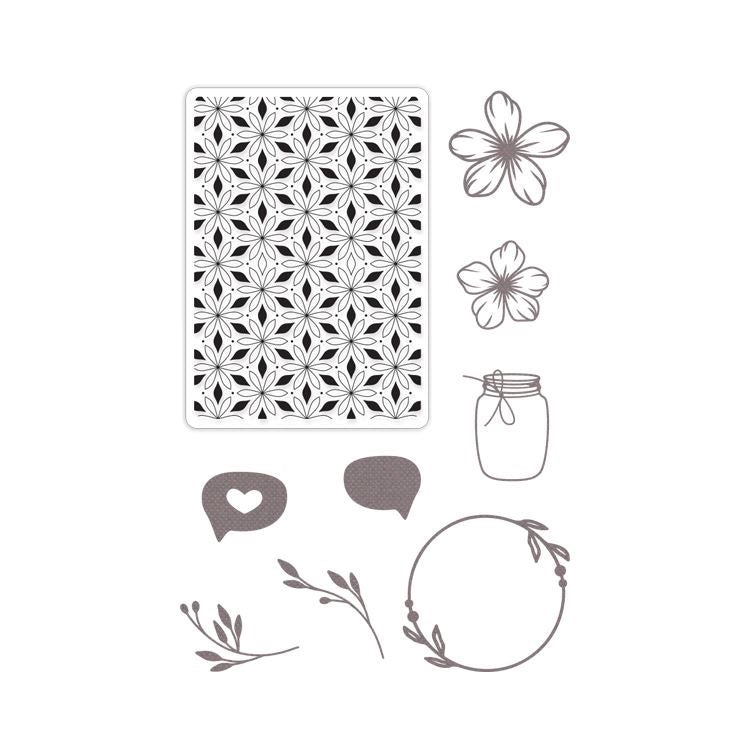
The beautiful page above by Hilary was created with the AZZA New York stencil and the set of dies below. Hilary and her team will be at the Melbourne Paperific Expo at Flemington Racecourse this weekend. There will be a ‘make and take’ session and ‘Show specials’ so do pop by and have a look if you are in the Melbourne area.
This is a lovely pack consisting of four dies, one die/stamp and an embossing folder that Hilary has used on the page above. These products are not available to purchase on their own. This was a special pack released for AZZA’s 20th birthday celebrations. The die/stamp allows you to colour where the gold is shown in the image below and then the ‘stamp/die’ will stamp the image and cut it out at the same time. The dies are perfect for flower photos on the page and can really be used for any occasion.
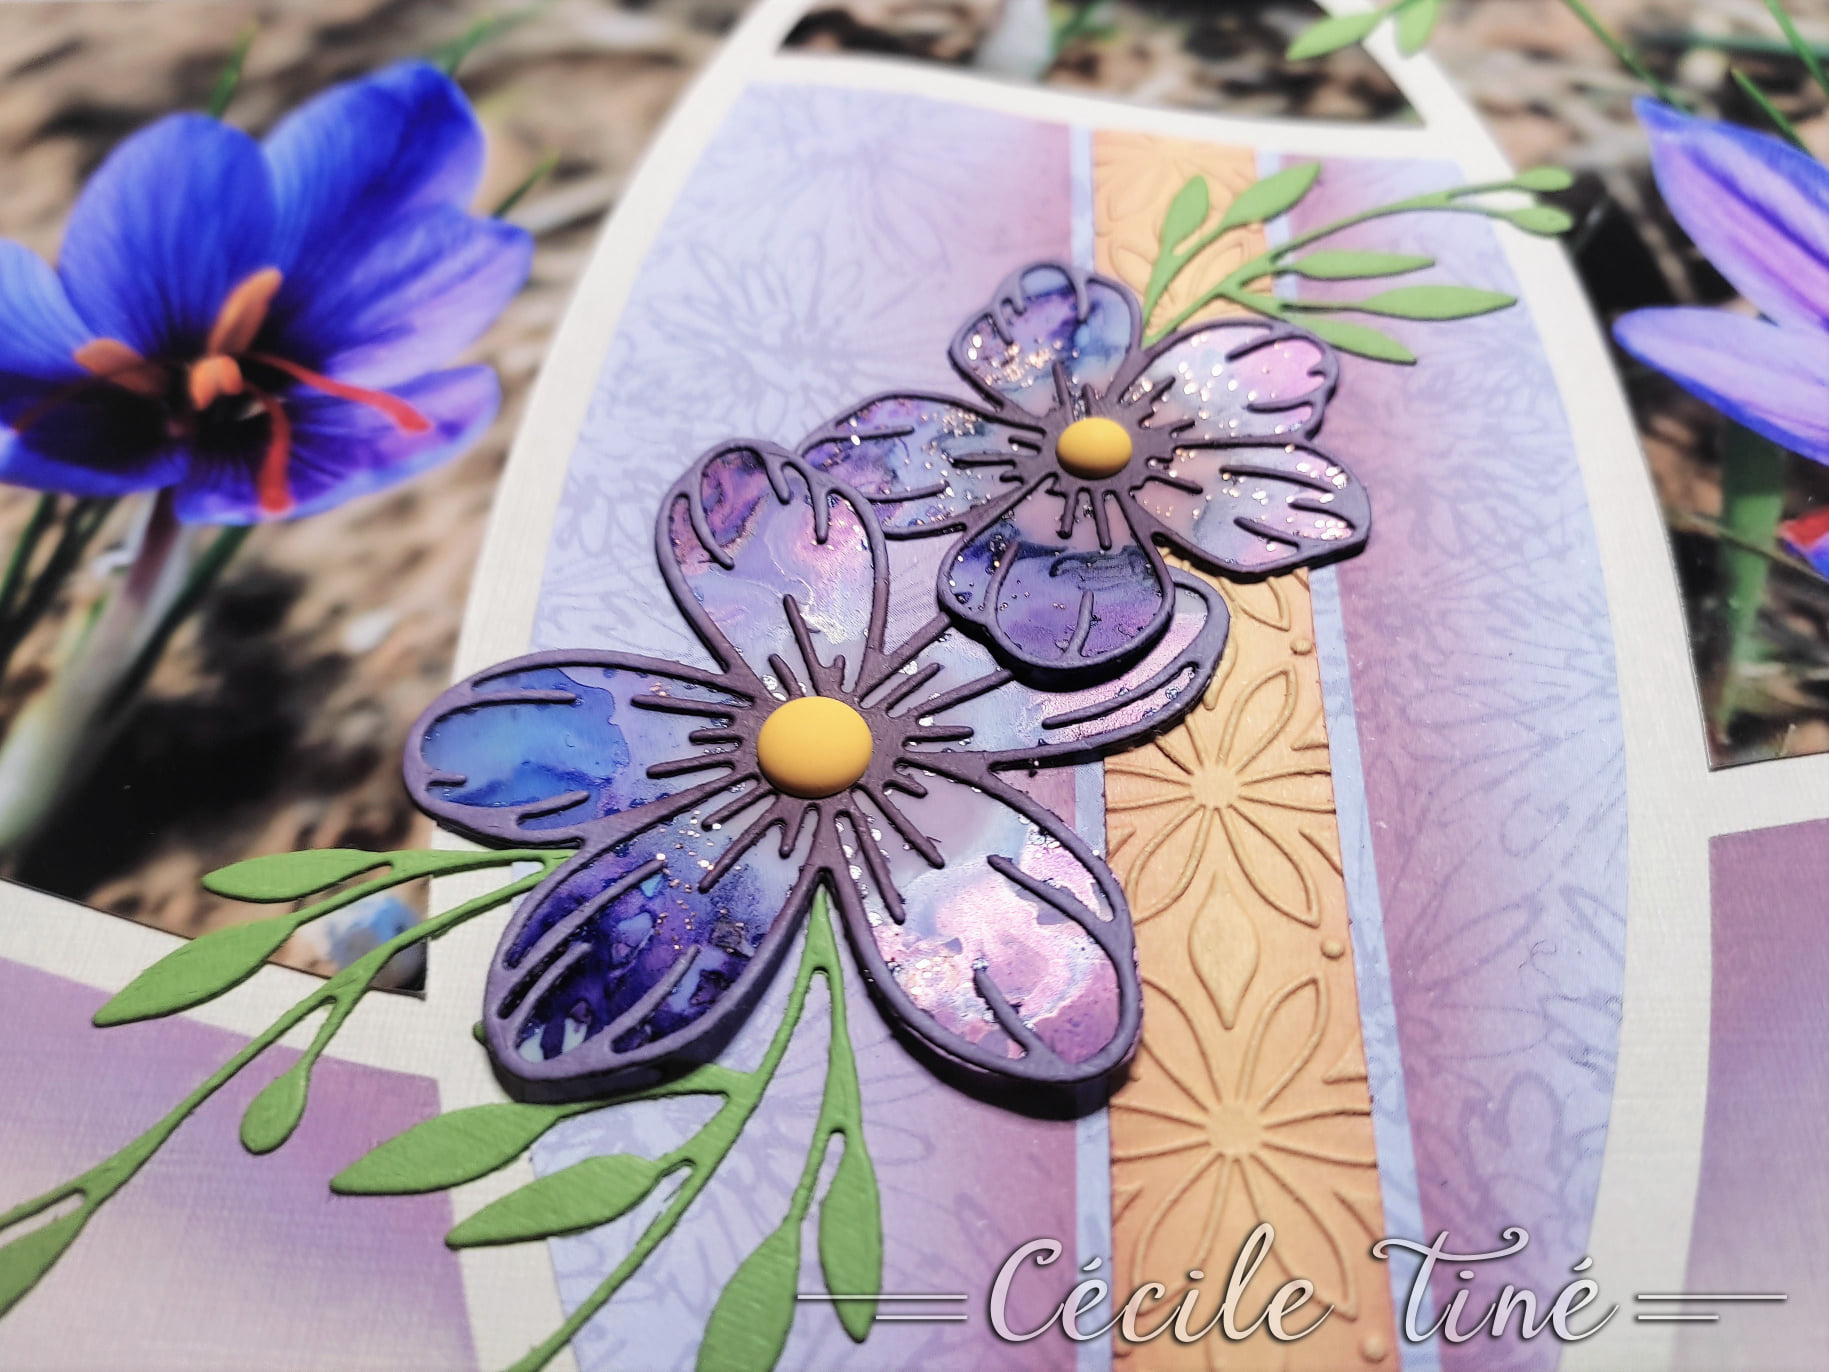
Sue Talbot in New South Wales created the two pages below using the dies above for decoration. Little Resin dots in the centre of the flowers can pick up the colours in the photos, or as seen in the second layout the flowers can be cut in a different colour.
Created by Sue Talbot – NSW, with the AZZA Kyoto stencilCreated by Sue Talbot – NSW, with the AZZA Montmartre stencil.Layout by Christelle created with the AZZA Charleston stencil and embossing folder in the kit above.
Martine Dallery has used one of the dies with the AZZA Noisette stencil below. She has mounted it on a few of the AZZA Sewn circles and used the Daydream embossing folder on her papers.
Page by Martine Dallery created with the Noisette stencil.
There are still a few sets of the pre-cut pages for the Noisette stencil in the online shop.
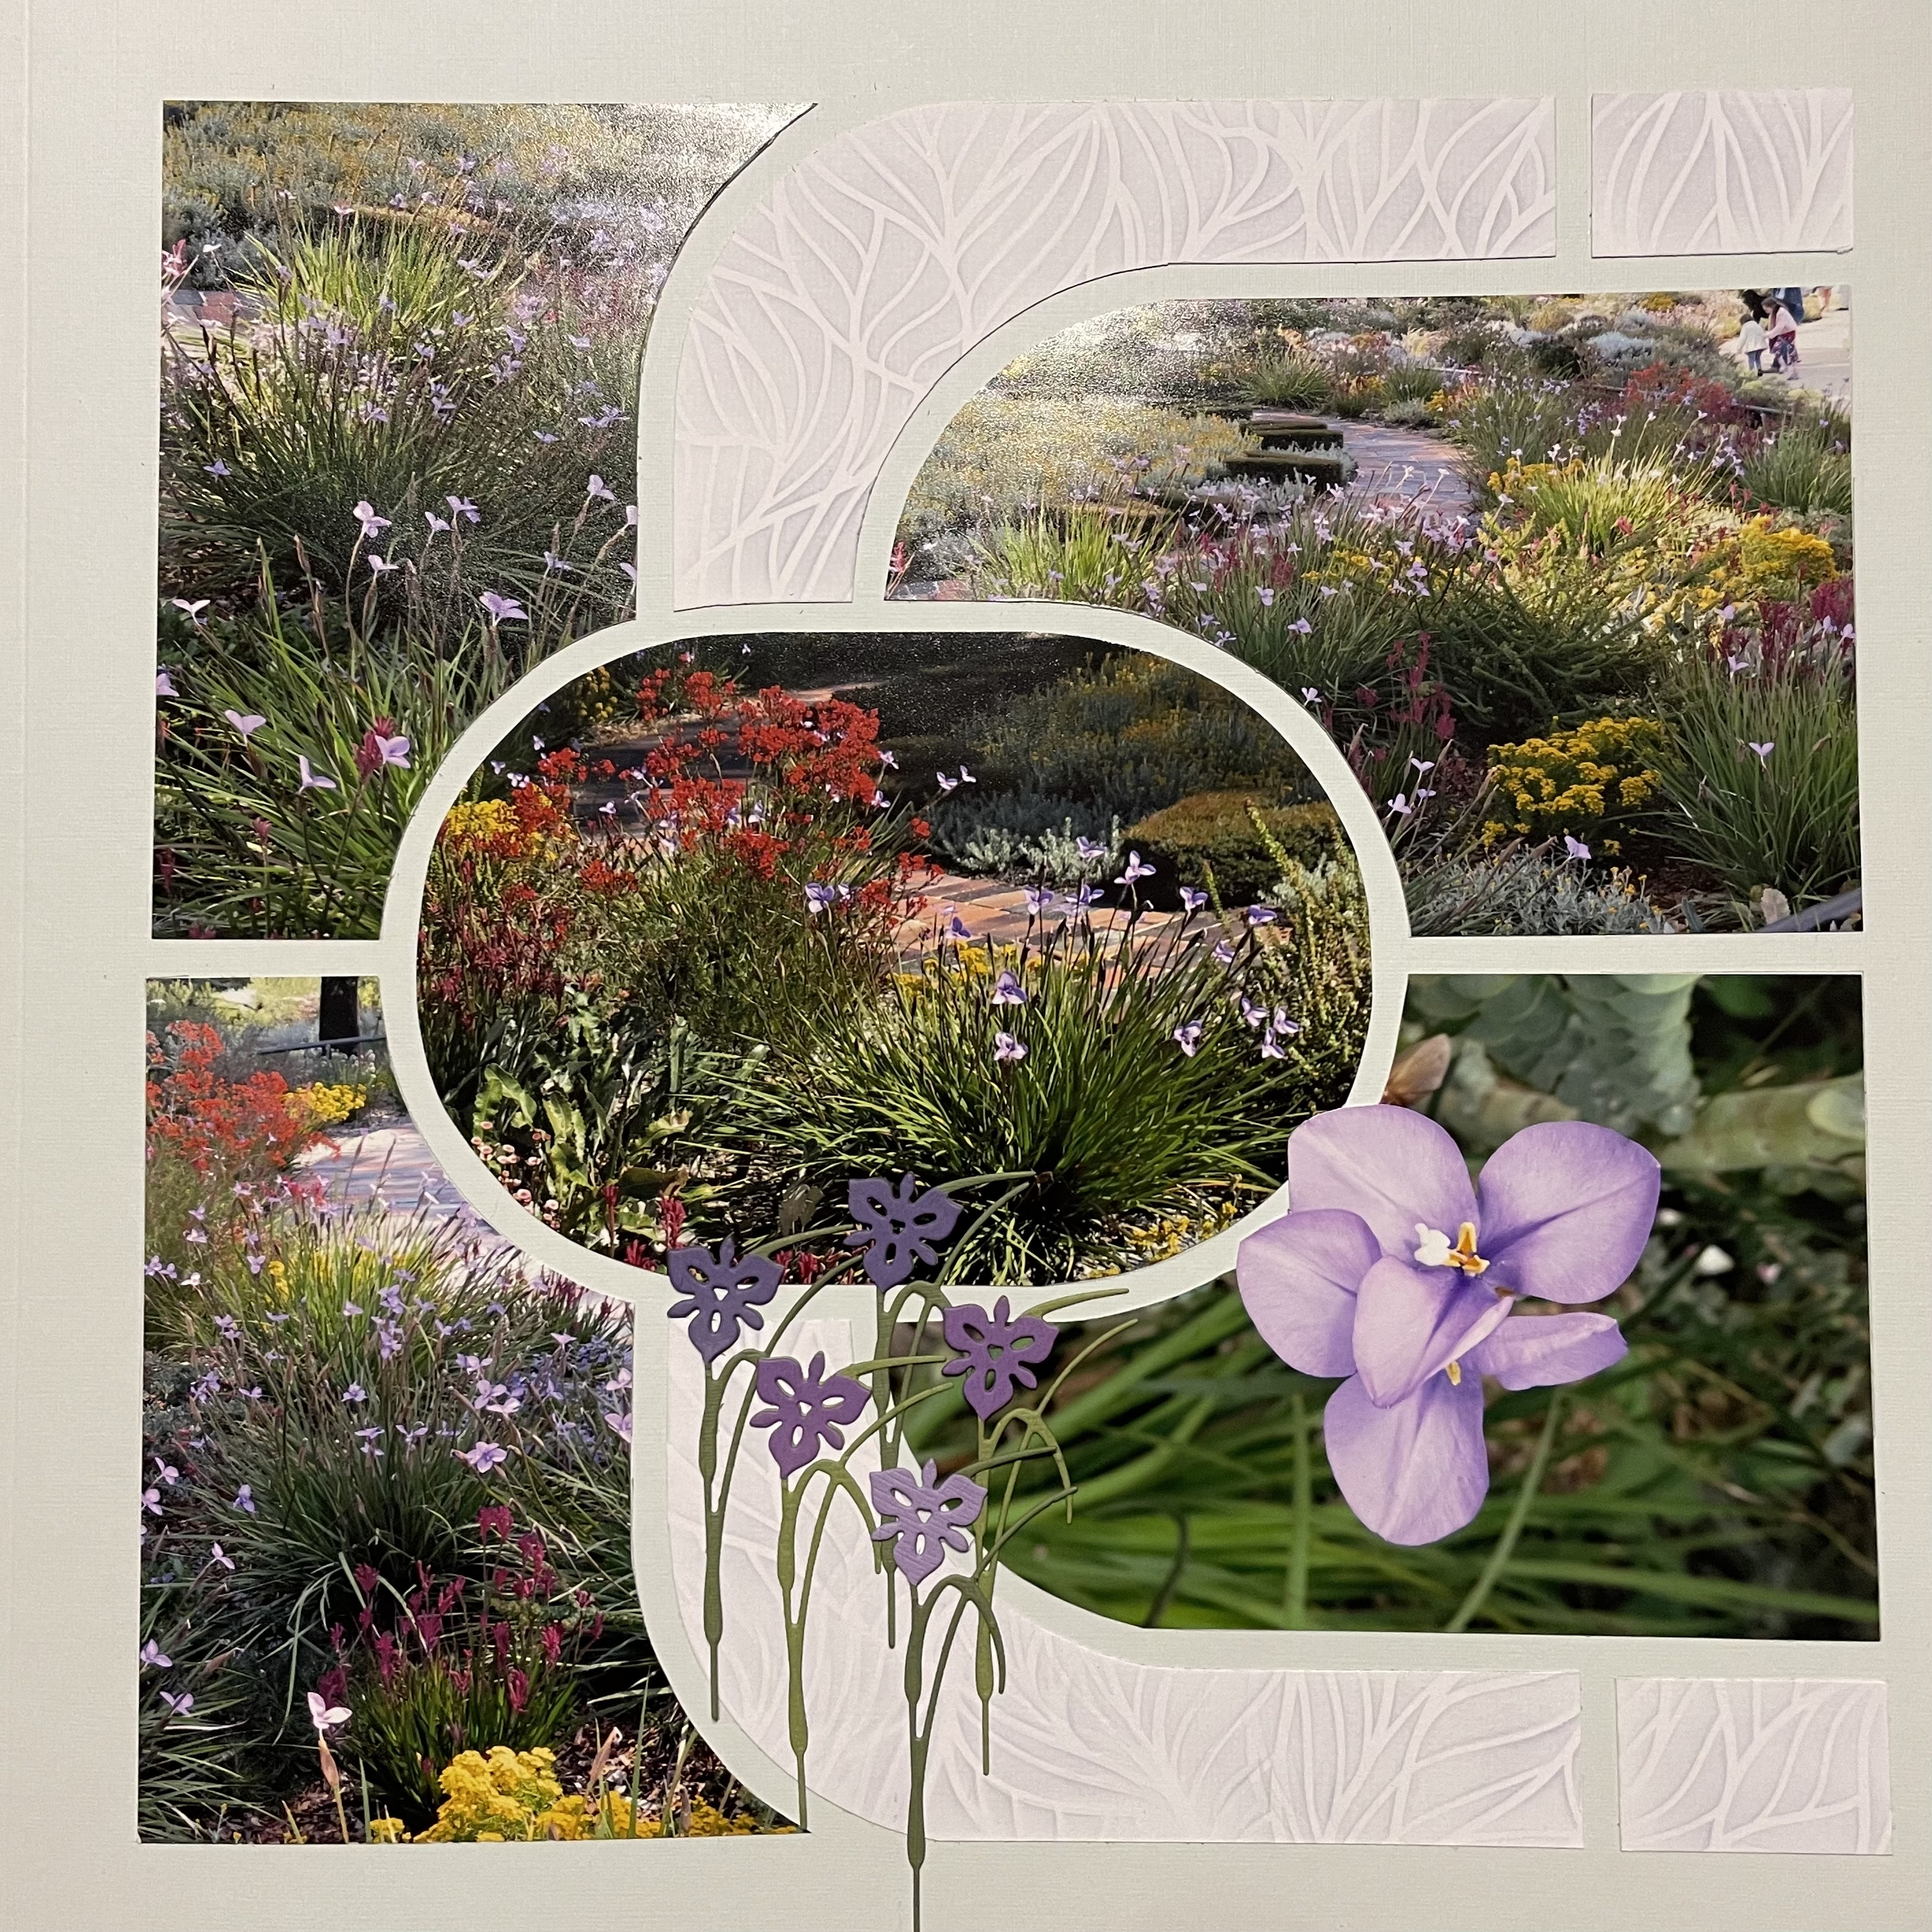
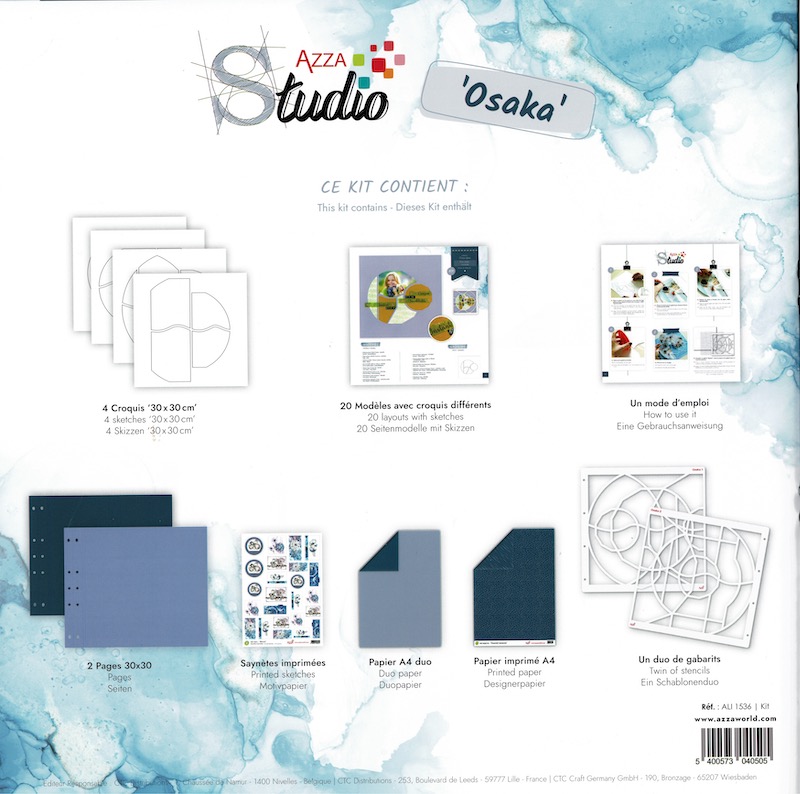
A layout below created with the AZZA Osaka stencil by Gillette Duwiquet in Europe using the Flower Field products. The Flower Field die is now back in stock.
Jocelyne Heyne used the AZZA Barcelona stencil set for the page below. She used the Flower Field products for the decoration. She has placed vellum behind the small figures. The Resin dot at the centre brings out the yellow in the centre of the flowers in the photos.
Created by Jocelyne Heyne – Europe
Two layouts with the AZZA Brisbane stencil, both using the Flower Field products released in July.
In the layout below, by Christelle Gicquel, she has used the three little flowers from the Flower Bouquet micro stamp for decoration together with the leaves from the AZZA Forever die set.
A lovely decoration using the same die set by Annie Alloiteau-Gatterre in Europe. She has used the Daydream micro stamp for the background and Resin dots to finish.
Created by Annie Alloiteau-Gatterre – Europe
Another lovely decoration using the same set of dies by Anne Forget below.
Created by Anne Forget – Europe
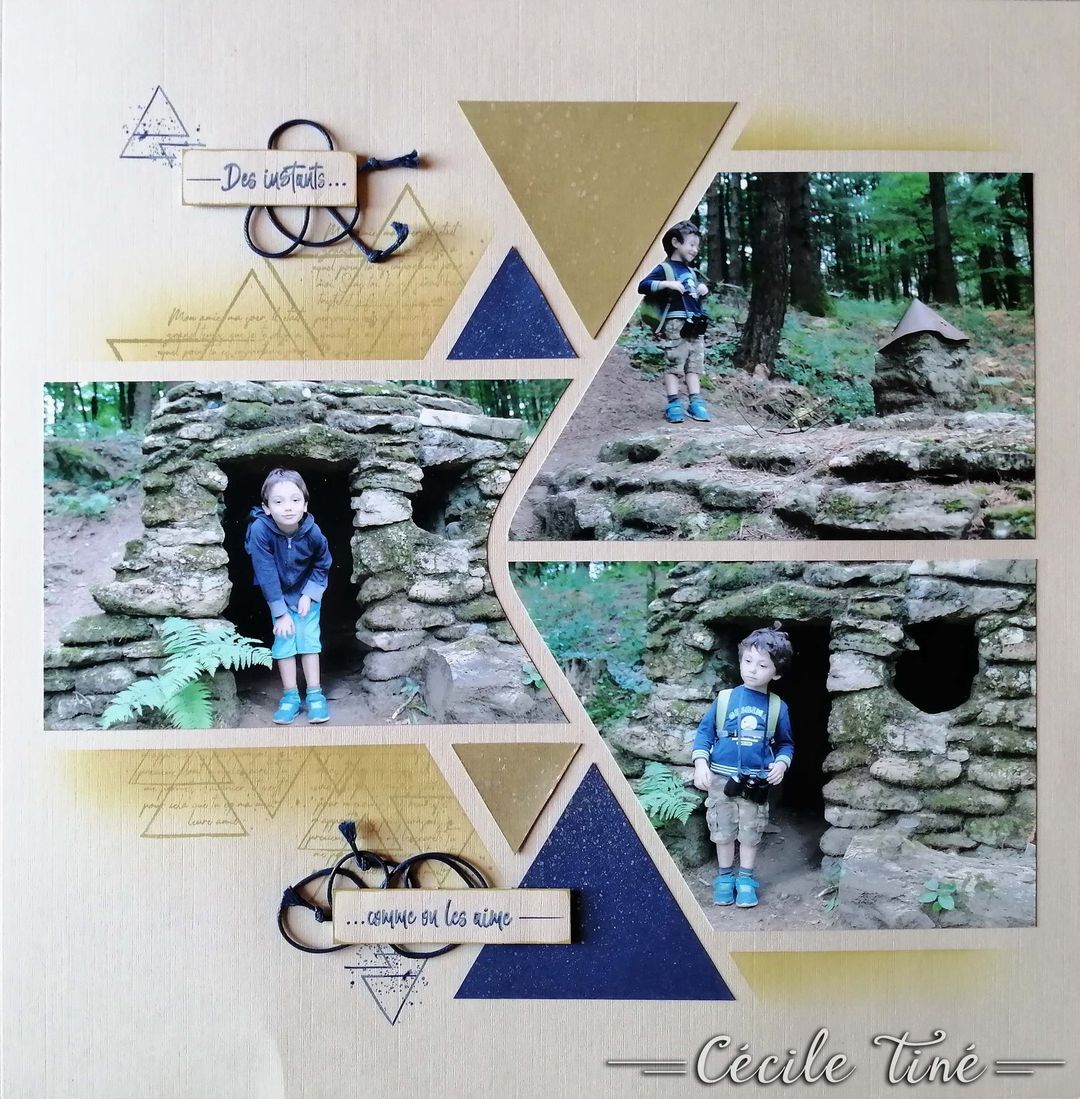
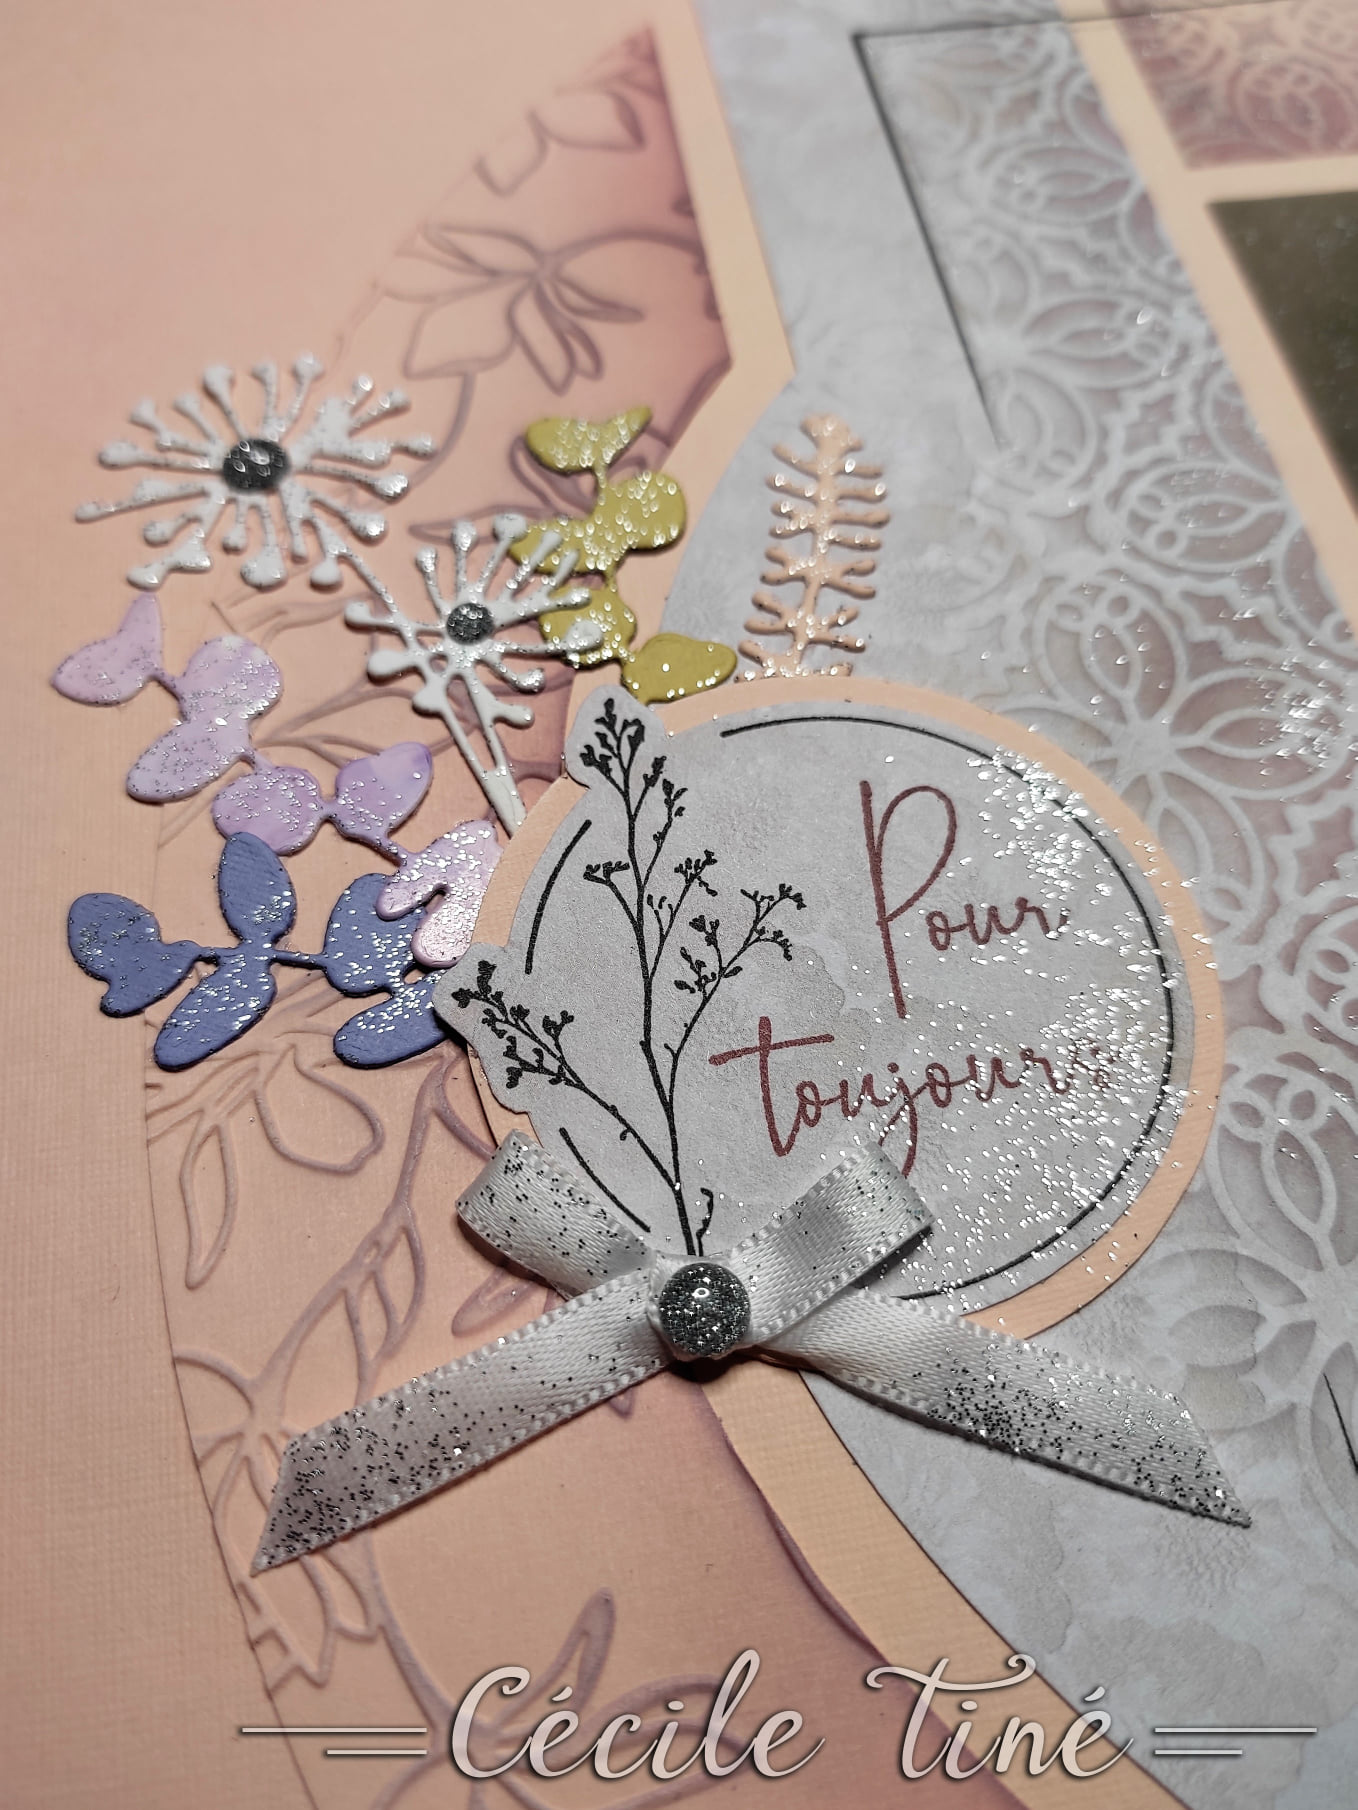
Lastly, a lovely Heritage layout using the same products by Cecile in Europe. Cecile has used the Forever embossing folder and texture stencil on this page as well.
Beautifully finished off with Resin dots, satin ribbon and Glitter paint. I have shared this layout before, but it was perfect to add to this collection.
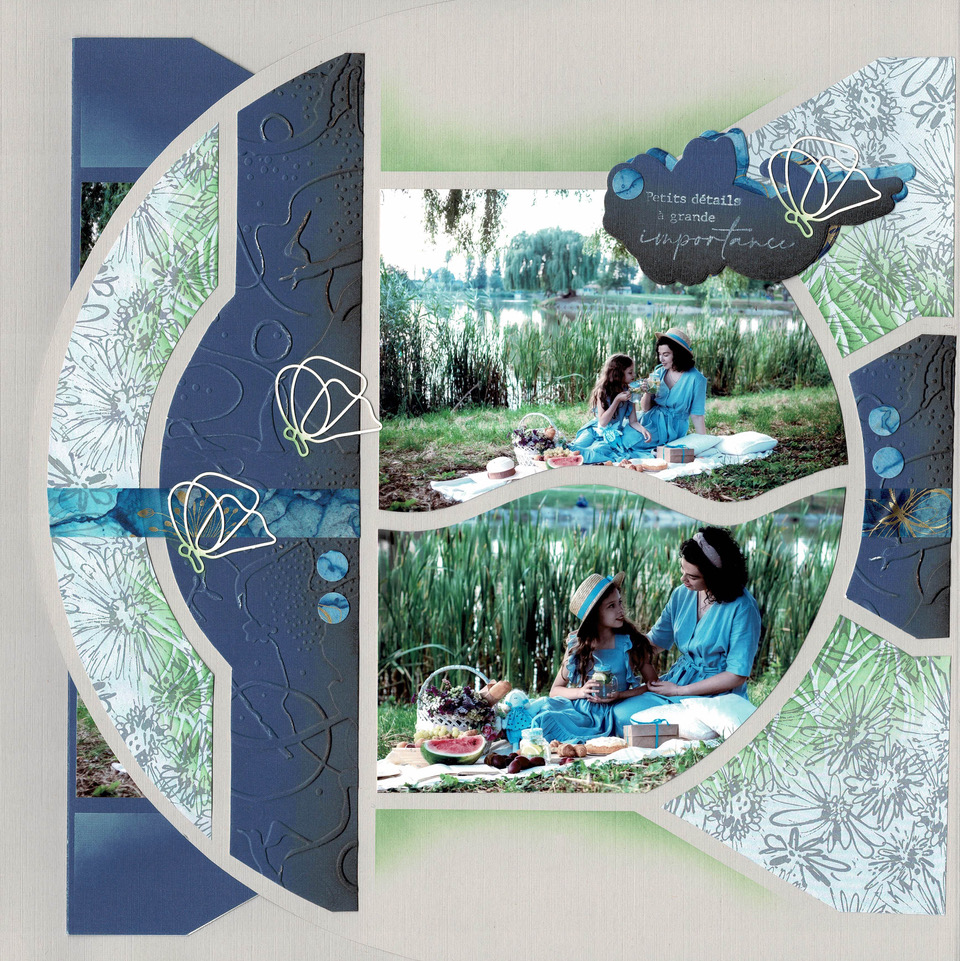
Another beautiful page by Christelle with an AZZA accordion sheet to include more photos. Christelle used the AZZA Burano stencil for this layout.
Accordion sheet folded out to the leftAccordion sheet folded out to the right
With this month’s products being ‘All Aboard’ AZZA has placed most of its Travel products on sale. These products will only be on sale until the end of the month, so do pop into the shop and take a look.
There is also only one week left to place your online order this month to receive the Athletics 1 promotion stencil – the promotion will end 31st August.
Jill Attrill in Victoria created this beautiful layout with the Athletics 1 stencil and AZZA decoration products.
Created by Jill Attrill – Victoria
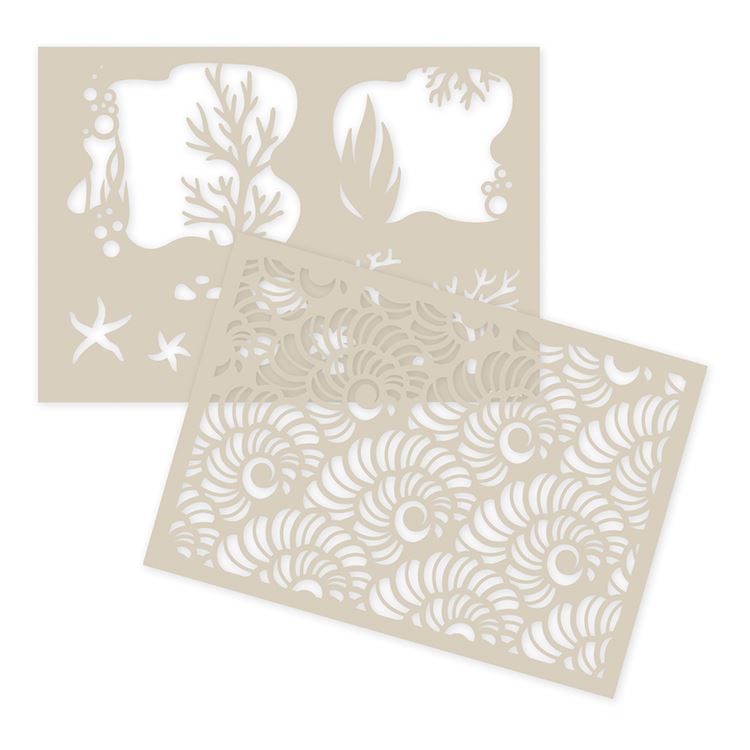
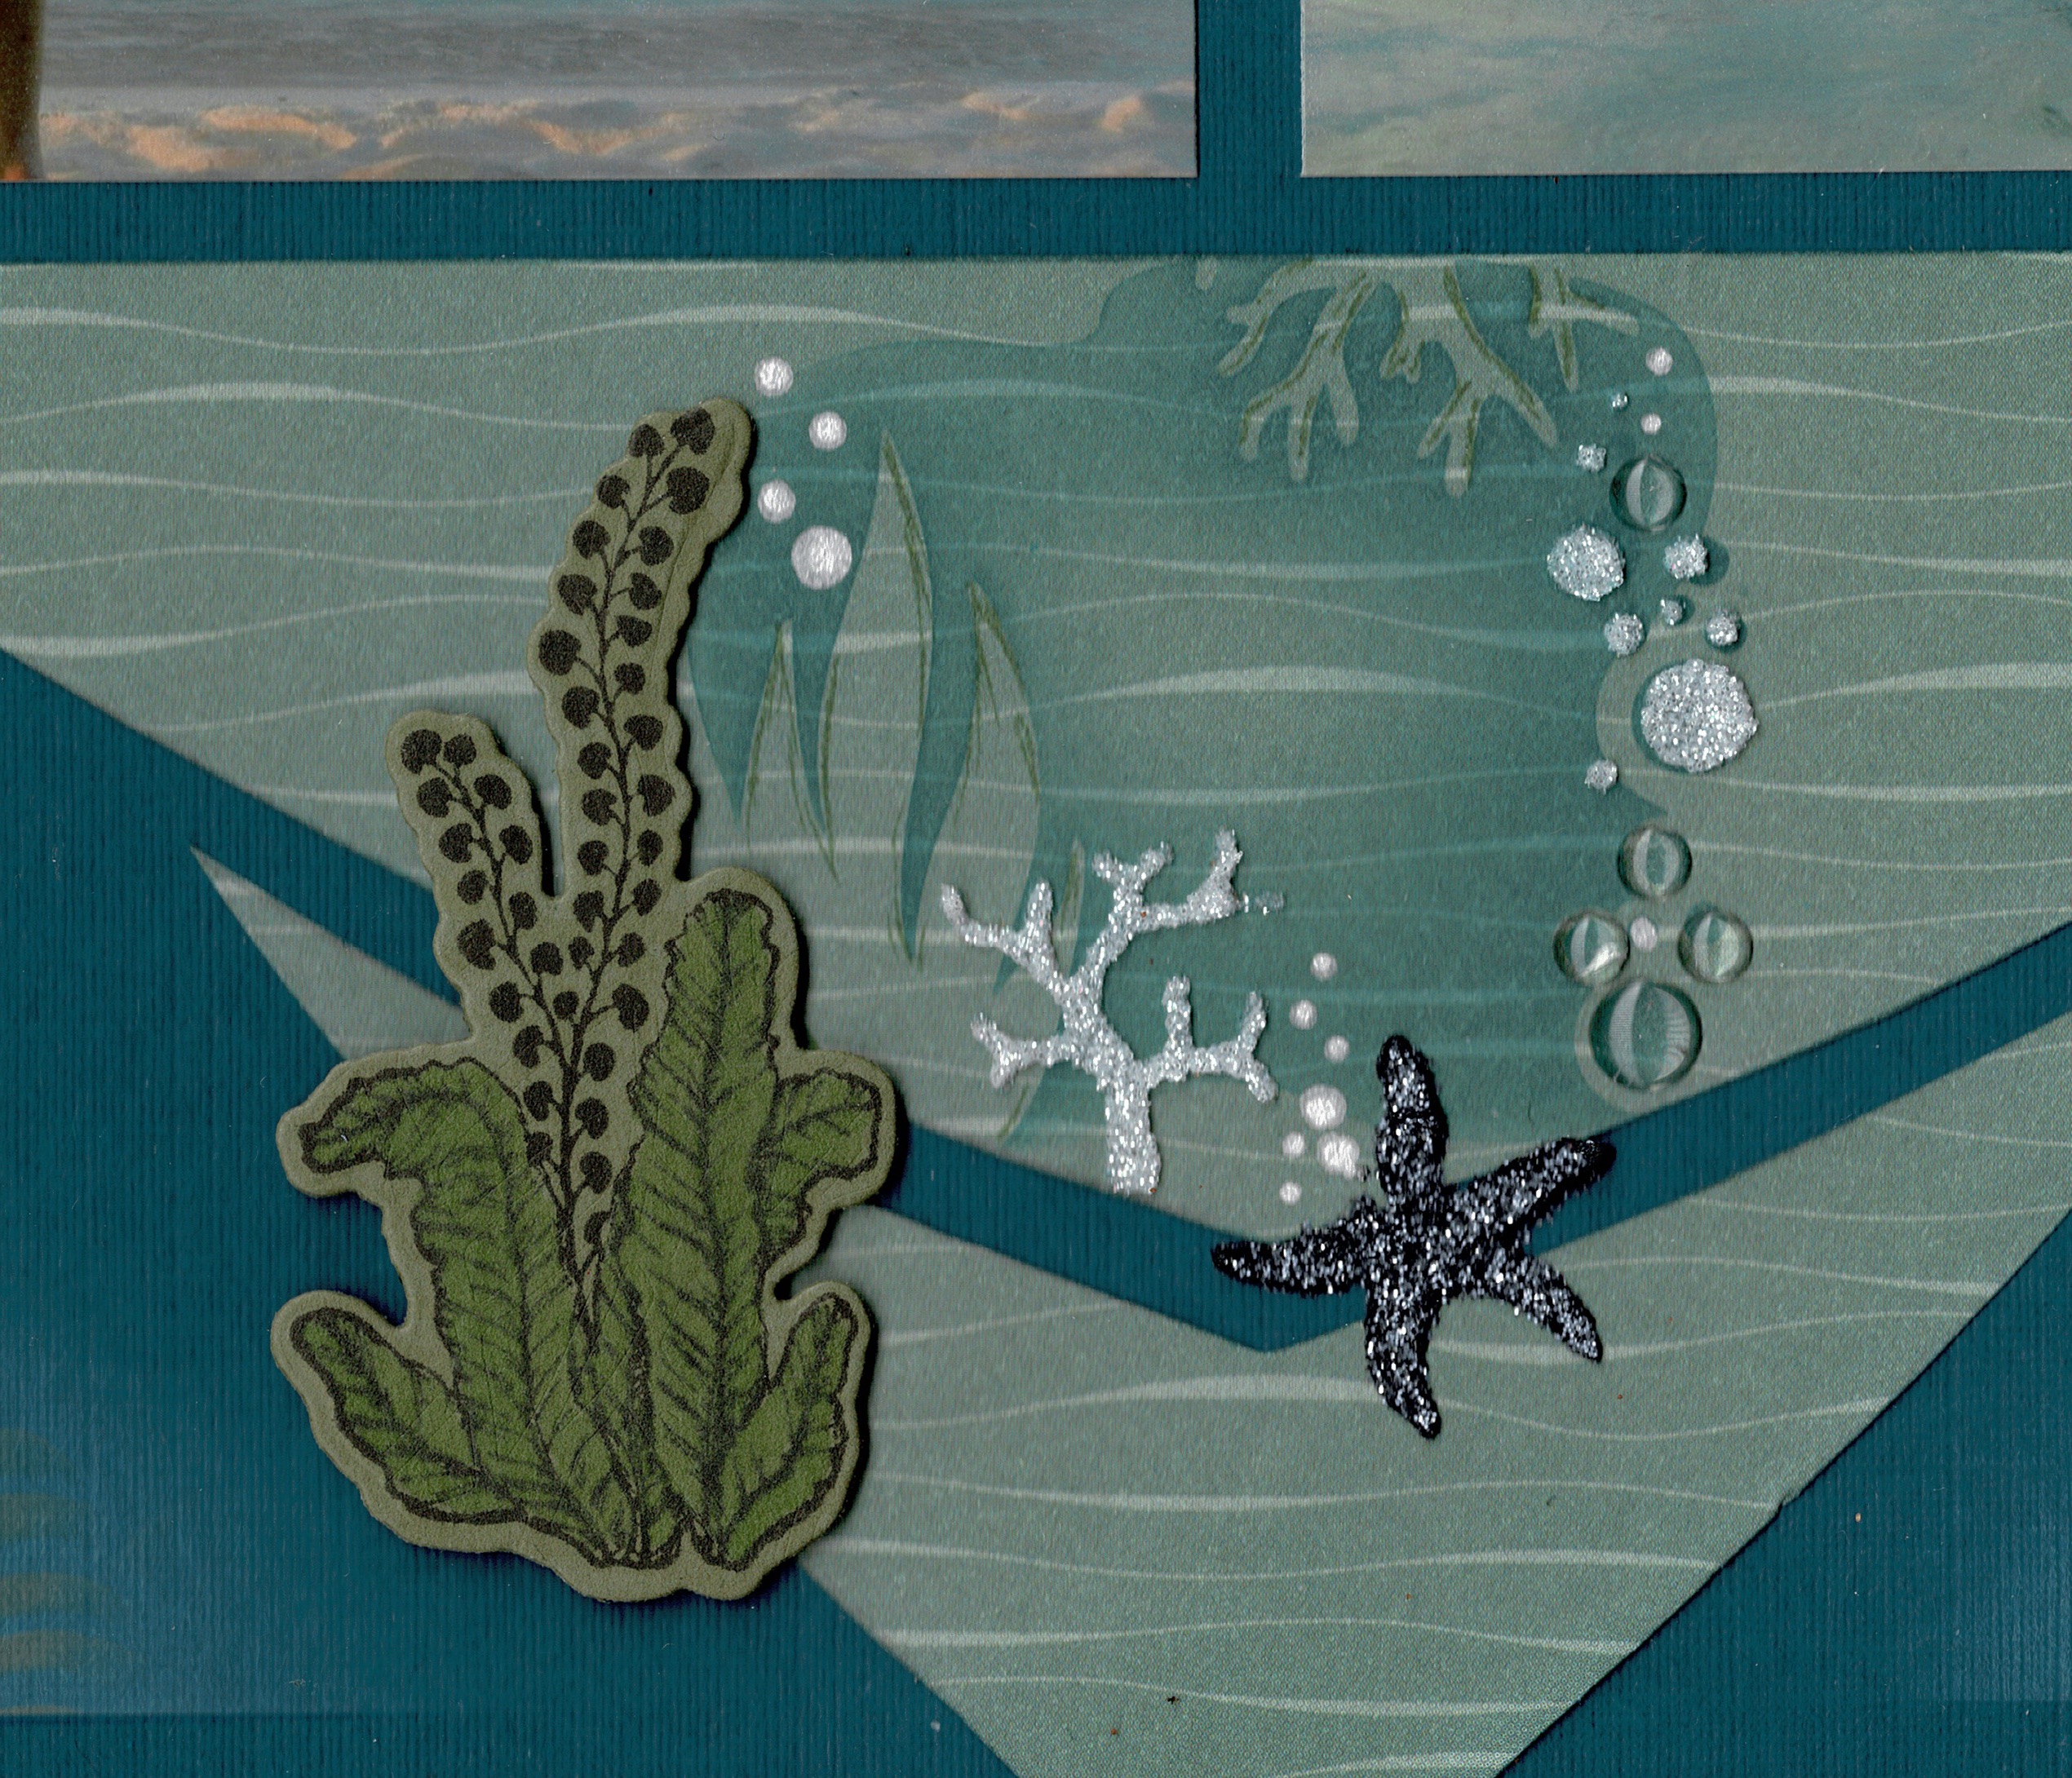
Jill used the ‘At the Beach’ texture stencil shown below on her page and the new Sea Garden paper.
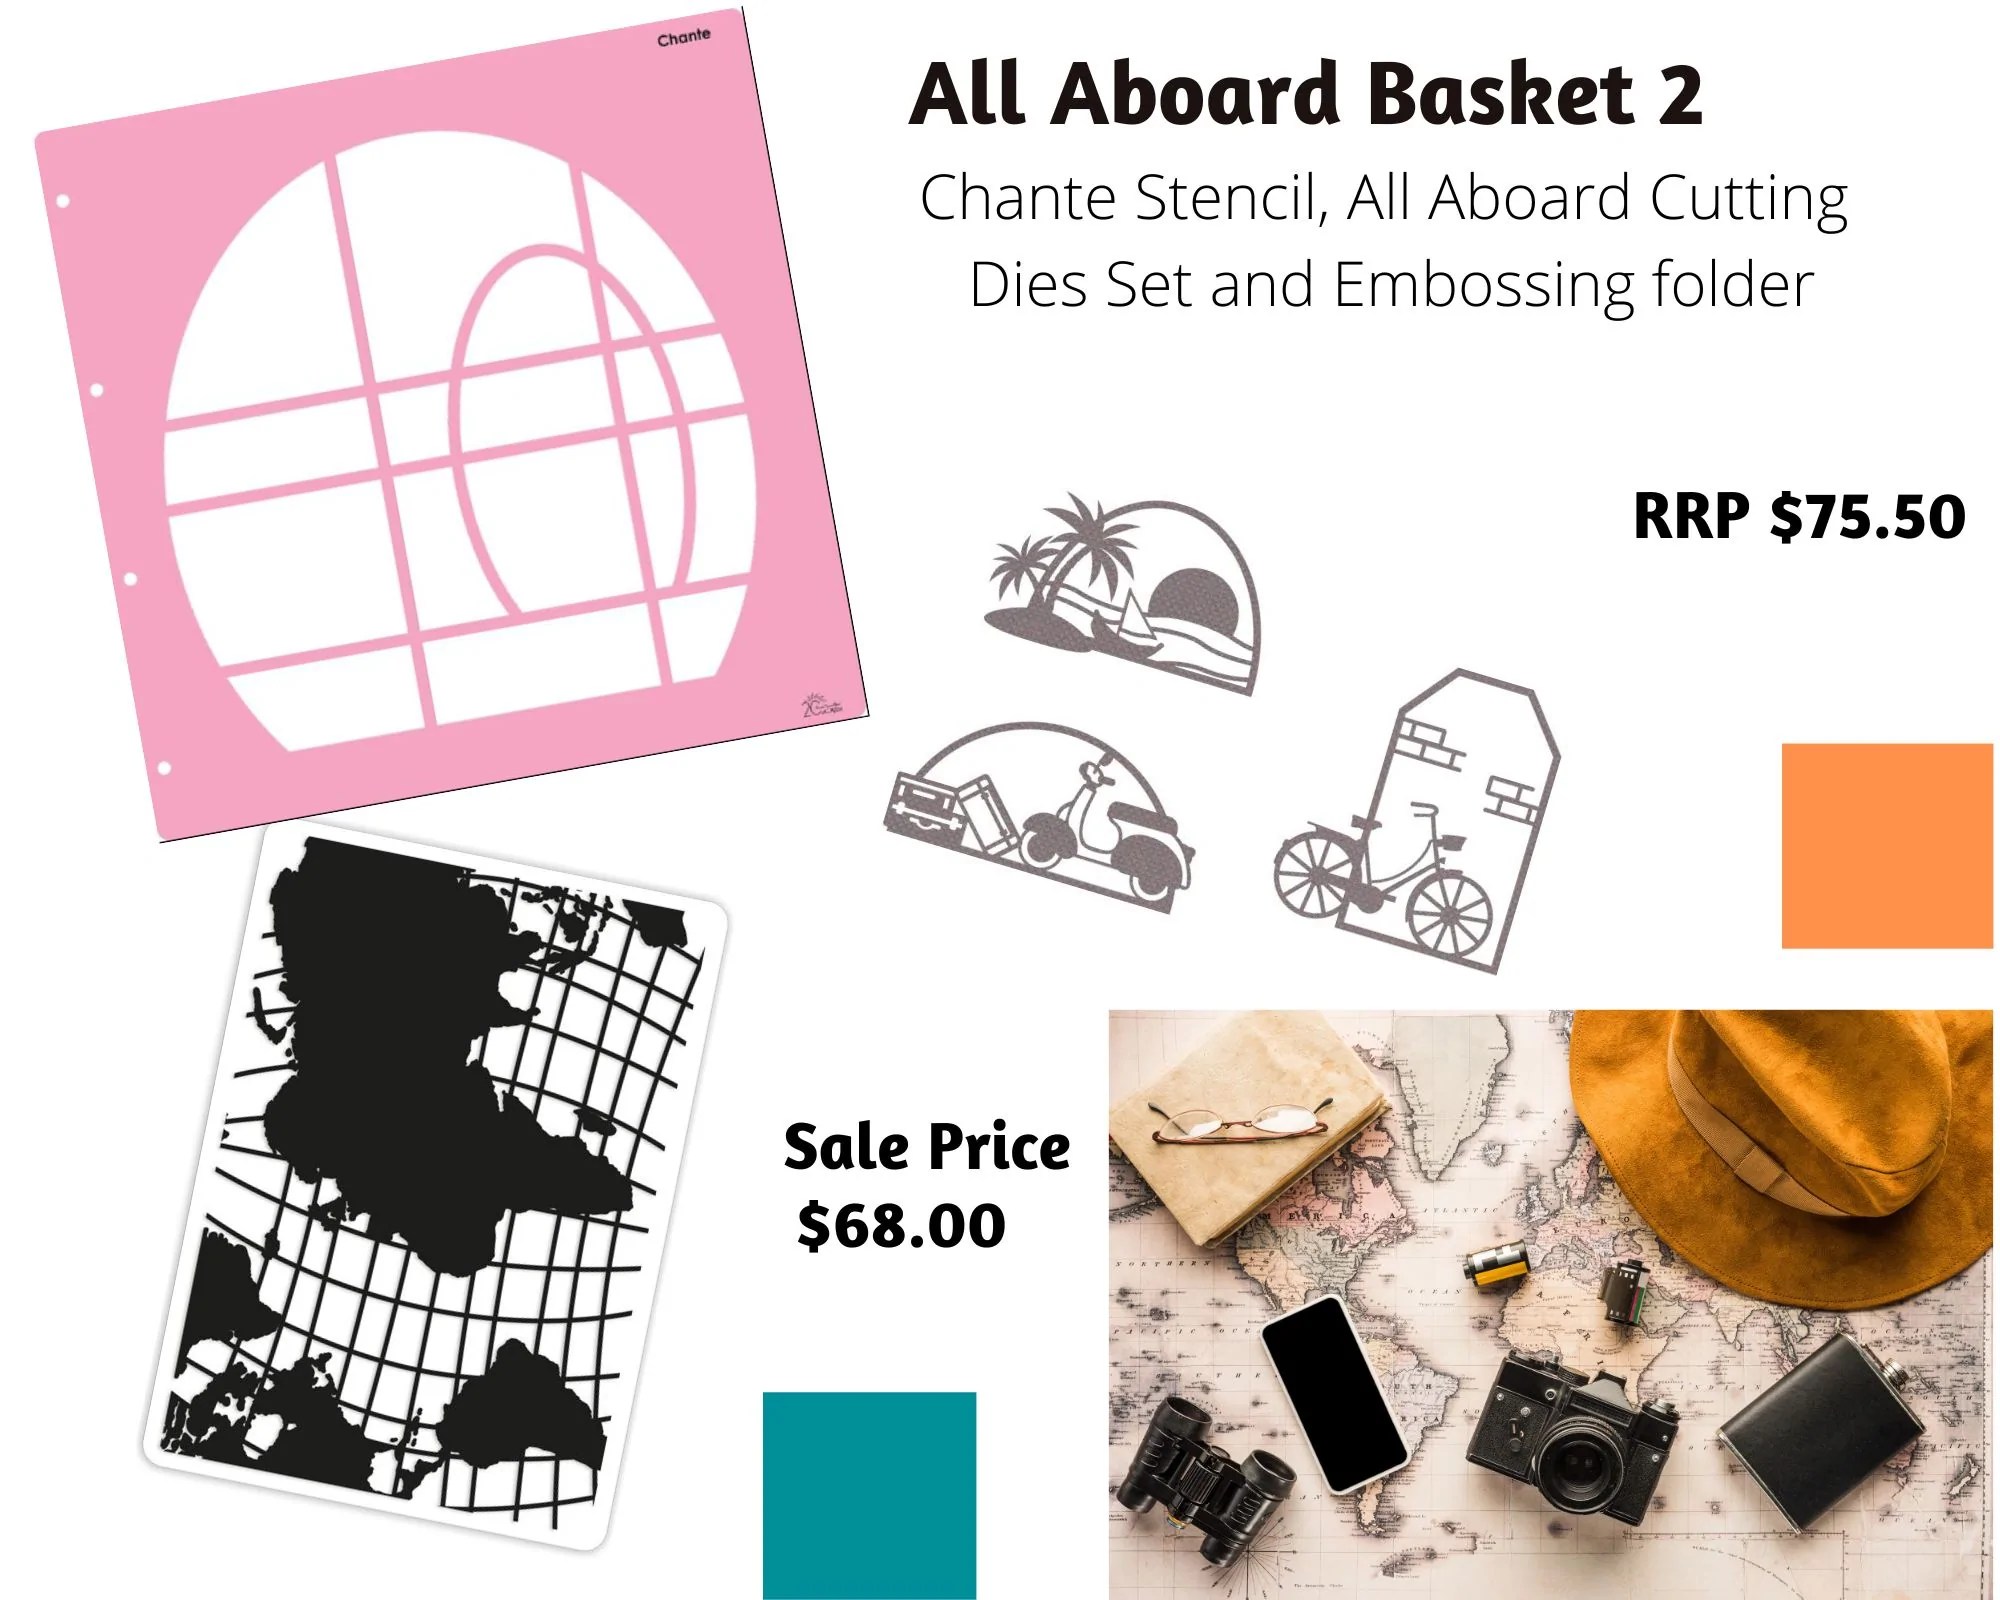
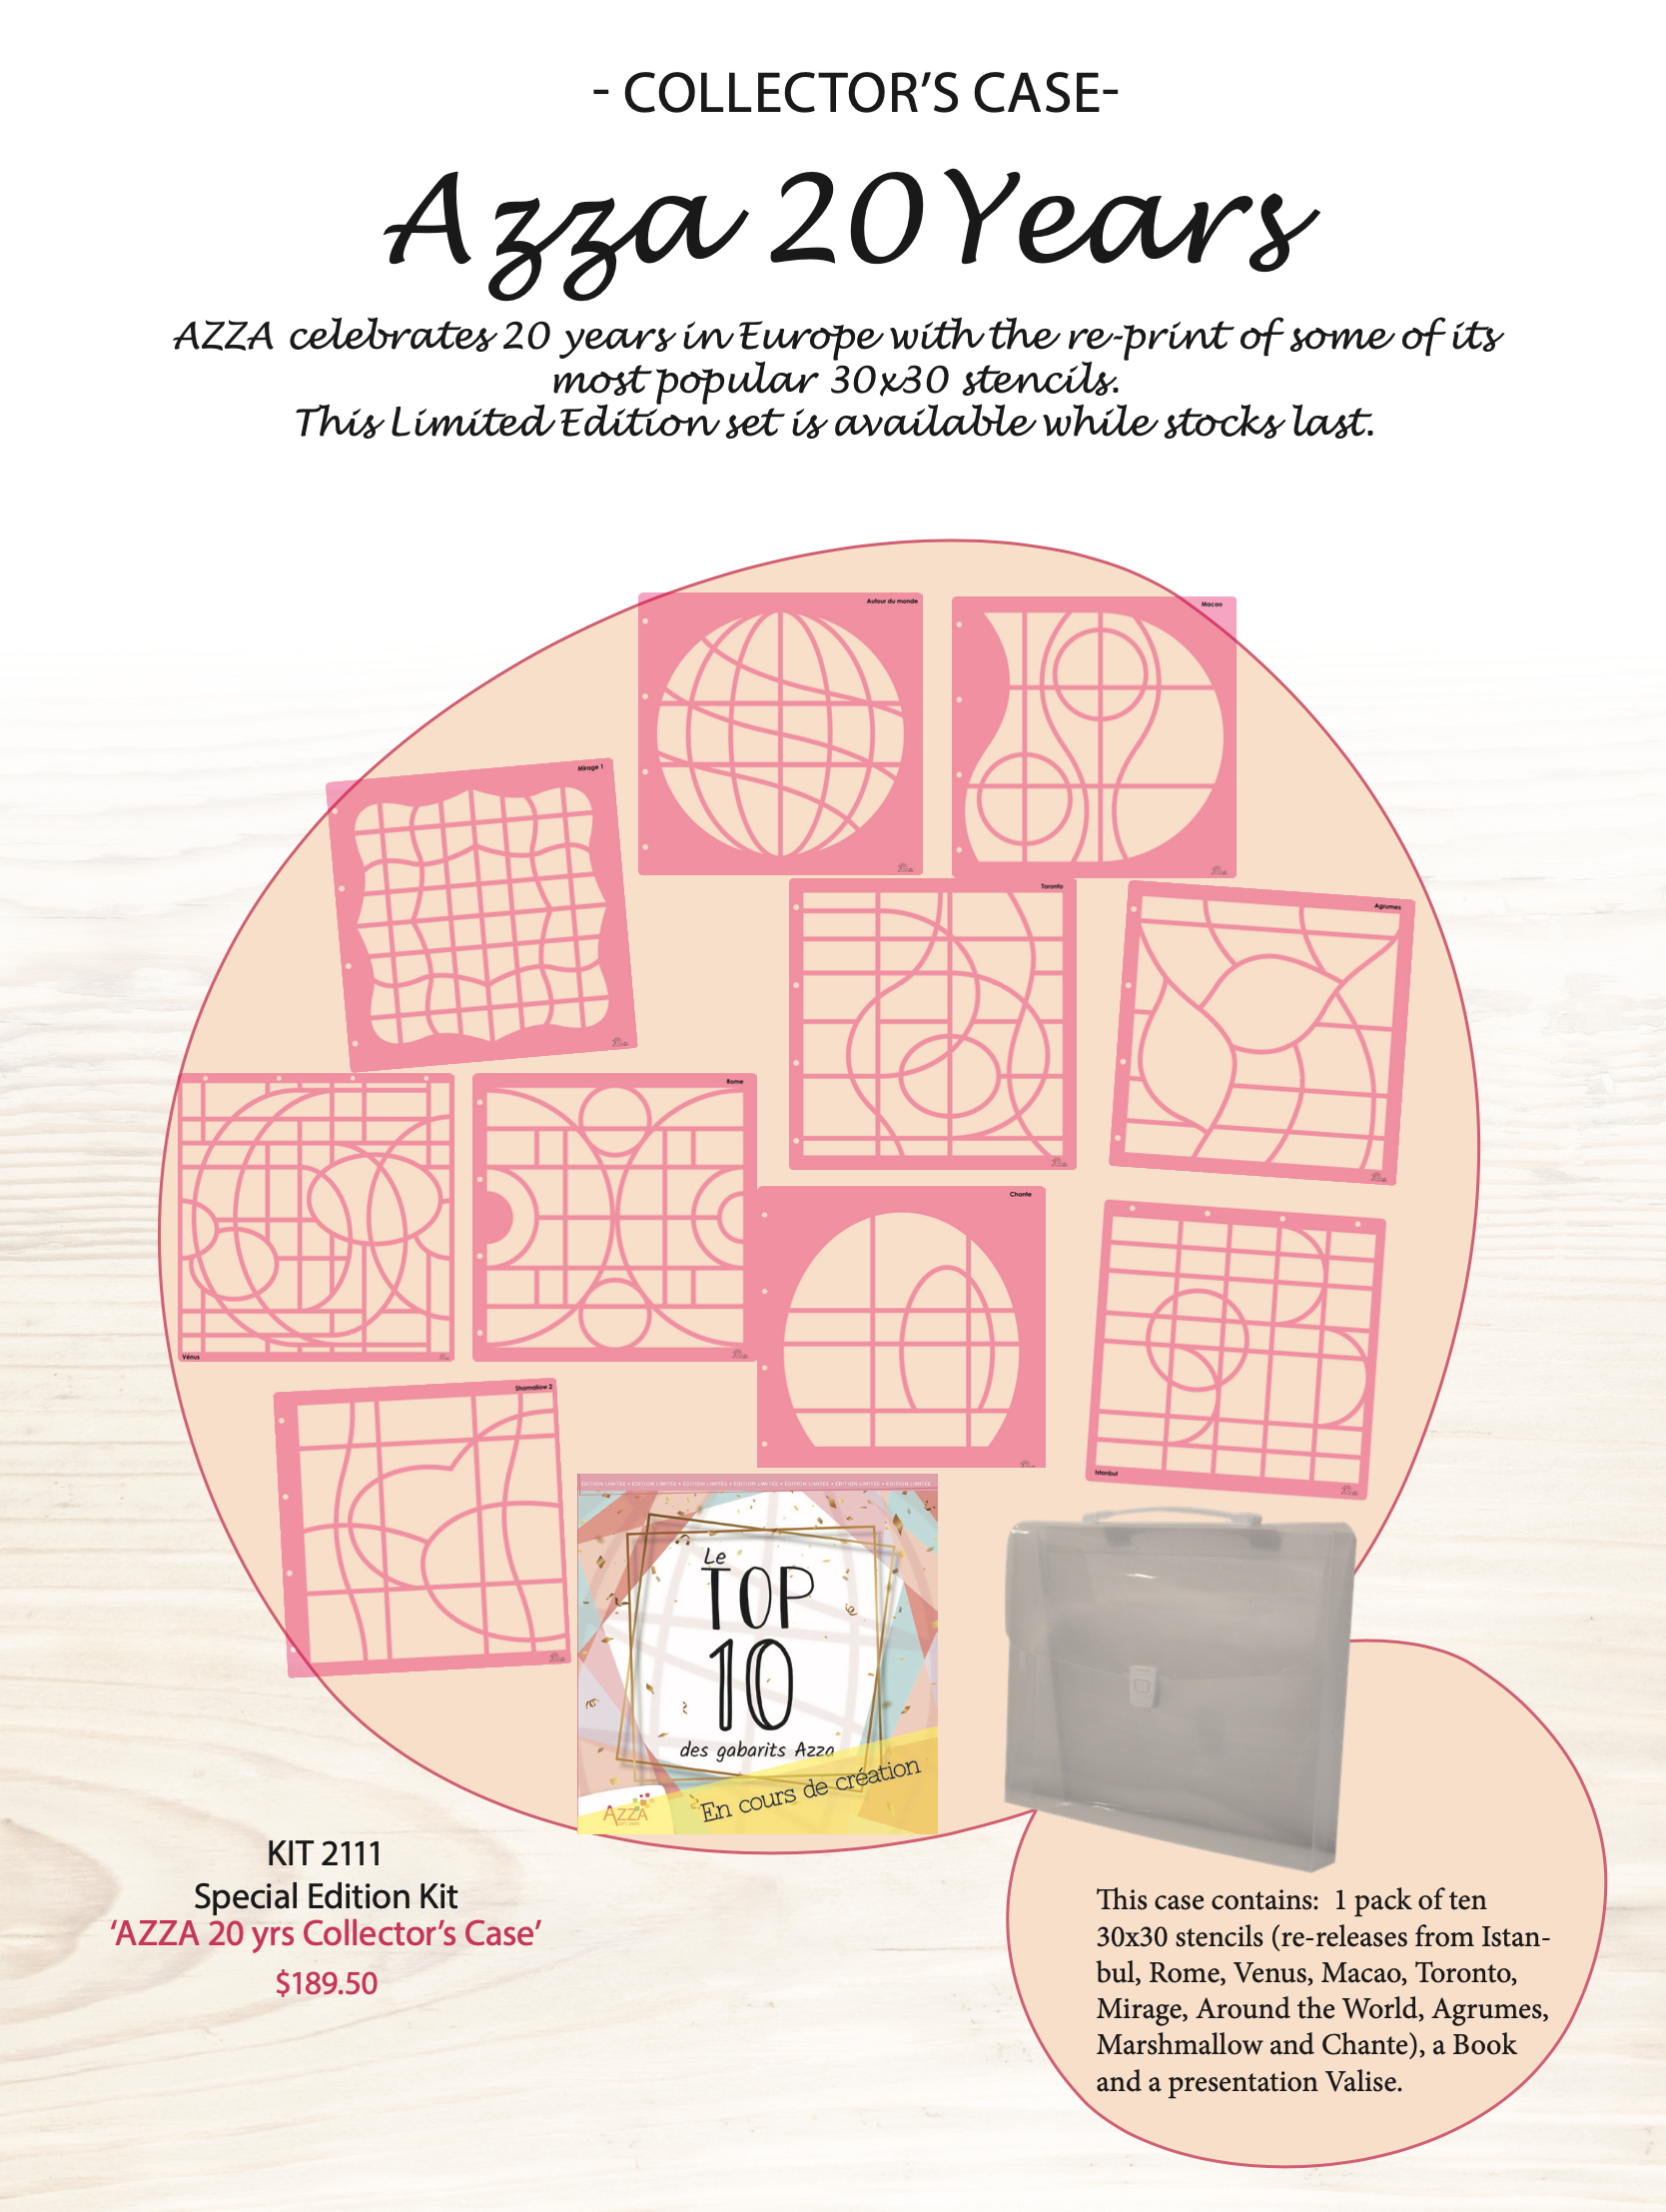
The August baskets with the Chante stencil will only be available until the end of the month. The Chante stencil is not available for purchase on its own, it is part of the Top Ten collection which is also back in stock.
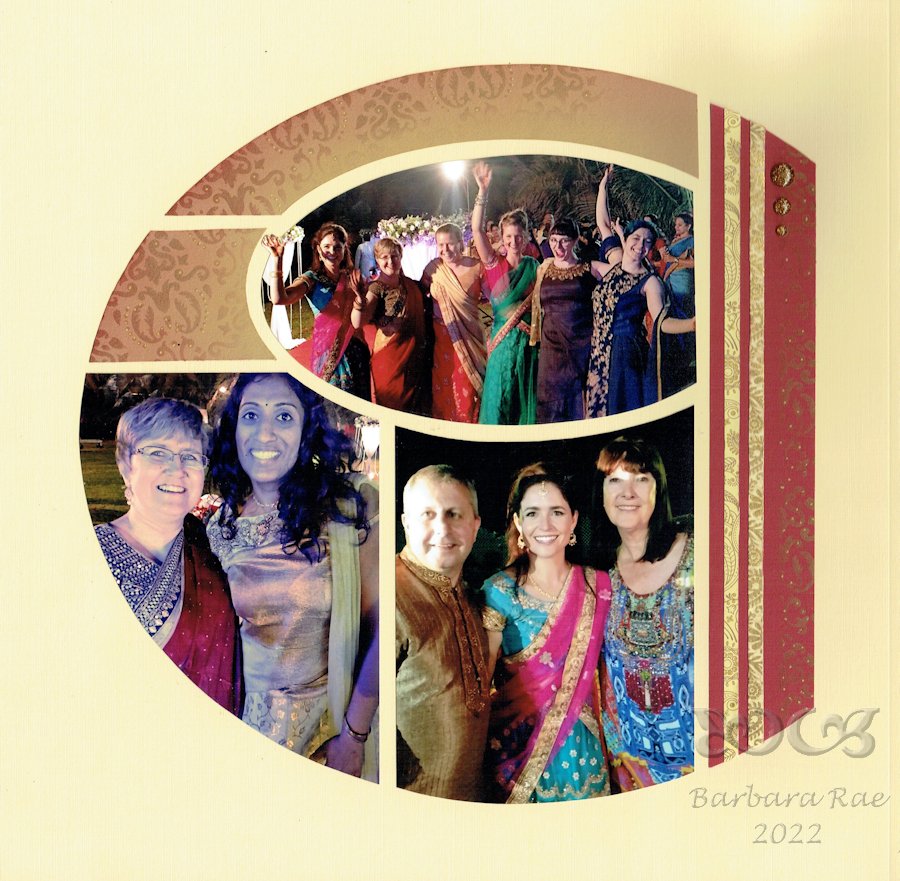
Created by Barbara Rae – Western Australia
Barb created the page above using the Chante stencil and the AZZA Cashmere decorating products.
This month’s products will be perfect once you return from your holidays – everyone seems to have taken off on holiday or for family reunions now that the borders are open. The decoration products cover planes, trains and cruises!
Included in two of the baskets is the Chante stencil. Some of our ‘older’ customers will have it amongst their stash of stencils, I have brought mine out and am enjoying using it again. It is very versatile on the page, the oval can be used to emphasise a particular photo on the page, or for decoration.
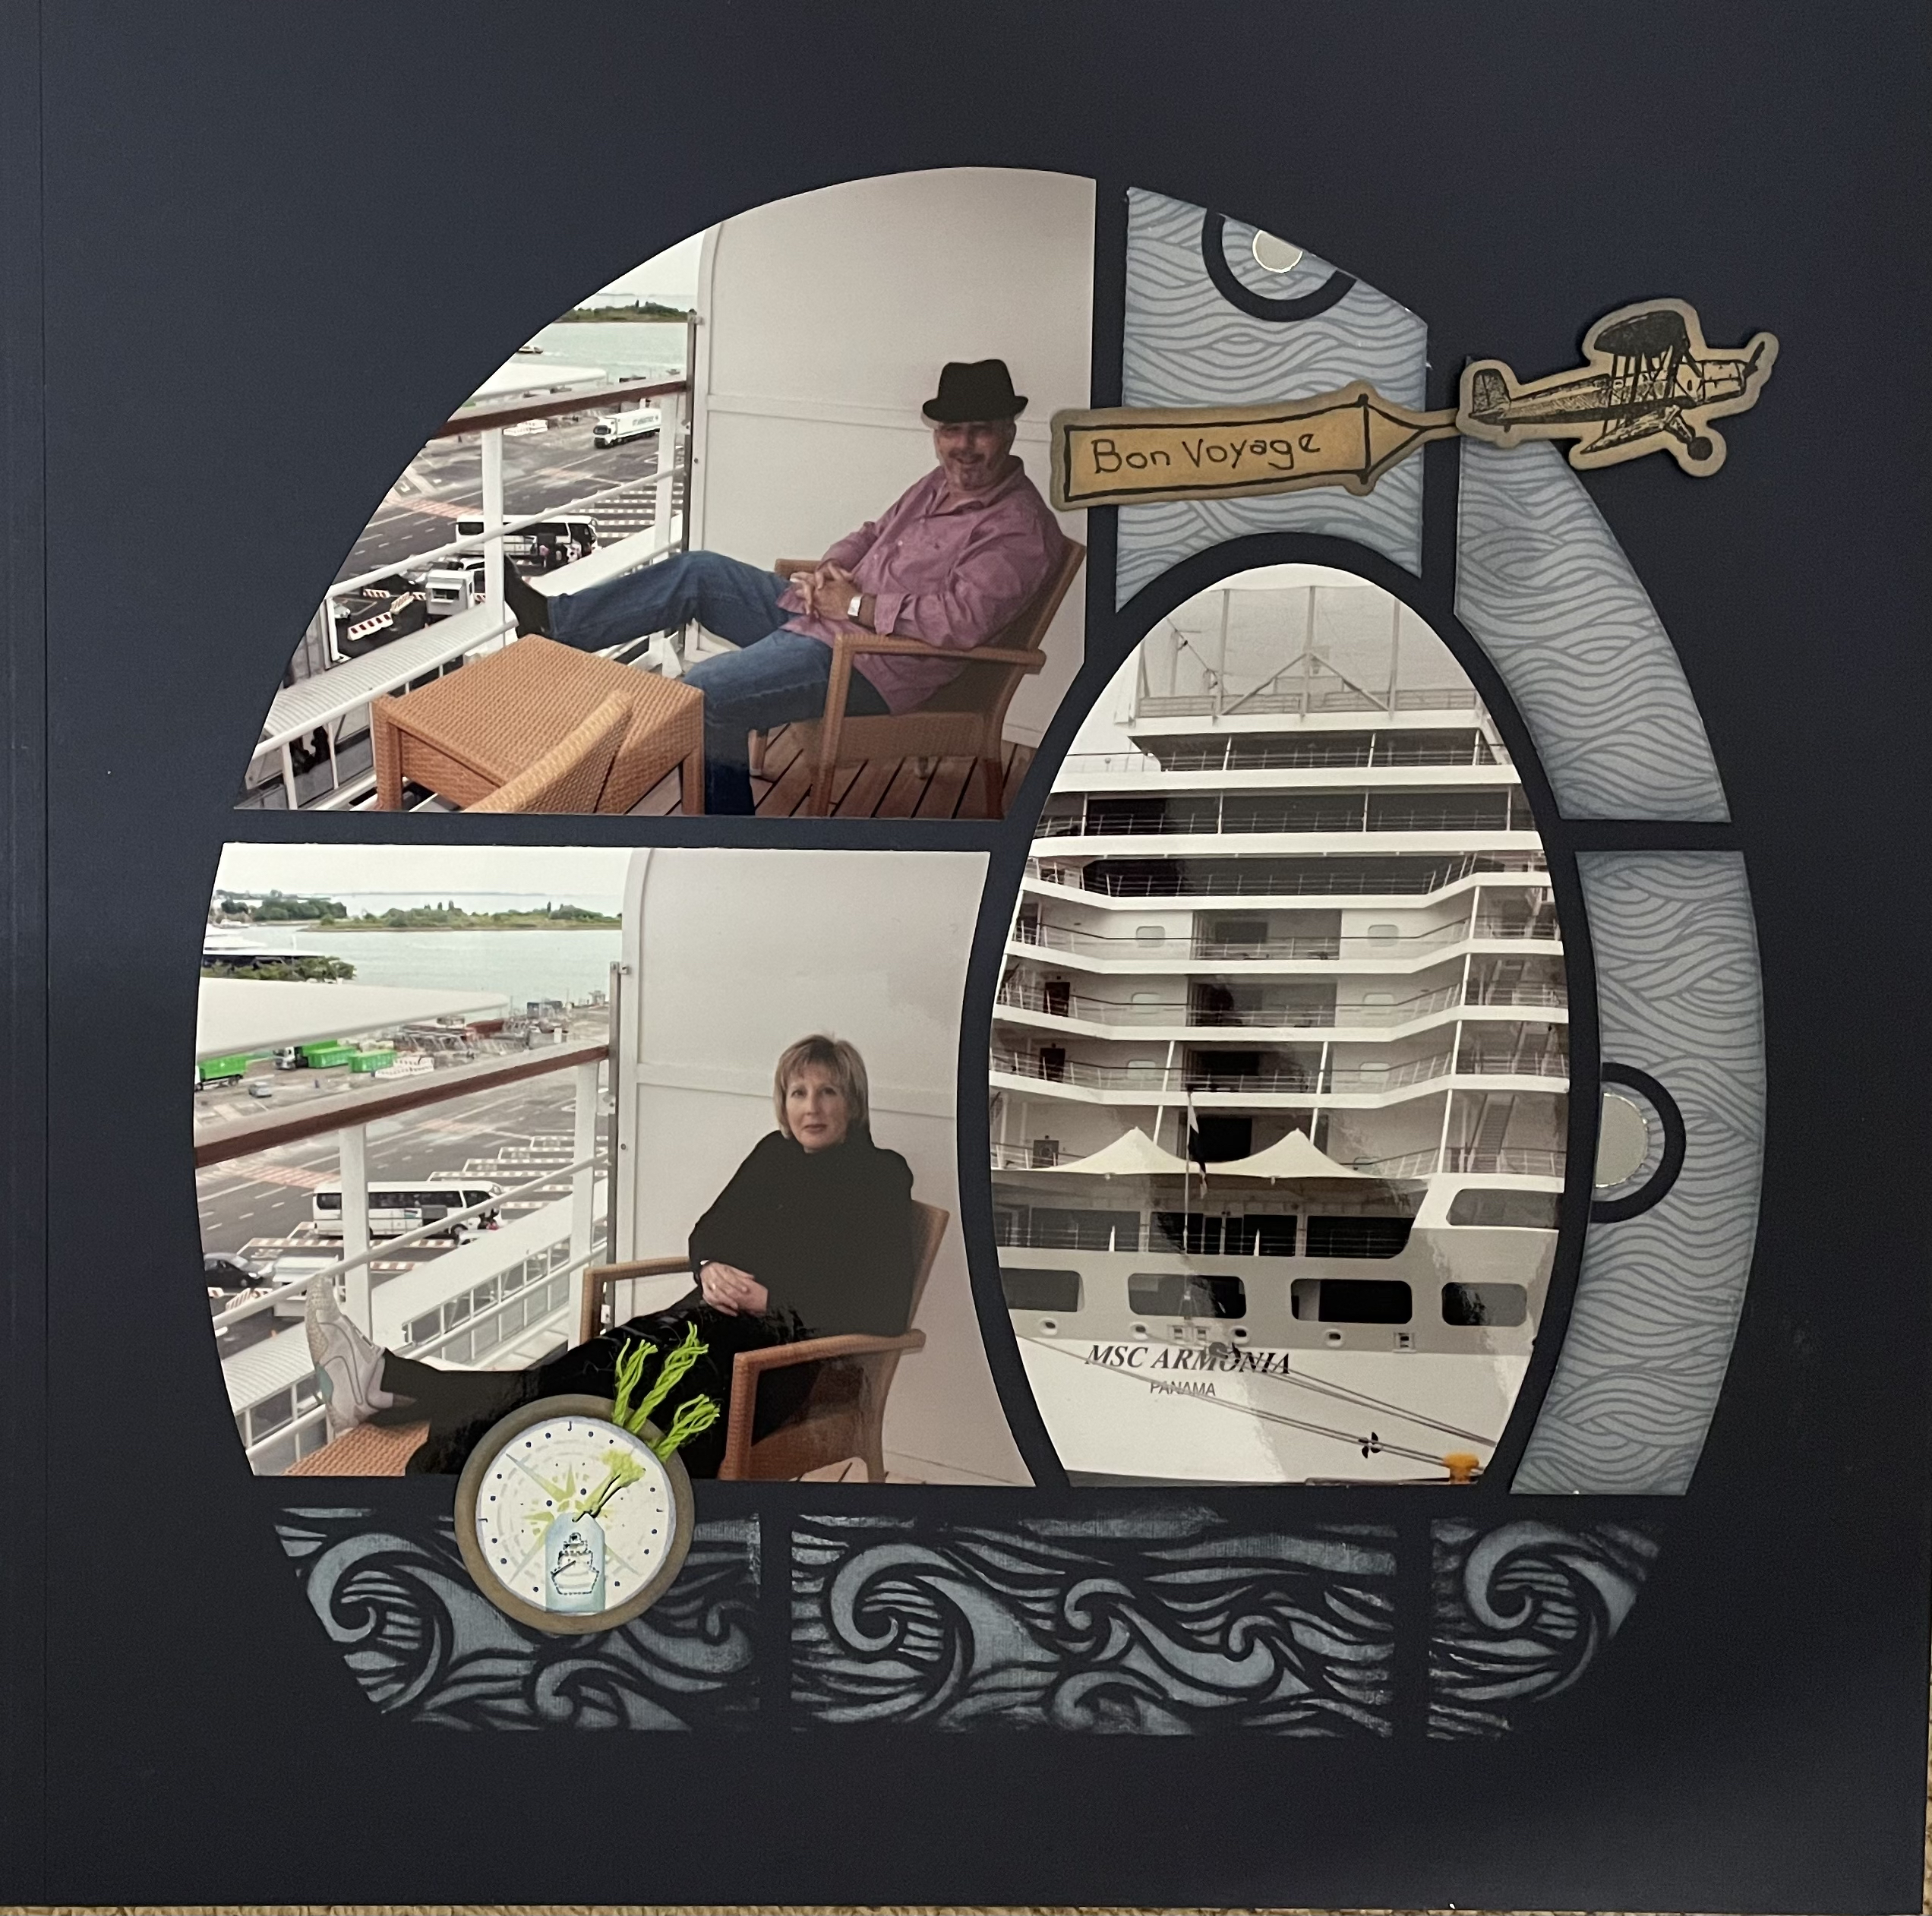
In the layout below I used the photo with the information of where the photos were taken in the oval as that is the ‘title’ of the page. I used the AZZA oval set of dies to cut out the stamped decoration and a smaller oval (cut out of the off-cuts of the photo on the left) to create a background for my little stamped cruise ship. The decoration stencil of the sea is lovely on the page. Note how I have used a few different coloured inks through the ‘waves’.
Page by Lyn Holmes
On the page below I did not use the full oval shape and often we forget we don’t have to use the full oval or circle on the page. I have used the ‘O’ in the large set of alphabet dies for my title and the All Aboard decoration products. The paper is a lovely shade of blue and will come in handy for any seaside pages.
Page created by Lyn Holmes
In the layout below I have used a landscape photo in the oval and this time didn’t include the top bit of the oval. I have used the All Aboard die, cut it twice as I wanted the green palm trees to be mounted on the blue image. I then used some AZZA sand below the palm trees, just squeeze out a little glue from your glue pen, let it dry a little and the sand sticks beautifully, or you can use the double-sided adhesive paper. For small amounts I often just use the glue pen. The larger chisel tip glue pen is good for this.
Page by Lyn Holmes
For the decoration on the left I used the decoration stencil and then the palm tree stamp over the top. I did not ink the frame around the stamp.
Deb Byrne in Tassie created the page below using the Chante stencil and an All Aboard sketch sheet image with the lovely stamp and die set. This is a great little stamp to place a title or date onto the page.
Page by Deb Byrne – TasmaniaCard by Hilary Hamilton – Victorai
Hilary created the card above using the same stamp/die set. It is a great card and would be perfect for Father’s Day coming up.
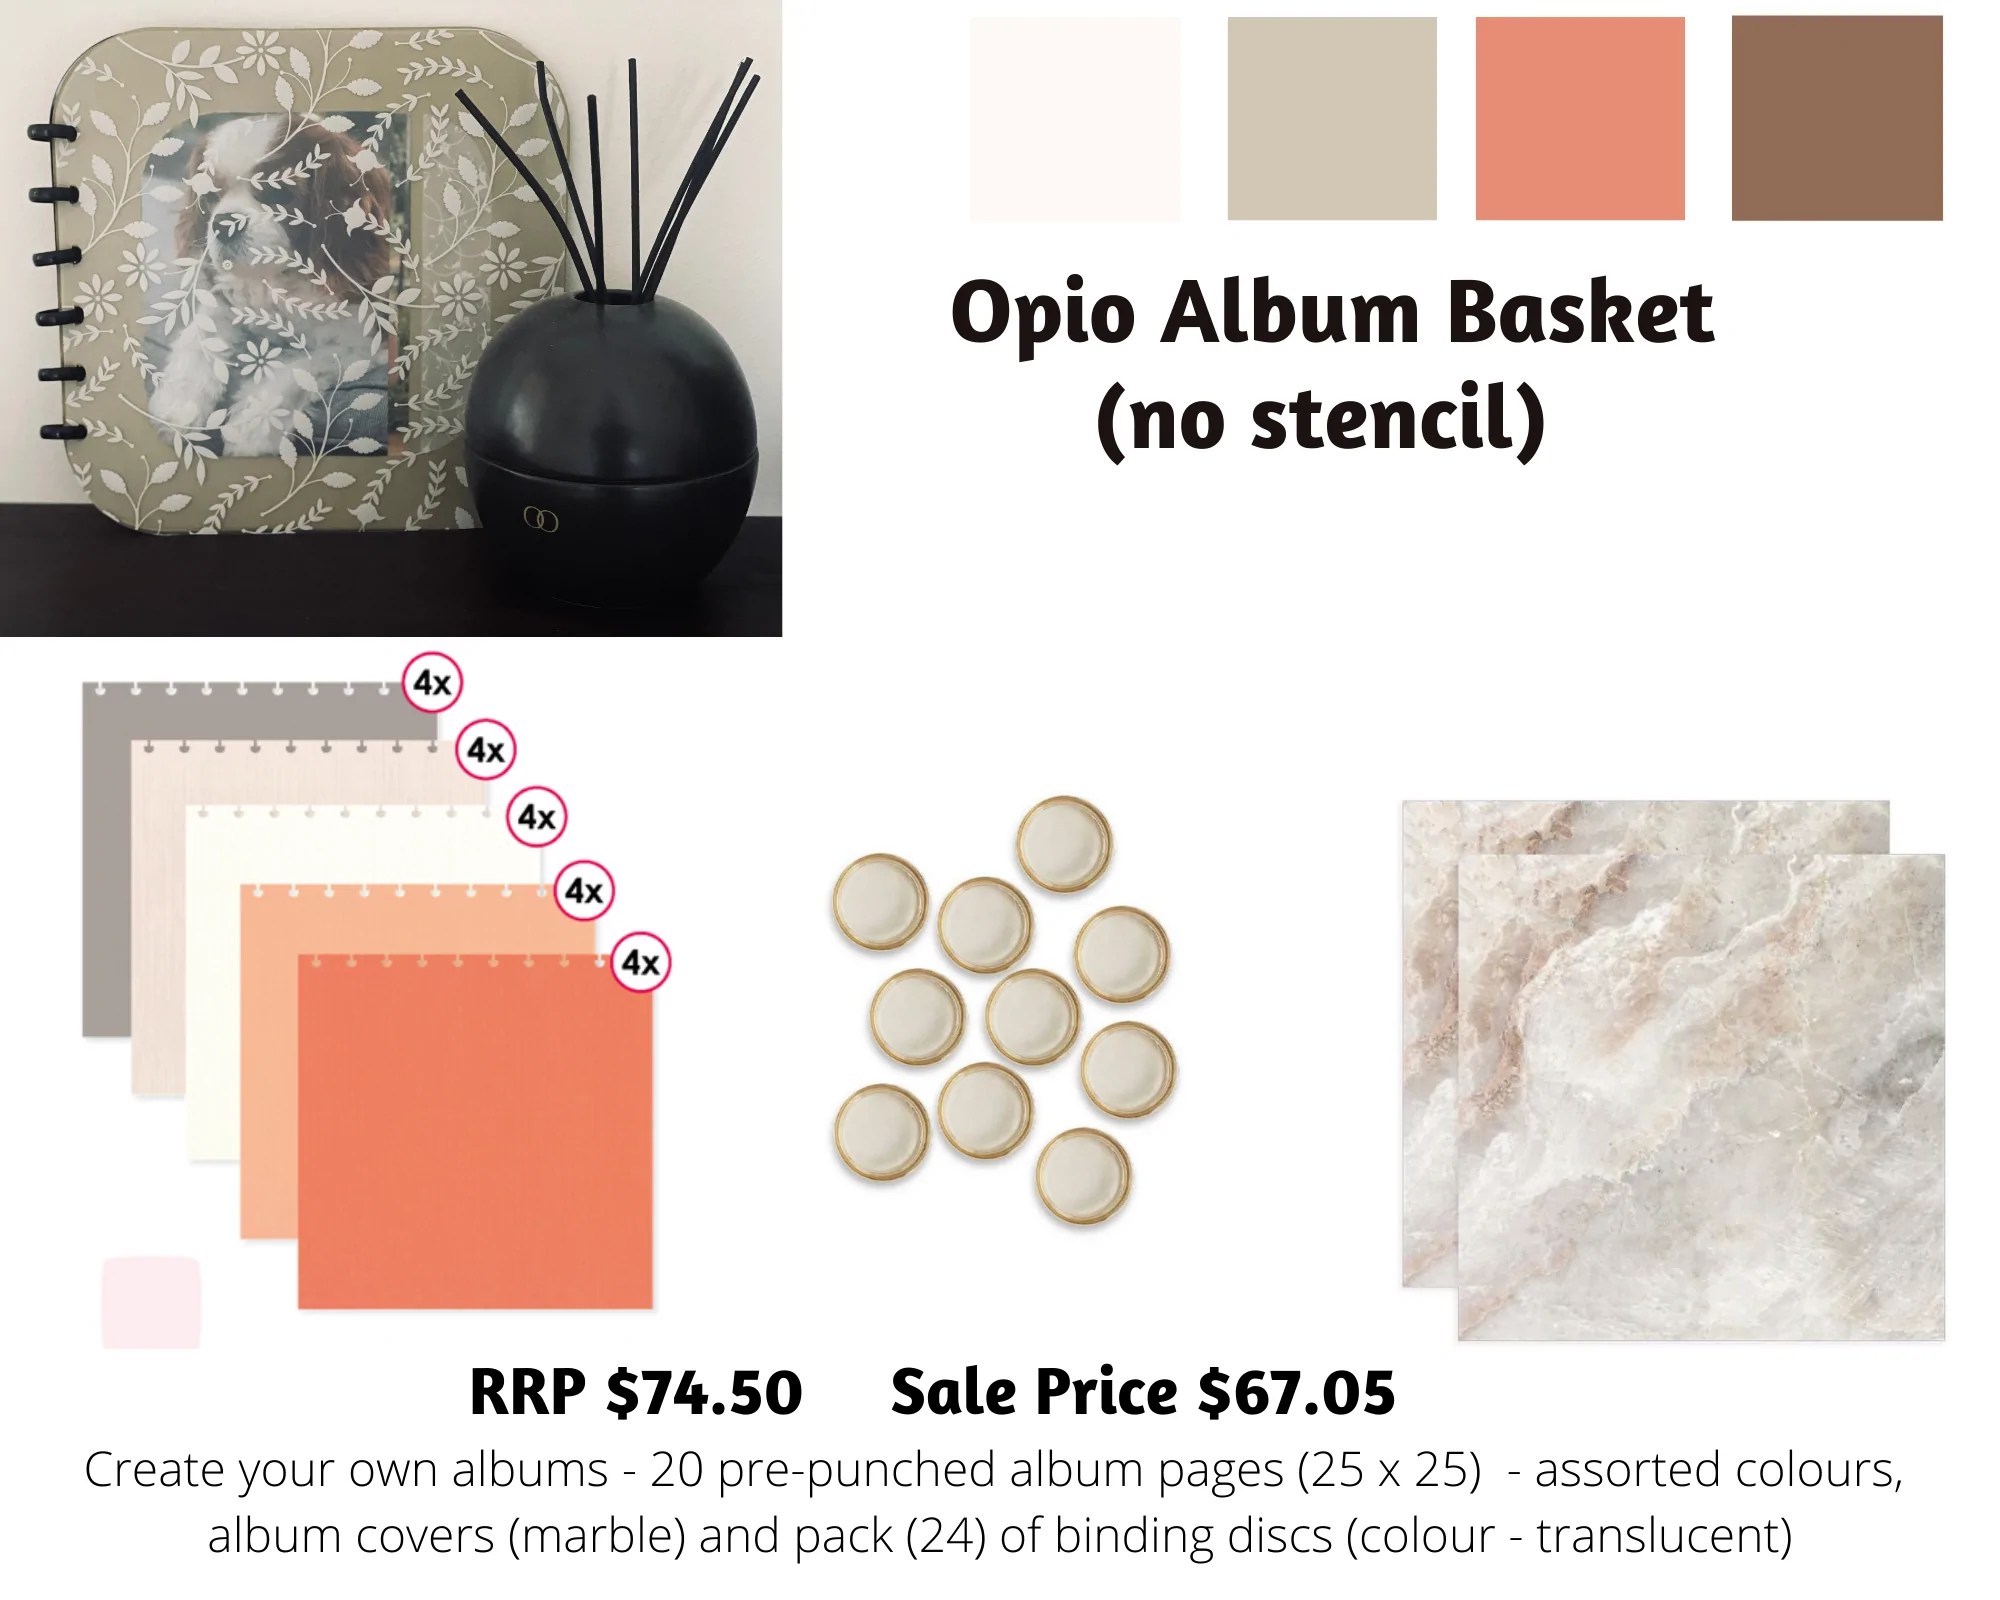
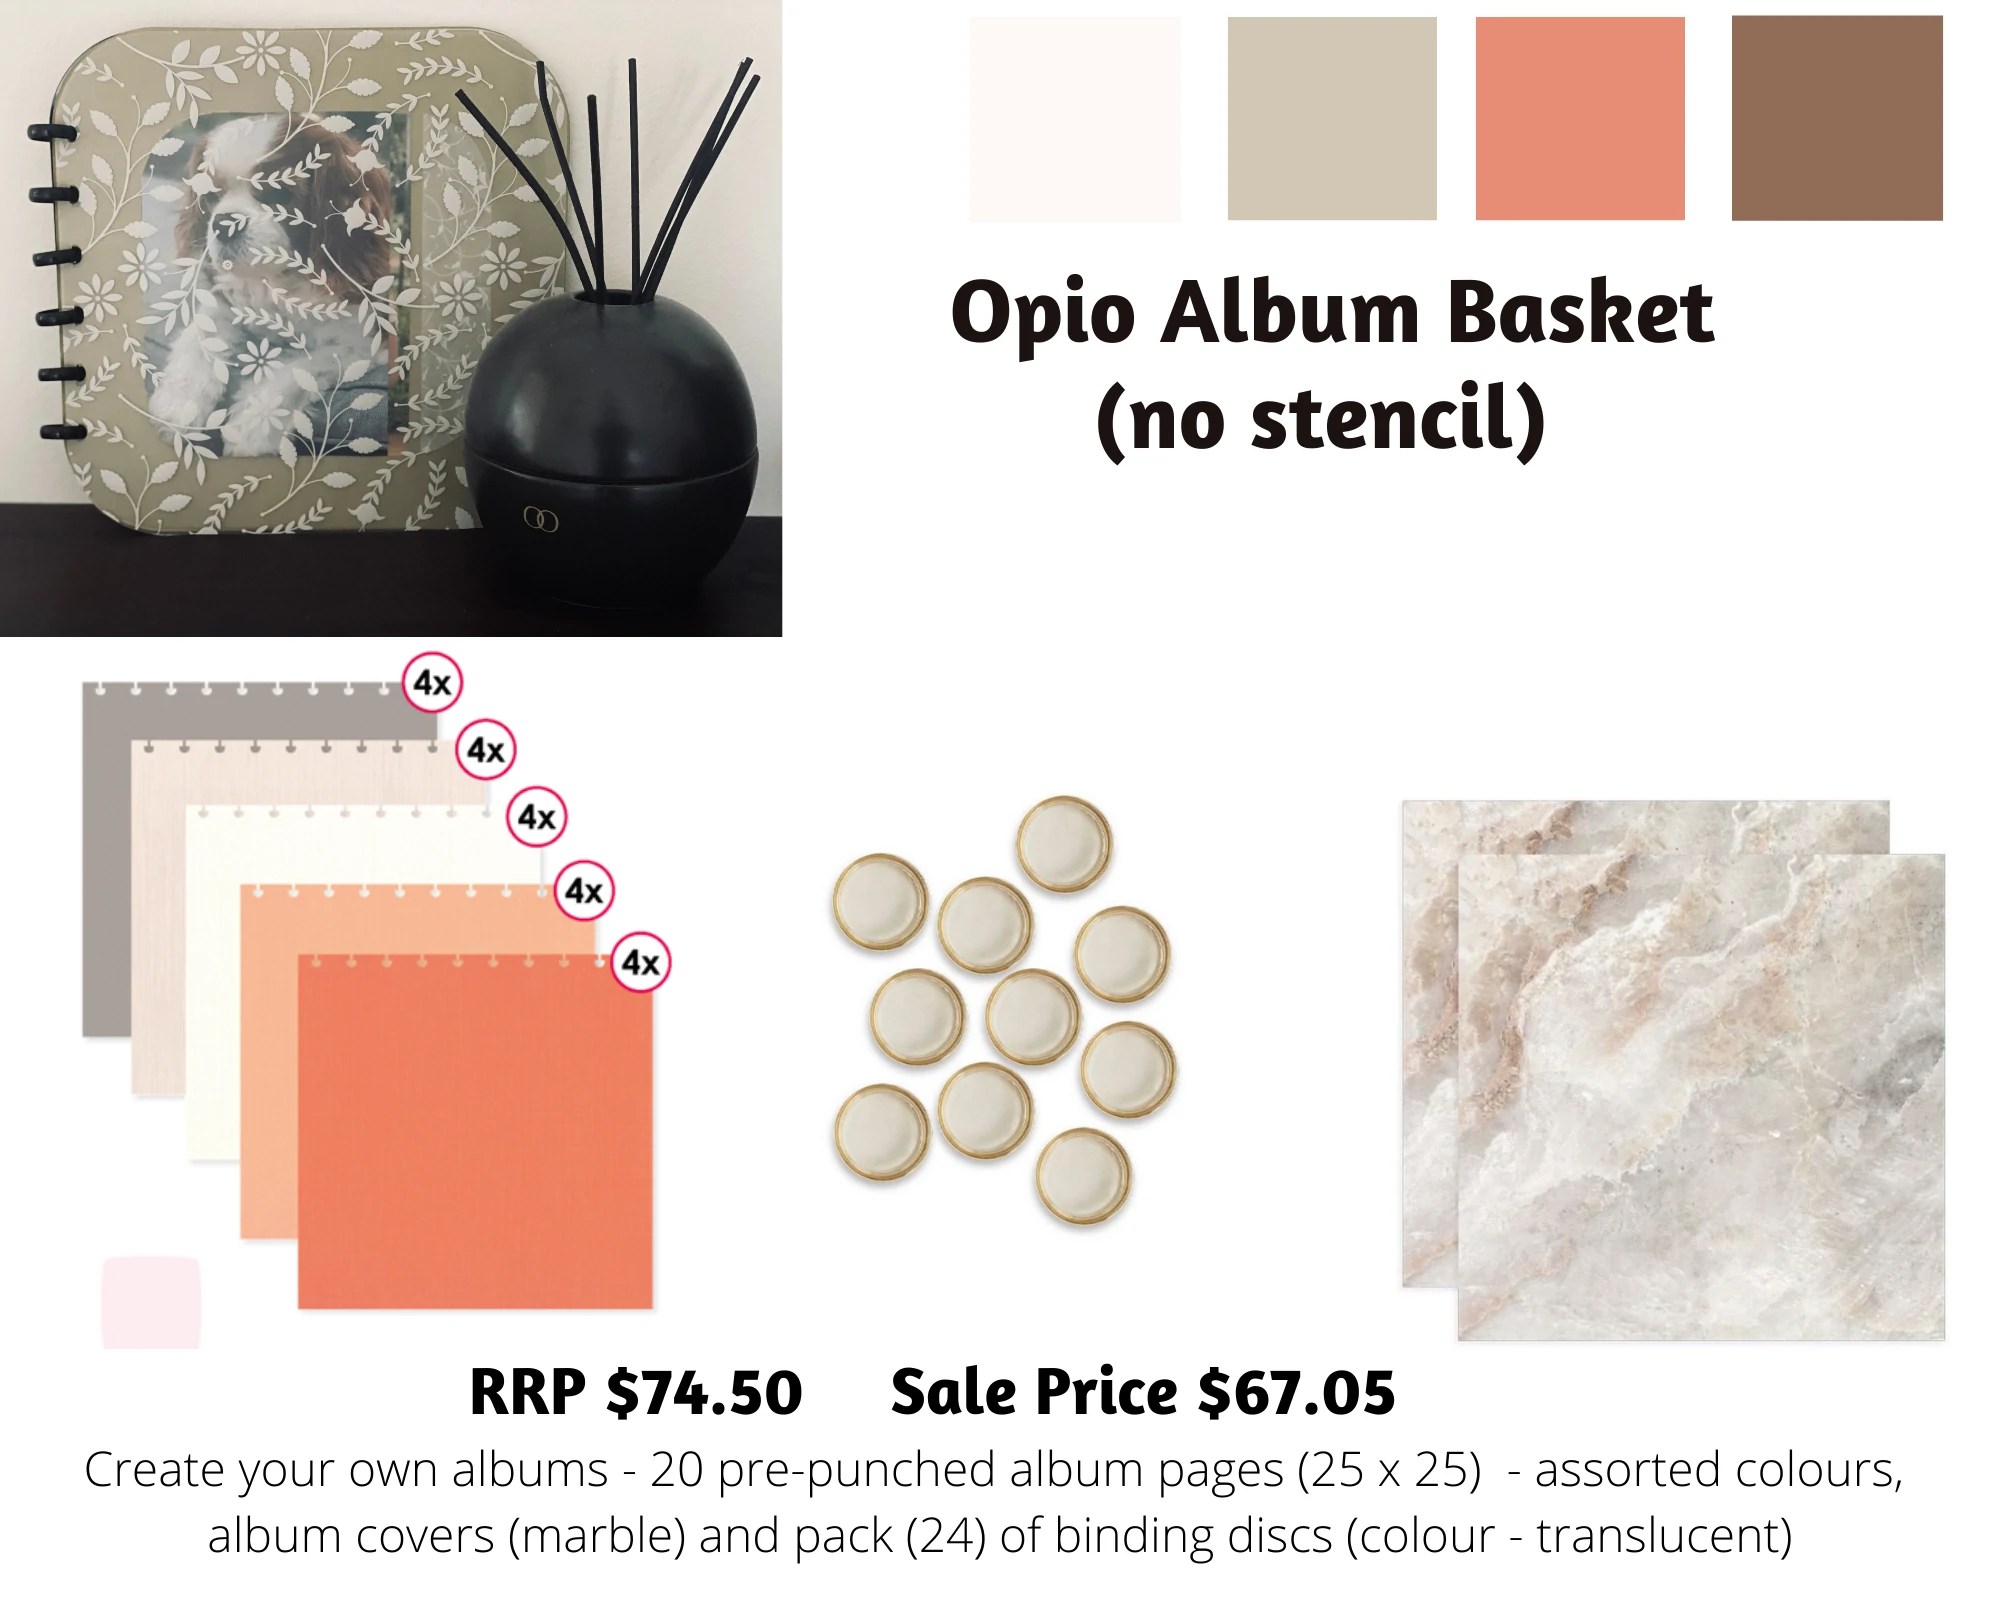
With Father’s Day around the corner, now would be the time to start working on a priceless gift for the man in your life – or helping the kids create it. An AZZA mini album of any size would be a perfect gift. If you have the punch, you can create a disc album of any size, depending on the number of photos you would like to include. The Disc album kit is still available.
If you do not want to purchase the full kit, you could purchase the pre-punched pages and discs – this kit includes all you need to make the disc album. There is a kit with the Opio stencil and one without for those who already have the stencil.
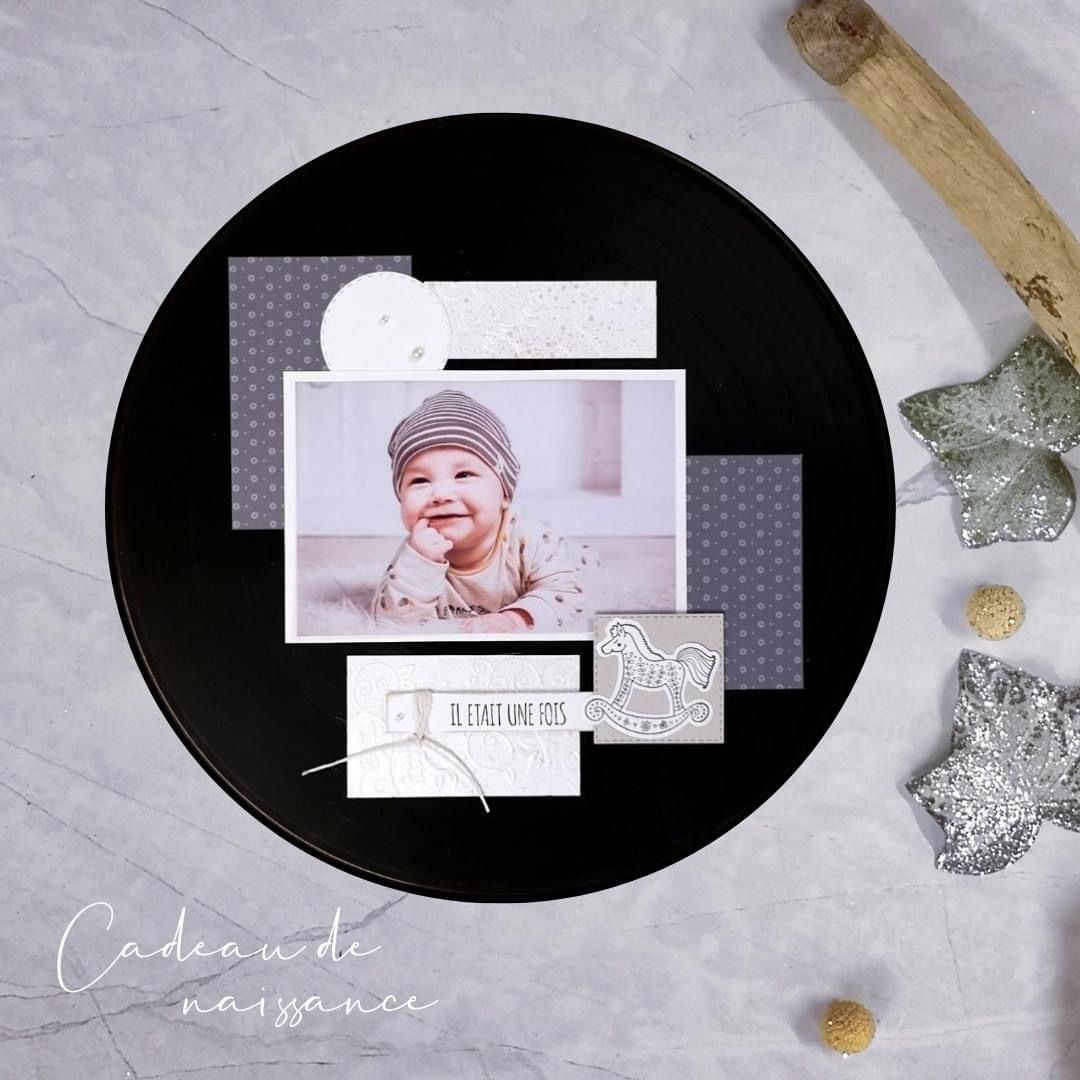
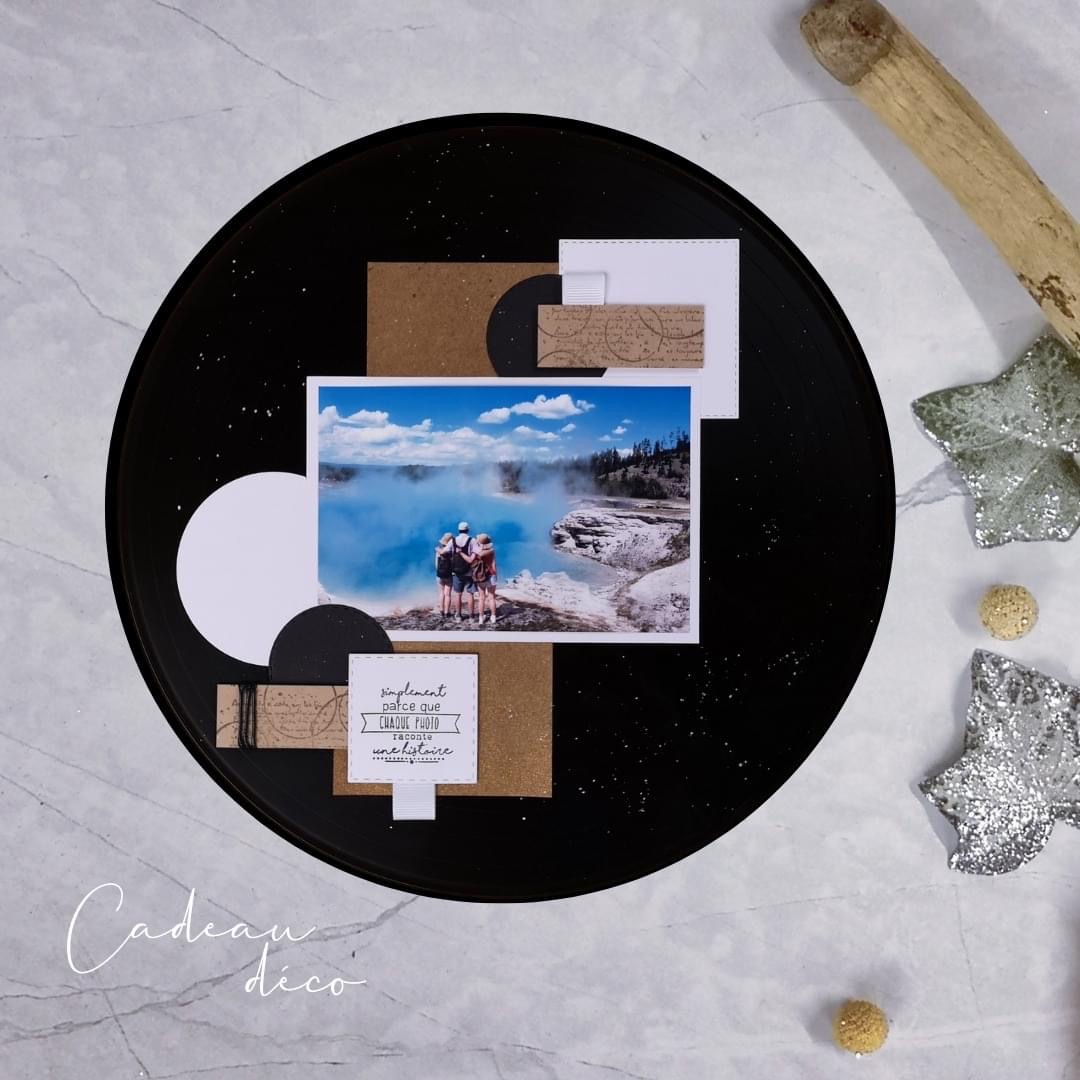
I also saw this lovely AZZA ‘Off the Page’ project which is another idea for Father’s Day. Scrap d’Enhaut in Europe created these layouts on an old record. I like the idea of an old record for the background and it is easily hung on the wall. Old records are not expensive in the old second-hand shops.
Scrap d’Enhaut – Europe
This would also make a lovely Christmas gift.
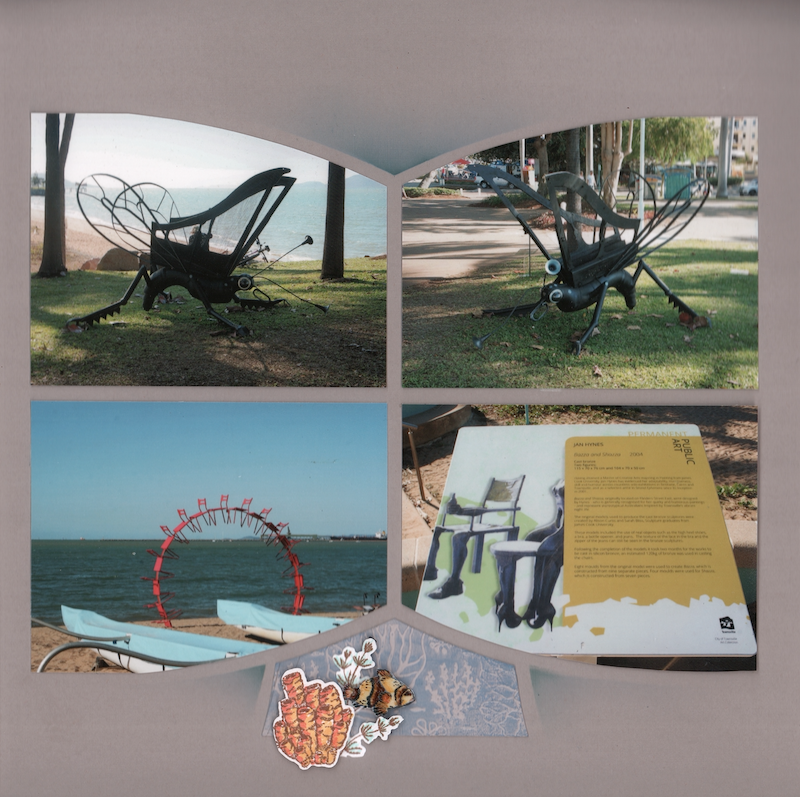
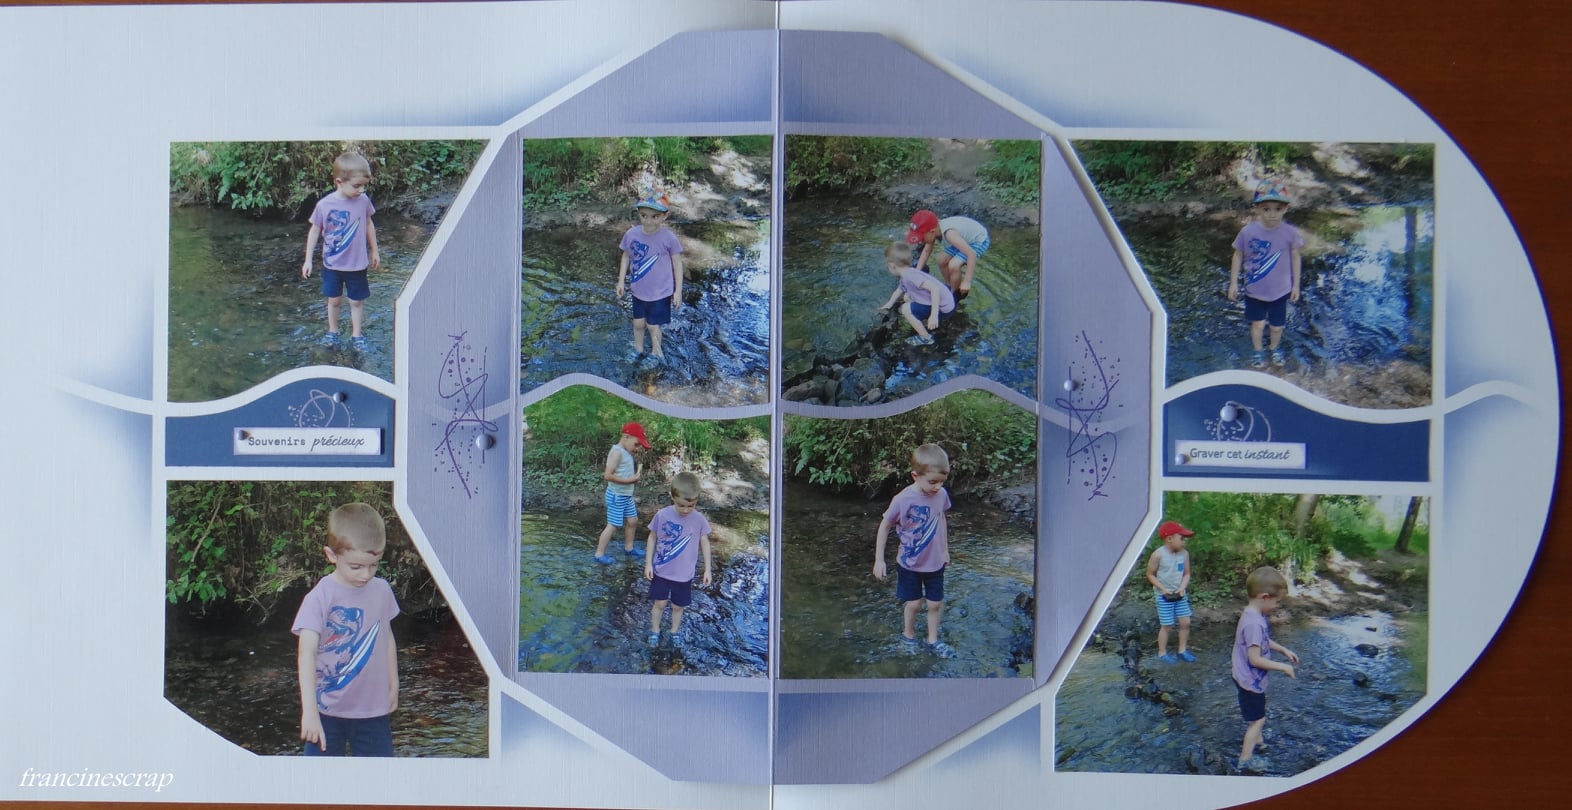
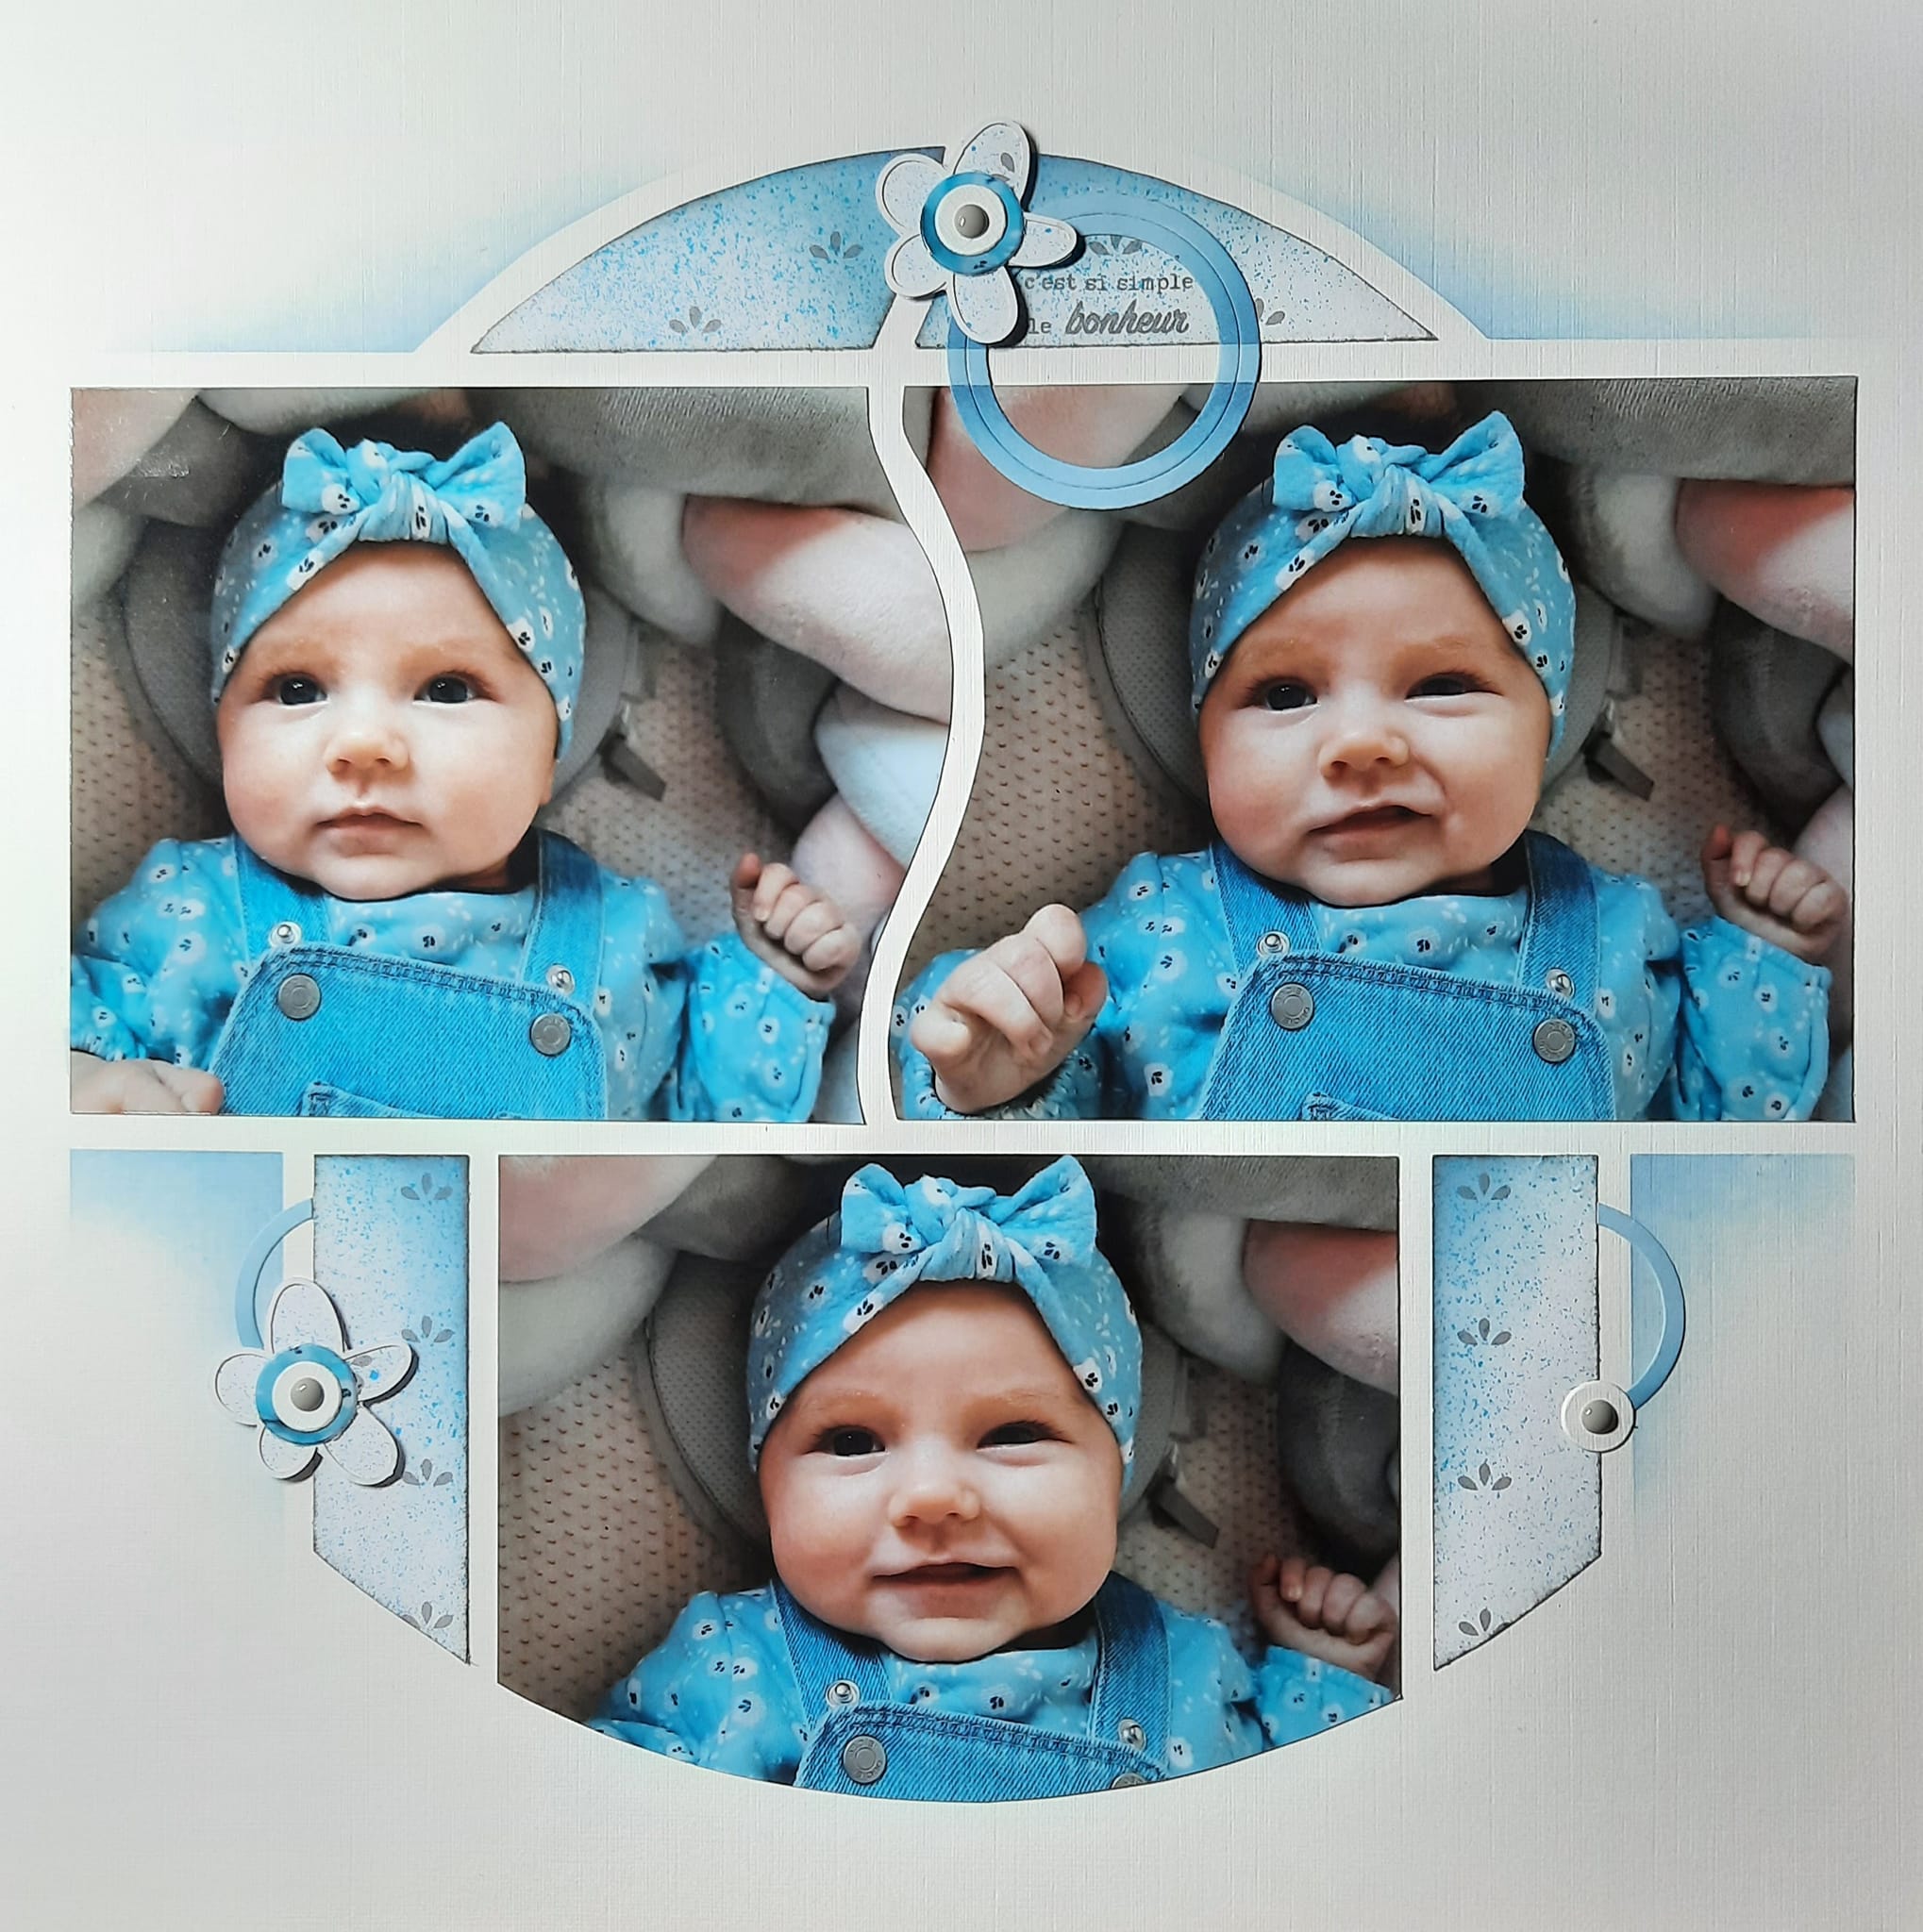
AZZA Australia is following in Europe’s footsteps and offering an online class when a new stencil is released. These classes will be recorded so participants can watch them at a later date again. There are also detailed documents to help with the cutting of the pages and placement of the photos.
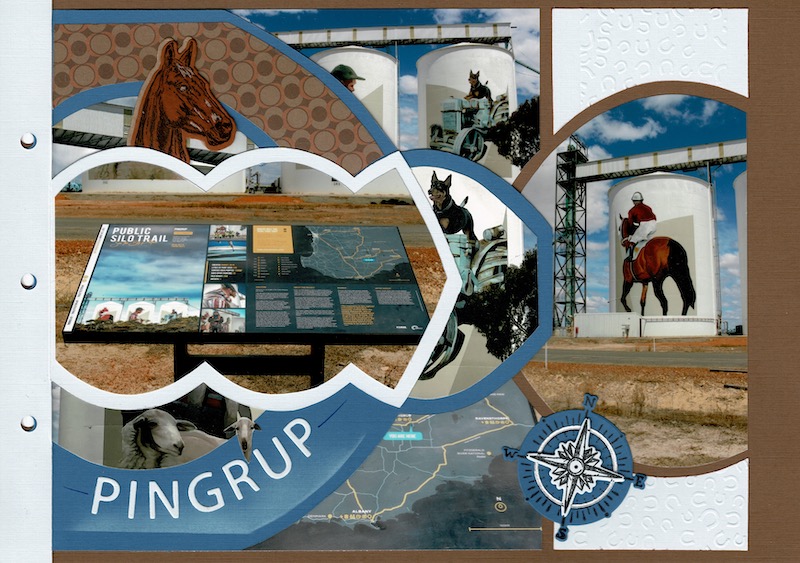
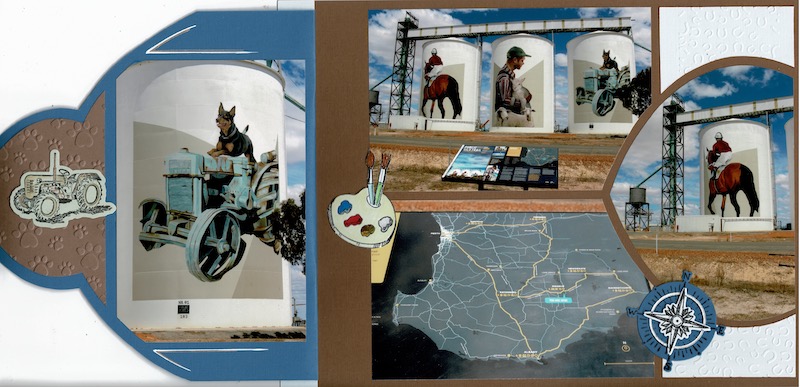
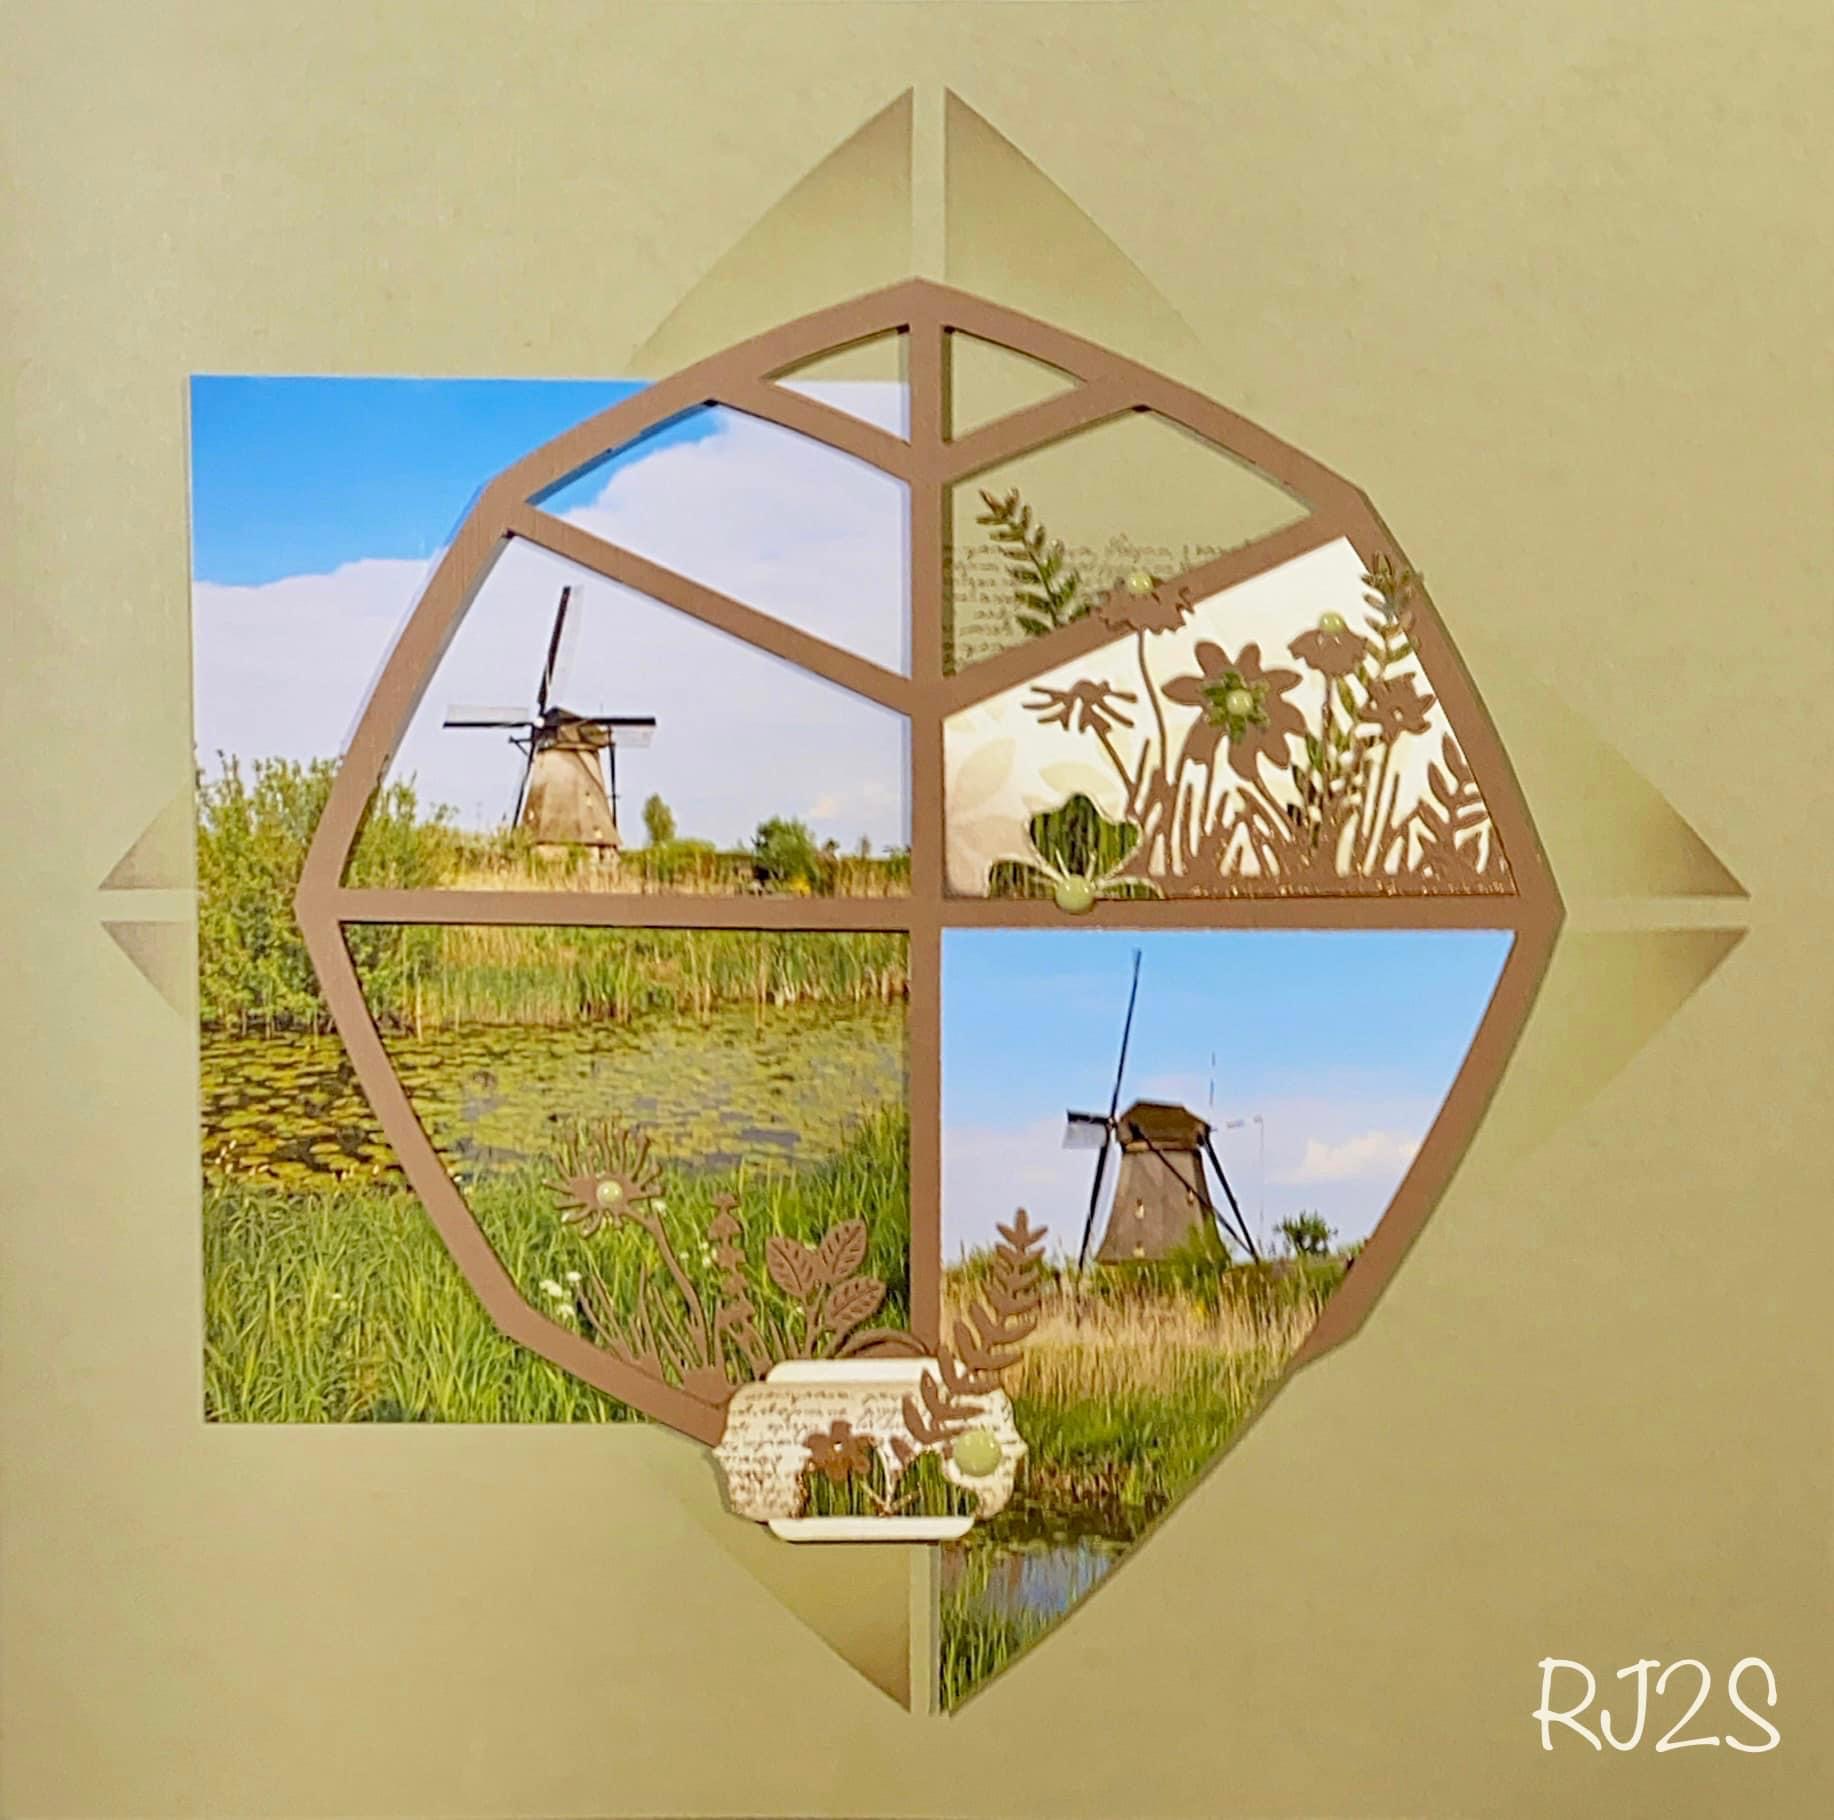
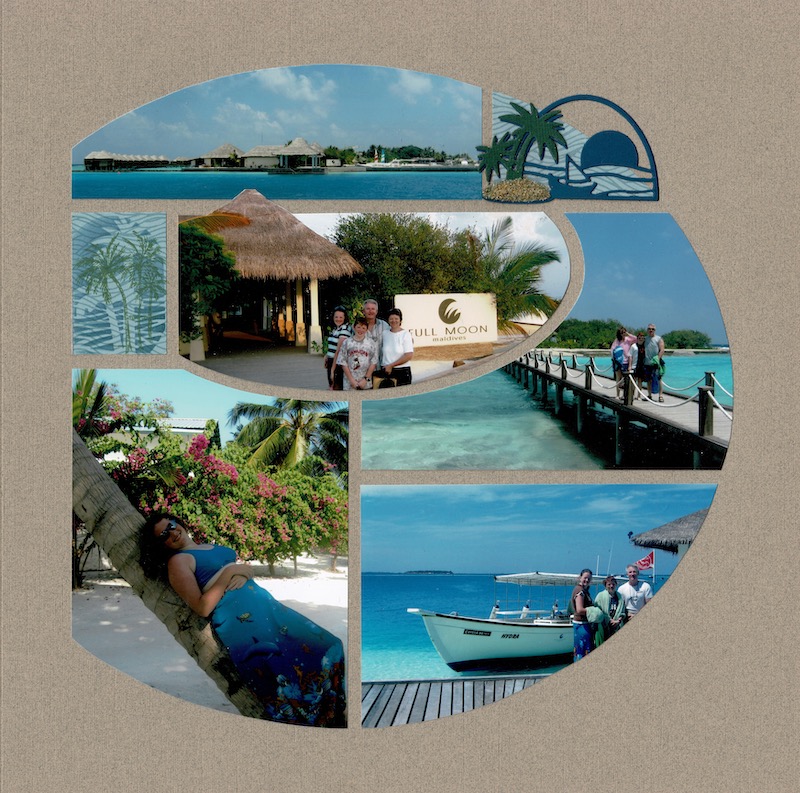
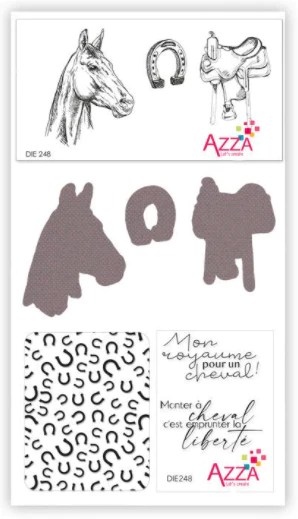
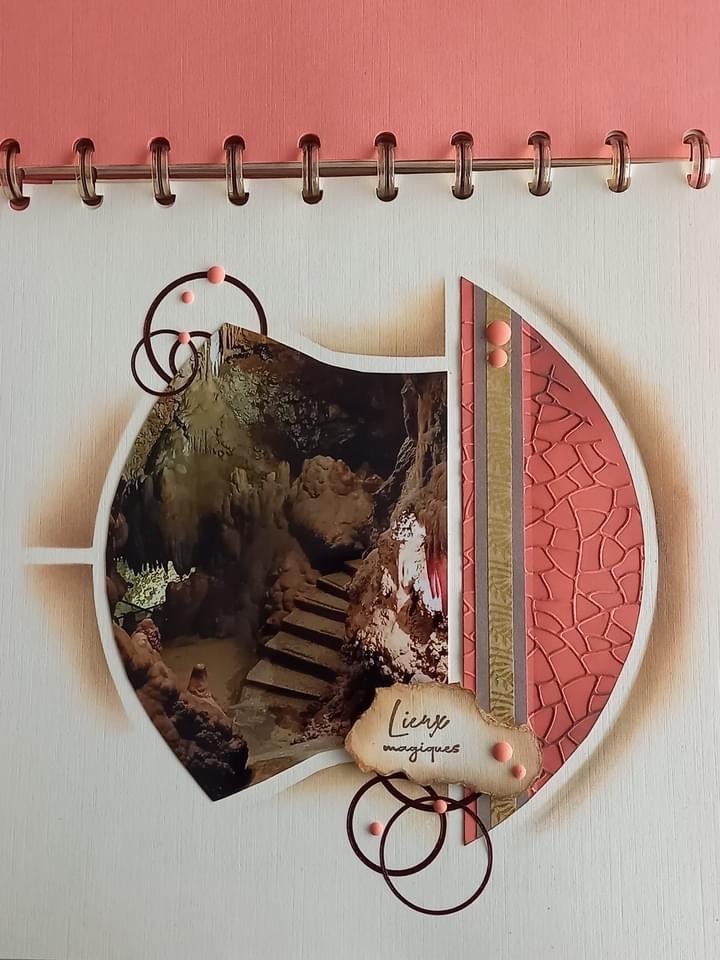
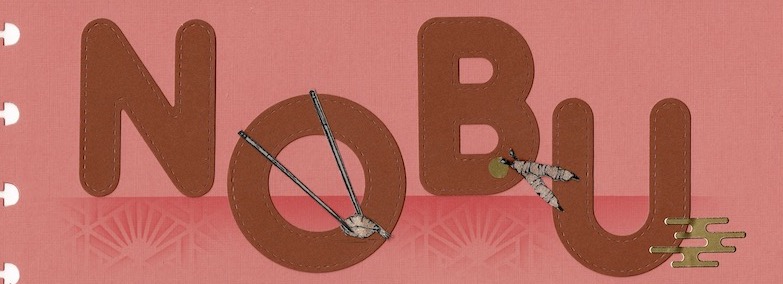
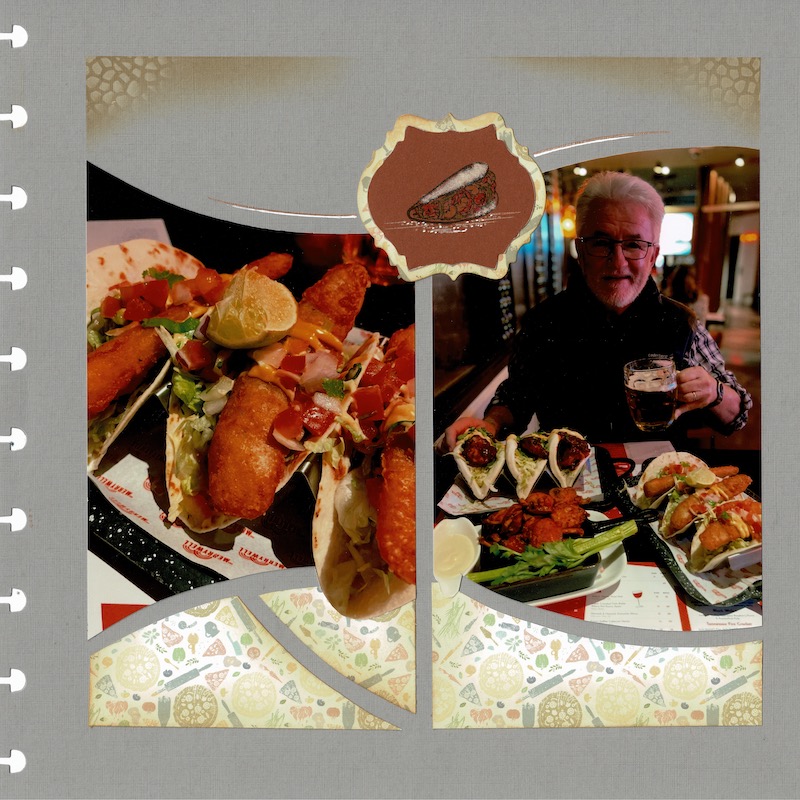
This is my completed page. As I was using photos from Tin Horse Highway in Western Australia I used the Horse Riding mini collection set for my decorations.
This is the inside lefthand page with the decorations from the back page peeking through.
Page by Lyn Holmes
I loved creating this layout and I managed to place 20 photos into the set of pages. A great way to use the photos you have without having to create too many pages.
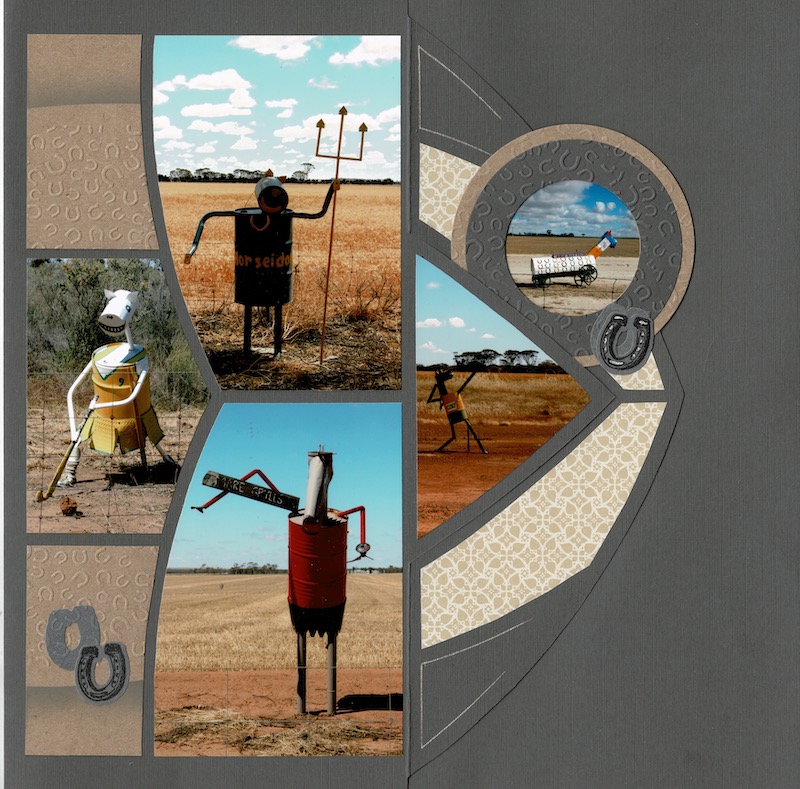
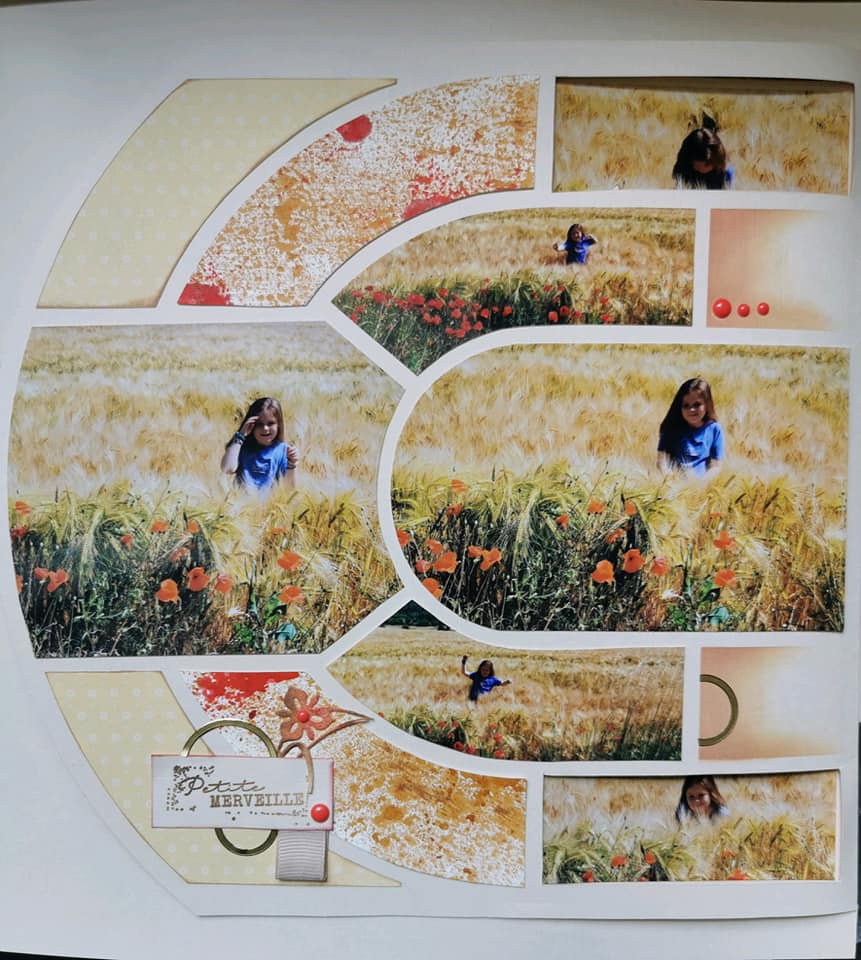
Another lovely set of pages created by Jennie Banks in Queensland following the Masterclass layout.
Page created by Jennie Banks – Queensland
If you would like to create a set of pages like the ones above contact your consultant or purchase an online class and you will have access to the video, documents and consultant help.
The next Scrap & Moi has arrived in Australia – this one is a special edition so is a bigger issue. The bonus stamp is perfect for any photos on the page.
The page below was created by Vanessa using the AZZA Brisbane stencil and the bonus stamp.
Page by Vanessa Bronckart – Europe
The Bubble die below is still out of stock in Australia but should be available to order in Belgium this week. The ‘Out of Stock’ notice will be removed once it has arrived, so please keep checking.
The Special edition Scrap & Moi has 18 layouts covering: Mineral (A4) San Francisco (A4) Hexagone (25×25) Brisbane, Athletics, Java (15×15), Burano, Cannes, Cancun, Osaka, Montmartre, Nairobi, Melbourne, Casablanca, Bombay. It also has two mini album samples, one without a stencil and the other created with the Java 15 x 15 set of stencils. If you want to use the XL Accordion sheets, it has a lovely album created with the Sherwood set of stencils. Lastly, it has a few instructions of various cards to create. So, as you can see, a lot of inspiration covering a wide range of AZZA products.
Lastly, always remember to check the sale section of the AZZA online shop. As the products this month are all about travel, most the AZZA Travel products have been put on sale for this month only.
Don’t forget the promotion on this month. Purchase product for $120.00 or more and you will receive a BONUS 30 x 30 stencil, Athletics 1. This is the promotion for August, Stencil 2 will be the promotion stencil in September.
A lovely layout by Patricia Guillaume created with the stencils above.
Page by Patricia Guillaume – Europe
Inside layout below.
Page created by Sabine Belvaux – EuropePage by Francoise Gleize – Europe.
Lovely layouts by our AZZA European consultants. Thank you for sharing them with us.
Deb Byrne in Tasmania created the page below using the All Aboard decoration products.
Page created by Deb Byrne – Tasmania
That should keep you going for a while, don’t forget to get creating for Father’s Day or Christmas if you want to be organised well ahead of time.
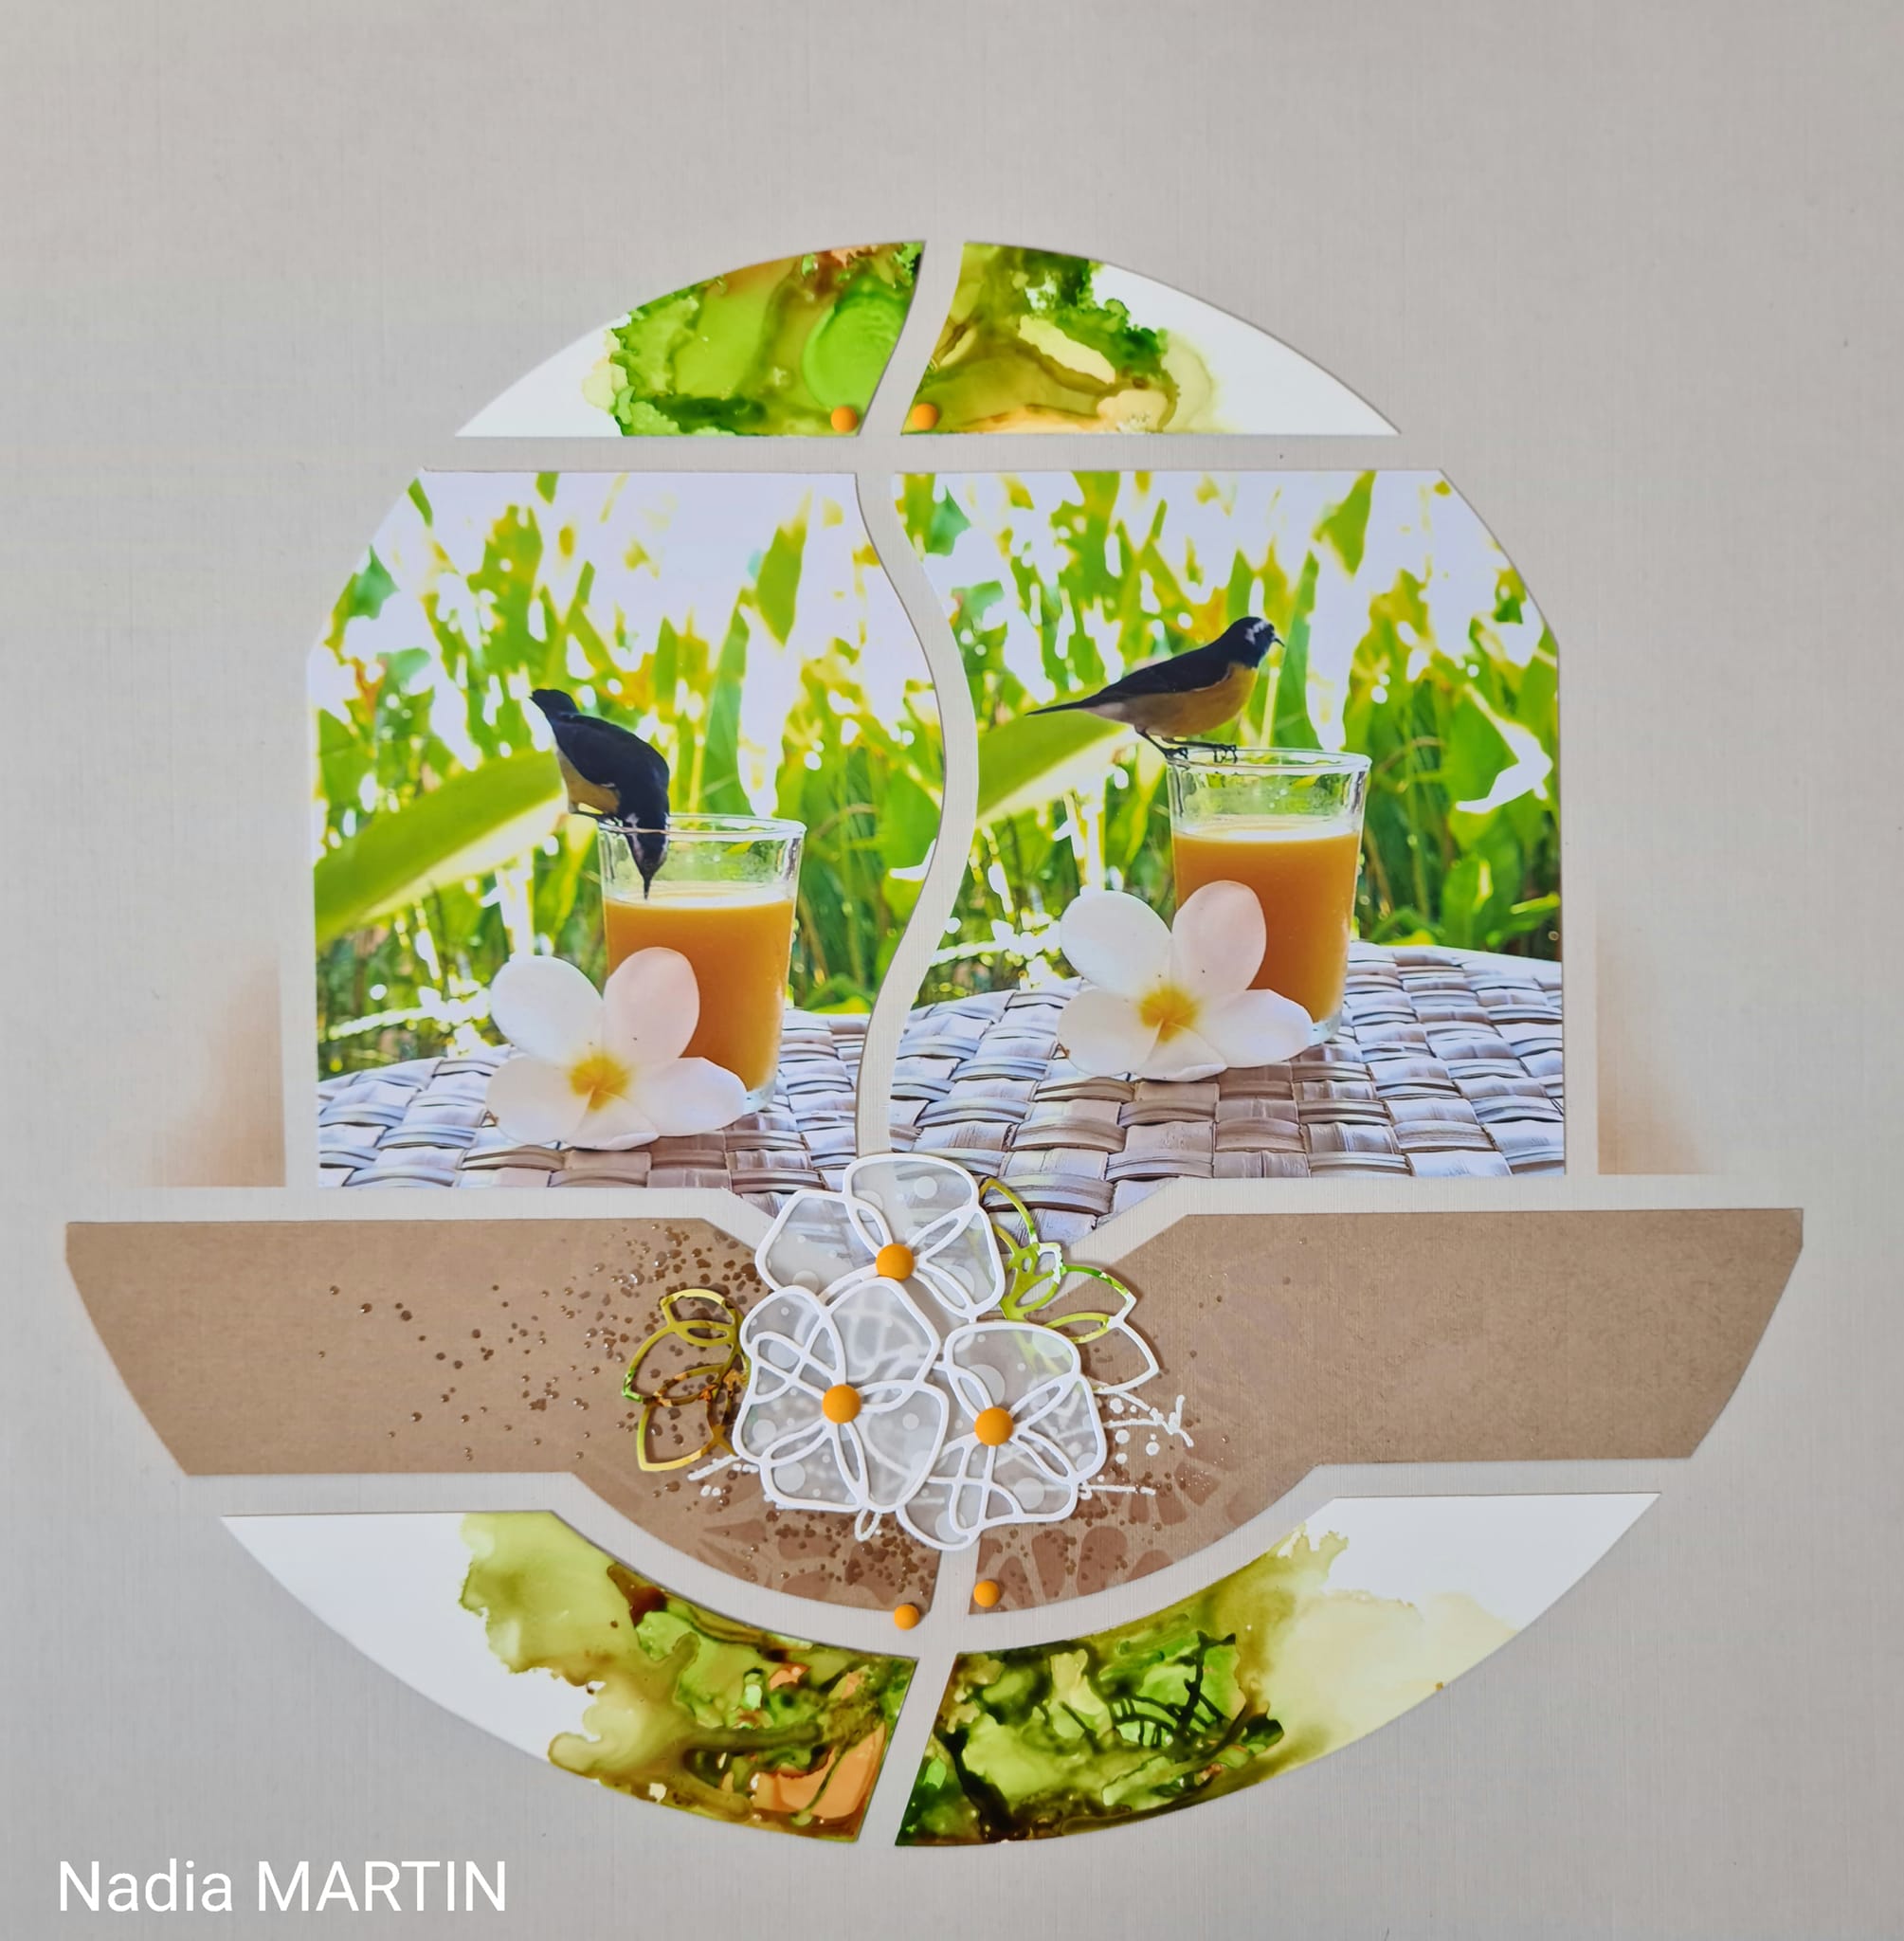
July saw the release of the AZZA Brisbane stencil and, with the Great Barrier Reef along the coast, what better theme than ‘Under the Sea’ with all the beautiful animals, sea plants and coral. If you have not been able to get away, scrapping all your coastal photos in winter should certainly lift your spirits.
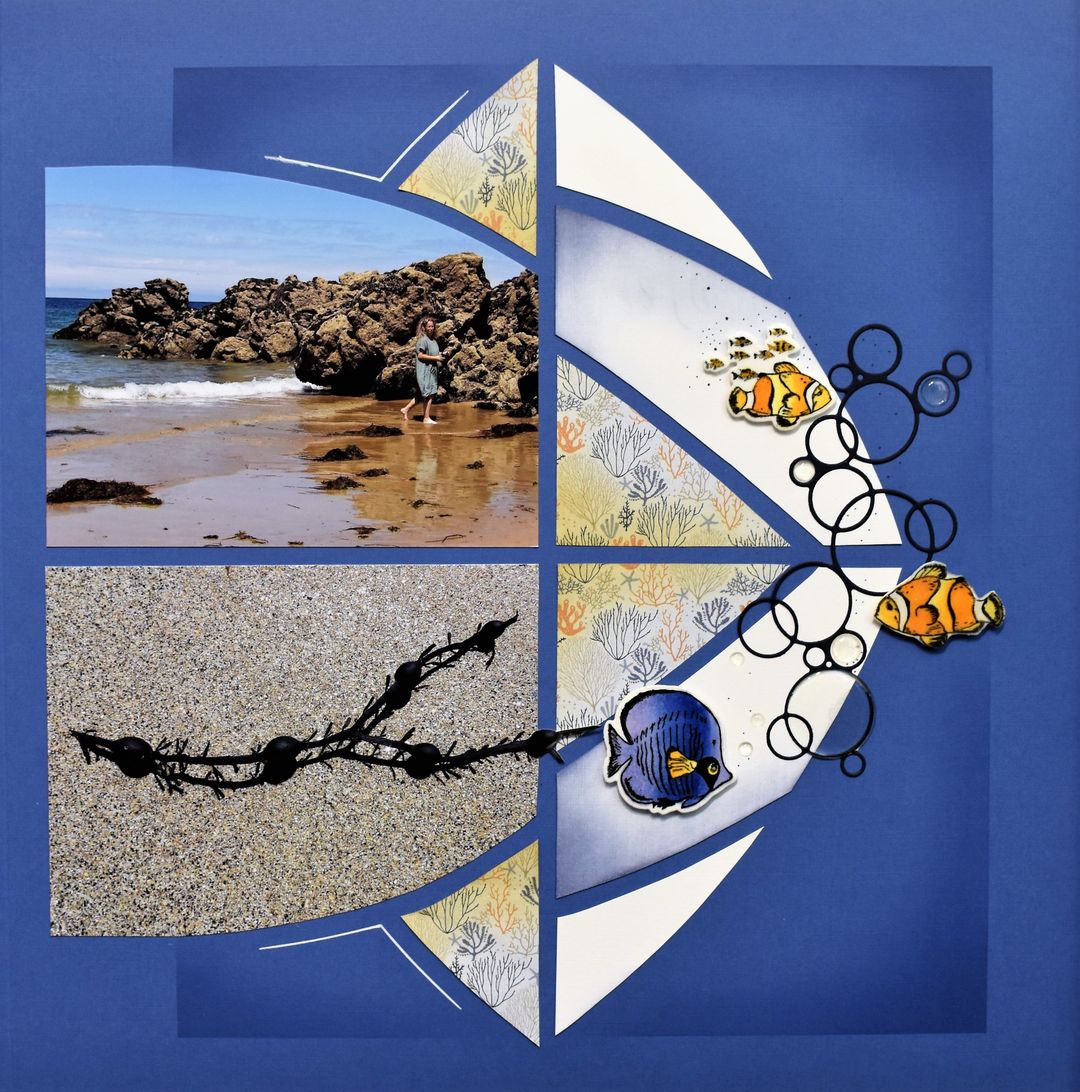
I created the page below using the Brisbane stencil and the new products. The papers are lovely and, of course, the AZZA sands are perfect for costal pages.
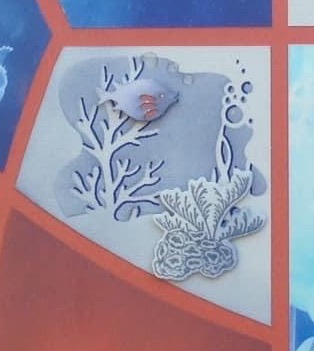
I set the Albany title into the sand, whereas the seahorse above was stuck onto the sand for more texture. Note how I layered the sand along the lines of the photo beside it. This is easily done, simply tear away the backing paper to the line that particular colour sand needs to go to, then work your way up the strip of paper. To set figures or letters into the sand, tear away the backing and stick the figure or letters down first, then sprinkle the sand onto the sticky paper around the image.
With the letters it is easier to place them onto the re-position tape first then onto the sticky paper, this is easier than doing one letter at a time. Sand is then sprinkled around and the letters become embedded into the sand.
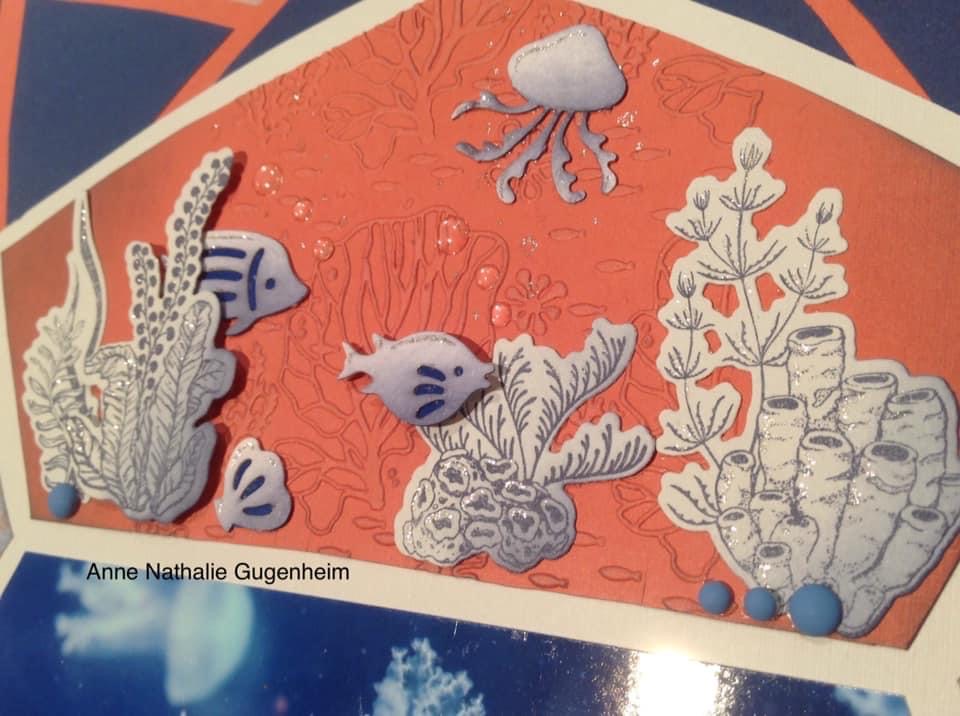
Page by Anne-Nathalie Gugenheim, Europe
I loved the page by Anne-Nathalie. She has embossed Vellum and used two little strips to mount her decorations. These Sea Garden images are lovely as they can be grouped together so easily as seen on this layout. The little bit of AZZA cord highlights the red in the photos.
The layout below created by Jocelyne Heyne uses two landscape photos on the page. I like the simplicity of the page.
Using three photos on the page and some lovely ‘water’ off-cuts Barbara Rae in Western Australia created the page above. Barb has used an image off the Sketch sheet, the Bubbles die and the AZZA Resin dots. She has created the pattern on the paper with the Sea Garden Texture stencil.
The layout below by Martine Boirin shows how a single photo can be used with the Brisbane stencil. Martine has used strips of paper which have been patterned with the Texture stencil completing the page with the Bubbles die and a few resin dots.
The Bubbles die – DIE 273 has been out of stock but should be available again mid-August.
Page created by Hilary Hamilton – Victoria
Hilary created the page above with the AZZA Opio stencil for a 20 x 20 album. She has used the AZZA sand, showing how the decoration stencil can be used to ink images onto the sand on a page. Note too, how the AZZA transparent Resin dots go well with this theme as bubbles.
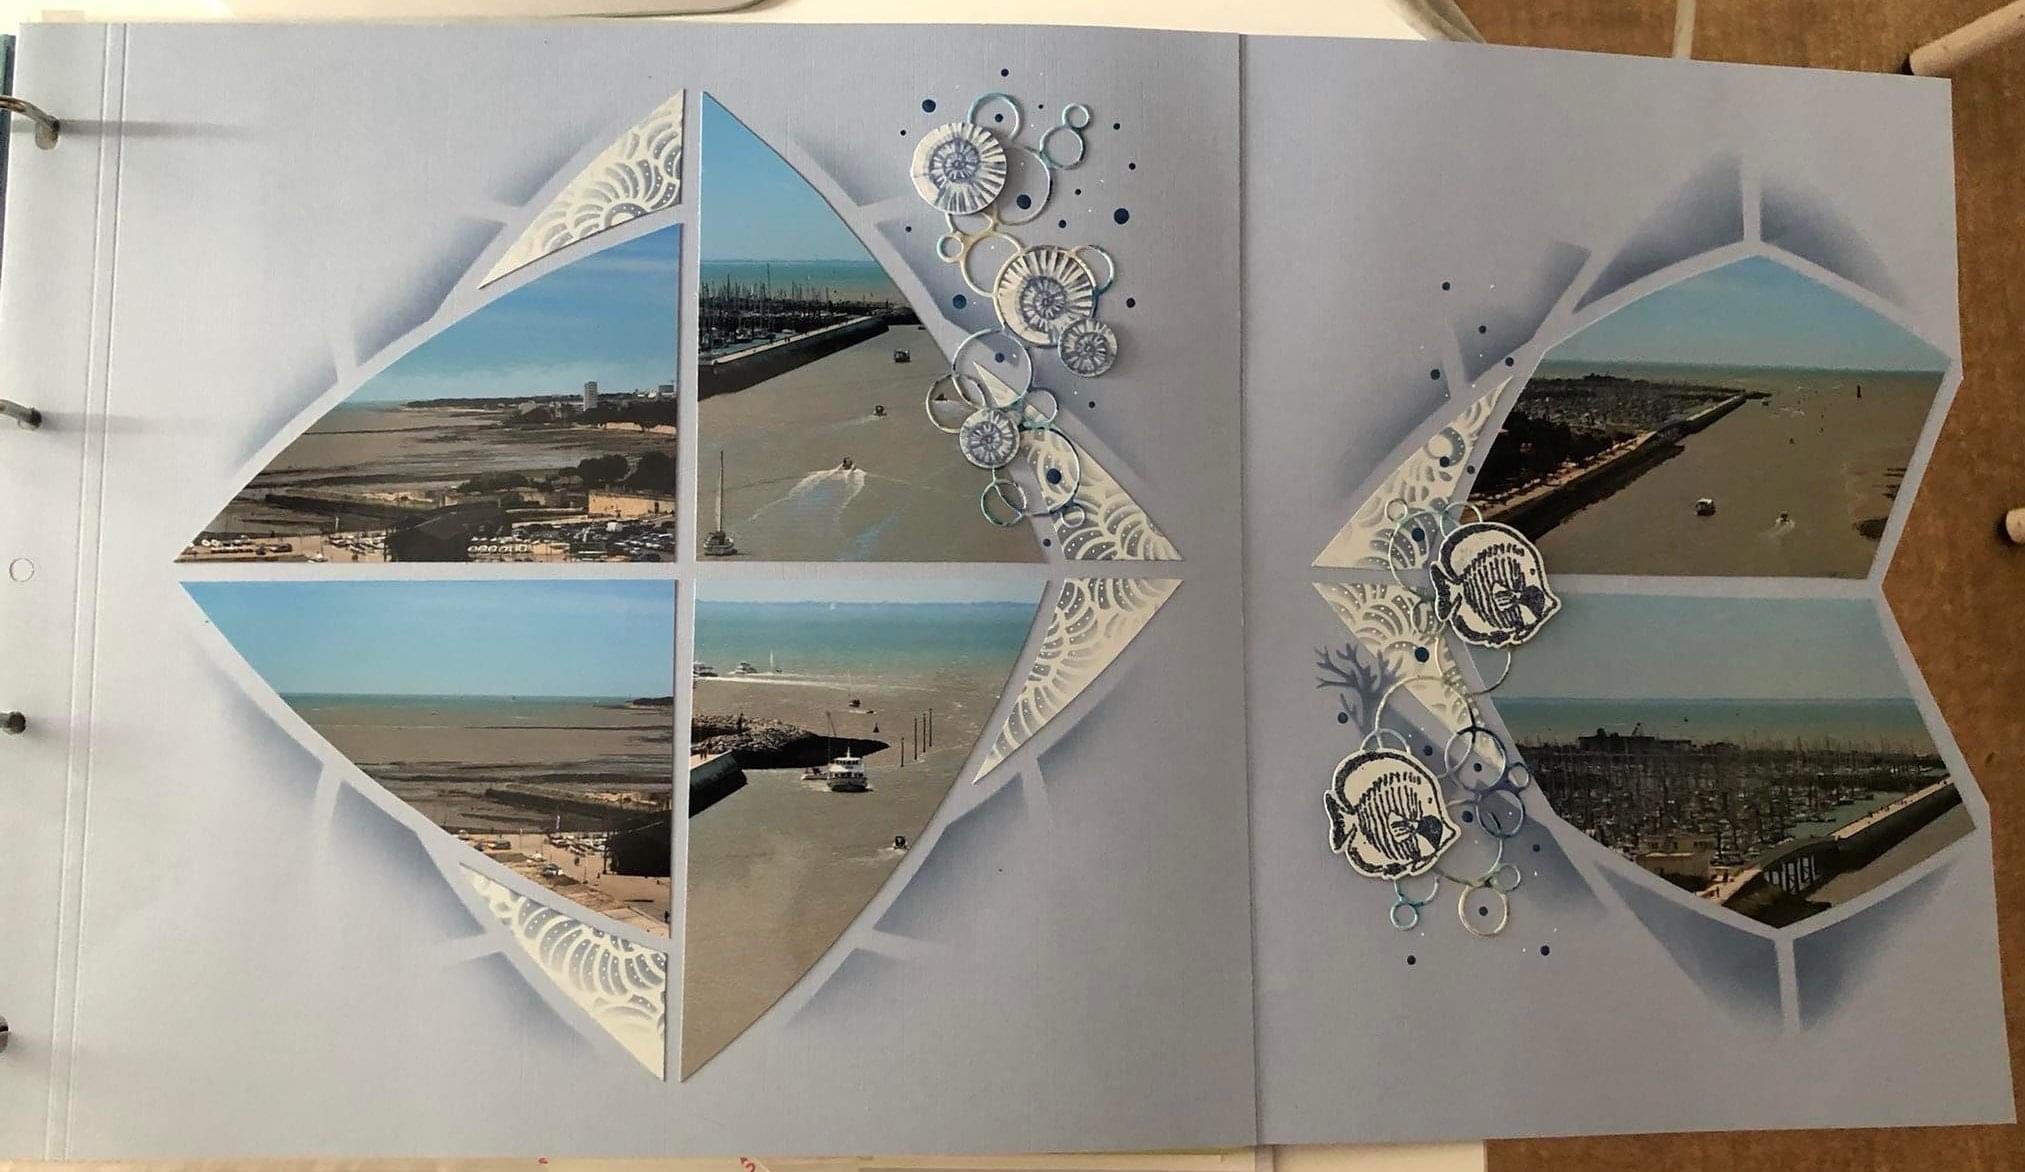
I did like the set of multi pages below but could not find the name of the person who created them. Please let me know if you do so I can give them the credit. Note the double page folded behind the title page.
Page created by AZZA – Europe
The background for the decoration bottom left was created with the Sea Garden decoration stencil, all bubbles have been created with the AZZA writer/Dot marker.
Page created by Scrapons sur le bassin d’Arcachon – Europe
Lovely layout above with two portrait photos, Sea garden paper, plain paper embossed with the Sea Garden embossing folder and lovely decorations giving a 3D feel about the page with the different finishes. The whole selection can be seen below.
To get you prepared well in advance AZZA has a ‘Christmas in July’ sale on this week, until the end of the month. Why not pop into the AZZA shop and pick up a few new Christmas products for your cards and gifts this year.
The Basket below is wonderful if you would like to be a little creative with the kids or grandchildren closer to Christmas. The large stamp set matches the MDF images and make lovely Christmas tree decorations or can be used on a Christmas card. The idea behind using them on a Christmas card is that the front is decorated for the card and a message and date can be placed on the back so that it can then be removed from the card after Christmas and hung on the tree in the future.
And if you are after a complete new set of Christmas products, we have two options in this box, the more expensive one has the set of dies to match the stamps and the embossing folder.
Mini albums are perfect Christmas gifts, begin working on them now and you will be well ahead of the pack come Christmas time. This lovely mini album below was created by Fabienne with the AZZA Montmartre stencil. A lovely size to work with. With the binding discs, the mini album can be cut to any size.
The papers and the medium stamp in this kit are a special release and not available to purchase individually.
The page below, created with the Montmartre stencil, shows how the bonus gift frames can be used on the page. Note how the stamped image on the front page lines up with the decoration on the page behind.
AZZA – Europe
Nolwenn has stamped both Vellum and one of the images off the Silhouette sheet. She has placed the Vellum behind the frame and the figure in front together with a second figure in the same colour as the stamped script. The Flower Field die could also be used in place of the Flower. This die is now back in stock.
A little secret: The Chante stencil will be part of two baskets next month. A beautiful page by Deb Byrne showcasing a few of the All Aboard products on sale in August.
Deb Byrne – Tasmania
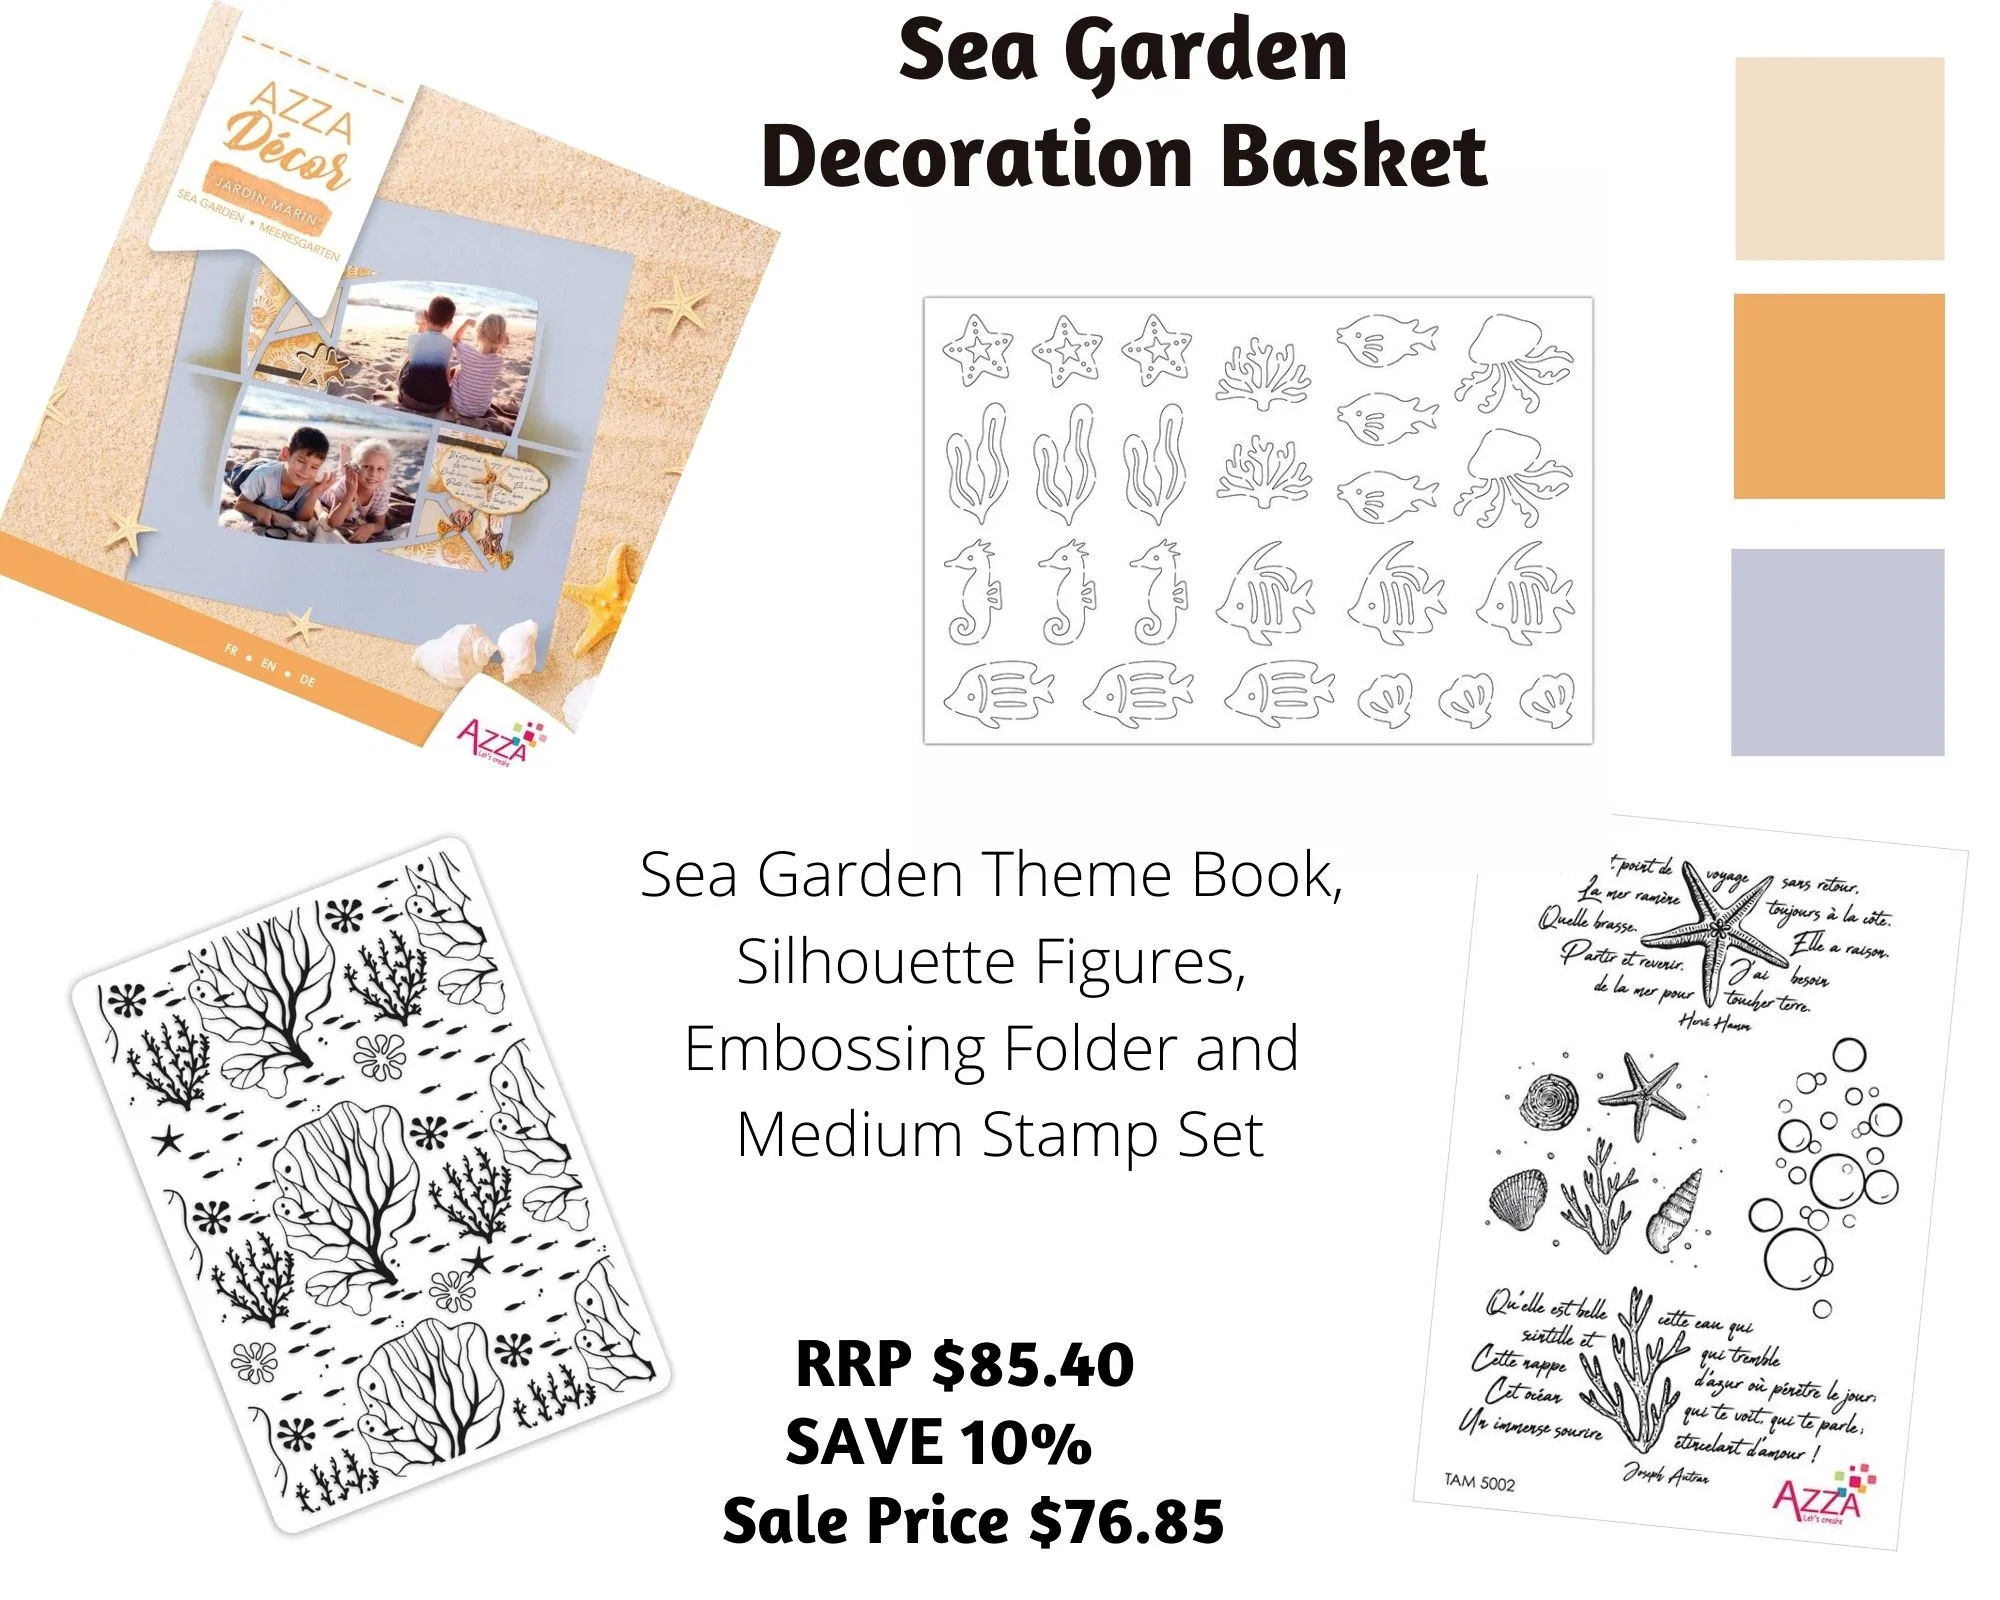
I’ll leave you with a few more ideas using the Sea Garden and Marine Fauna products.
This is a lovely layout by Murielle in Europe, where she shows how the images with this theme layer very well to created a beautiful decoration. She has used the Dymo machine to punch out the title for the page.
AZZA Europe
The decoration below shows a whole scene created on on a page using both the die cut images and the figures together on an embossed background. Note how perfect the transparent Resin dots are as bubbles. Anne Nathalie has completed the page with iZink glitter paint and Resin dots.
This smaller image has been created with the Sea Garden texture stencil as a background and a stamped image and figure placed upon it with 3-D mousse behind to give the page some texture. All Mail Out subscribers will have received this Texture stencil and a lesson on the many ways to use it.
With winter’s arrival comes a few more weekends indoors and how better to fill the days but with catching up on those albums you have had on your ‘to do’ list for a while. I have seen a lot of our ladies creating beautiful family albums as with the lack of travel over the past few years the holiday shots are now few and far between. This is not a bad thing as I believe a family heritage album is a priceless gift for anyone and it also keeps the family photos alive with future generations knowing just who was who in generations gone by.
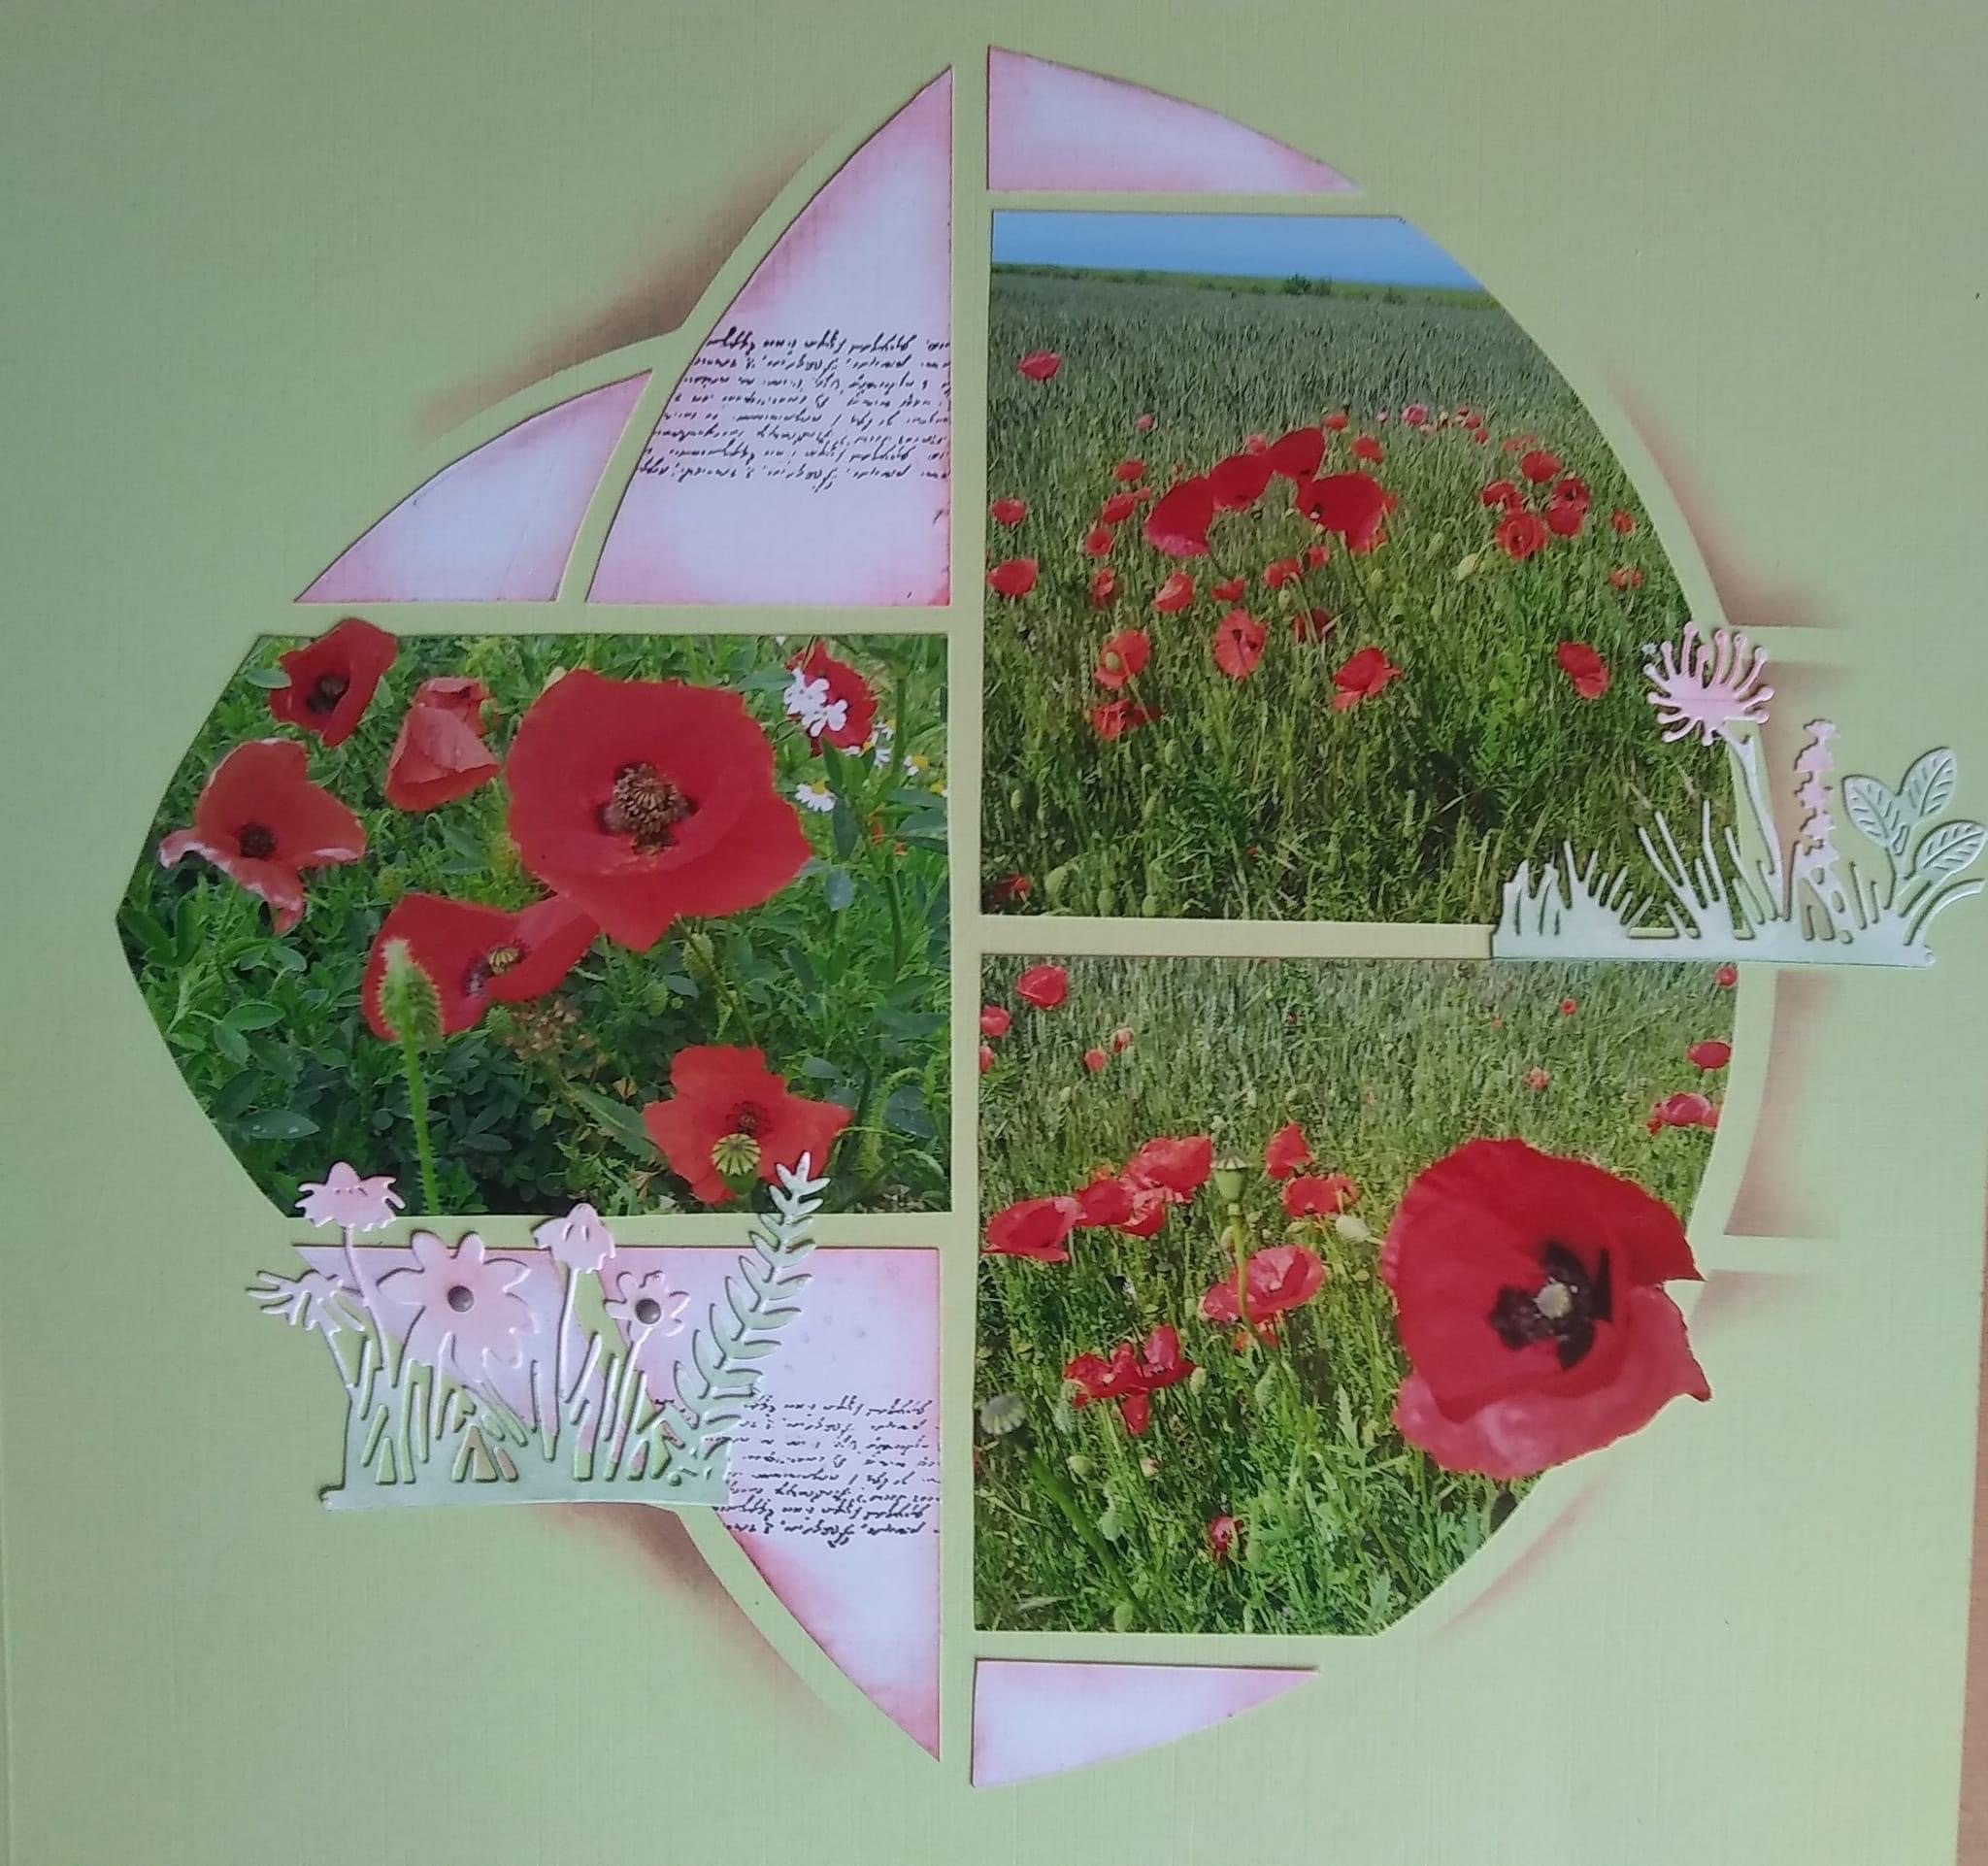
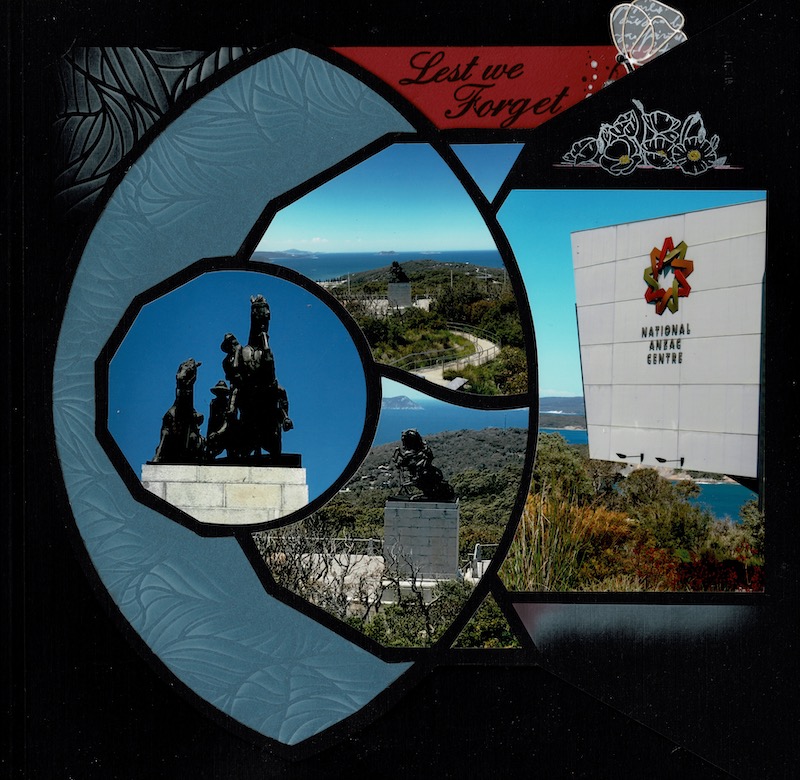
I am still seeing beautiful layouts with the Osaka stencil. I created the page below with photos from the Albany National ANZAC centre. I have used a sheet of the patterned vellum in the top left corner, stuck down with self adhesive paper. The strip in the middle with the information is slightly raised and was mounted on black card. I completed the image with the beautiful Poppy die in the Forever set seen below. Note how I elongated the ‘circle’ in the middle of the stencil to fit in a landscape photo.
This paper is perfect to use with the AZZA vellum paper, sand and velour. It has a clear core so will not show on the page. Whatever colour card stock or paper used will still be visible once the adhesive sheet is placed on it.
These dies are also great for covering up ‘unfortunate spaces’ which I believe was a comment often used in class by Ros, our ‘retired’ Consultant in Esperance!
Page by Magali Molinod-Rivasseau – Europe
I liked this layout by Magali as it is so simple on the page. Magali has used the lovely ‘At the Beach’ Texture stencil duo for decoration.
If you are looking to use the Osaka stencil on an A4 page, the layout above is a good sample.
I finally completed my page created during the online class with the Osaka stencil. I used one of the Daydream stamp and die sets, a stamp from the earlier ‘Lace’ theme and the three little flowers cut out of the latest Flower Bouquet micro stamp image. These little flowers come in very handy for covering up any bad cutting or lines/corners that don’t match up well. My wavy line through the middle of the layout didn’t quite line up, but that was fixed quickly with an added decoration. Stamped, coloured with my Woody pencil and Aqua brush, cut out and stuck onto the layout with a little 3D mousse behind it.
Page by Lyn Holmes – Western AustraliaPage by Lyn Holmes – Western Australia.
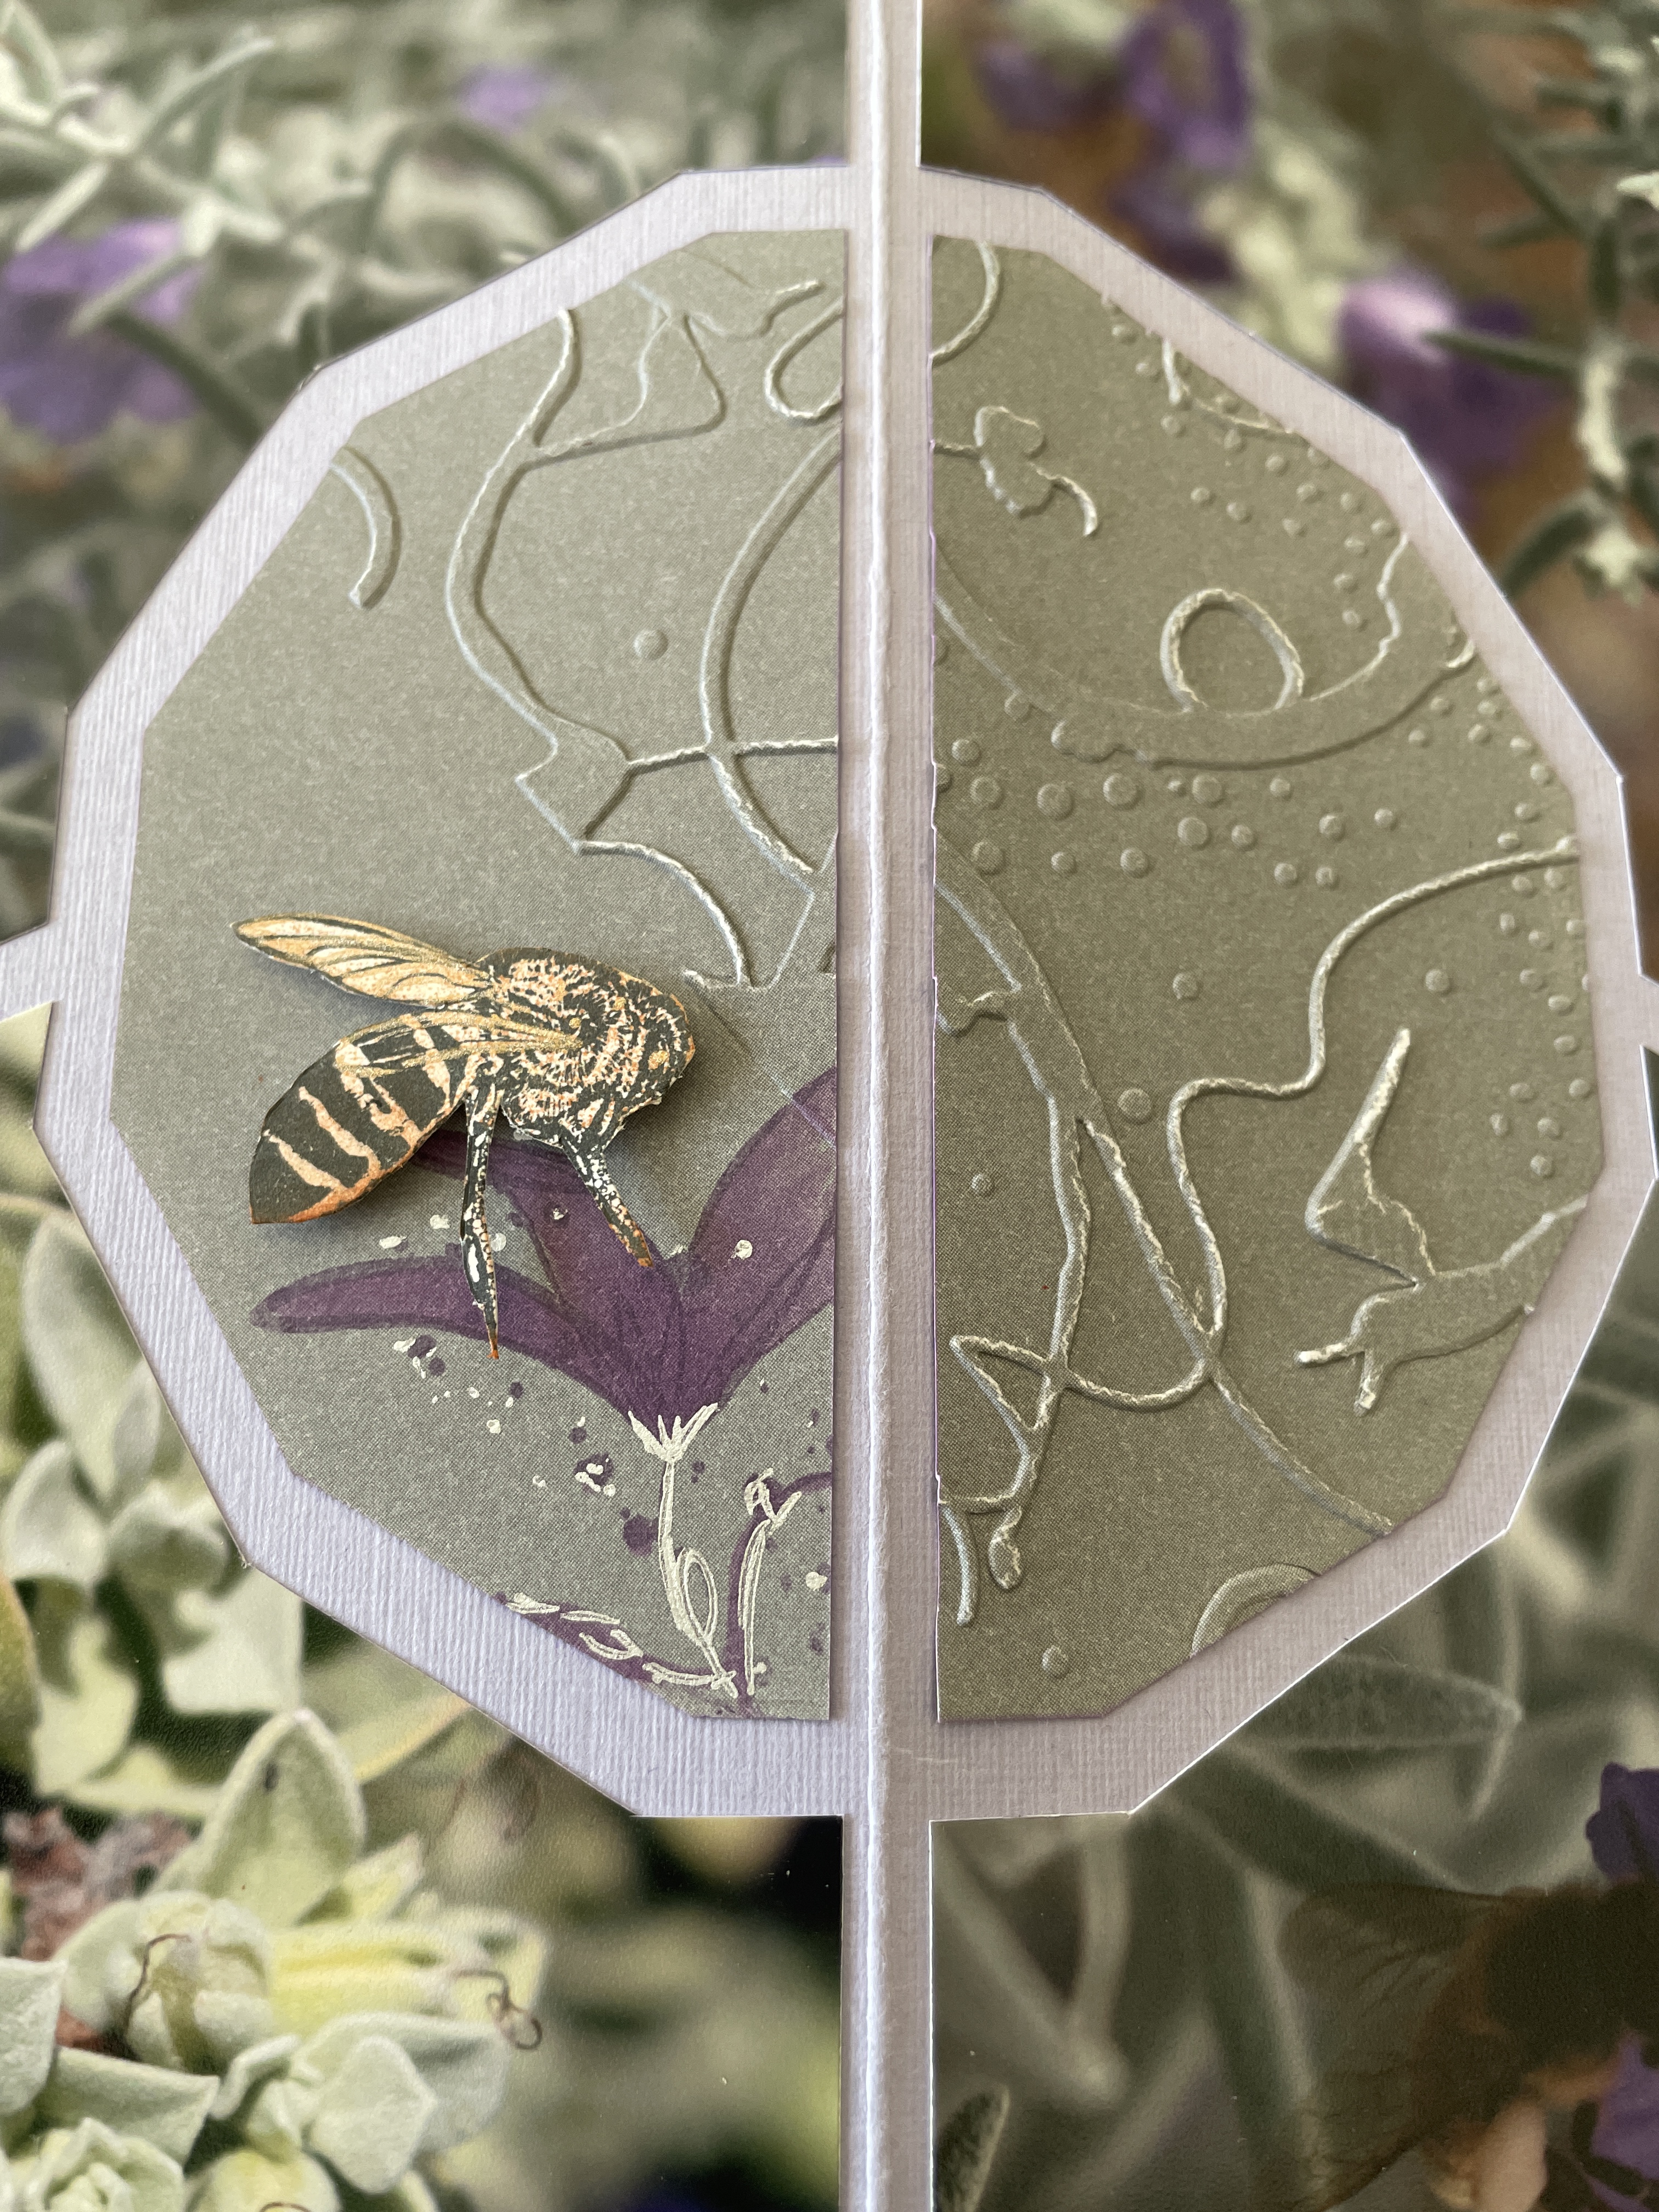
Note that I did not emboss the whole shape in the centre on the left. I left an area where I wanted to place the decoration. I stamped the lovely lily image, coloured it with my Aqua brush and inks and then used the bee stamp from the AZZA range Small Beasts. I placed a little 3D foam behind the bee to make it look as though it was perched on the flower. This is a good example of not using the complete stamp image, but only the part you require for your decoration.
June Mail Out was all about the Flower Bouquet Stamp below and the many ways it can be used on the page. It was included in the Mail Out as it is such a versatile micro stamp.
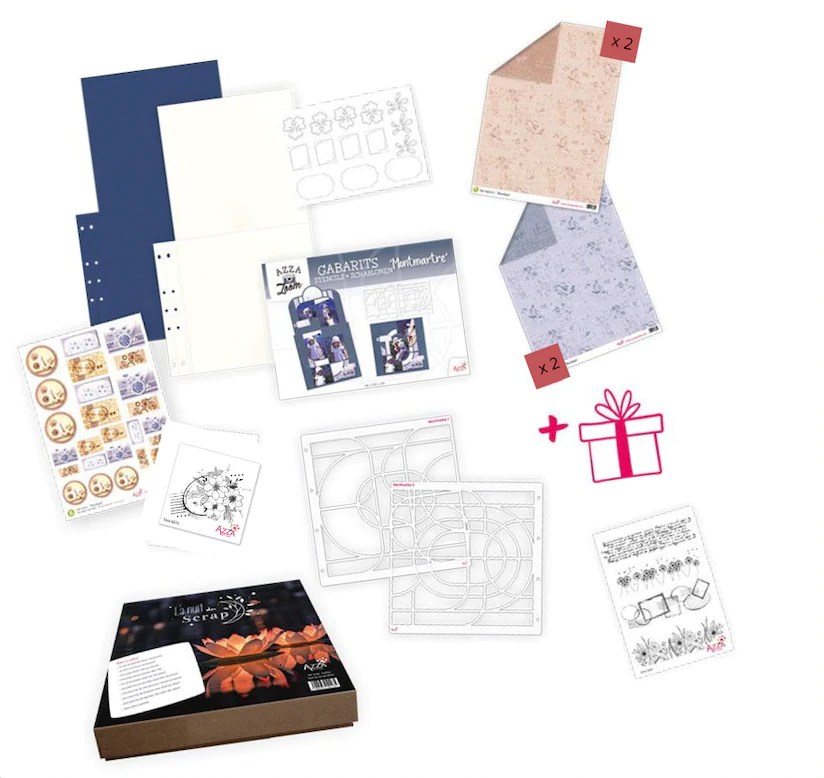
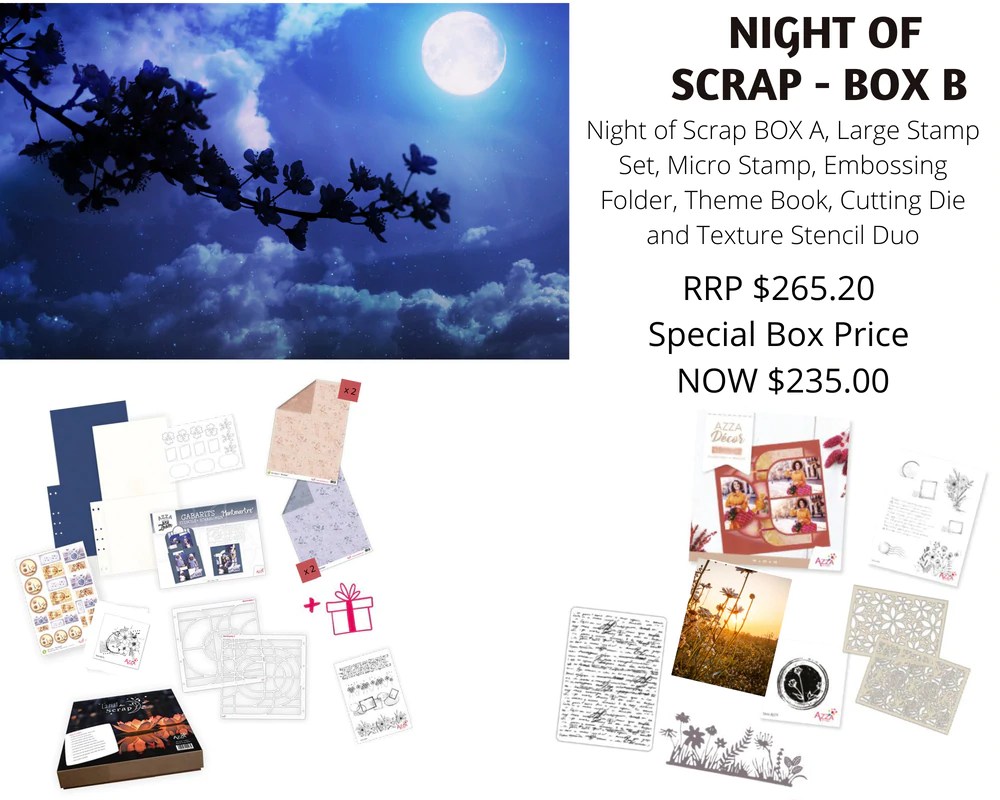
Now, on to this month’s release Montmartre stencil and the GORGEOUS Flower Field products. This was released in Europe as a Night of Scrap box so we decided to release it in two options in Australia. Box A is almost the Studio equivalent: Montmartre was not released as a Studio, only with the smaller booklet. Box B will get you all that is in Box A and more. If fact, it is the full release in one box. Of course, you also make good savings buying the box set if you love the products. There is also a small gift included in the box.
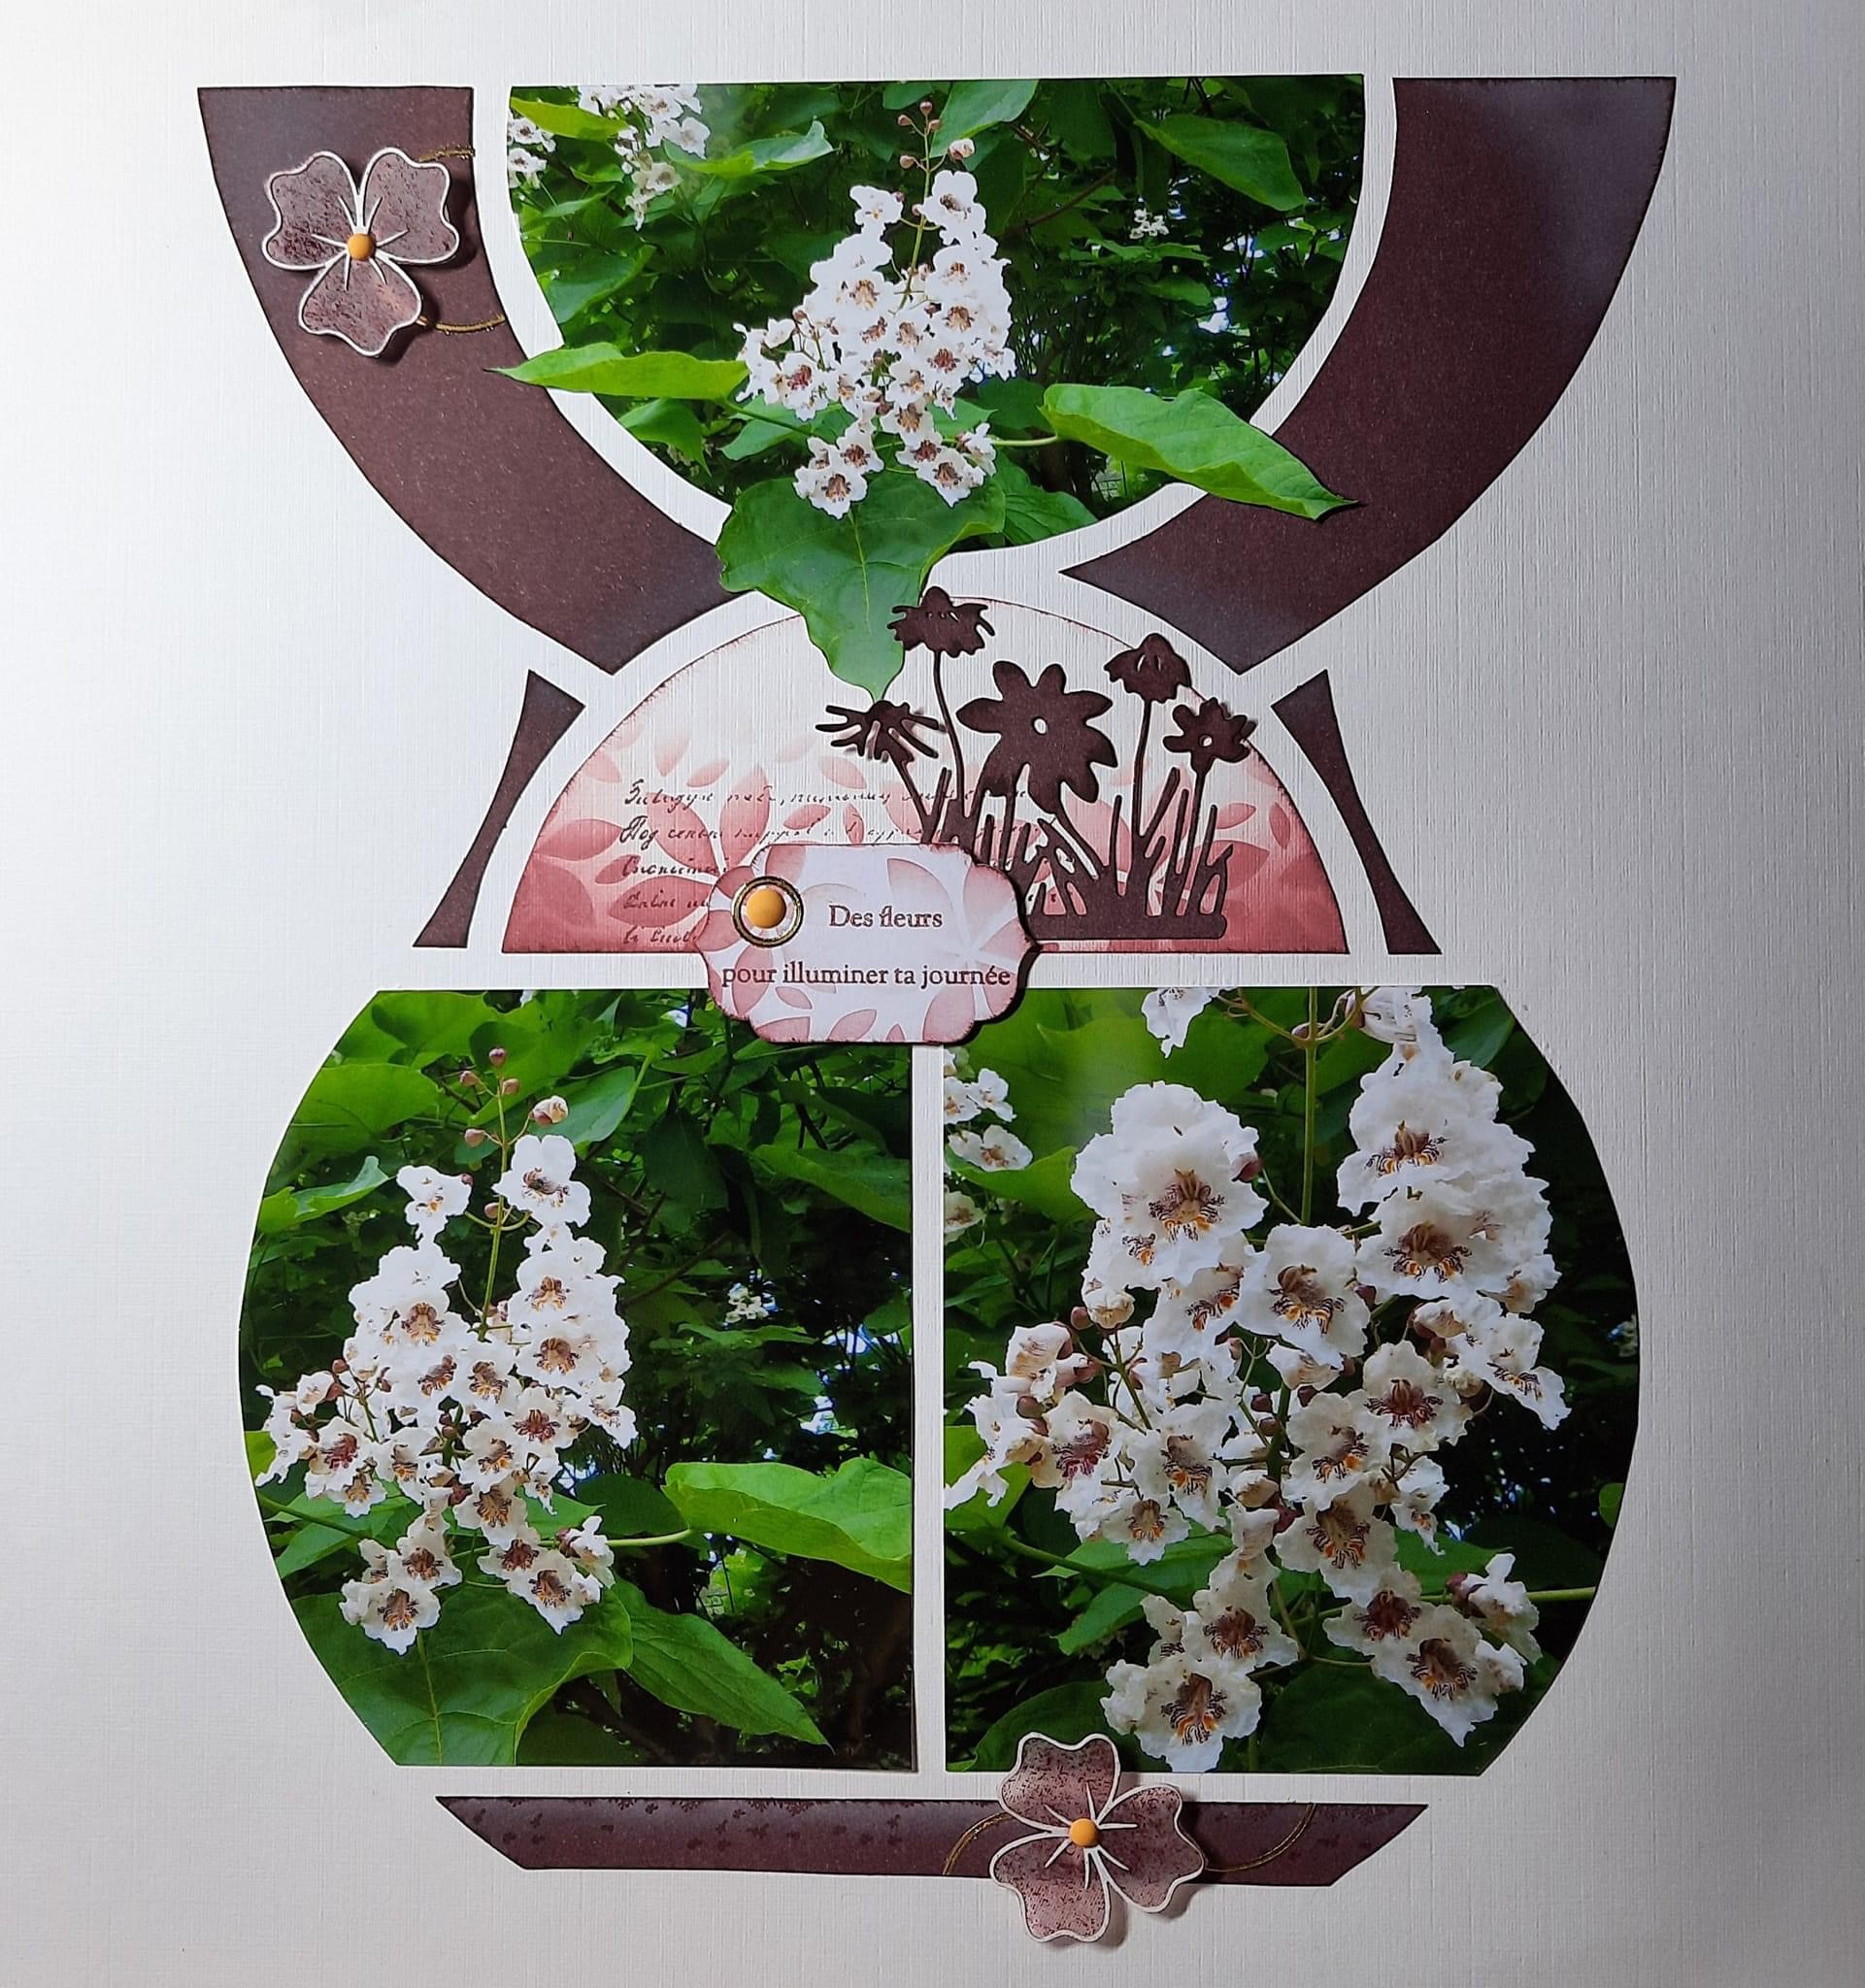
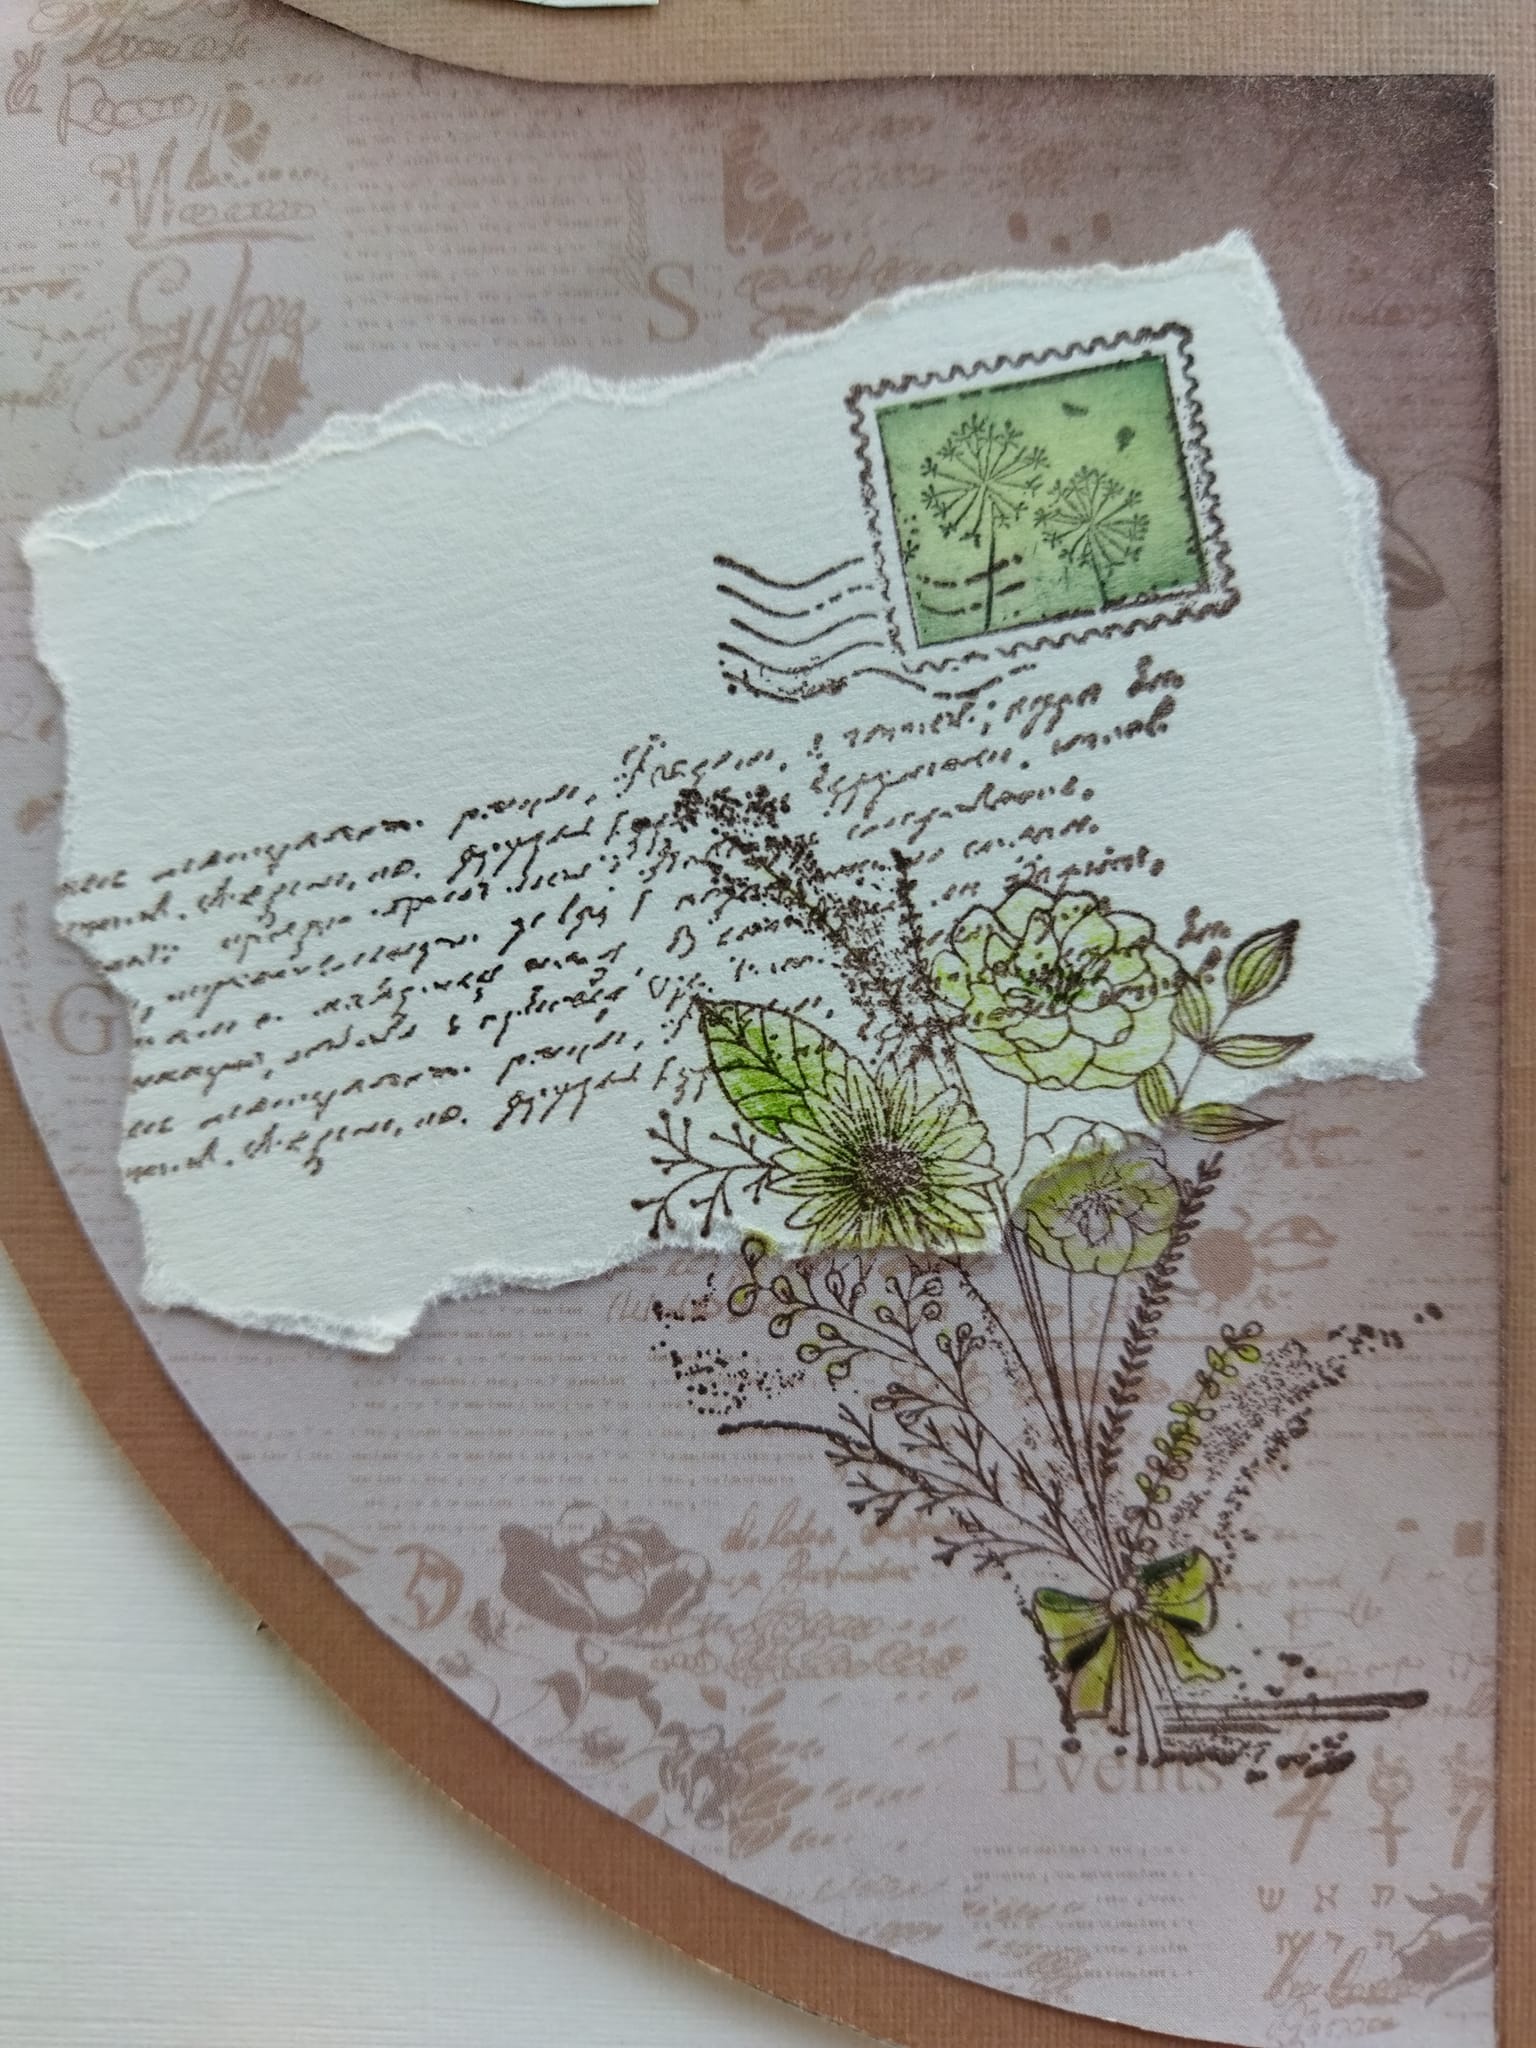
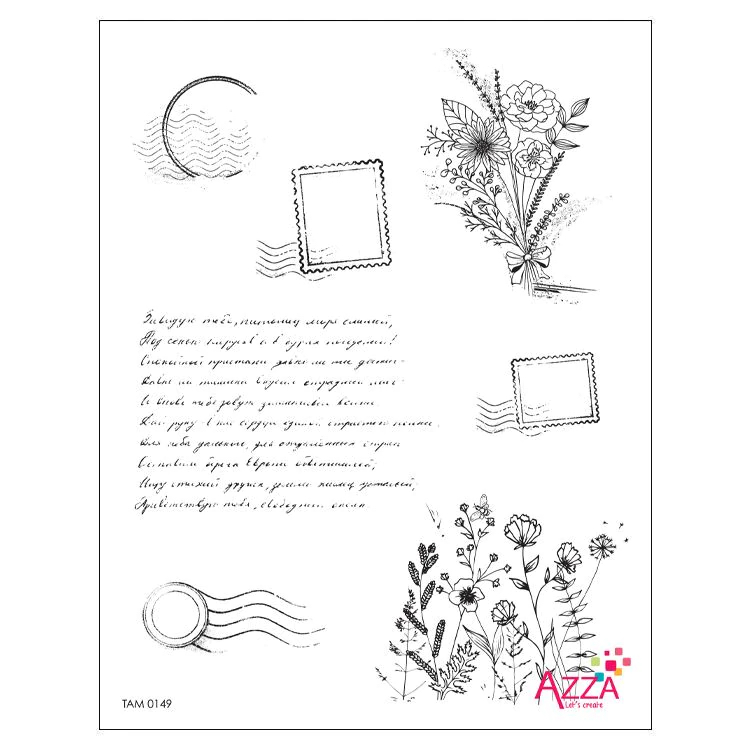
I created the page above with the Montmartre stencil and the Flower Field decoration products. I used both script stamps, stamping twice on the left-hand side to get the writing the full length of the photo. The smaller script stamp filled the space on the right perfectly. The decoration at the top was based on the lovely decoration by Laurenscrap in Europe seen below. The script embossing folder goes well on the page with all the AZZA Script stamps.
Decoration by Laurenscrap – Europe.
For this decoration three stamps from the large stamp set have been used together to create a beautiful little scene.
Note the little stamped image can be further enhanced with an image inside the border. This can be done by blocking off the area with re-positional tape and stamping whatever image you would like in the centre. If the area is chalked or inked first, this will bring the tones of the page into the decoration.
Page created by Lyn Holmes – Western Australia
On the page above I used the Montmartre stencil with the oval horizontal. I always place the ‘subject’ of the page in the oval or circle if I am using one, as I feel that is where the eye will go to first. I kept the decoration simple on this page as the photos are quite busy. I also found that the small images on the AZZA Sketch sheet will fit perfectly into this stamp in the stamp set shown above. This particular image was off the Travel Sketch sheet. I find the Architecture die is perfect for any photos of the Sydney Opera House.
Sue Talbot created the page below using the products released this month. The stencil looks just as good without using the oval shape in the centre.
Page crated by Sue Talbot – NSW
Two more pages I thought were quite beautiful. The first created by Sophie using the new stencil and the Flower Bouquet micro stamp mentioned before.
The second created by Azz’Art in Europe. She has used the Montmartre stencil for the layout together with the newly released paper and texture stencil. I love the use of the Daydream texture stencil where she has cut out the individual images. She has also used the Daydream dies and and completed the decoration with two colours of AZZA Resin dots.
Below you can view the video showing how to create a lovely layout with the June product release. Below is a sample page by Valerie Guioc of the page created in the video. Once again the Flower Bouquet micro stamp has been used, this time on an image off the silhouette figure sheet.
Below is a lovely card using the newly released products:
AZZA Europe
Congratulations go to the winners of the Mother’s Day competition:
Carole Rutter in Western Australia won the Clients category with the page below. Carole used the AZZA Melbourne stencil for her layout. The patterned paper and die were special order products, she used the ‘Relax’ embossing folder and the Zigzag Chic texture stencil.
Page by Carole Rutter – Western Australia
Mary Iviglia, AZZA Consultant in Beaconsfield Upper in Victoria won the Consultant category. Mary used the AZZA Bombay stencil and dies for her layout. She used the ‘baby’ 15 x 15cm embossing folder and completed her page with AZZA Glitter tape, Resin dots and two colours of cord.
Page by Mary Iviglia – Victoria
From this Friday, 24th June until Thursday, 30th June there will be a promotion in Australia. A pocket will be on offer for all orders over $150.00 placed during this period (as long as stock lasts). The pocket contains an AZZA 15 x 15 trio set of stencils, a pack of AZZA paper, an accordion sheet, album covers and a small AZZA stamp. Irene Warfe, AZZA Consultant in Sebastopol, Victoria has created a sample Accordion album with the products from the pocket.
Created by Irene Warfe – VictoriaCreated by Irene Warfe – Victoria
If you have any queries please don’t hesitate to contact: enquiries@azzaworld.com.au
We are half way through May already and winter temperatures are already creeping in. Soon it will be time to rug up and stay indoors, perfect scrapbooking weather.
This month saw the release of the ‘Forever’ themed products and two new Big Shot starter kits. These kits are designed so that they can be used with any theme on the page and are a great basic set to have in your tool box.
The Big Shot starter kit shown below, DIE 275, is the larger of the two sets. The embossing folder is 10.5cm x 14.5cm and from that you can tell the size of the dies.
A beautiful card shown above, created with the Big Shot starter kit. Below a lovely page created with the AZZA Java stencil, decorations using the Big Shot starter kit dies and embossing folder.
AZZA EuropeAZZA Europe
The smaller Big Shot starter kit is shown below, it is the same size as the AZZA mini collection sets.
I loved this layout below by Cecile in Europe. Cecile has used the AZZA Osaka stencil for her layout and then products from the Forever range released this month for her decoration. The embossing folder is going to be one of my favourites I think.
Die 269 is another very versatile die, I have seen it used on many pages this month.
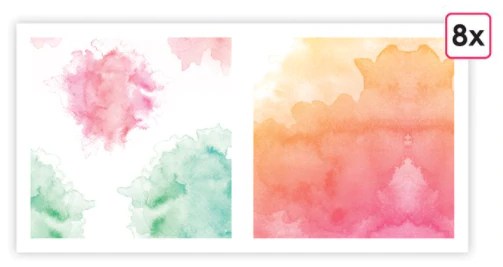
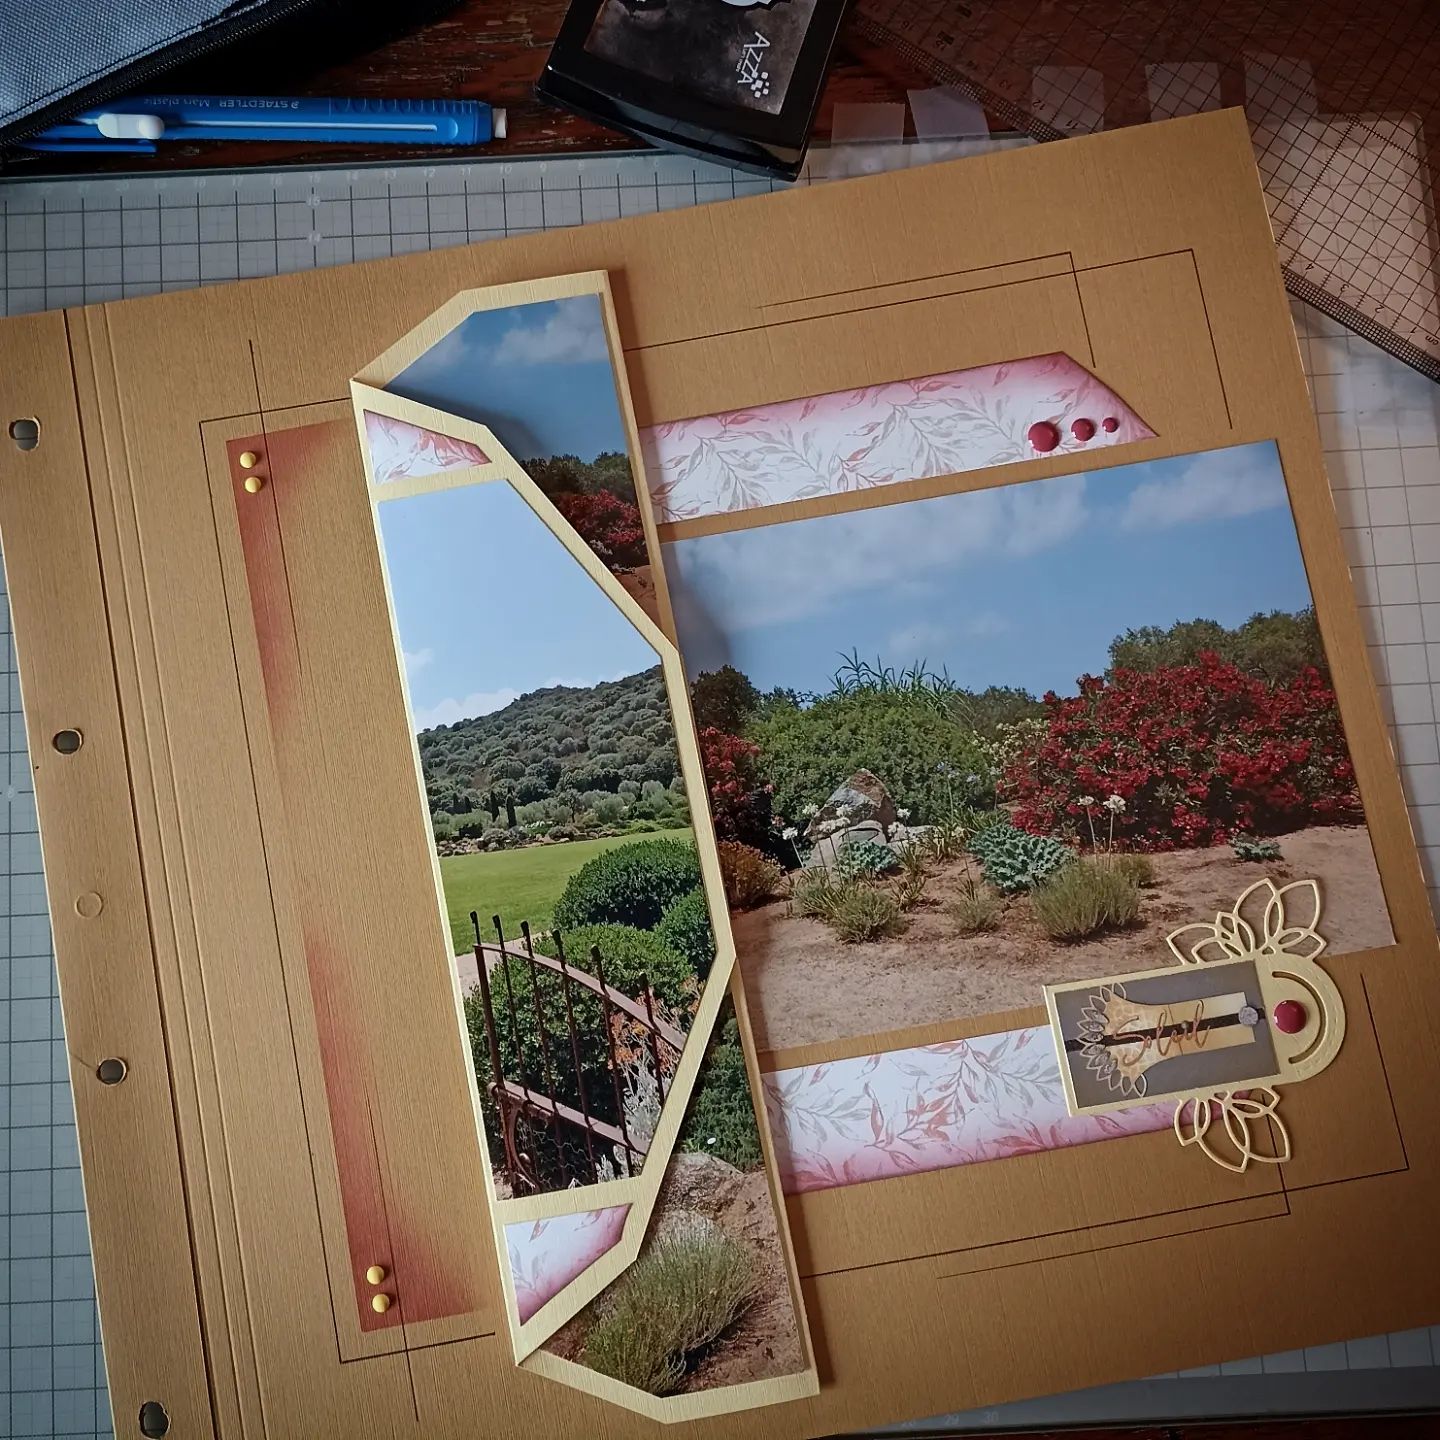
I used the Forever products on my double page below. I used the AZZA Osaka stencil and a vertical double page. New vertical pages will be released next month, I have a bit of old stock. I used the vertical double page as all my photos were portrait. If you only have landscape photos you can do the same layout, just swing it 90 degrees.
The slim photo on the left is showing from the back page, remember when you do this the image seen when the page is closed must be decent. I used the Forever embossing folder on the paper and it is delicate enough to use with a large piece of paper. The lovely ‘Watercolour’ patterned paper worked perfectly with the photos. Unfortunately, the Forever die that I used has sold out in both Australia and Belgium and will not be re-run. The stamp I used for the word ‘Forever’ is on the fairly new AZZA Word stamps released in Australia.
Below you can see the page open. I used the small dies from the Big Shot Starter kit for the tab to open the page, lace patterned paper and a figurine which I placed on a circle cut from an off-cut of one of the photos. I used one of the dies from the Forever set but cut the circle off it.
Page by Lyn Holmes
I have found the ‘Watercolour’ paper blends well with colours across the spectrum. Below are a few pages I created for a very special family album. The first I used the Loire stencil and die, finishing the decoration off with the beautiful Silhouette butterfly, a stamp, inks and Resin dots. The second page was created with with the AZZA Boston stencil duo. The lovely Watercolour patterned paper needs no further decoration.
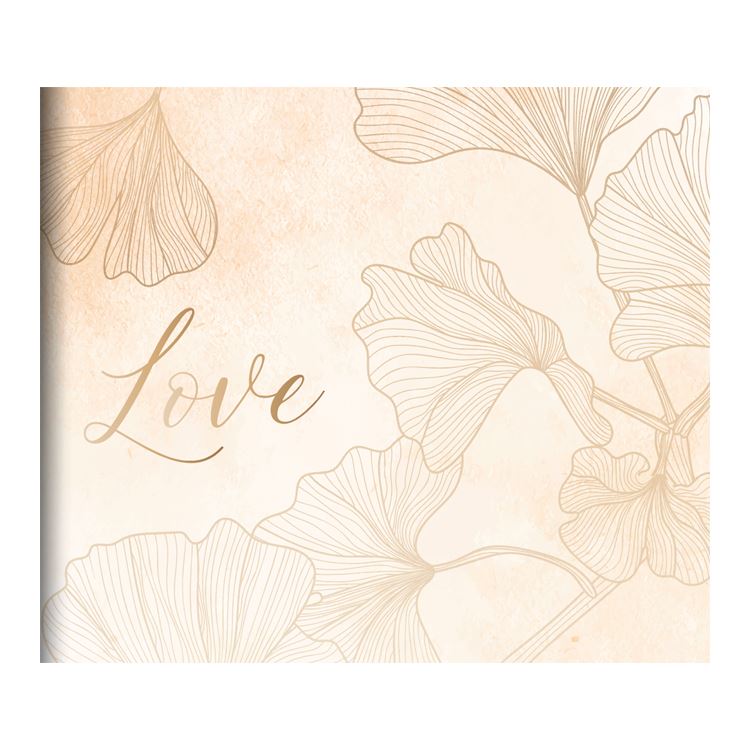
The new ‘Love’ album is just perfect for so many themes in an album, not only wedding. I am using one for the family album I am working on at the moment.
You can incorporate the images from the Forever stamp with the Forever die, which cuts beautifully as you can see in the samples below.
Created by AZZA Europe Created by AZZA Europe.
I would love to show you the whole page, but I could not find it on Pinterest. The gentle shading on the stamped images can be achieved with Alcohol pens, inks or chalks.
If you don’t think you are great at decoration, the Figure sheet always provides instant images you can colour in, place 3D mousse behind and pop onto the page very quickly.
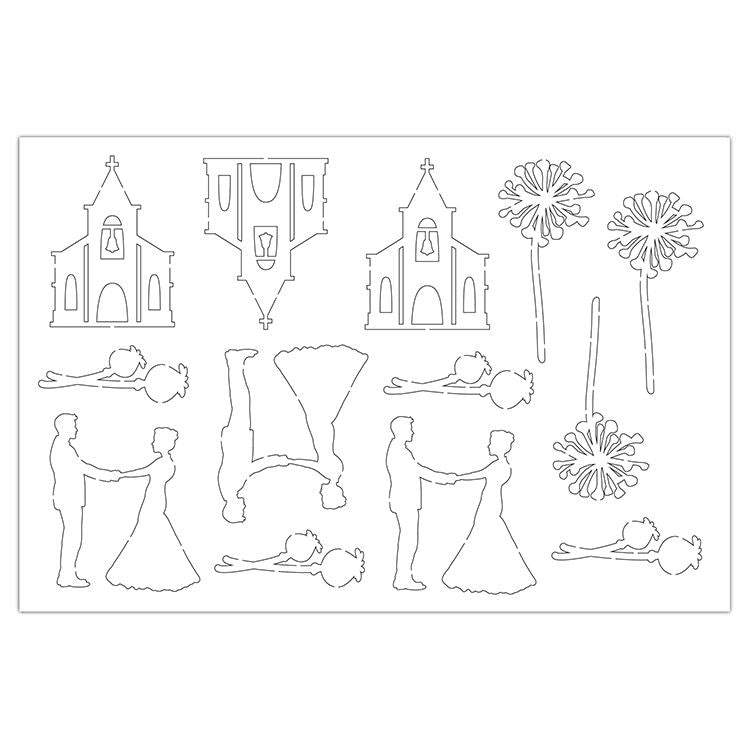
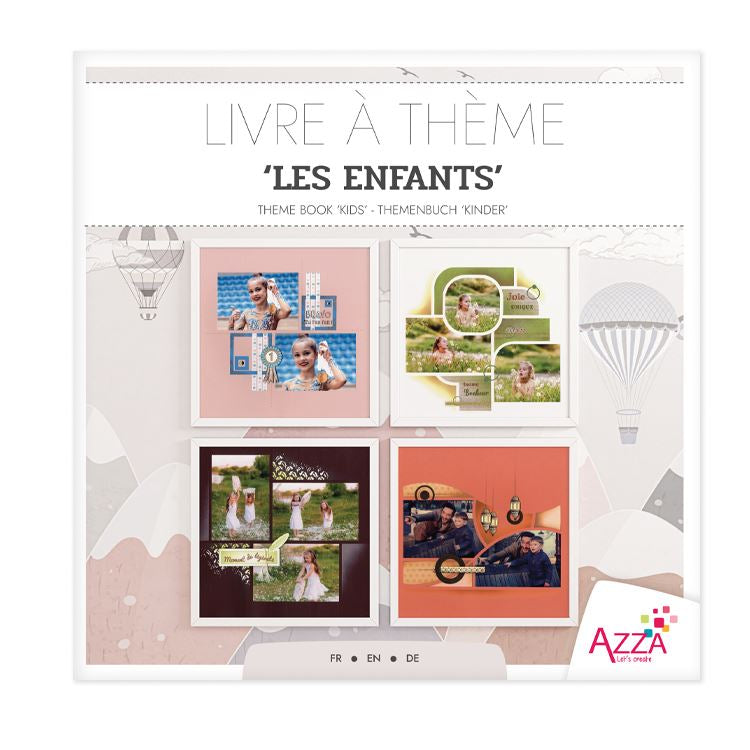
If you have enjoyed the book previously release by AZZA, the best selling one being “Around the Single photo”, this month AZZA has released a book “Children”. Although the title is “Children” obviously the layouts can be used with any theme on the page. In the book there are 28 different layout ideas and two ideas for mini albums.
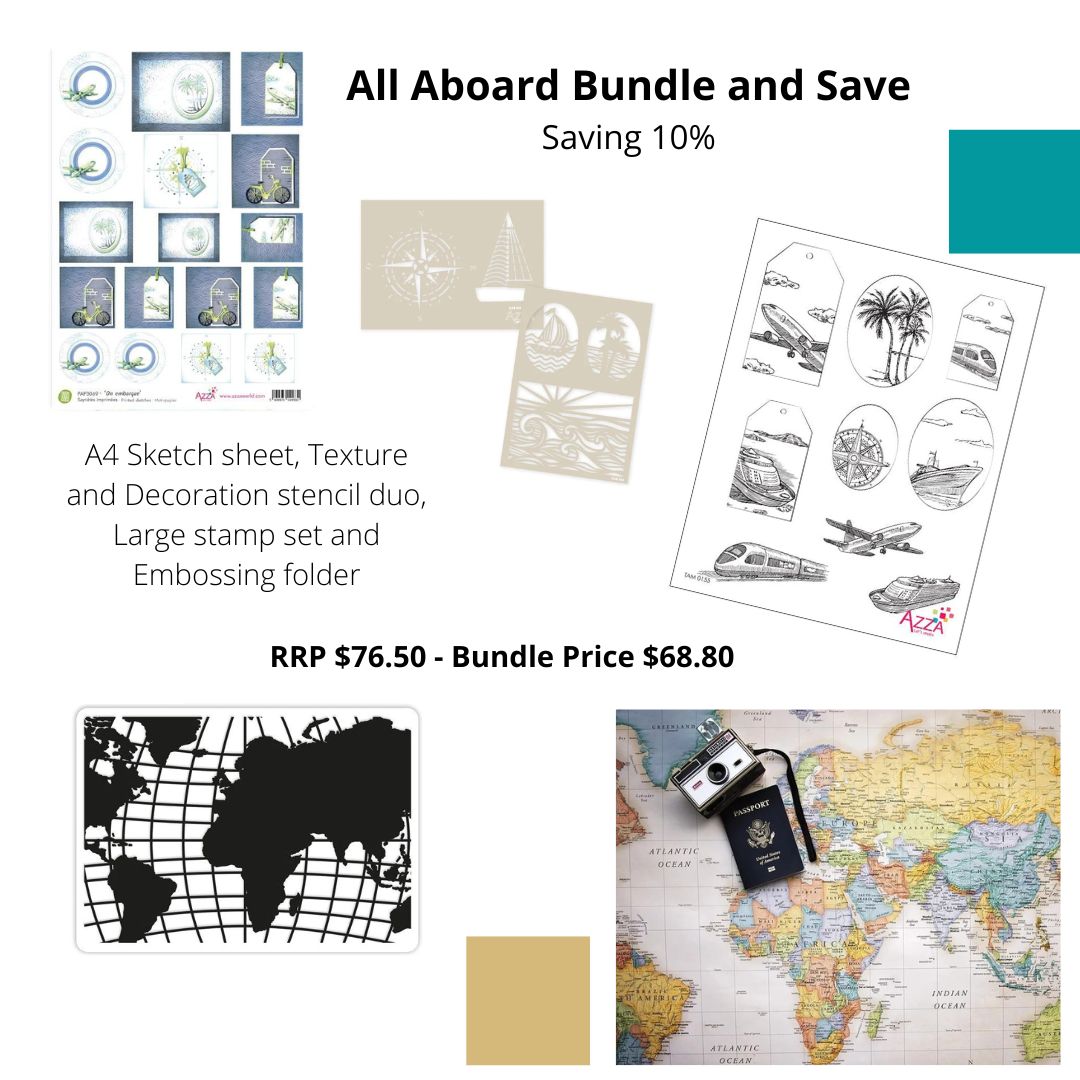
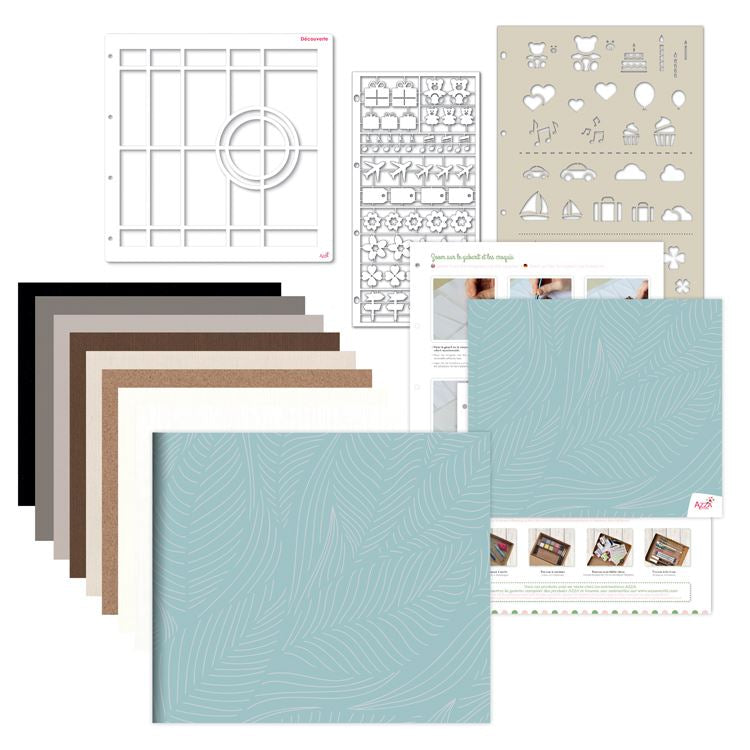
This month also saw the release of an AZZA Scrap kit and Scrap kit PLUS. These kits are great for gifts or to purchase for a specific project. It includes, the Album, stencil, pages, ideas book and an A4 sheet of figures and an A4 Decoration stencil. When you purchase the Scrap kit and Theme kit together in a bundle, you can save 10%. If you are a beginner, new to AZZA or want a very simple stencil, this one is perfect.
Now for a few Osaka layouts I thought I would share with you. This first page was created by Favienne Graulich-Lorge in Europe.
Page by Fabienne Graulich-Lorge, Europe.Page by Fabienne Graulich-Lorge, Europe
Anne-Nathalie has used the paper and stamp from the 20th Anniversary box set.
Page by Magali Molinod-Rivasseau, Europe
I liked this black and white page above. I am sure the Daydream image has been stamped onto vellum and then placed onto the page. It can be adhered to the page behind the Resin dots.
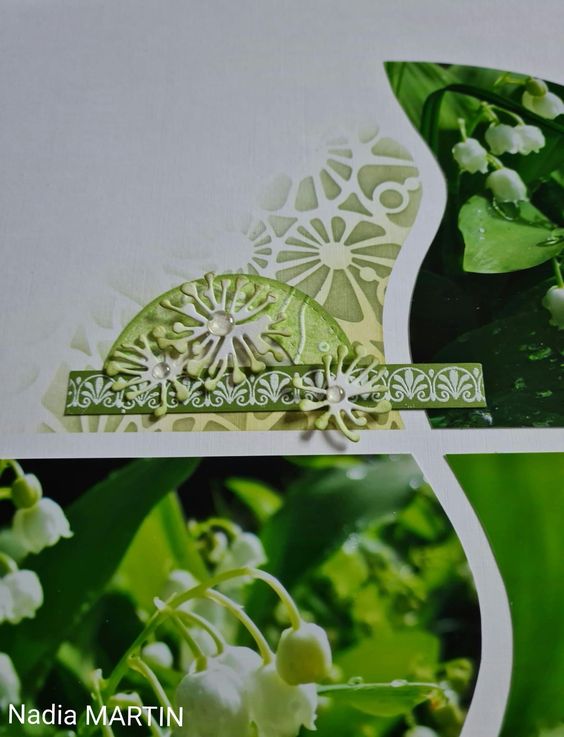
I liked this decoration above by Nadia. For all of you that received the AZZA Mail-Out last month with a lesson on texture stencils, this is a perfect example of using a ‘strip’ of AZZA texture stencil to create a lovely decoration on the page. Nadia has used the Texture stamp included in the AZZA 20th Anniversary box set. She has used the daydream embossing folder and texture duo stencil and lastly placed the little figures off the Forever figures sheet (or you could use the same image using the Forever die) placing a little 3D foam behind them to raise them up and lastly translucent Resin dots for their centre. Perfect use of an AZZA stamp, deco stencil, embossing folder and figures sheet to create a decoration.
Created with the AZZA Osaka stencil
This month Mail-Out was all about the next micro stamp released and the use of embossing folders. I found this layout today created with the AZZA Casablanca stencil and Arabian Nights products, so a few more ideas for the Mail-Out recipients as they will have already received the Arabian Nights micro stamp. This multi page was created by Clair Marquez in Europe.
Page by Clair Marquez, AZZA Europe
Such lovely use of the AZZA products. You can find all the Arabian Nights products on our website, link below.
AZZA Australia is running a competition throughout the month of May celebrating Mothers. The page created must be created with ONLY AZZA products and the theme of the page is to be ‘Mother or Grandmother’. Pages to be submitted by the end of the month: deborah.azza@gmail.com. There will be a section for Consultants and a section for Clients, if you are a Client and have a Consultant please let us know. Details are in the latest AZZA newsletter.
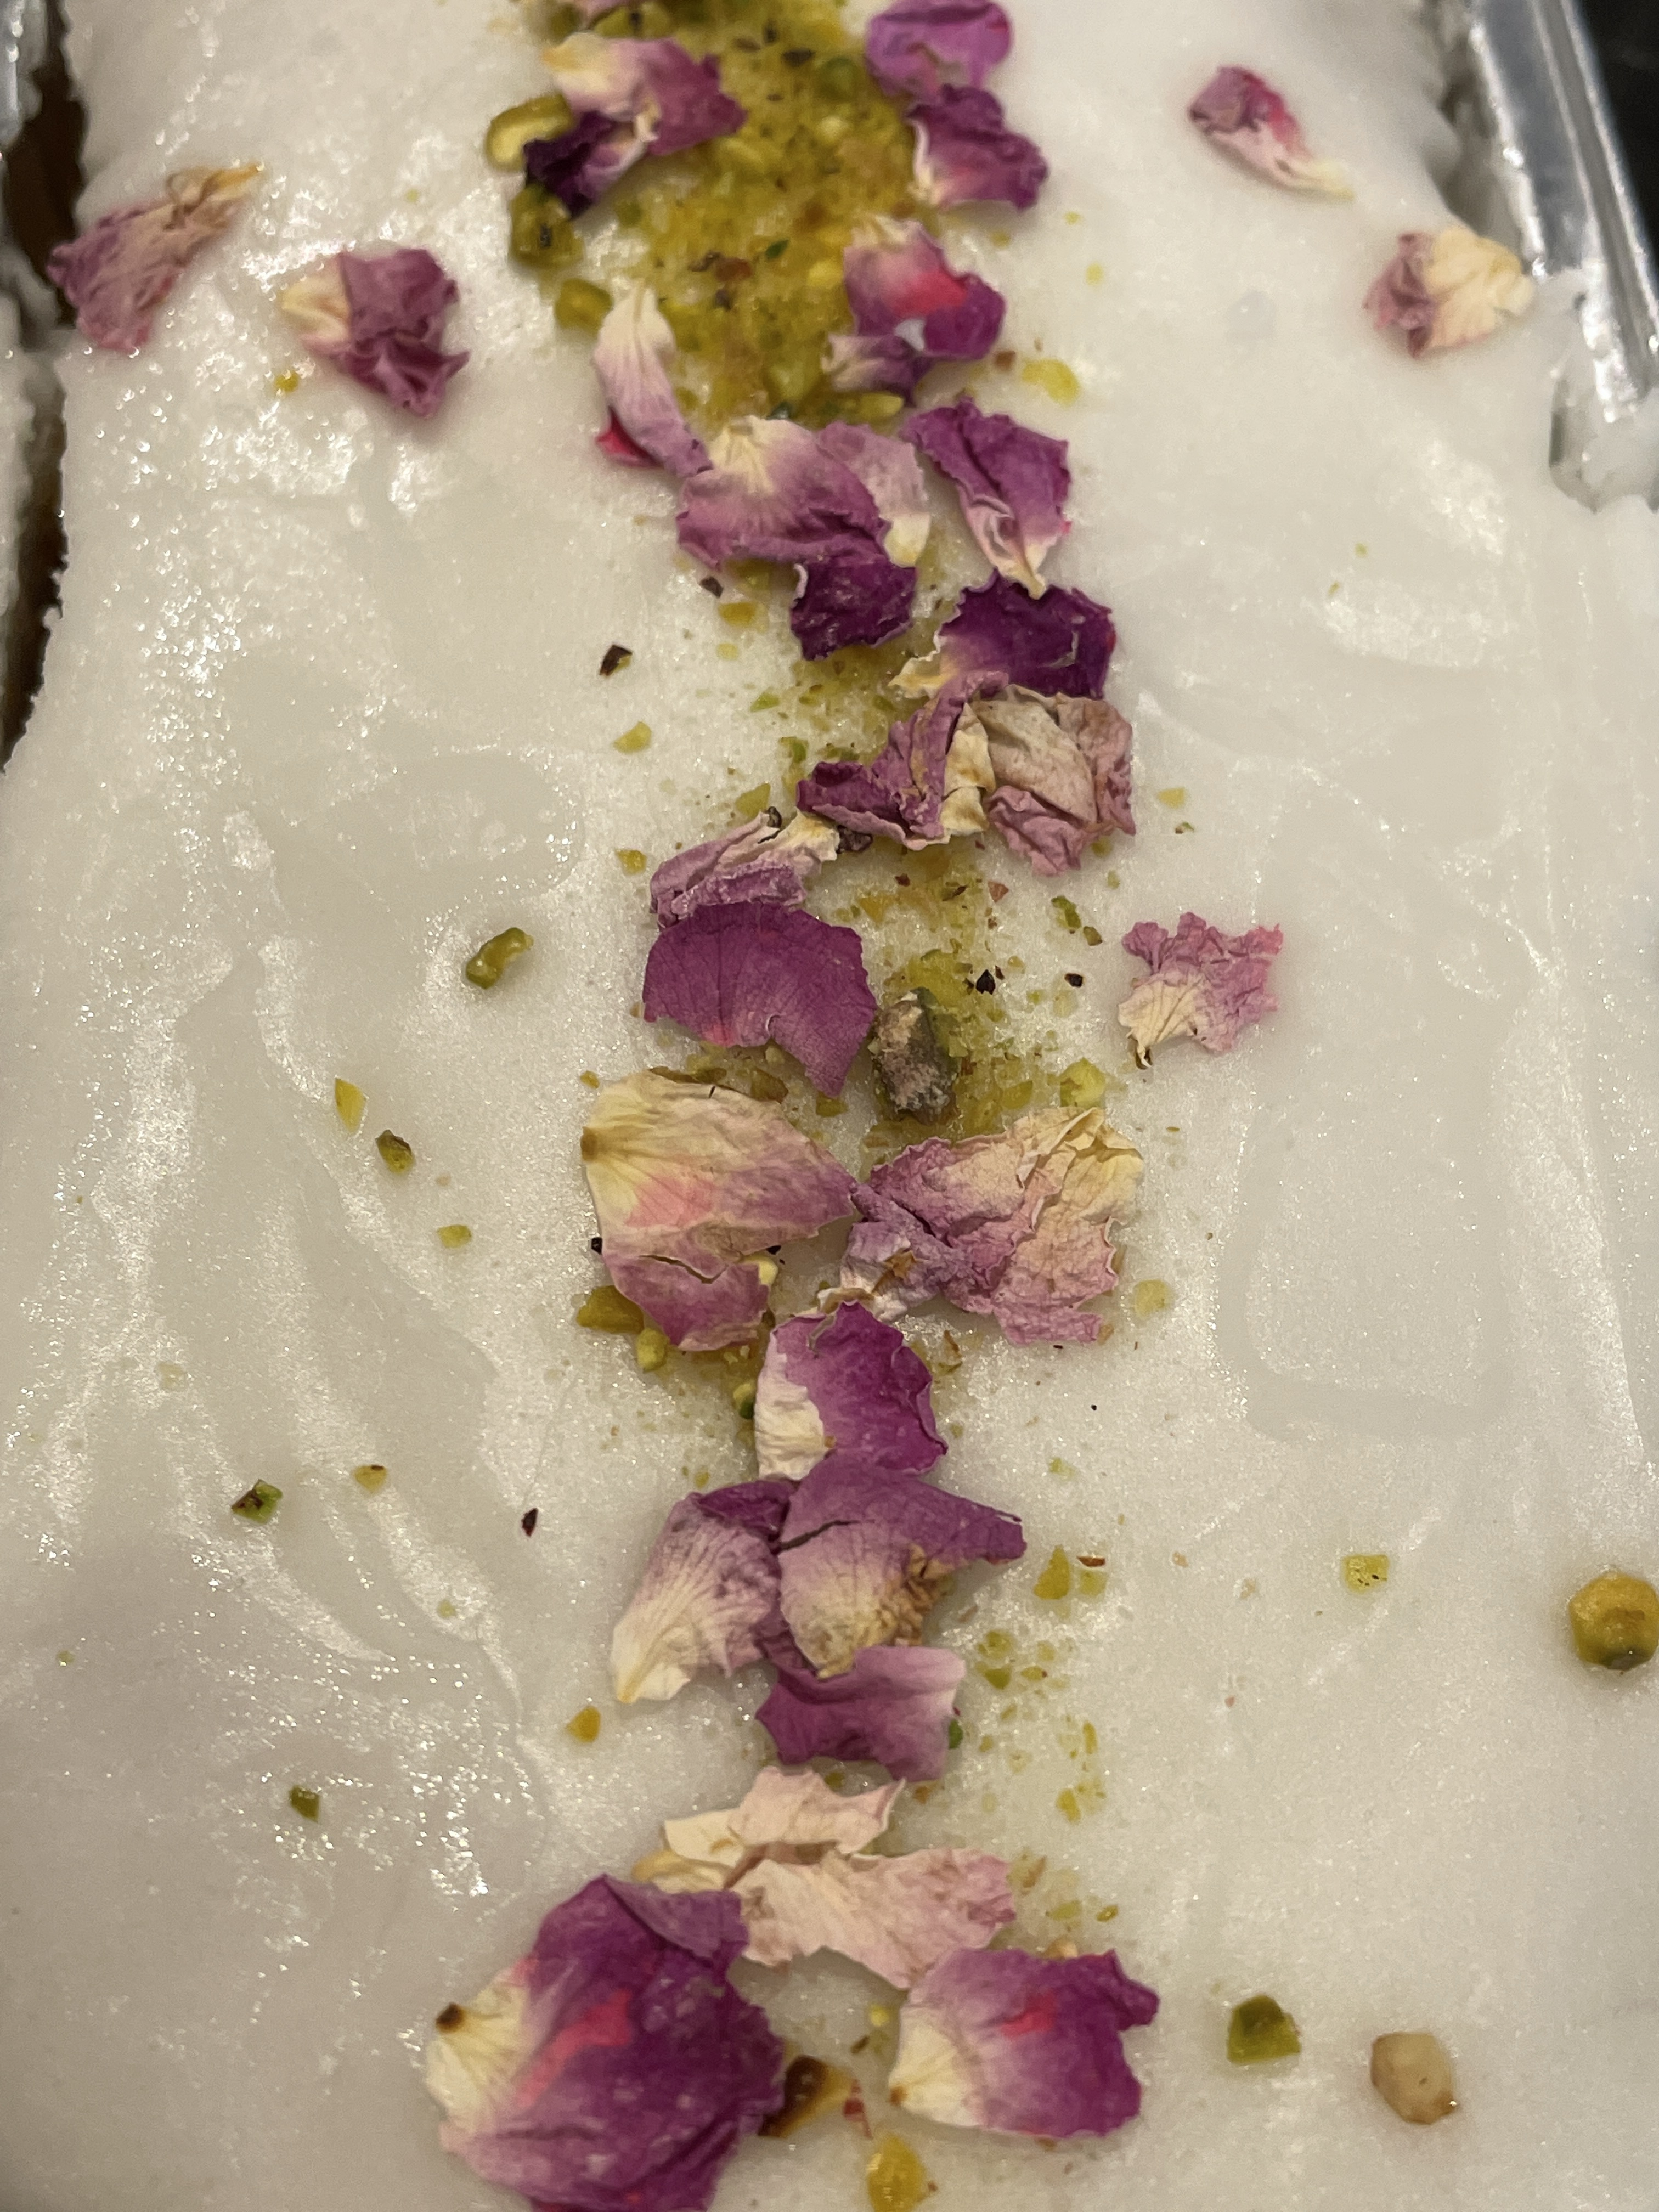
All products had been kept ‘Top Secret’ until after the Cabana weekends in Europe. This year the ladies were actually able to gather together once again. In Australia, everyone who purchased a Cabana box during March was invited to join the online class on the 10th of April. Over 25 ladies signed in and some amazing pages were created. An online link was sent to those who could not attend. If you purchased a Cabana box and did not receive this link, please get in touch with your Consultant. A big ‘THANK YOU’ to Anita Day for presenting a wonderful class. I managed to get together with my ladies for a Cabana day and we had a great time – even Judy’s cake matched the theme.
The online class project was based on the double page layout below.
Many more wonderful interactive layouts can be found in the Focus book. This book can be purchased in a basket with the pre-cut pages.
So much fun can be had with these pages and it adds a little fun to the album too.
Barbara Rae – Western Australia
Barb Rae in WA created this lovely page above, the paper is perfect for the theme of the page. She has used the new AZZA word stamps on the front page. These sets were created for AZZA to be used on the scrapping page to make up a title or a little journalling. The AZZA Alphabet die cuts have been used on the inside page.
There is only one Cabana box available. If you purchase this box you can create a page with your Consultant and will also be sent the link to the online class recording. If you like the range, these boxes are a huge saving.
Although there are sample layouts, the end result of your layout will be designed by the photos you are using. Below are three different layouts all with the pre-cut pages.
I created two pages below, one on each of the new colours. The first page was using the new Midnight Blue page. I used the Classic essential paper but added a little of the AZZA Glitter paint to match Nicole’s blouse. I completed the page with a white Gel pen, the AZZA Daydream dies and texture stencil and the new mini collection set: Beauty. With the flower die I only removed a few of the inside sections to give a little definition on the page.
An easy way to get a clean line of inking, chalking or pen work when you don’t have the tool stencil is to cut your shape out of a sheet of acetate and use it as a stencil as shown below. Place the acetate behind the stencil, mark the line you want to use and then cut the acetate. Remove your stencil and use the acetate as your stencil, then keep this piece of acetate with the stencil in case you need to use that particular curve again.
The second page I used was the new Hydrangea colour. I had the perfect photos and some of the background that was not in focus, worked perfectly as the background for my decoration. I used the Daydream embossing folder and the large set of stamps. Note how I have then used the AZZA pom-pWeddingom with inks to colour the stamped image, finished off with a white Gel pen and two resin dots. I couldn’t help adding a little orange Resin dot to replicate the Ladybird. Any pen or Gel pen works beautifully on the matt Resin dots. I also used a little of the new satin ribbon to complete the decorations.
Lyn Holmes – Western AustraliaJill Attrill – Victoria
Jill has created this beautiful page completing it with the Daydream patterned paper, the Daydream micro stamp, the AZZA words stamps and the Circle stickers. Barb used the same set on her page that I highlighted earlier in the blog.
On the page below Jocelyne has used the Osaka stencil and the AZZA Ring dies. She has also backed the lovely little flower figures from the Silhouette sheet and created the centre of the flowers with a small circle punched out of off-cuts of the photos and white paper, completed with a Resin dot.
I loved the use of the flowers cut with the Daydream die on this page. Nadia has placed the lovely patterned AZZA vellum paper behind them. She has completed the flowers with a Resin dot and, of course, with so many colours available you can always match the flowers on your page.
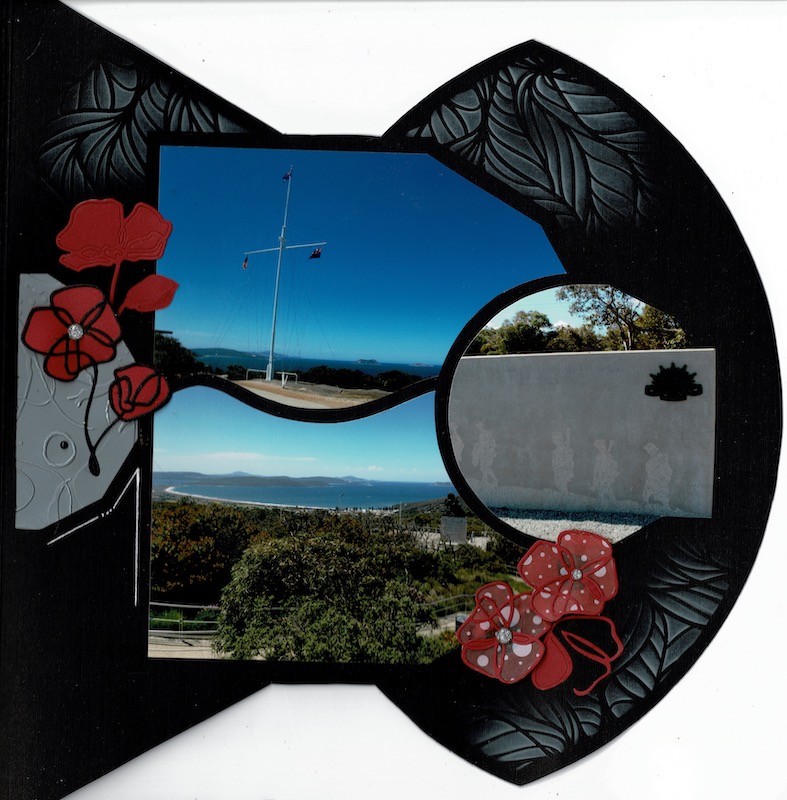
Having seen Nadia’s page I created the double page below using the Osaka stencil and Daydream decoration products. They make beautiful poppies and I thought with ANZAC weekend coming up this was the perfect page.
Lyn Holmes – Western Australia
The front page has been cut to a shape in the stencil so that the title on the second page could show through. I have used the lovely AZZA ‘Lest we Forget’ stamps for both the title and the poppies on the front page. As the paper is quite a large size, I have also used the Daydream texture stencil to create a pattern.
Below you can see how how I have cut the front page. The Osaka stencil is listed as a 30 x 60 stencil and you will see one of the frames of the stencil are only 5mm thick. This enables you to use the stencil on one page and flip it for use on the opposite page with only a 5mm gap.
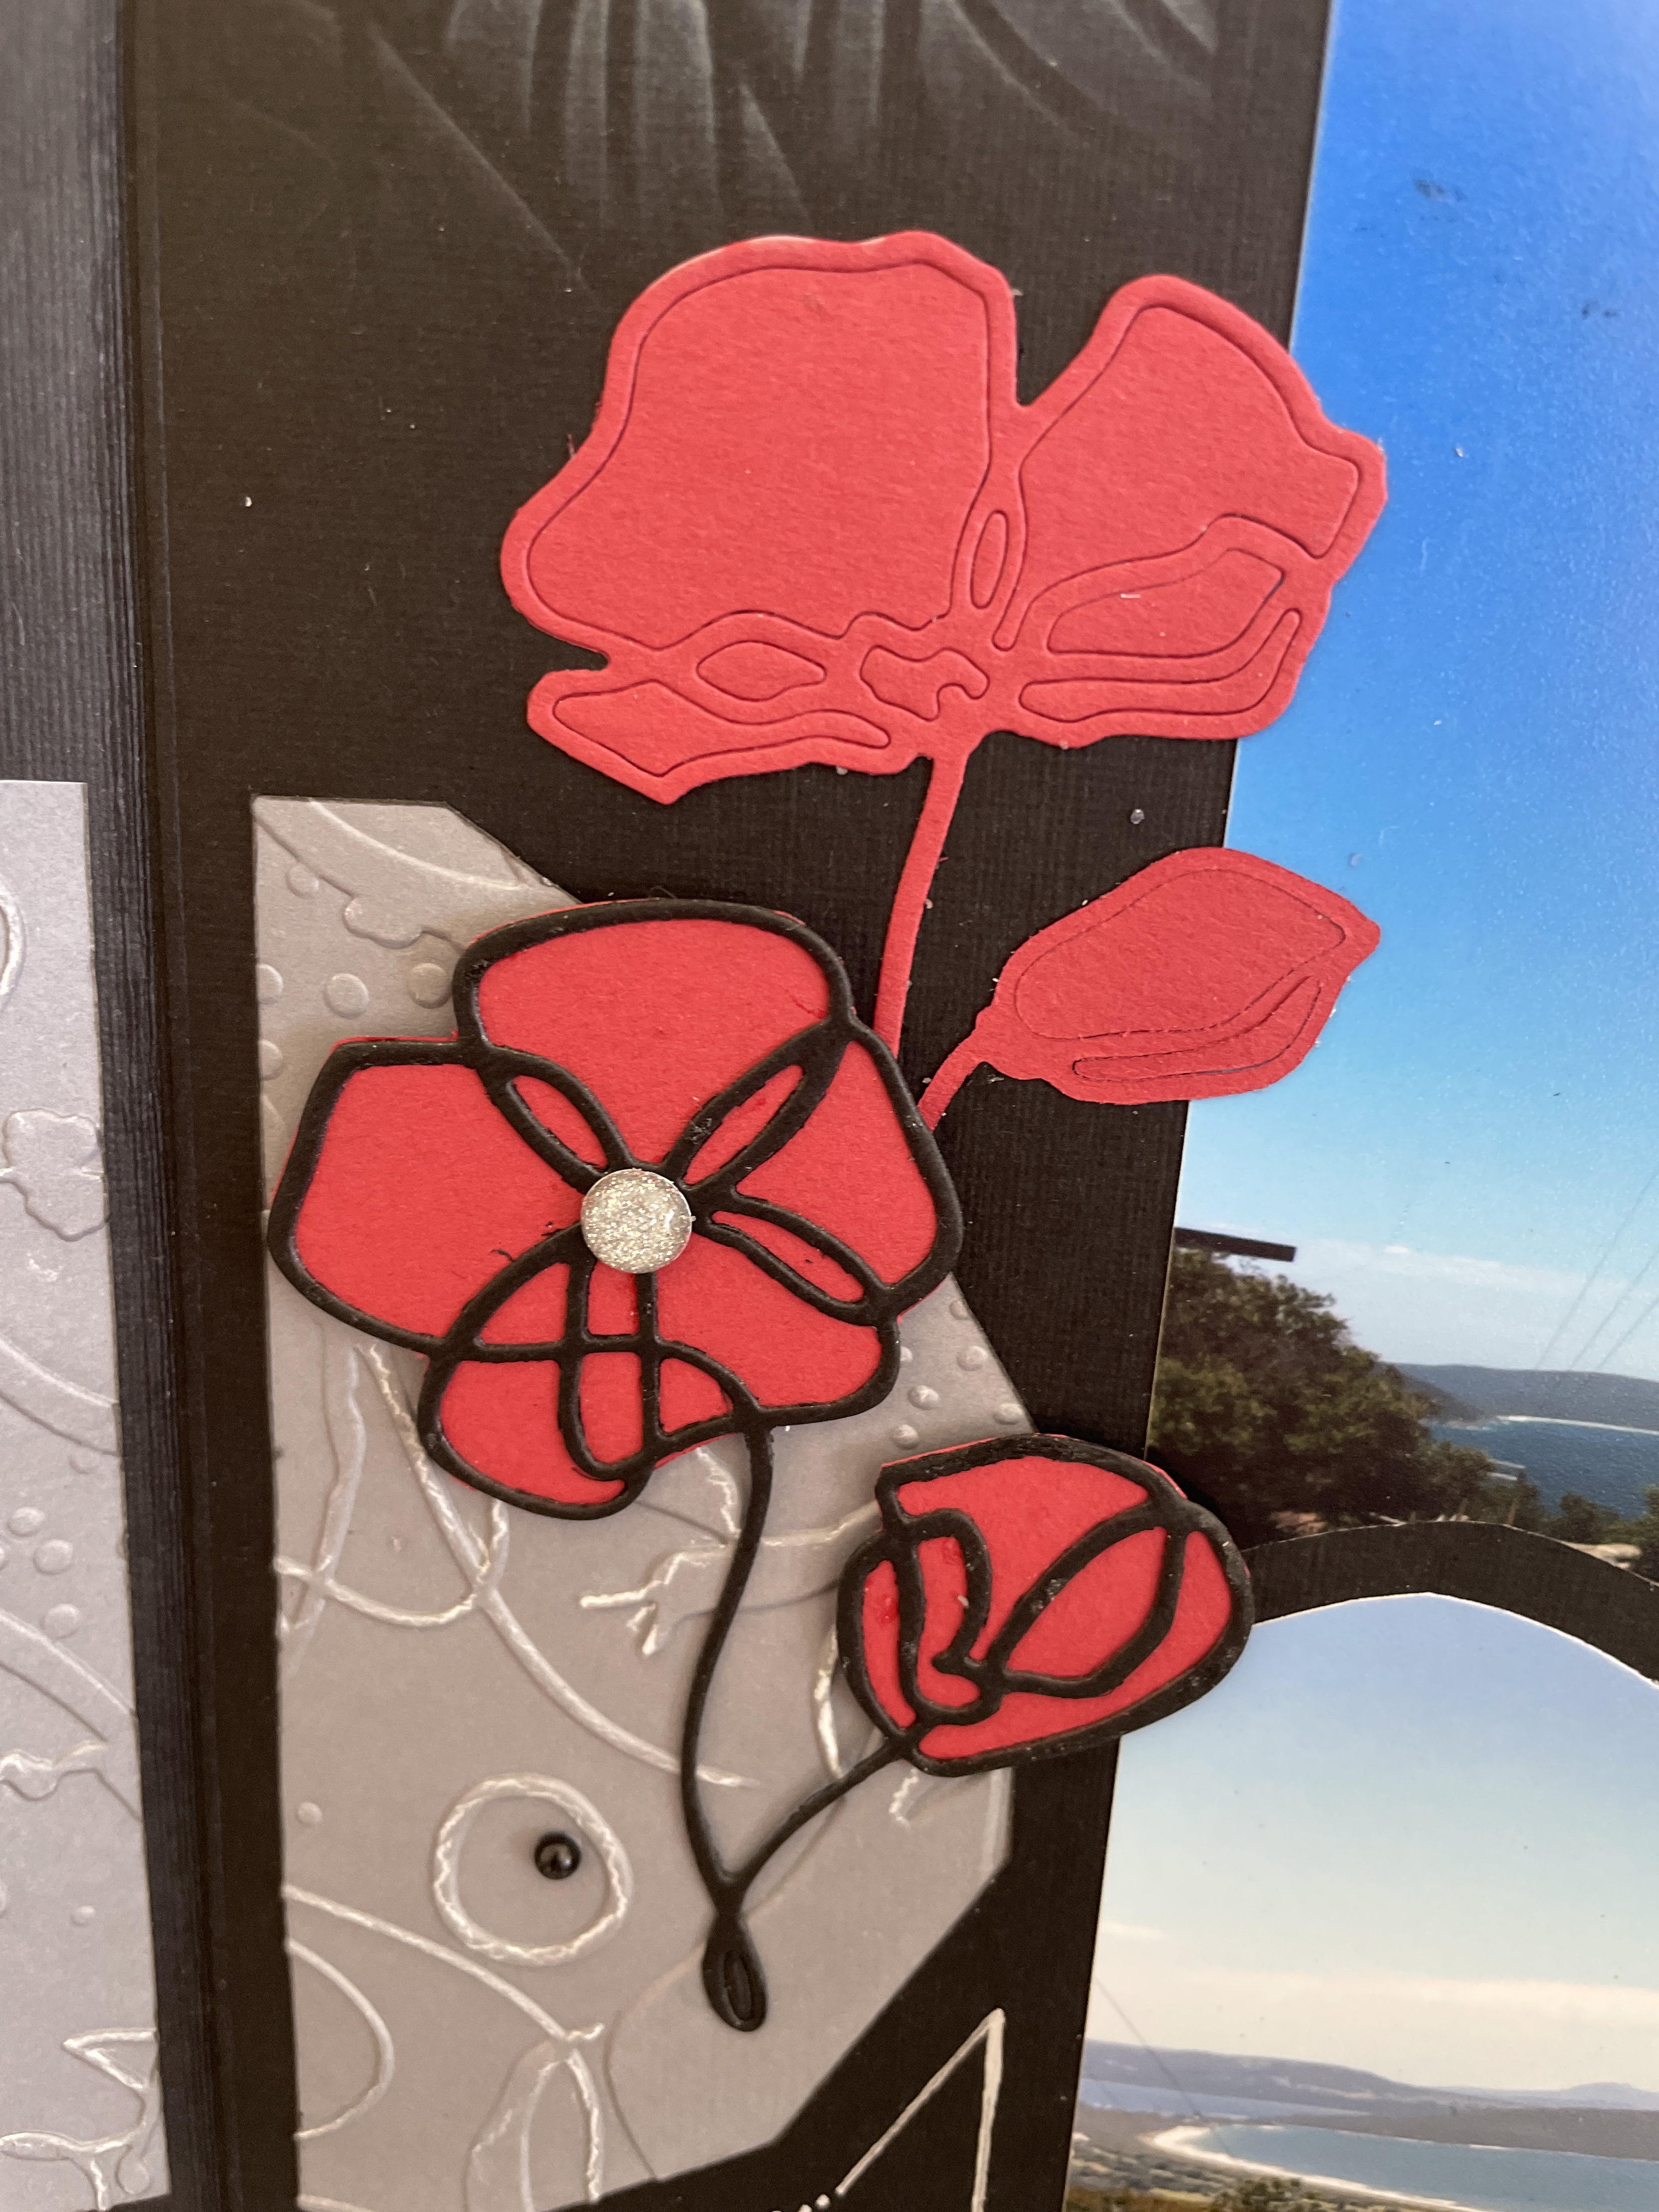
I cut the poppies out of both red and black paper. For the centre of the page I used two sets of poppies in the red paper using both the outline of the flowers and in the insets. As I was flipping the smaller poppy on the page I ran it through the Big Shot without the dies, just the plates, to get it flat on both sides. I then cut the other poppy in black and placed red paper behind it. You can also cut the poppy twice and replace the red insets with the black insets and vice versa, but it is far quicker and easier to just place whatever colour flower/paper you are looking for behind the outline and cut it out. I cut the flower, placed glue on the back of it, stuck it onto the colour paper or Vellum and then cut around the outside. I have backed the individual flowers with the Vellum paper above. As with Nadia’s page, you can leave them plain giving you a lovely white flower (I did this with the butterfly figure next to the title) or as with my poppies, use an alcohol pen on the back of the Vellum to colour the flowers. Remember when you stick the flowers onto the page having used Vellum, only place the glue around the edges behind the flower outline and behind the Resin dot in the middle or it will show on your page. The page colour becomes darker where the glue is.
A close-up of the poppy shows where I have used a 3D mousse dot to stick the poppy onto the page. I used this to my advantage as I wanted the black for the centre of the flower. Do mix and match your die cuts, using some without the insets, and some with colour. Just as natural flowers no two are the same.
Christine Ronsin – Europe
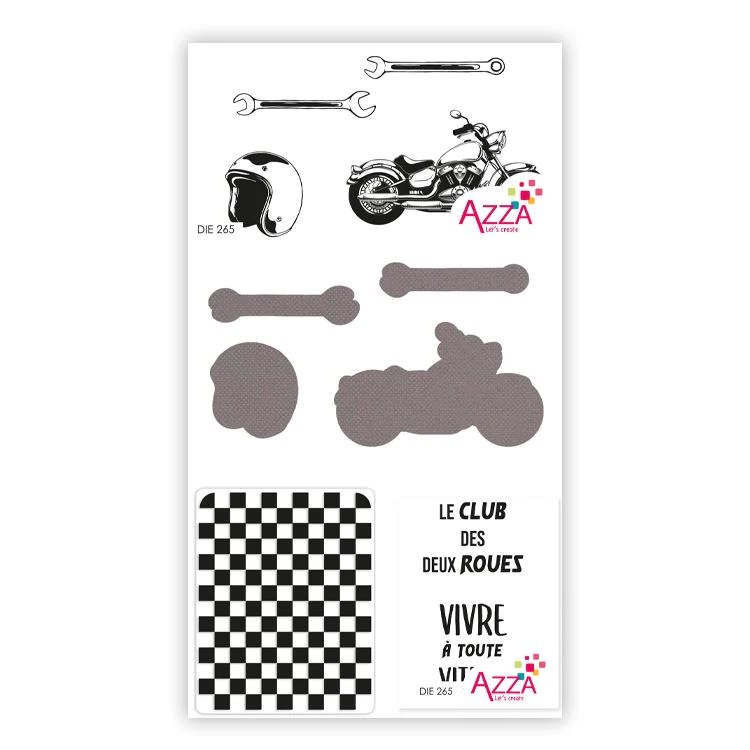
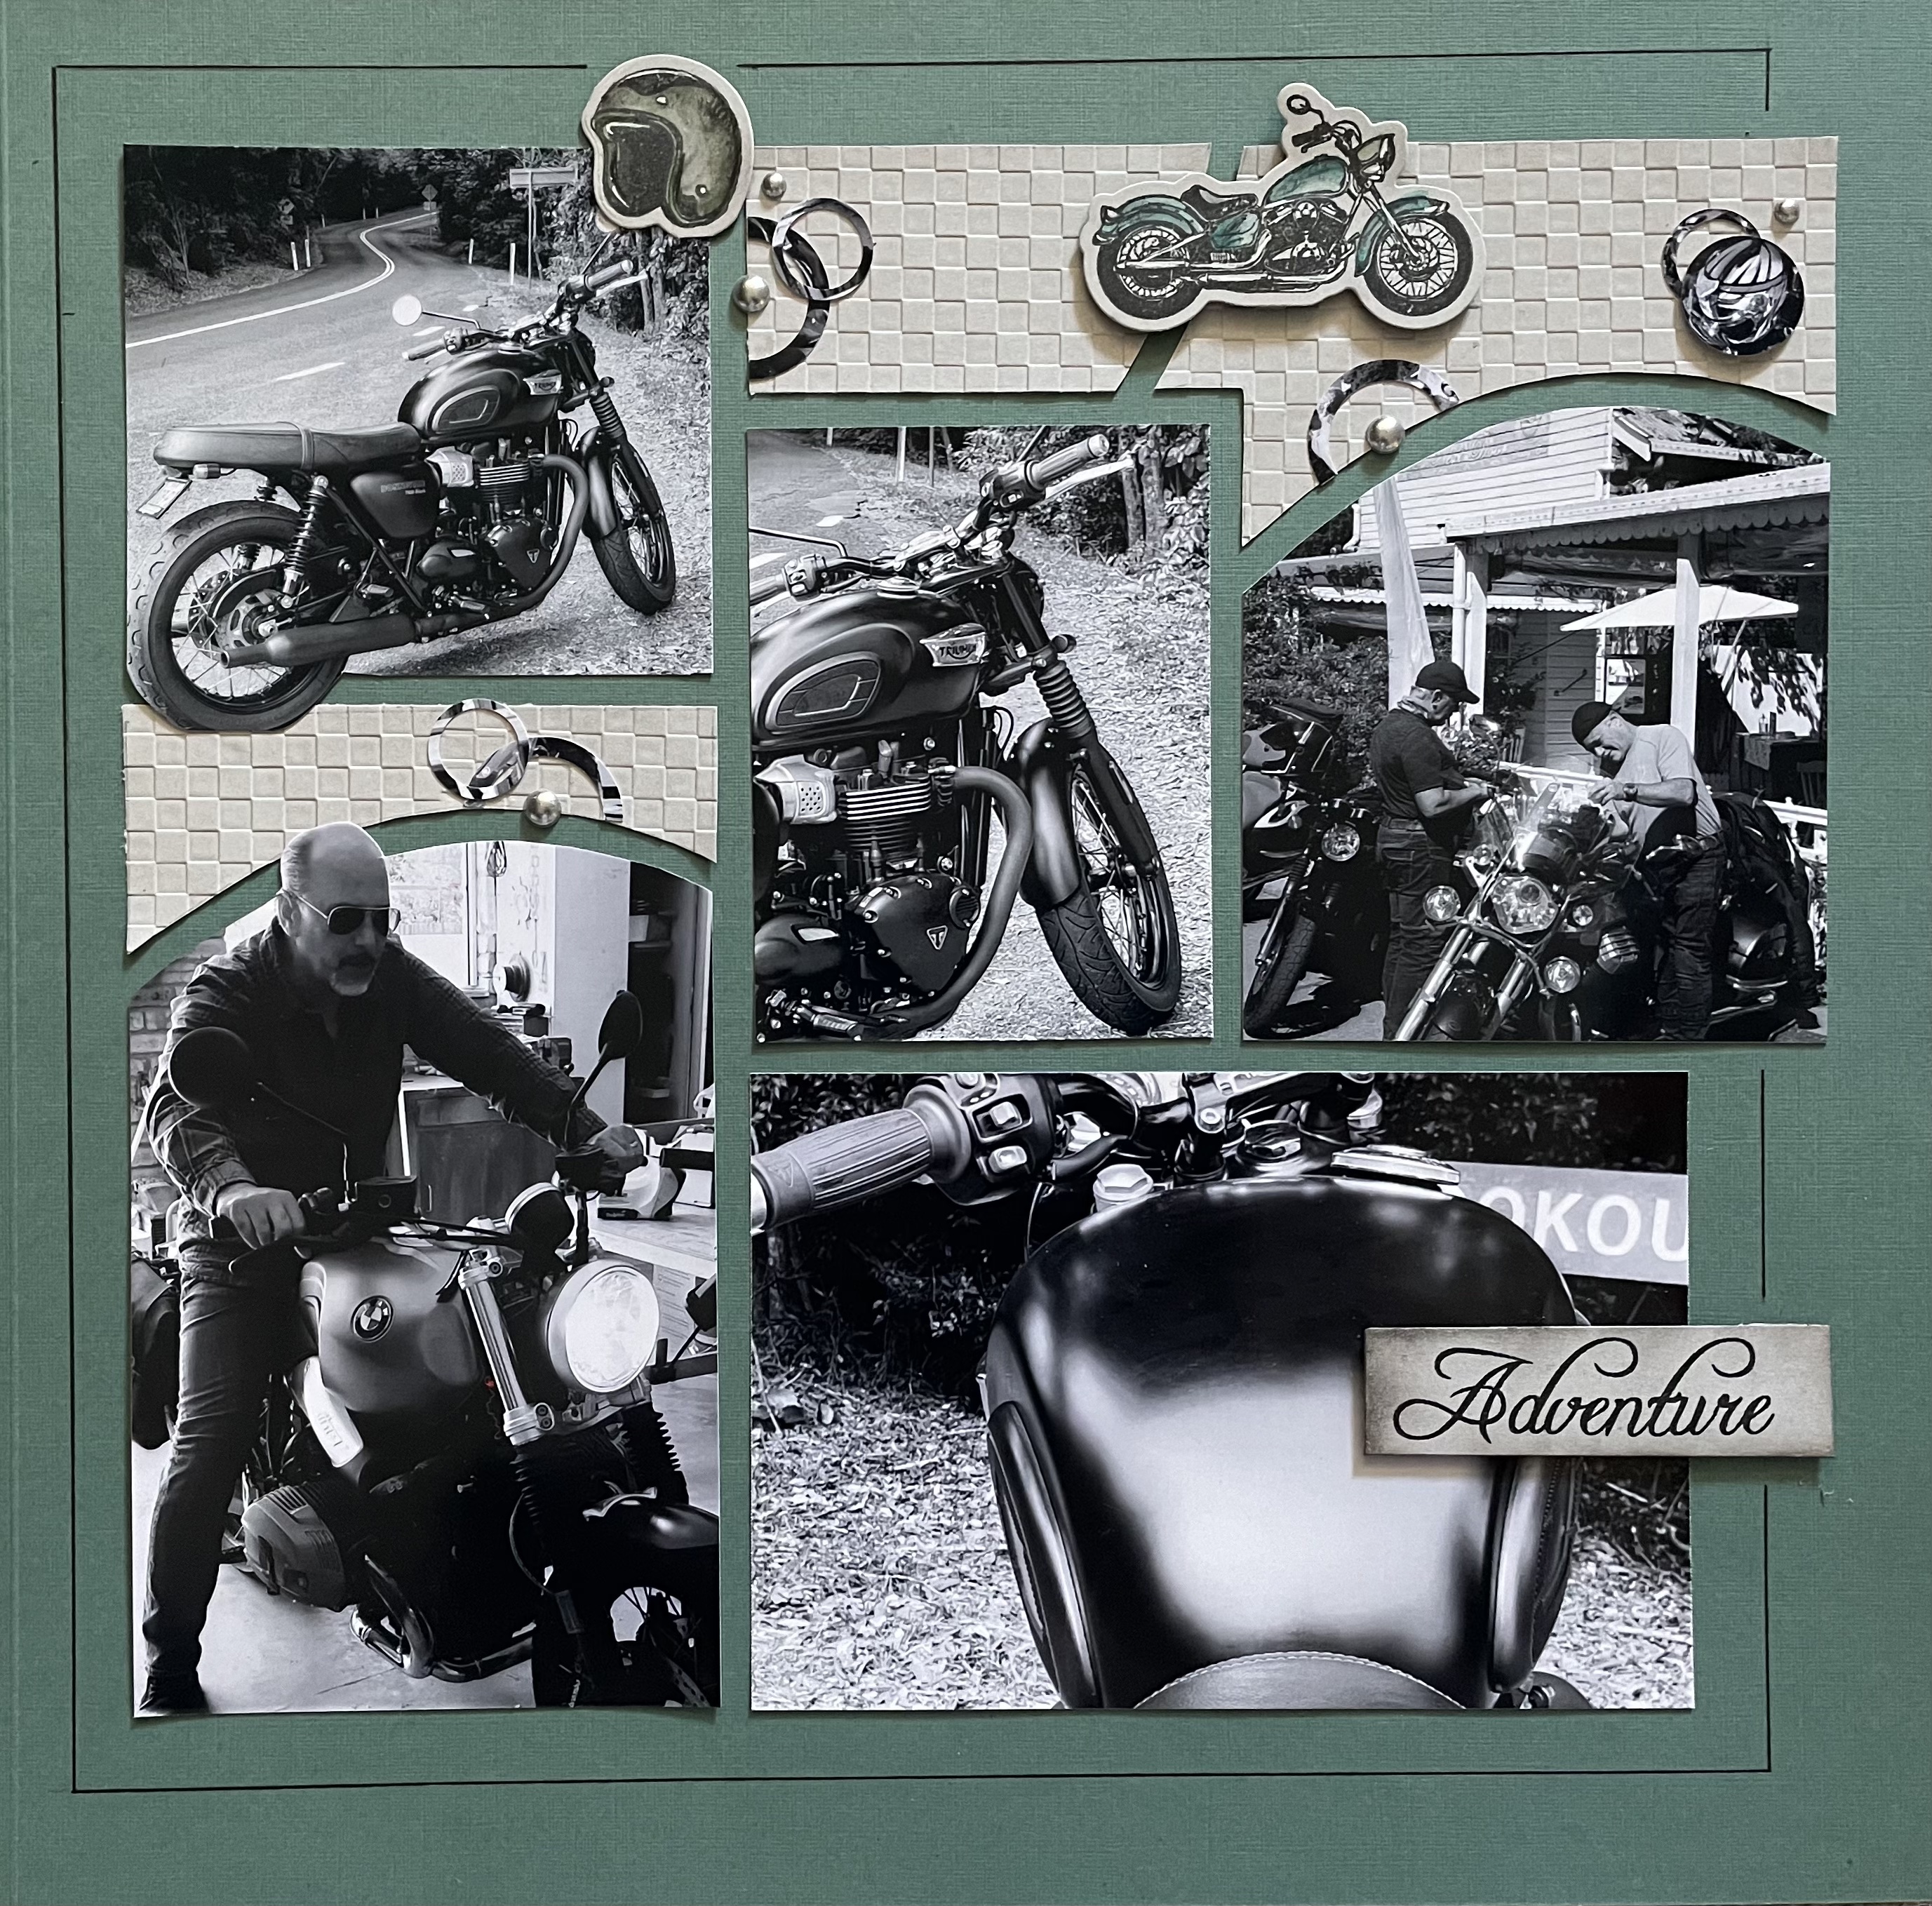
Another Osaka page I love was this page by Christine. She has used the Motorbike mini collection set for her decoration and showcased the product beautifully.
Now for a few more decoration ideas that I thought I would share with you:
Christine Caparros – Europe
A beautiful design by Christine above using the Daydream decoration products and the AZZA Ring dies. Christine has embossed the large set of rings and coloured the smaller set of rings with Alcohol inks. These inks have not been introduced into Australia yet, but will be in the coming months. She has completed the decoration with Resin dots, a Brad and some ribbon.
Lyn Holmes – Western Australia
In the decoration above, I have cut around the circle in the stamped image and slipped a stamped strip through to give the image a background.
Lyn Holmes – Western Australia
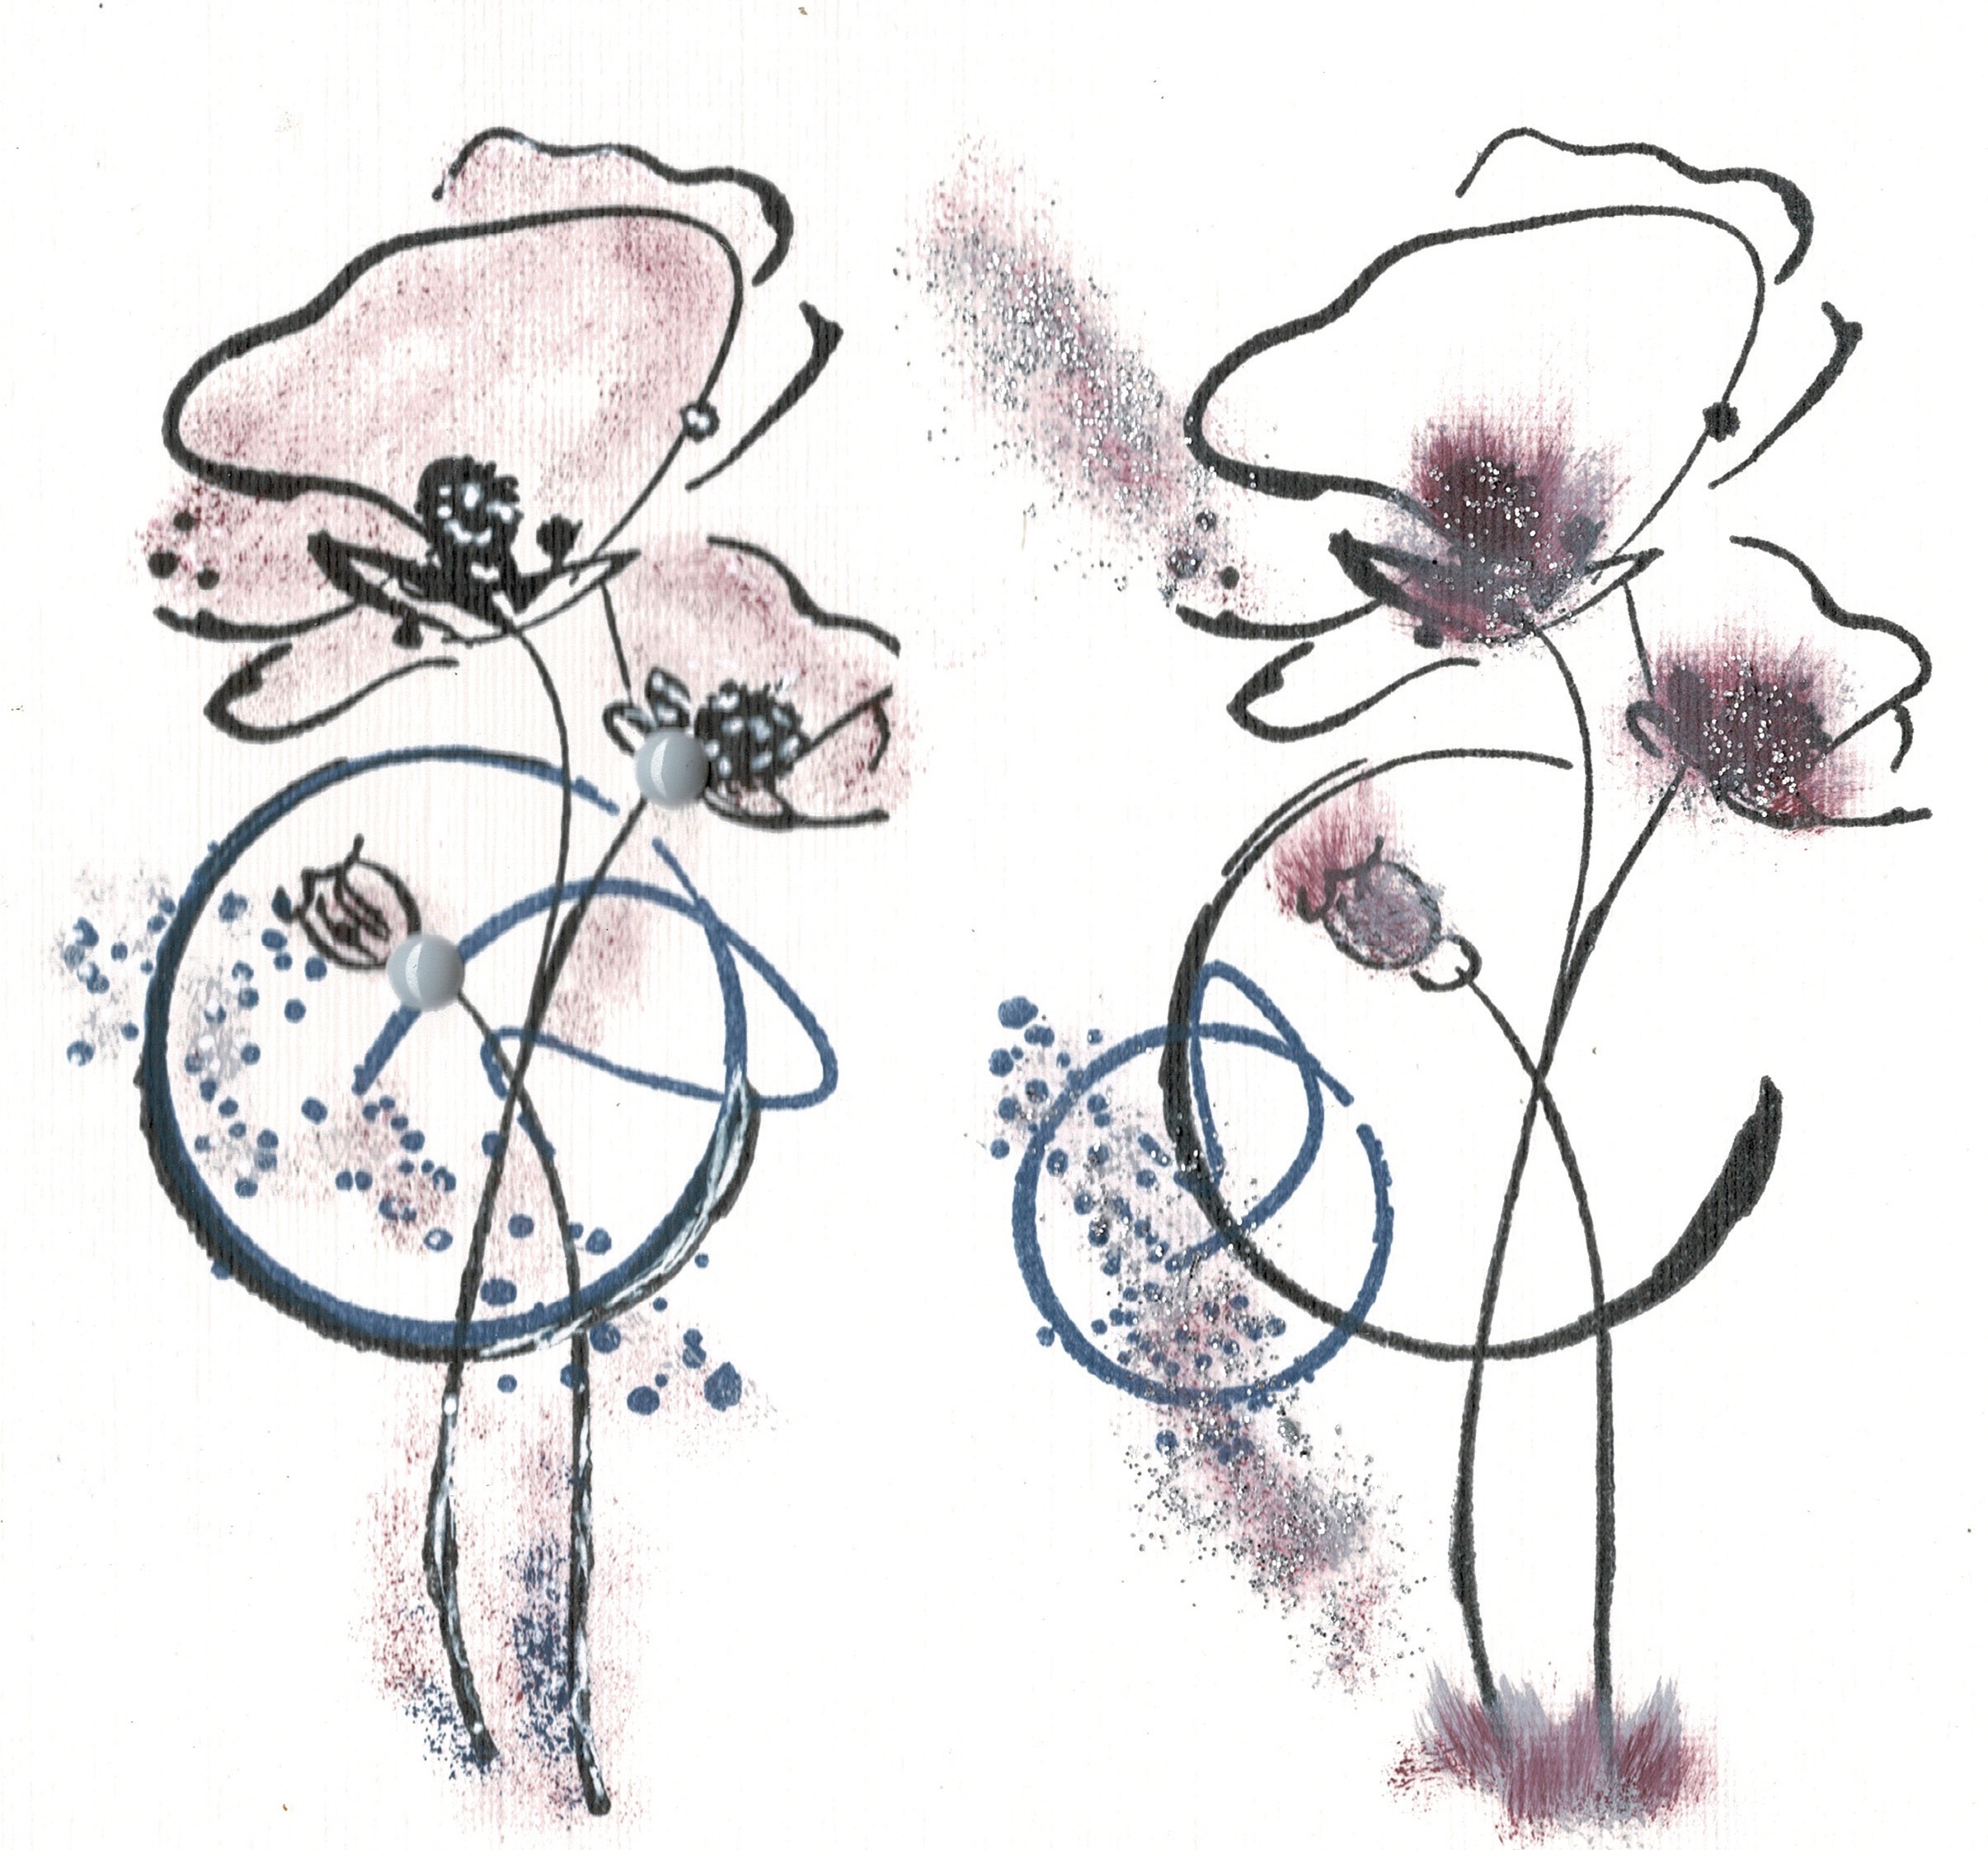
In the image above I wanted to show you how to get two different effects using the AZZA pom-poms. In both, it gives the stamped image character, the one of the right being a much bolder design. In the image on the left, I dabbed the pom-pom to get a lighter colouring on the page. In the image on the right, I inked up a pom-pom then placed it on the page and swiped outwards, lifting the pom-pom at the same time. I completed the image with the same pom-pom but just dabbing it to get the smaller dots. In both images, I combined a stamp from the medium set of stamps shown below with the stamp from the large stamp set. If you have a few colours on the page the smaller stamp can be stamped in a second colour as seen above. I have then used both colours with the pom-poms. Lastly, I added a few more dots in various sizes with the new AZZA Dot Marker pen and then with an AZZA brush I added some AZZA iZink Glitter paint, dotting glitter over the area where the dots were and at the base of the flower on the left to ground the image a little. These images also look beautiful coloured with the AZZA Aqua brush.
These stamps can be used with any theme of the page and are perfect for that little space that just needs ‘something’! In the image below I used the AZZA pom-poms to get the darker colour in the centre, I used the AZZA chalks and blending brushes to get the lighter blue on the outside of the wings of the butterfly and finished off the decoration with a white gel pen, AZZA Dot marker and iZink glitter paint as described above. For the background I merely chalked a circle. The AZZA decoration duo is perfect for creating backgrounds for your images to sit upon.
The latest Scrap & Moi is now available to add to your order, subscriptions will already be on their way to you.
With school holidays in WA, a long weekend behind us and a long weekend ahead of us I do hope you can all get in a bit of scrapping and, if you are away, I am sure you will be taking photos to scrap in the months ahead. Isn’t it wonderful we can all travel again.
Autumn is with us and all the trees are slowly donning their Autumn shades before their leaves fall to the ground. AZZA has beautiful Autumn products to go with your photos with Autumn themes for the colours.
This is a beautiful set of stamps. If you look carefully you will see that not only are there Autumn products but also lovely spices and a little teapot that can be used on so many pages. The stamped images can be completed with an Aqua brush, Alcohol pens, inks or chalks. Look how beautifully they come up on a page.
AZZA Europe
I created the double page below with the AZZA Burano stencil to showcase the Autumn products. The die set is irresistible and works perfectly with the stamped images. Deb has used the pumpkin die on the page above with the Botanical Scrap kit stencil. I have kept the decoration quite simple as the pages are busy. Note how I have used some of the off-cuts from the double page and embossed them with the AZZA Lace embossing folder and used them in the smaller areas that I needed to fill. By using the page off cuts and embossing them, I have added texture but have not added a further ‘colour’ to the page, again keeping it simple so the eyes go to the photos.
On the page above created with the AZZA Burano stencil, Deb has used both the Autumn dies and the the stamp set. She has used the lovely new Copper colour AZZA cord for a little texture.
The Autumn leaves die set is also beautiful on the page:
The AZZA Autumn SALE is on at the moment. Most of the AZZA products in Autumn hues are on sale for the month of March together with previously released Autumn products. Do pop along and have a look.
The stencil Java released this month in Australia is a new concept: FOUR stencils each 15cm x 15cm. These four stencils can be placed on the scrapping page in so many different ways and you can see that the lines will always match to give a lovely layout. They are also perfect to create a 15 x 15cm card.
Lyn Holmes – Western Australia
When it came to actually sticking the photos and papers to the page, I found it was easier to work with one stencil at a time, gradually building the page up.
Remember to overlap the frames of the stencils when you use them on the page. This is to ensure you only get a 5mm gap between your photos and papers, and not a 1cm gap. (See below)
Once the photos were on the page and I looked at the photo bottom right, I just saw two other AZZA stamps and couldn’t help but use them. I used the Web texture stencil, this is only available in a Mail Out edition. So all in all I used a stamp and die from the AZZA mini combo kit Beauty released this month, the new Autumn dies and stamps, the older AZZA Autumn leaves die, the River stamp set and the Art & Craft mini stamp.
Funnily enough, Jeni and I had used the same stamp set in class earlier in the week. Jeni is creating an A4 Album for her brother and these are his fishing mates. We coloured in the fish with chalks and the blending stamps. The texture stencil used for the water was Alpes Maritimes. I just love these fish, great for masculine pages and cards.
The stencil comes in a basket with an AZZA Accordion page, this allows you to add so many more photos to your scrapping page. The Java stencil and book can also be purchased without the Accordion page.
Speaking of baskets, if you would like to make a 20 x 20 disc album, there is now a basket to purchase the product without the stencil.
I did like this page above, part of an album created by an AZZA Scrapbooker in Europe (apologies will attach the name when I find it). The Alpes Maritimes embossing folder is perfect on the page and the I like the AZZA Sticker circle and Resin dots decoration.
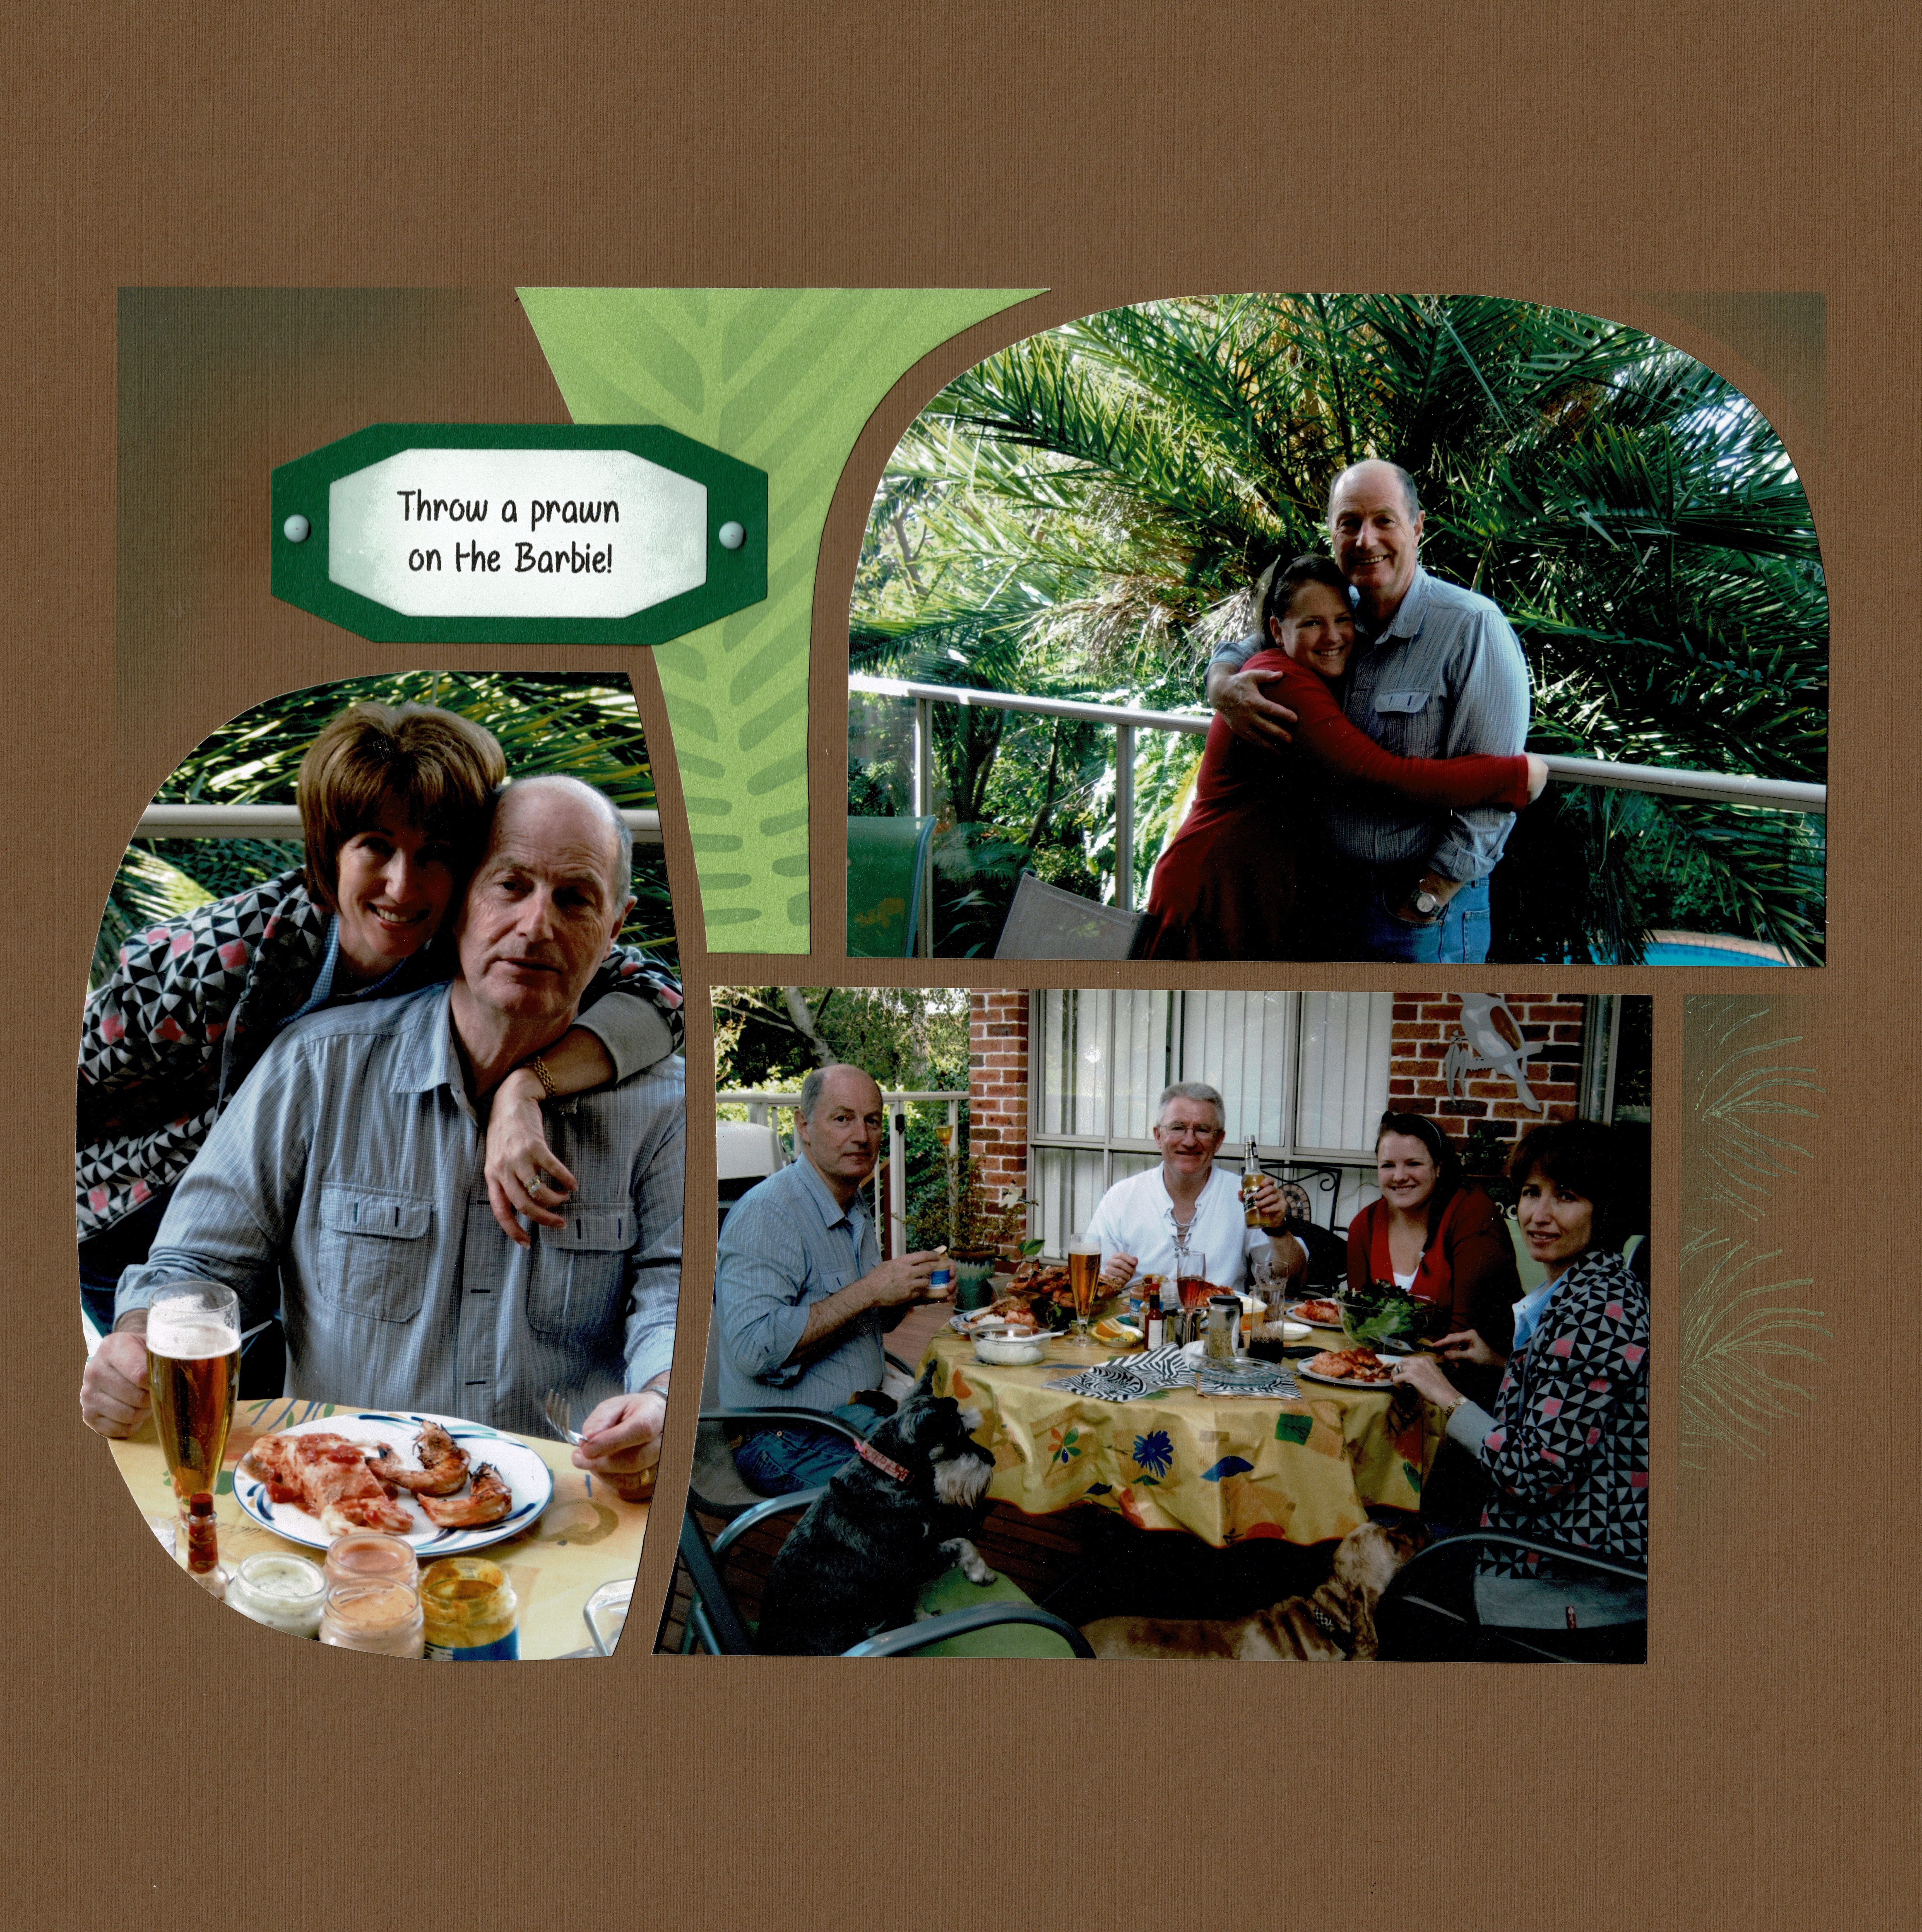
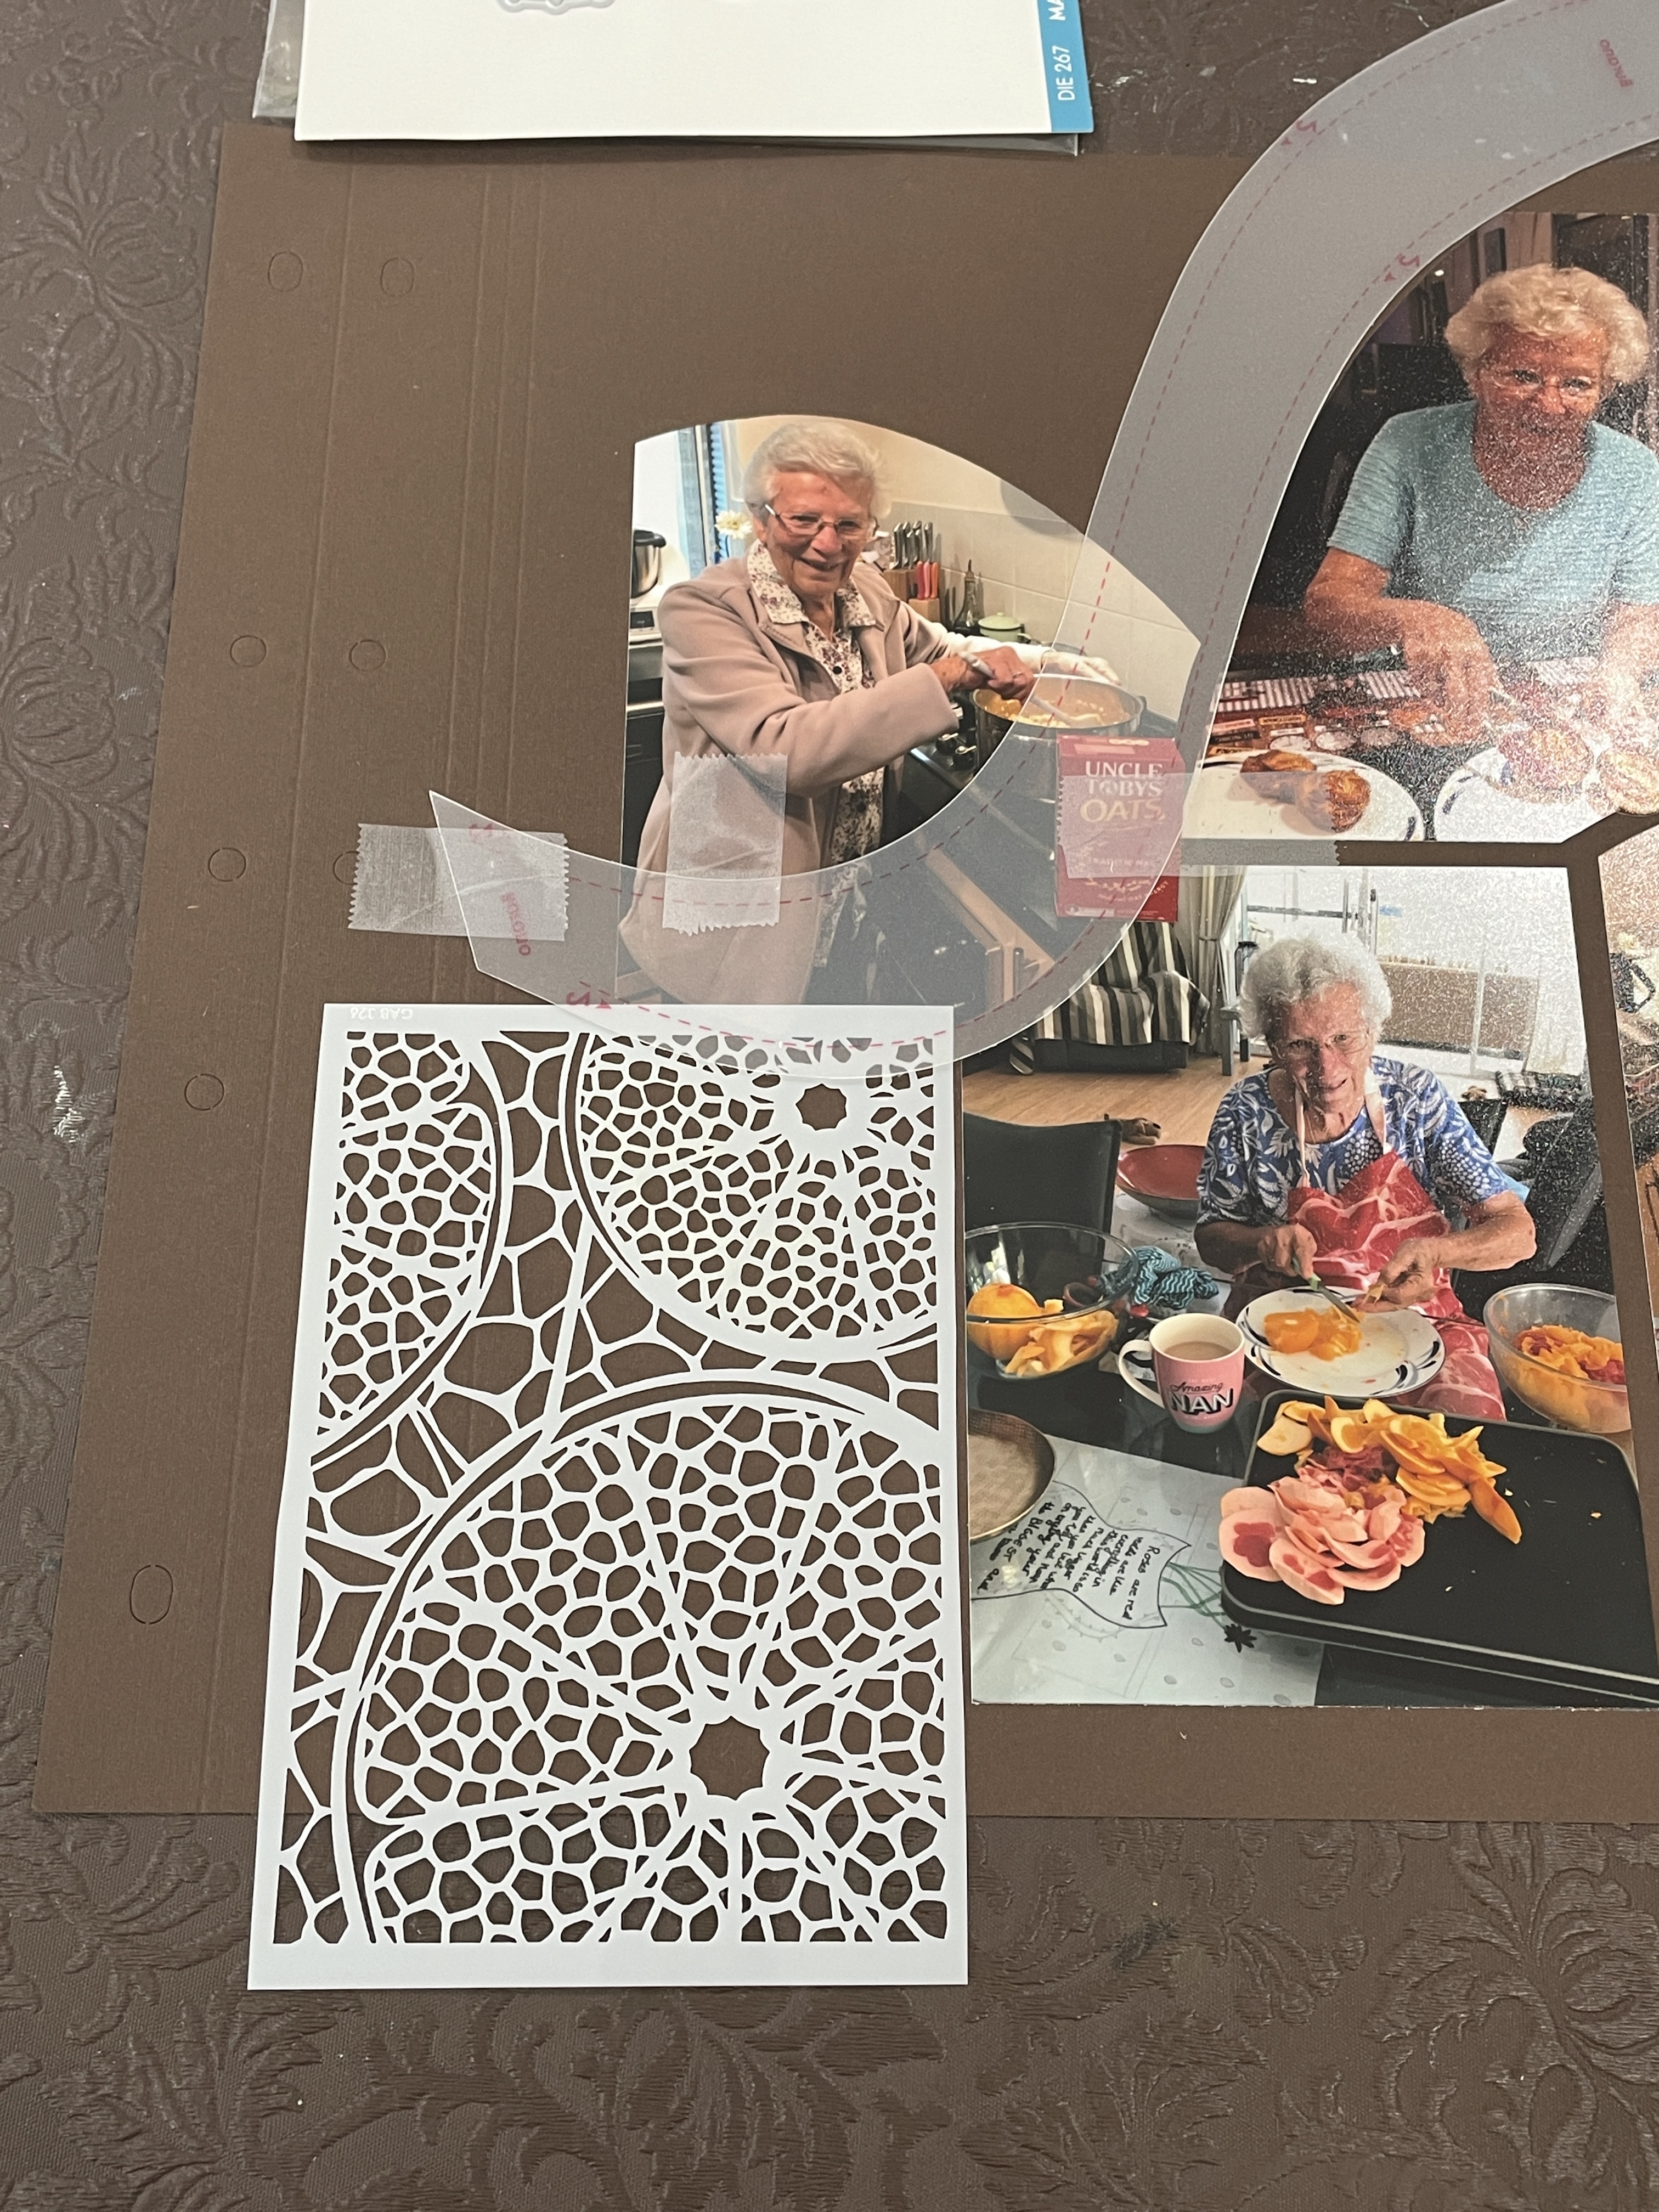
I too have been working on a 20 x 20 Disk album, this was a title on one of my pages showcasing the new ‘In the Kitchen’ sets of stamps. There are both ‘Salt’ and ‘Sweet’ sets with the Sketch sheet and papers having both themes on them.
These sets of stamps are designed to incorporate them into a scene for your decorations. Below I have used the AZZA Opio stencil, the ‘In my Kitchen’ patterned papers and the Tropical texture stamp in the top corners to complete my frame.
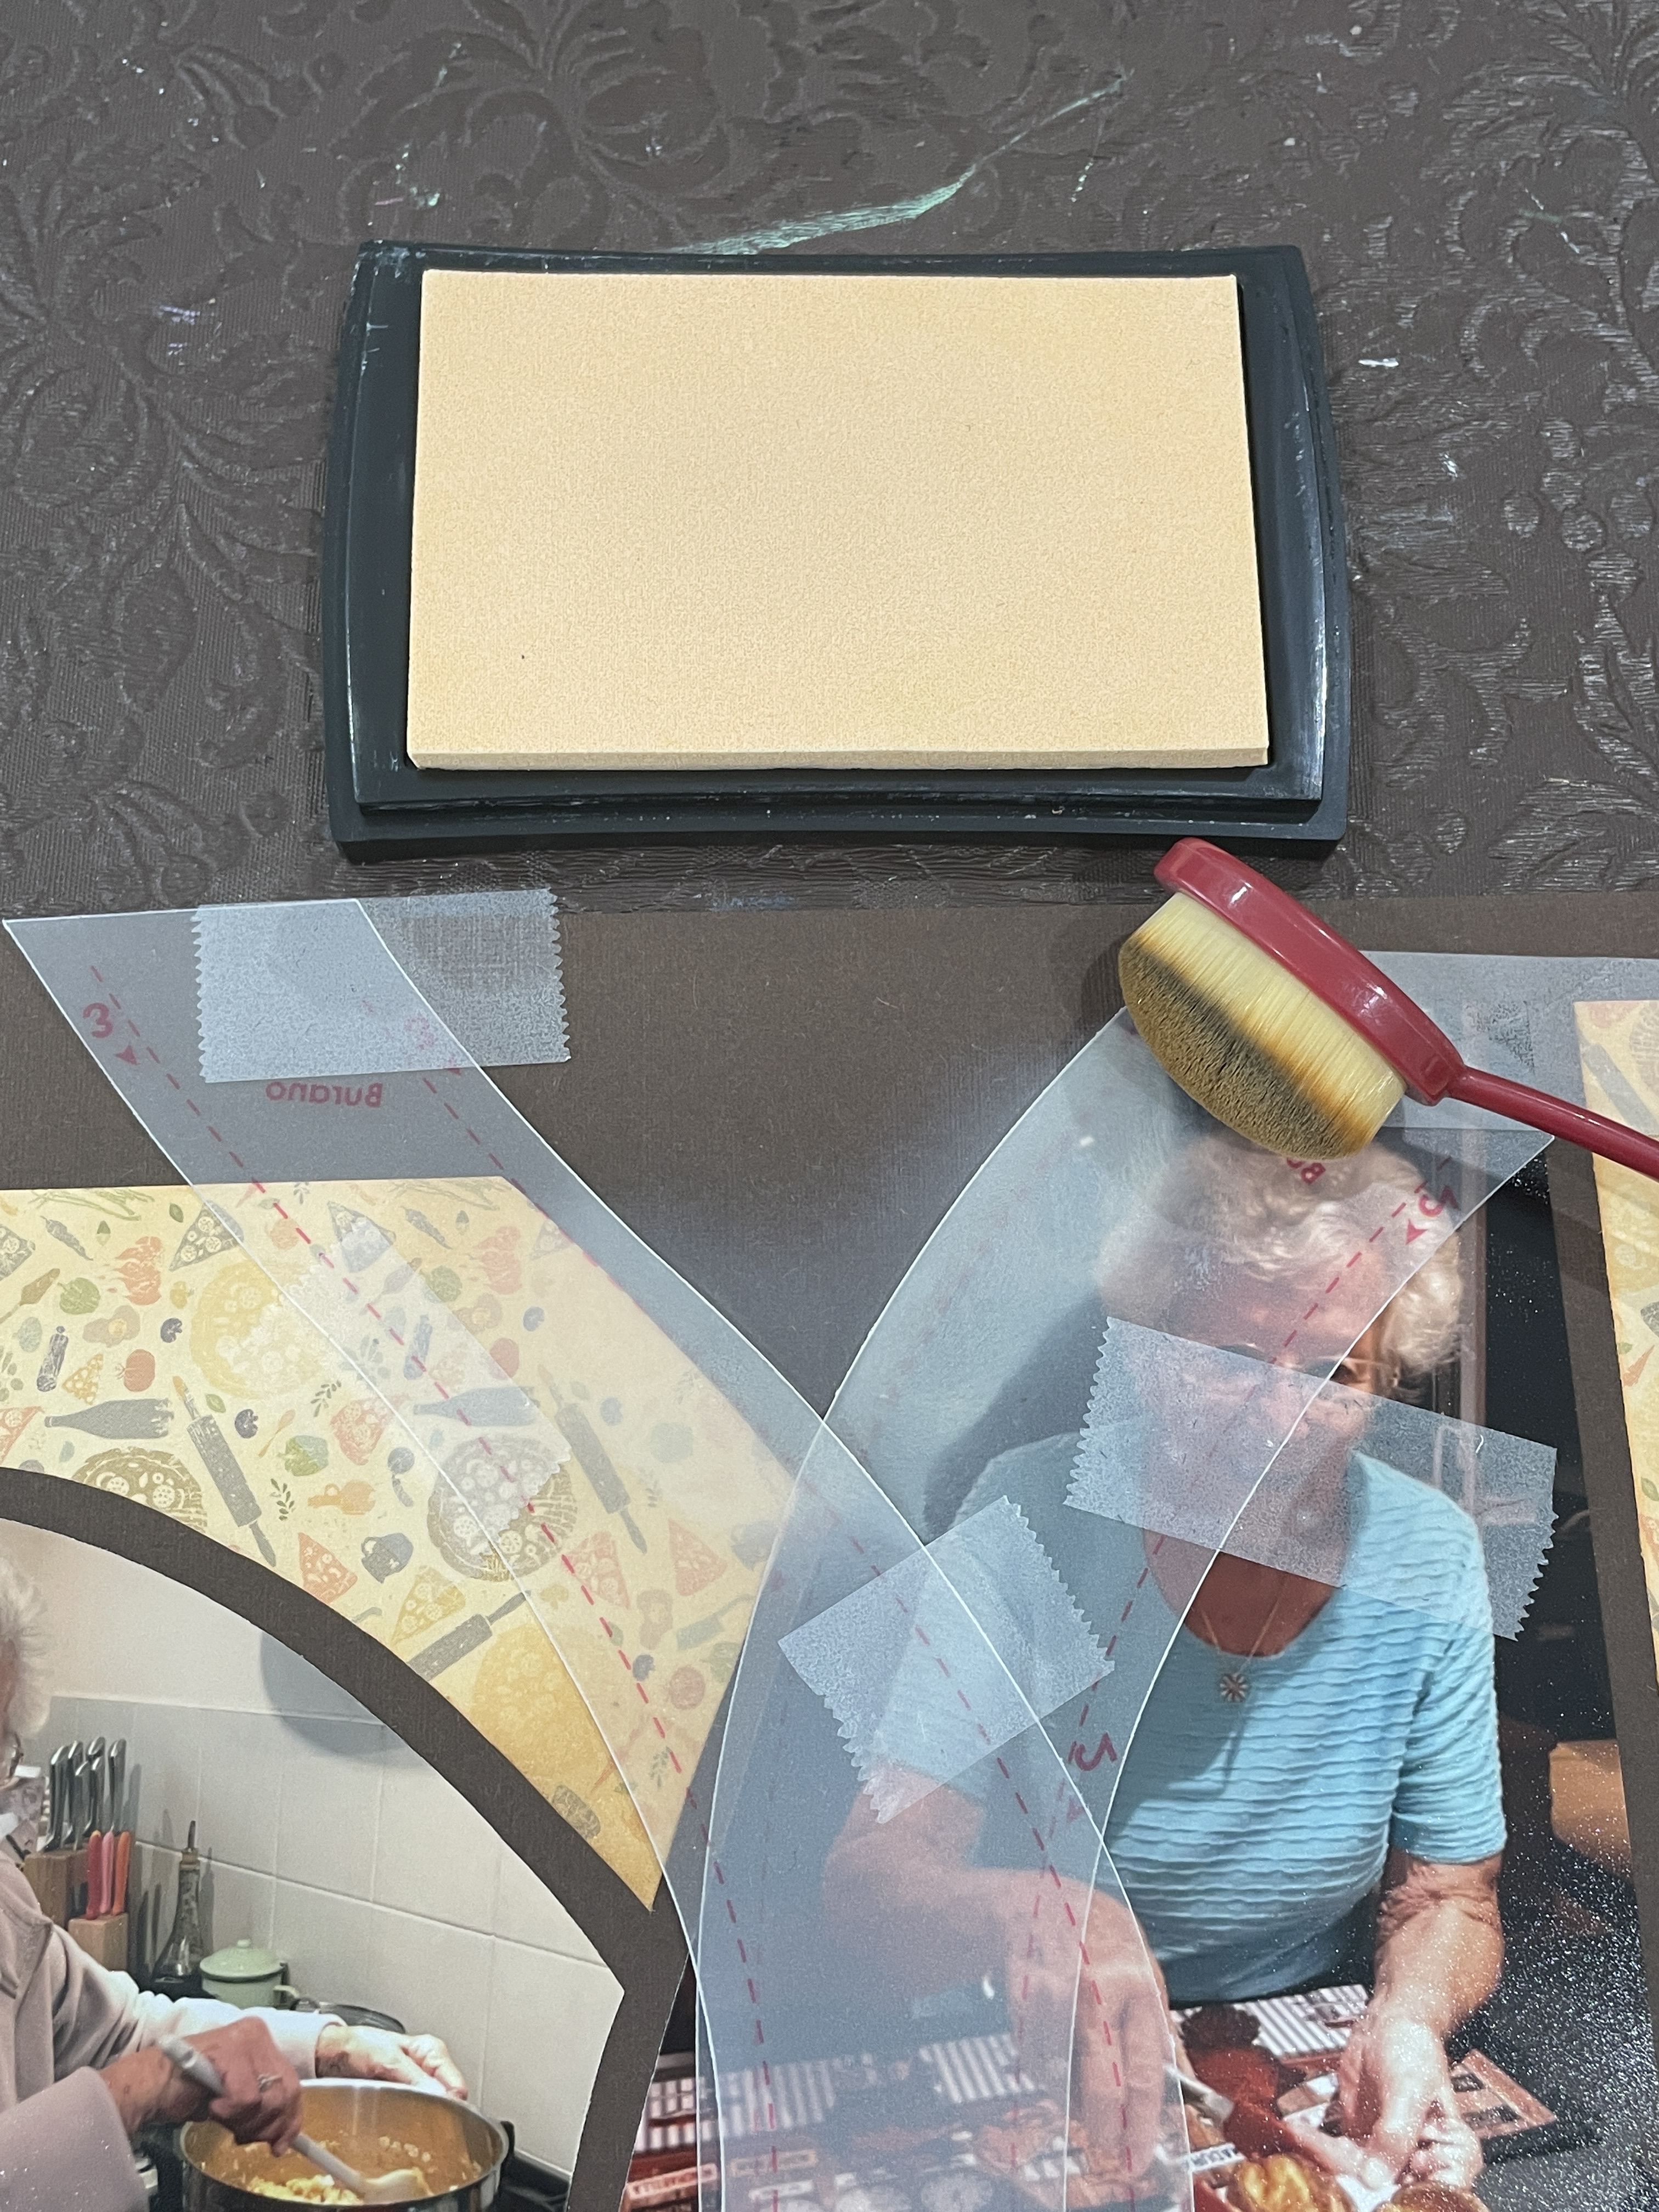
I used the same Texture stencil on the page below as it worked perfectly with my Mum making marmalade. We always put her to work in the kitchen when she visits as no-one makes marmalade, crunchies (they taste just like Anzac biscuits) or Yorkshire puddings like Mum does!! On this page, again created with the new Burano stencil, I have used the ‘In my Kitchen’ patterned papers and set of dies – oh they are just perfect for all your cooking/baking pages. With the patterned papers being quite ‘white’ they are easily inked or chalked to blend in with the page colour and photos tones. I am busy making a Family recipe book that I can give to my kids, with all the family favourites. Watch this space.
Speaking of family, the other side of the Texture stencil can be used on pages with any theme. It makes for a great background for a title or to fill in a space on the page. The first page below I created with the AZZA Dallas stencil, one of my favourite and the second page is created with AZZA Kyoto stencil.
Lyn Holmes – Western Australia. AZZA Dallas stencil.Lyn Holmes – Western Australia. AZZA Kyoto stencil.
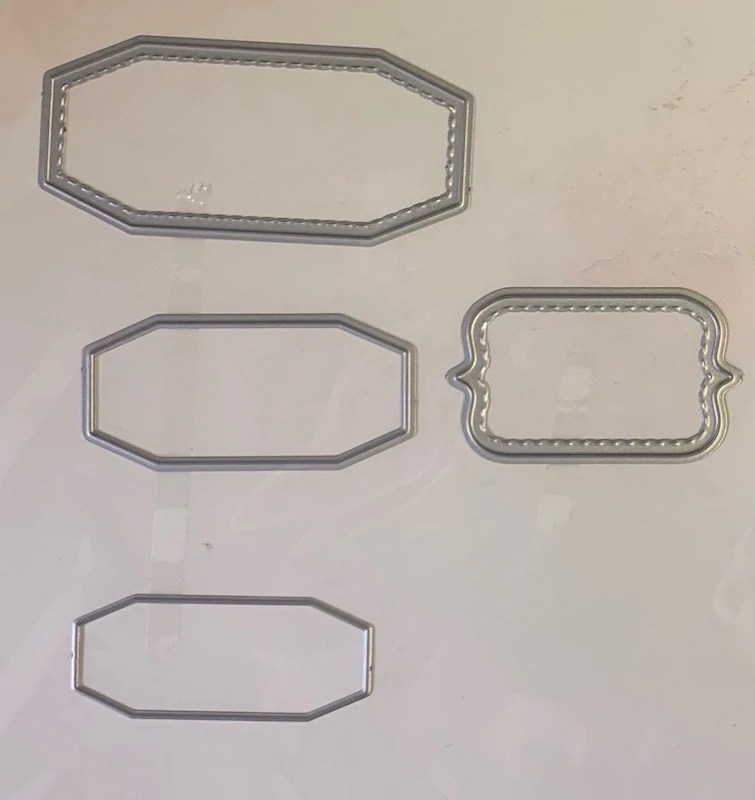
This Nesting tags die set is perfect for titles or journalling. I used it on the page with my Mum cooking. As you can see above, it looks nice with two different sizes using the smallest Resin dots as the little ‘nails’ holding the frame up.
The new AZZA Word stamp sets work well with all the AZZA tags and frame die sets. These Word sets have been made specifically for AZZA, a size that suits both Scrapbooking pages and cards. Below I have used them on my Title page for a special 20 x 20 Disk album I am creating. There was a large truck parked below the tree in the top photo and I did not want it on the page. I decided to create a title which would takes its place and used a few words from one of the sets of stamps.
A second page from Jeni’s album showcases the AZZA Word stamp sets. Although it is an A4 page Jeni adapted AZZA Dallas stencil to fit the page, a great outcome.
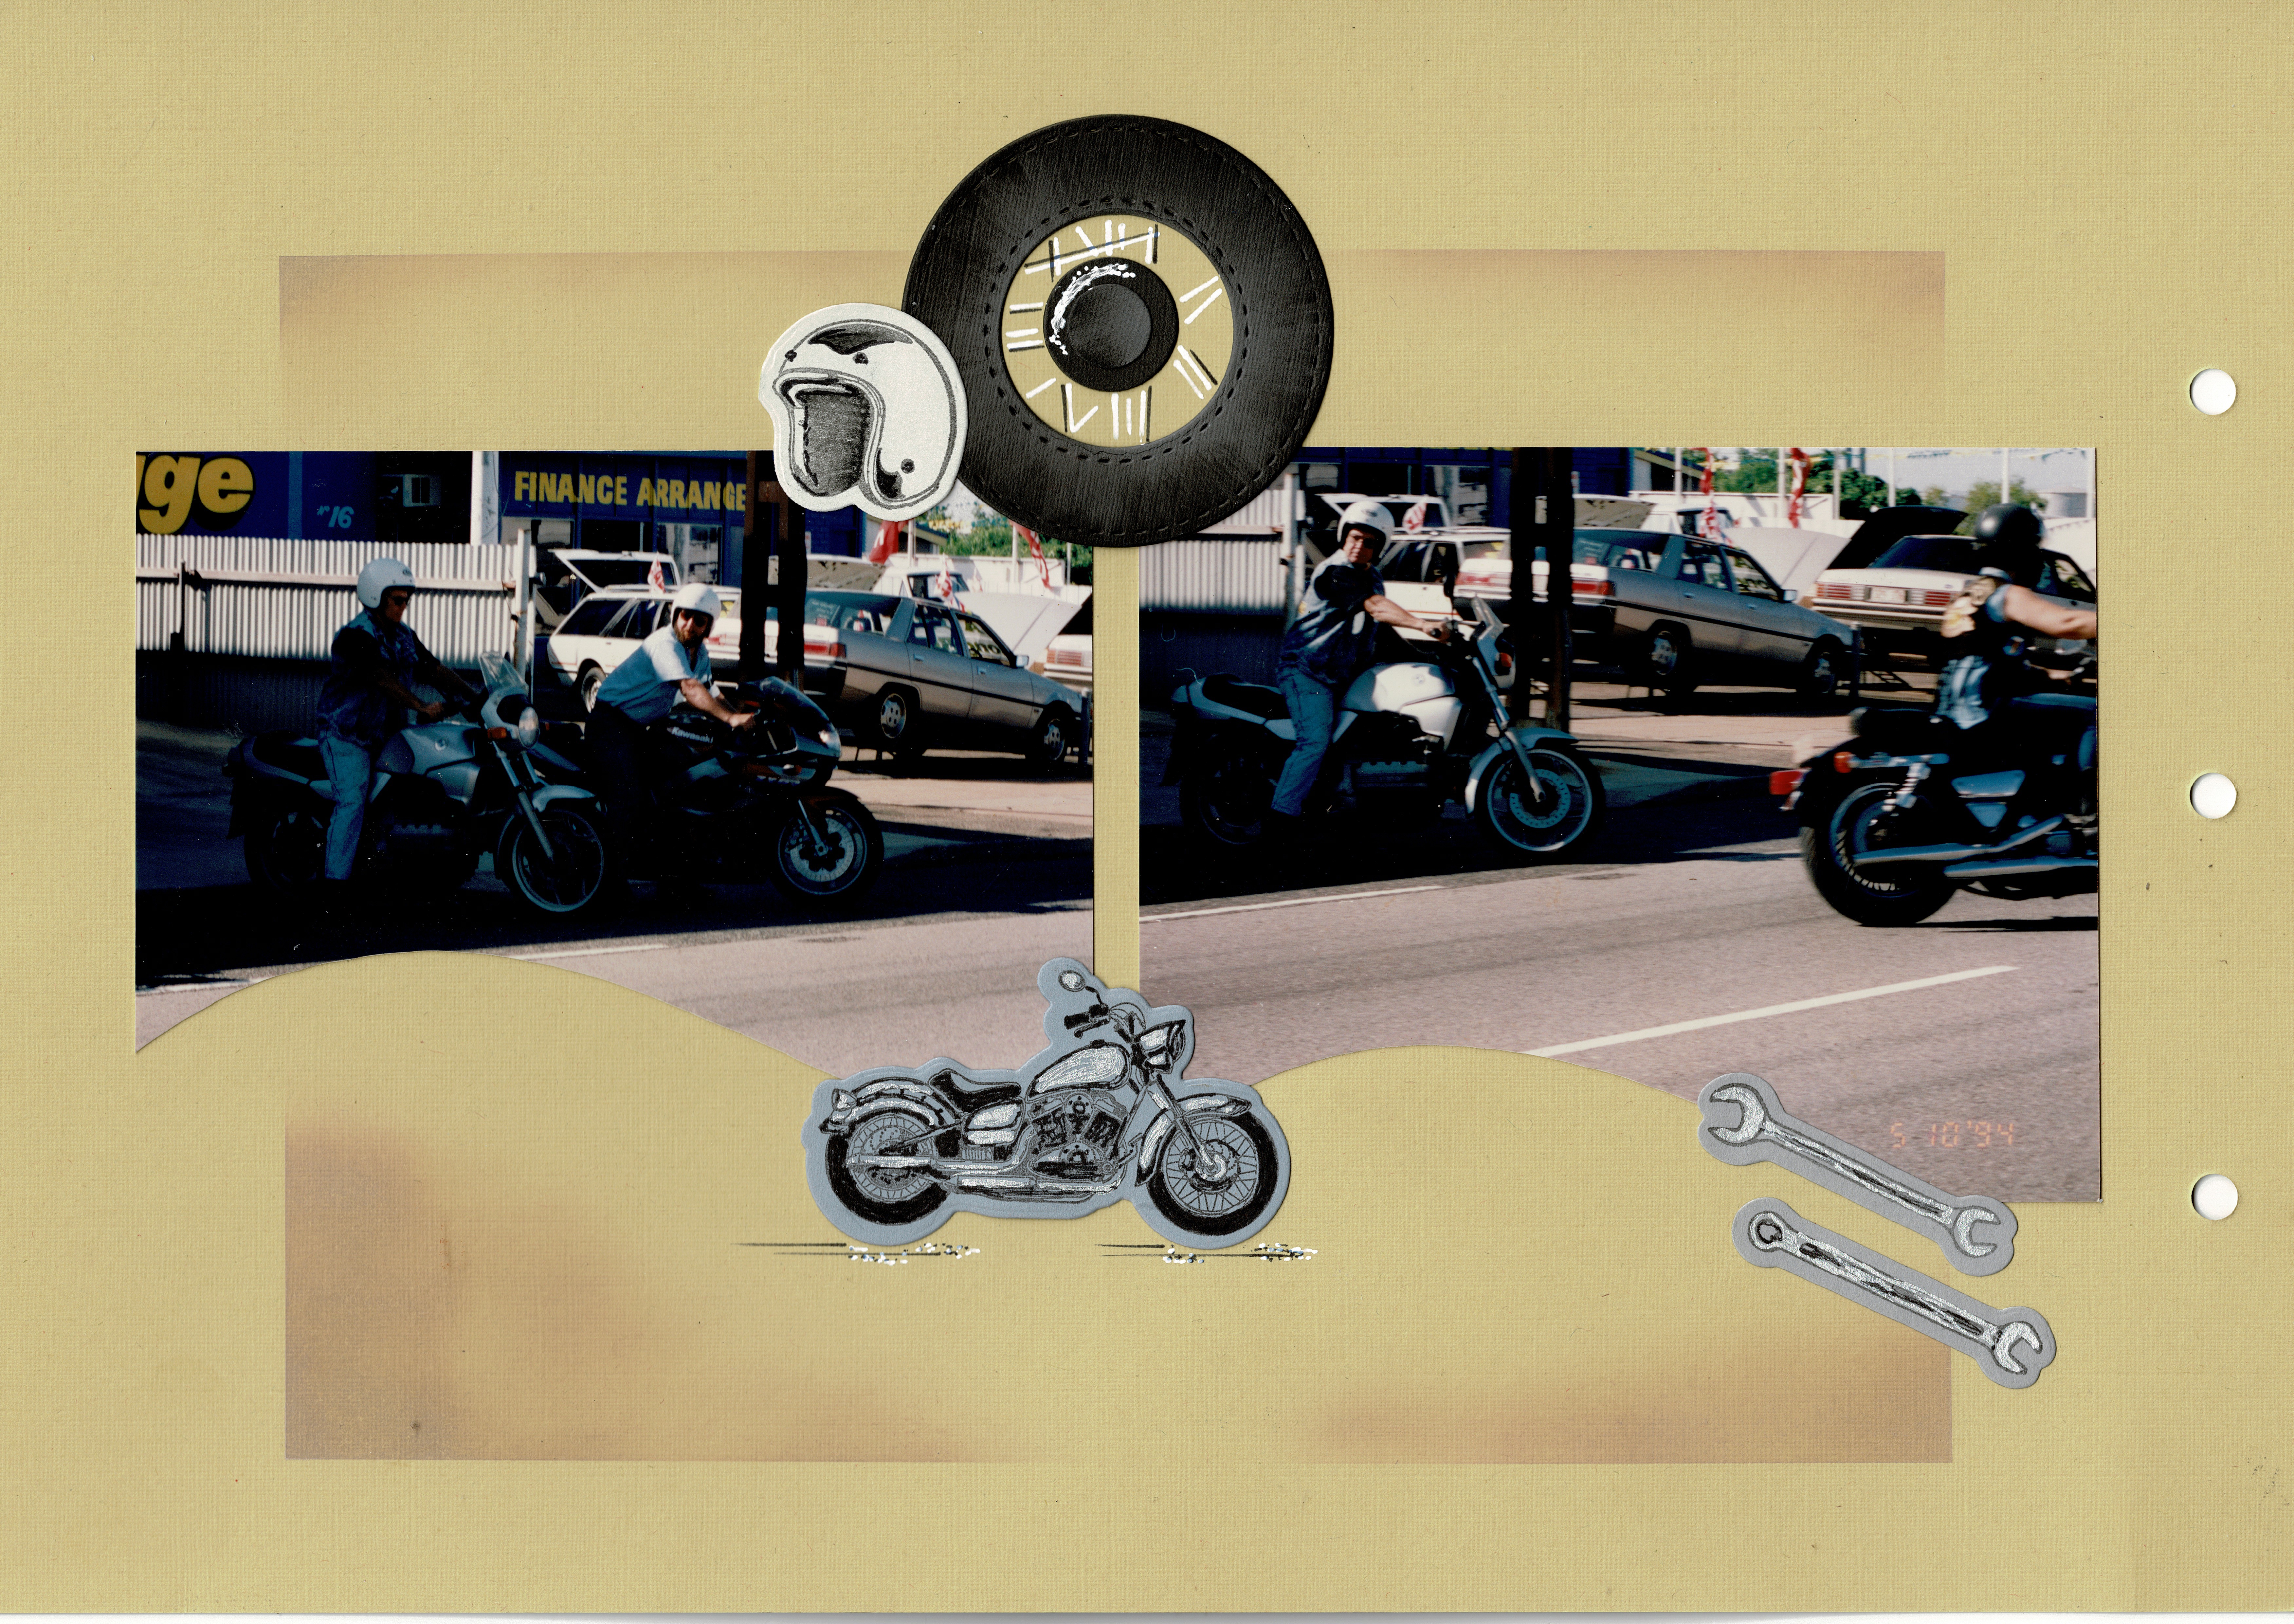
Another of Jeni’s pages from her album. The bike tyre was created using the ‘O’ from the large Alphabet set and the middle of the tyre are the two circles from the middle of the large number 8. It was based on the AZZA decoration below:
Azza Europe
Deb Byrne also created a lovely page with the Burano stencil and using this set for her decorations. She has also used the AZZA Words set stamps for her title.
Well, I think that is enough to keep you going. A few tips to end.
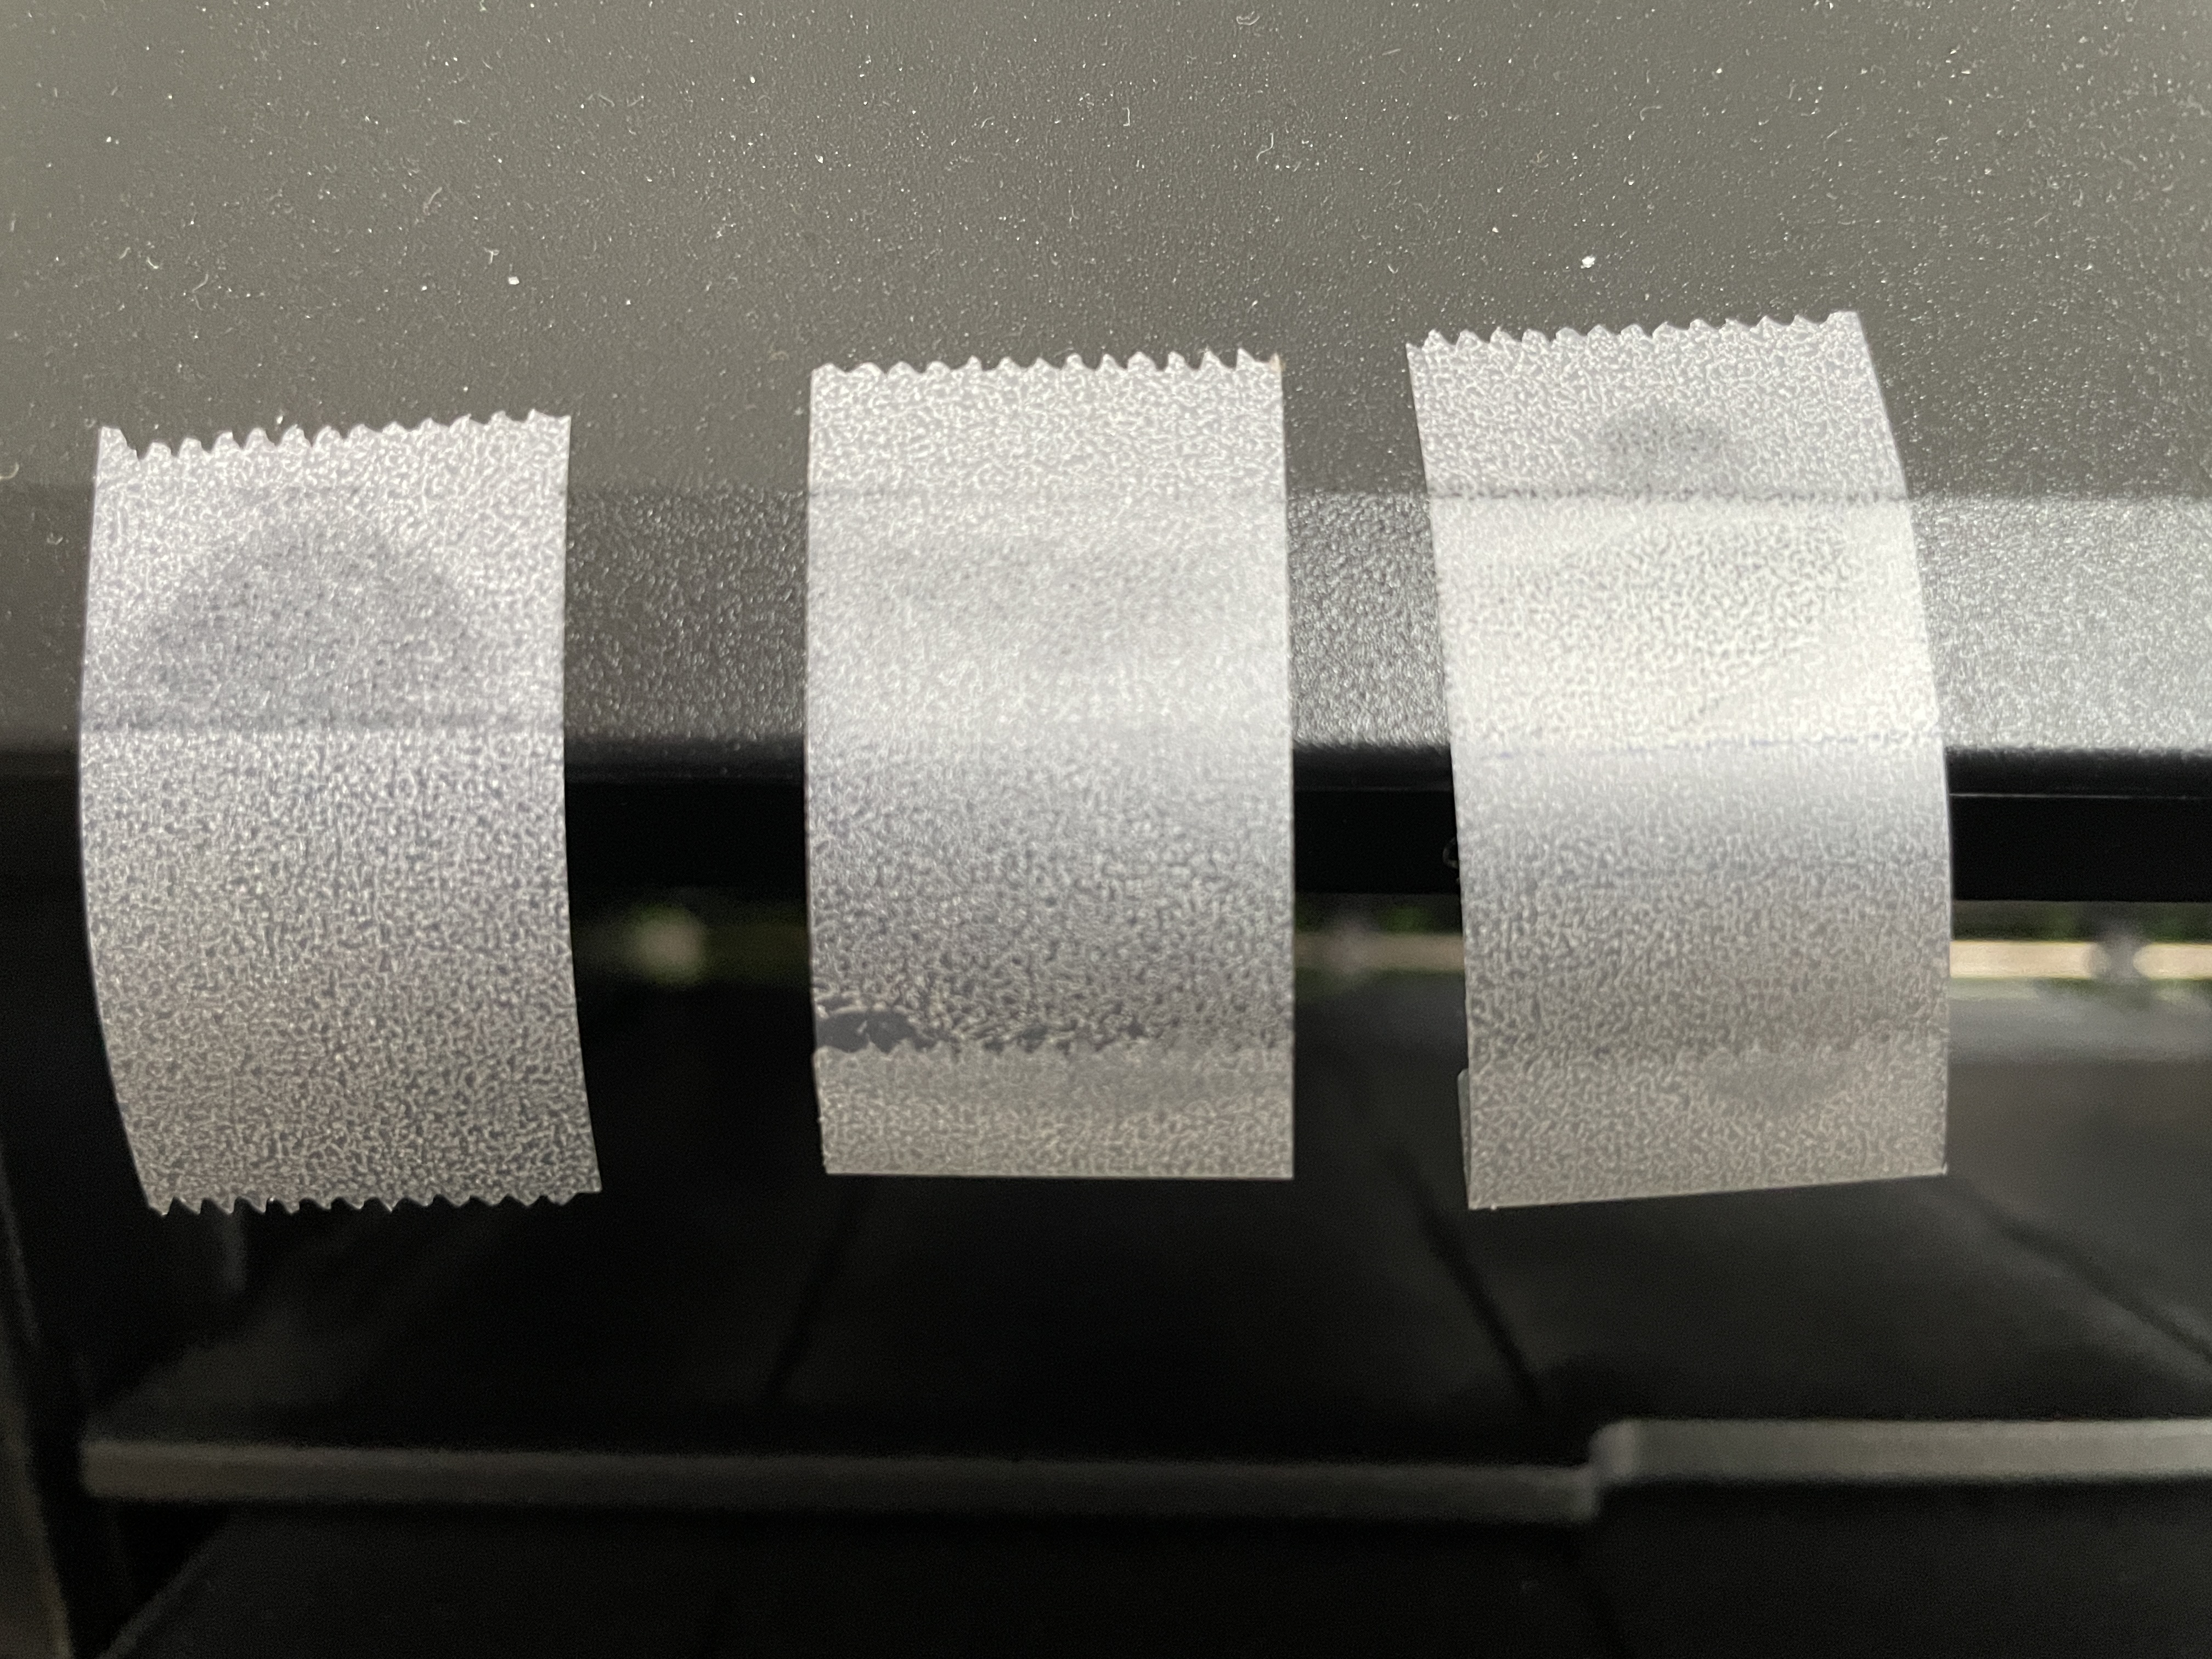
If you don’t want to get fingerprints on your layout whilst working, use a strip of re-positional table to protect your page: Sticky side up so it moves easily over where you are working.
Many of you struggle to catch the end of your re-positional tape when you have inked or chalked on your page. I saw this tip this week and cannot believe I didn’t think of it before: Fold a small tab on the one end!!!
Keep your pieces of pumpkin together with re-positional tape on the front, whilst placing the double sided tape on the back, saves a lot of frustration.
The AZZA Burano stencil has a ‘tool’ stencil, don’t forget to use it for all your inking and chalking. Match the numbers on the main stencil and the tool stencil.
Happy Scrappin’
Lyn
If you are in Bendigo, don’t forget to pop on over and see Ruth at the AZZA stand


You must be logged in to post a comment.